Why is it that when I build an application, Xcode creates a debug build? I want to create a release build. How can I do this?
Add a comment |
7 Answers
Product / Scheme / Edit Scheme..
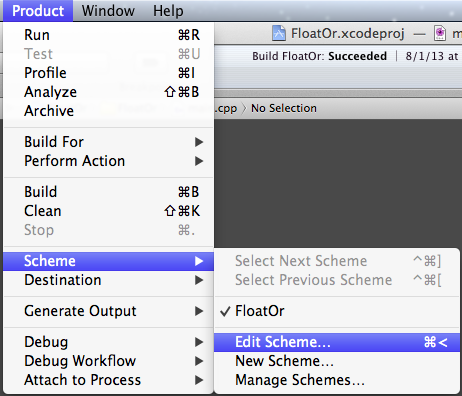
And from the menu that comes up, select Release under "Build Configuration".
Comments
Xcode 11
I found this question because I had already finished debugging my app and I wanted to make a release build for the app store. I always forget which menu item to use, though. This answer is a reminder to me and others next time.
Choose the Generic iOS Device from the active scheme menu.

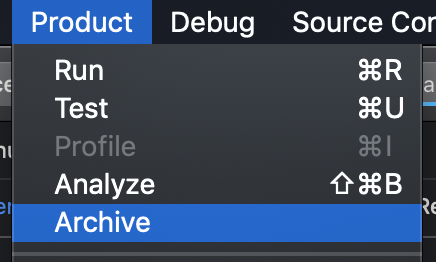
Then go to Product > Archive.
You may have to wait a little while for Xcode to finish archiving your project. After that you will be shown a dialog with your archived project. You can select Distribute app... and follow the prompts.
More Help
This answer is for those who are already all signed up with a developer account and just need to get the archive from Xcode to iTunes Connect. If you need more help signing up for a developer account and getting an app to the app store, read the following links.
Comments
It is done over building an Archive version.
First connect a iOS device to your Mac. Then select that device as target in Xcode.
Now click on the tab "Product" and click on "Archive"
6 Comments
zoul
This works, care to explain the downvote? When you Archive, you get the binary in built in the release mode the archive. This might not be the most practical way of getting the build, but that depends on blackguardian’s use case.
Helge Becker
jheriko
this doesn't solve the problem, although it may work. there are ways to run a release build through the debugger.
maninvan
The questions isn't "How to I create a distribution in Xcode?" Creating 'release build' is a normal activity (and to debug them) when the compiler optimizes code incorrectly or verifying debug release only options are disabled. The answer is below, but in short press SHIFT+COMMAND+, and edit the scheme to run release.
|
Leaving the original answer below, but this has not been the recommended method to create a "release" binary for distribution outside of Xcode in a long time — for that you want to Archive: see answers above.
If you are looking to debug/test a Release build in Xcode, this approach is still relevant.
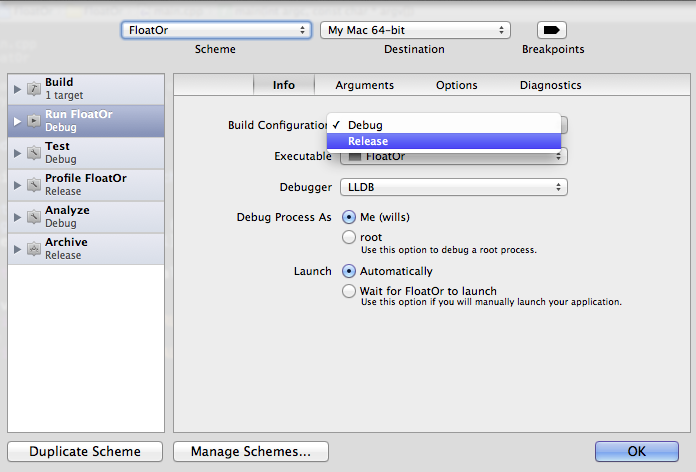
To create a release build, you have to edit your current scheme (⌘<) and highlight "Run [name of application]. On the right, select "Build Configuration" and choose "Release". Build as usual.
3 Comments
zoul
Do you know if there’s a way to build in the release mode just once, without editing the scheme? (Something like the toggle that used to be in older Xcode versions.) “Build for archiving” does not seem to work for me.
Itai Ferber
That doesn't seem to exist anymore, but it's not an incredible hassle if you use the keyboard shortcut to do it...
Alp Altunel
on lefthandside you see Product folder. right click it and click "Show in Finder"
If any one needs to go through how to make Adhoc build, here are quick steps
Product > Archive
then
Export > Save for Ad Hoc Deployment ....
See quick video https://jumpshare.com/v/rHLJII2npwyHCgGCabQA
2 Comments
Follow these steps:-
- Go to product option
- select Scheme option
- Edit Scheme option
- change Debug to Release
Make sure Through this you can run build in your physical device if you are disconnected to System.. but if you will run the same code o n simulator then you will face some error then that time you need to change the scheme option Release to Debug
Comments
Here is my 'more detailed' list of steps for creating a release build > (Working on a team and a project that has many schemes and environments)
- checkout a new branch like releases/x.x.x that contains all changes. (x.x.x is the version) (Its more about your team conventions)
- Check to make sure your app bundleIdentifier is correct (might differ for each environment)
- Team/account/licence: log into correct account that has provisioning profiles. then under signing and capabilities make sure your Team is correctly selected and has all certificates needed
- Upgrade the version in project settings to x.x.x
- Make sure the scheme you selected is correct
- Make sure the URLs of API calls are pointing to your release environment
- Its better to select 'Any iOS device' instead of a simulator or actual device
- Commit any changes locally if you have any (this step is very important)
- Validate to make sure all is good
- Create an archive
- Distribute your app for AppStore Connect
I use an apple proxy named 'transporter' that is pretty easy for uploading iPA to Appstore
Happy releasing!