
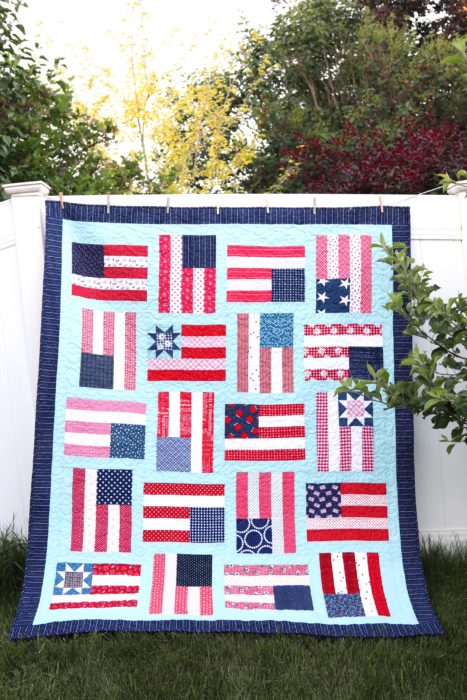
You may remember the Americana Flag quilt blocks I shared a few weeks ago. I'm excited to finally share the block tutorial as well as a pattern to make your own US Flags Quilt in time for the 4th of July. I decided to call this quilt Flying Flags.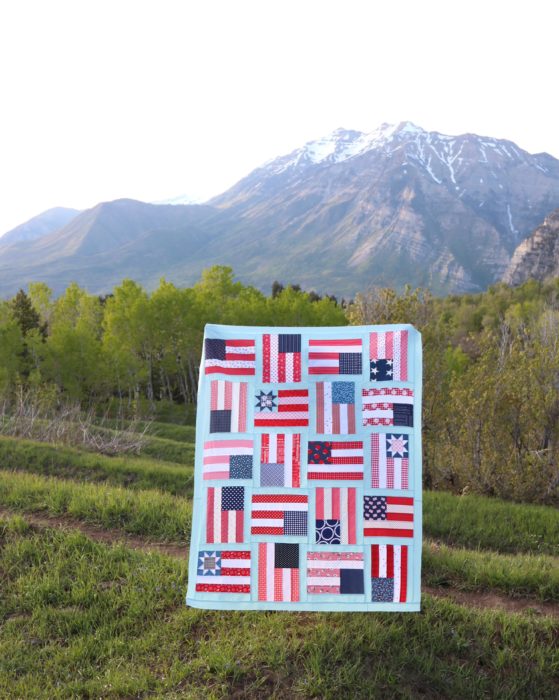
I have always been a sucker for Americana folk art. This quilt is a little bit of a shout out to that inspiration. I love making flag quilts (I've made a bunch). I've had this design floating around in my head for years now, and this is the year I finally got my act together to make and share it before the 4th of July.
The block for this quilt is super fast and easy - making this quilt come together really quickly. But I also made it so that it's easy to embellish with optional pieced star blocks if you want a little more detail in your quilt.
This quilt is also perfect for using precut 2 ½" strips or your favorite scraps or fat quarters. Bust out all of your red, white, and blue for a fun, scrappy patriotic quilt!
American Flag Quilt Block Tutorial
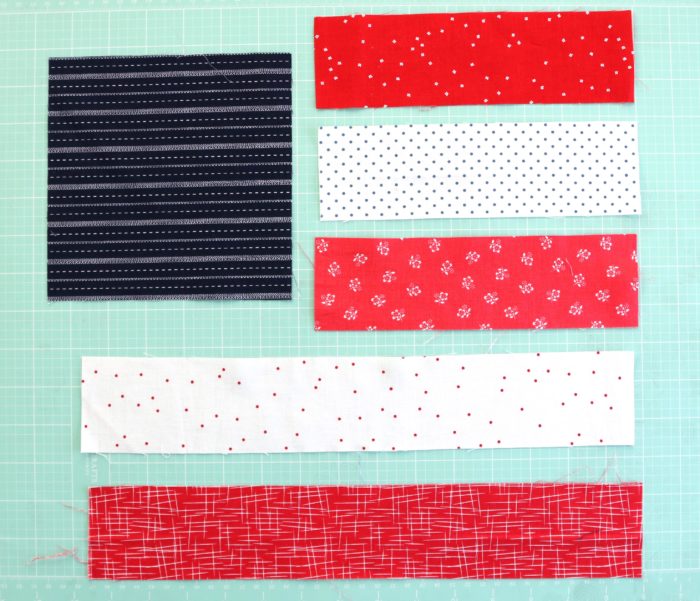
Fabric Requirements per quilt block:
- 1 Blue square 6 ½" x 6 ½"
- 2 Red strips 2 ½" x 8 ½"
- 1 White strip 2 ½" x 8 ½"
- 1 White strip 2 ½" x 14 ½"
- 1 Red strip 2 ½" x 14 ½"
- 2 Background strips 2 ½" x 14 ½"
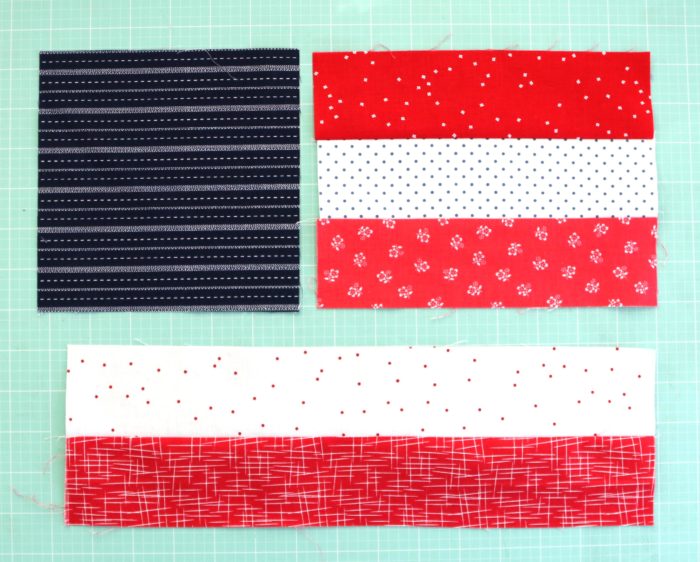
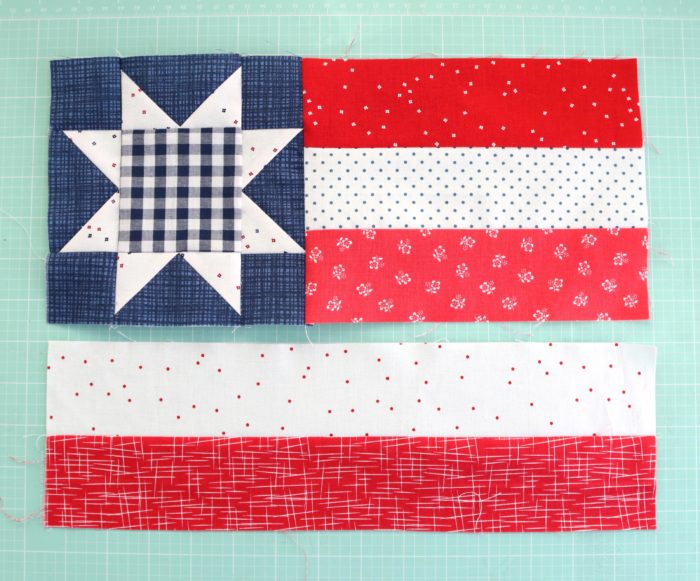
Sew three 8 ½" strips together, alternating red and white strips. Press seams toward Red
Sew two 14 ½" strips together. Press seams toward red.
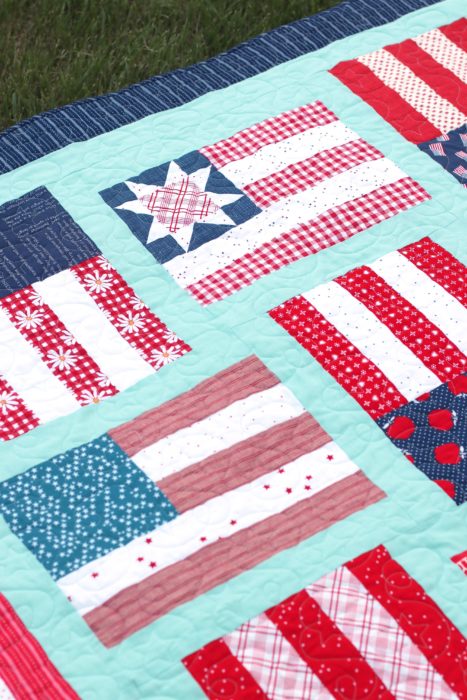
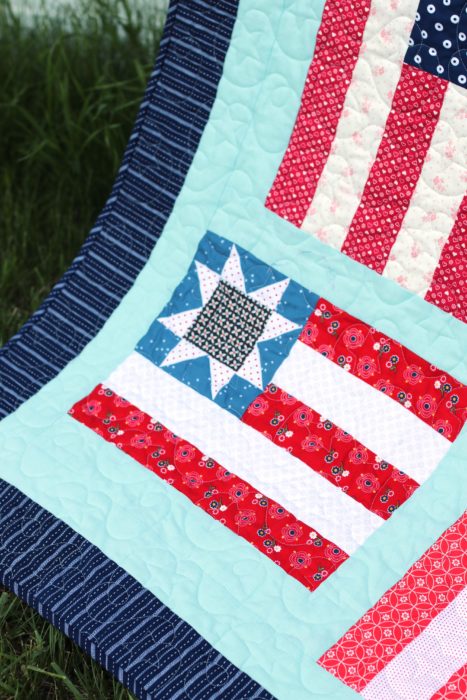
Now here's the fun option where you can substitute a 6 ½" x 6 ½" unfinished (6" x 6" finished) star quilt block for the blue square if you want to!
You could use any 6" finished star block here. Go here for a tutorial to make a 6" x 6" finished Sawtooth Star.
Sew 6 ½" x 6 ½" blue square to the three 8 ½" red-white-red strip set. Press seam toward the blue square.
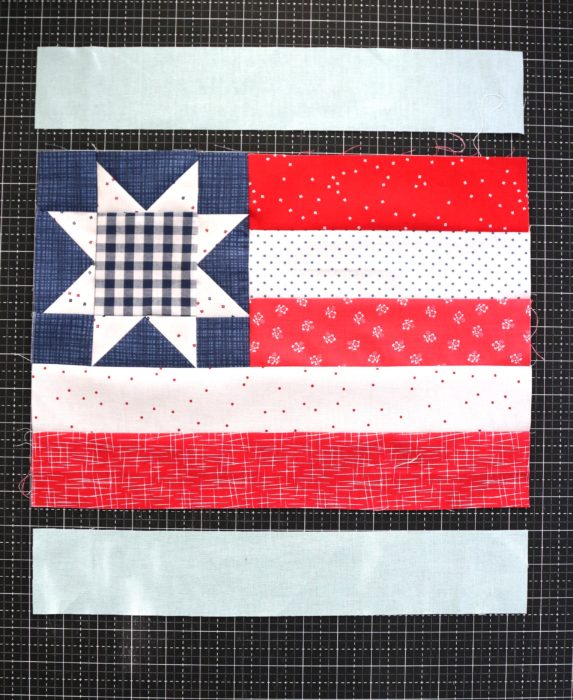
Sew bottom red-white strip set to the top red-white-red unit. Press seam toward long white strip.
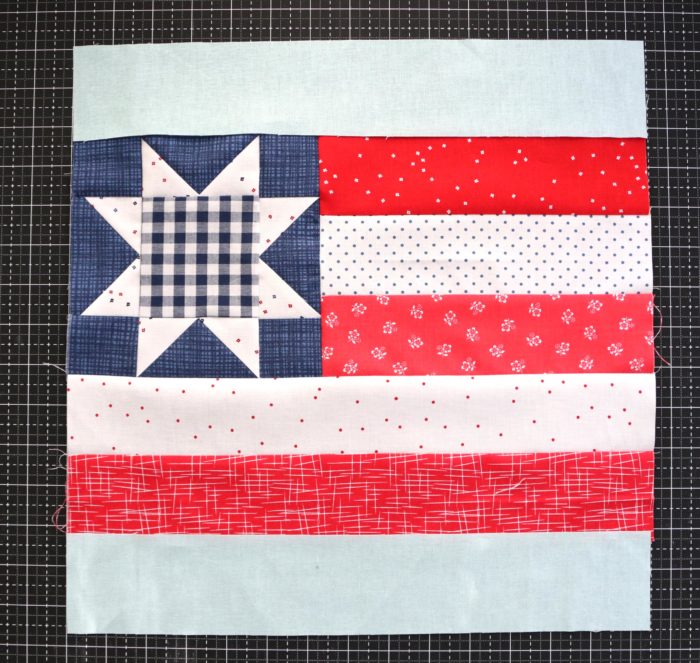
Sew two background 2 ½" x 14 ½" strips to the top and bottom of the flag block. Press seams toward the background strips.
This will give you a 14 ½" x 14 ½" quilt block.
You will need 20 blocks for this quilt.
Flag Quilt Assembly
For Quilt fabric requirements, borders, and assembly instructions you can find a printable PDF pattern for this quilt, including yardage requirements, here.
This quilt is such a fun, fast finish.
Updated and Extended Fly the Flag Pattern Version
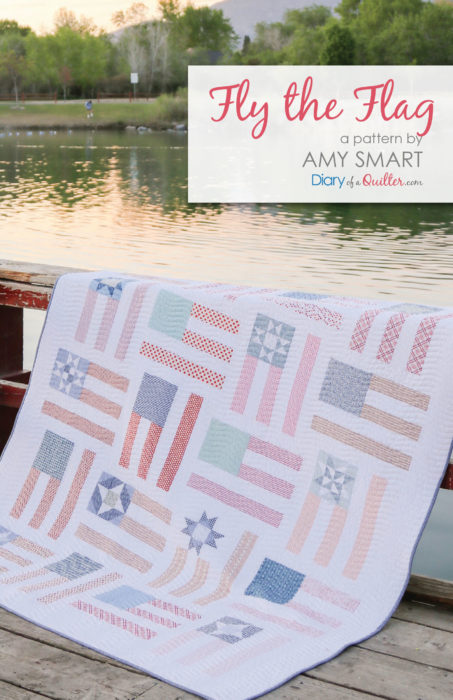
I've since made an updated version of this quilt in some faded, "beachy" red, white, and blue prints here.
I've also updated the pattern. The plus version of the pattern also includes multiple star block variations. The pattern also includes the block instructions to make it so that all of your flags hang right-sides up. (As I know not everyone is okay with rotating flags where some are upside down.)
The extended version of the pattern is available in my Pattern Shop.
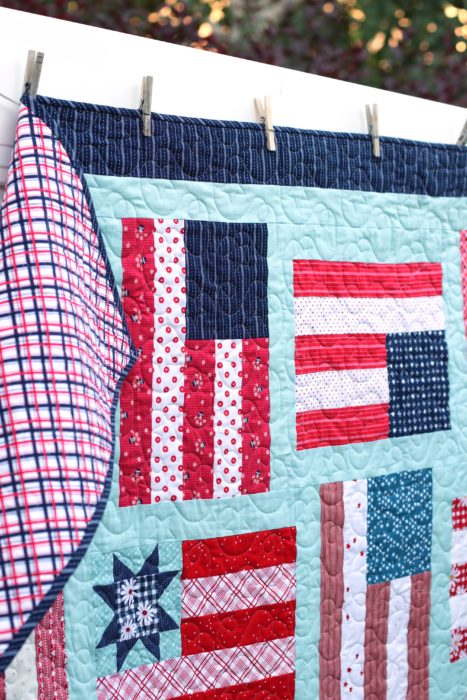
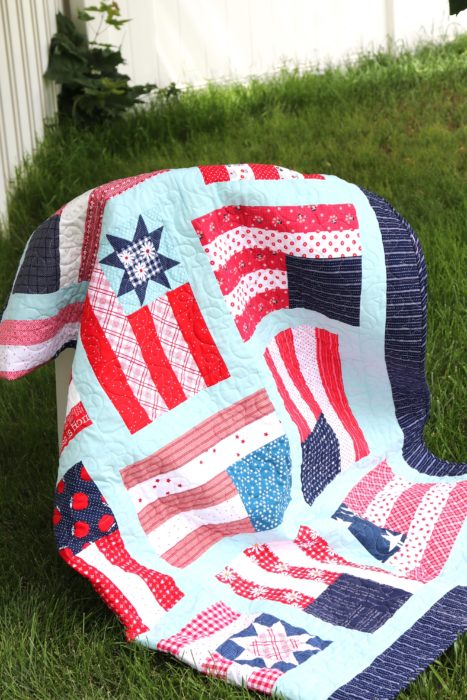
My quilt was quilted by Melissa of Sew Shabby Quilting using an edge-to-edge Stars pattern.
For my flags I used a mix of Riley Blake basics as well as prints from my various fabric collections. The navy stripe for the border and bias binding is from my Sugarhouse Park collection. The background fabric is Riley Blake's Aqua Linen (Cotton/Linen blend). I love the added texture it gives, but it would look great in cotton to.
The backing fabric is the red/navy plaid from Sugarhouse Park also available here.
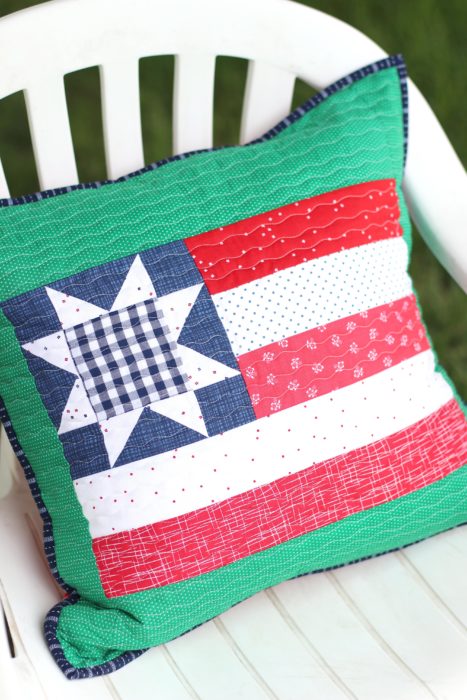
Don't have time for a full quilt right now? This block makes a fun quick mini quilt or pillow. Here is the info for an 18" x 18" pillow.
Pillow Finishing Yardage (in addition to fabric for flag center)
Background fabric: ⅙ yard
- cut into 1 strip 3 ¼" x WOF - sub cut 2 pieces 3 ½" x 14 ½. Cut 1 strip 2 ½" x WOF - sub cut into 2 pieces 2 ½" x 18 ½"
Backing: ½ yard
Binding: ⅙ yard - cut into 2 strips 2 ½" x WOF
18" x 18" Pillow Form (I used a 20" x 20" pillow form for a snug, plump fit)
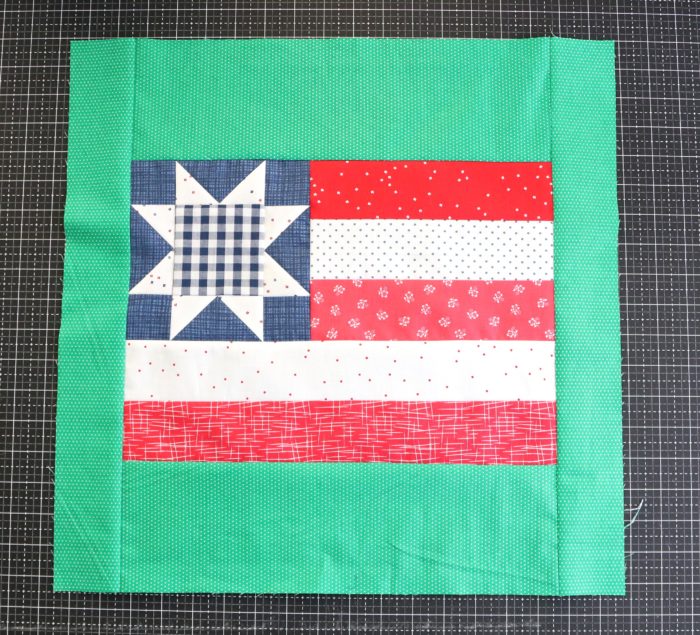
Make 10 ½" x 14 ½" Flag block as demo'ed above.
Sew 2 pieces 3 ½" x 14 ½ to the top and bottom of flag block. Press seams toward background. Sew 2 pieces 2 ½" x 18 ½" to the sides of block. Press seams toward background fabric.
Make quilt/pillow backing using favorite method. (Here is a simple method for making a back for any pillow)
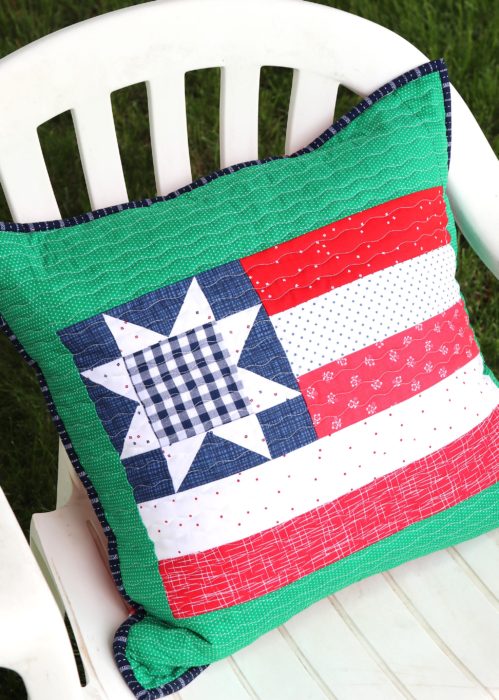
I used a green dot from my Sunnyside Ave collection for the background of this pillow. I love the way the green border gives kind of a preppy contrast with the flag block.
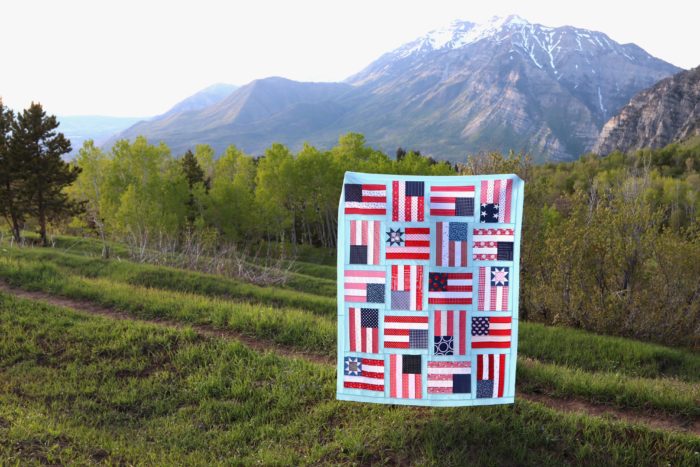
So there you have it! A fun, festive flag quilt variation to play with. I pieced my blocks together on Memorial Day and then took it with us on a hike that evening. I love the setting with a little purple mountains majesty as a backdrop.
 Again the pattern PDF is available here if you would like a printed version with all of the fabric requirements.
Susan Q says
Thank you so much Amy for the beautiful quilt pattern! The timing of your post couldn't have been better! I just finished a quilt a couple of days ago and was thinking, okay, what's next, and then I saw your post. I do believe I can get this done by the 4th of July!! A couple of pillows with your design will get thrown in as well. Thanks again for the unplanned but fun quilting project that is going to consume the next few days ❤
Jocelyn says
Your quilt is pretty amazing!
Elfi Juvrud says
Do you offer a conversion for baby quilt size? I make baby quilt for the military. Thanks.
Amy says
Oh, that is such a sweet thing to do! The block size is pretty big - you could make 4 blocks - which would give you a 28" x 28" center and add borders to make it bigger? Or 6 blocks to make the center 28" x 42" center - and again add borders to make it wider?
Jan Easterday says
Amy, your flag quilt is Amazing! Would love to make this, I think it belongs in my collection. Thanks for sharing.
sue d says
I love, love,love this quilt!! I guess it is because the addition of aqua(my favorite color) just makes each flag pop.
The Joyful Quilter says
This quilt is SEW darling!! Thank you for sharing the tutorial with us.
Amanda says
I’m new to quilting and was wondering if this pattern could be done as a quilt as you go quilt?
Amy says
Hmmm. It's possible. I don't have much personal experience with Quilt As You Go, so I don't know what the step by step process would be.
Jeanne Boswell says
Thanks for sharing your fun design. It's a hit!
Sharon T says
Thank you so much!
Susie Q says
what happen? your vertical flags have the blue in the right corner but you and protocal say left corner??
Amy says
When I made my blocks, I made them all the same direction and just rotated them. The option is provided if anyone wants the vertical flags to have the blue in the left corner. It's really easy to customize for personal preference. 🙂
Pat Gottshalk says
Great block and your choices of background colors is wonderful. Thanks for sharing your creativity.
Carmen Montmarquet says
I love this flag pattern, Thank You So Much for sharing it!!!
elizabeth a hinze says
Thank you Amy I'm going to make this I've been think for years about having a flag quilt for July
and this fits the ticket
Thank you!
I maybe bold and try the green ; )
Robby Bottom says
Guy loves this Amy so it looks like I will have to make it. Thank you for your inspiration. 💜💕💗
Catherine Carmichael says
This is wonderful!! Thank you for sharing! Definitely going to make one or ten!!
kathleen says
Love it! Great work.
Shari says
I love this idea, and will put this on my ever growing list of quilts I want to make. Thank you for making it customizable. I would have to make it with all the flags right side up. Maybe it’s just because I was brought up in a military household, but doesn’t anyone else have a problem with some of the flags being upside down?
Amy says
I totally get it! One way to look at it is that there's no right-side-up for this version - you can rotate the quilt any direction. That said, I'm making a washed-out version and I think I'm going to make all of the quilts right-sides up for that one. Stay tuned! 🙂
Gwyn says
Thank you. Every time I think I know what I want to make with Gingham Girls and Sunnyside Ave. you give us a new idea. I could do two flags for a table runner on my coffee table and still have some scraps for something else.
Virginia Over says
I love the quilt but you should never put the flag upside down. It is a signal of distress.
Kathy says
This is adorable! I’m sad I missed the kits, I’m apparently late to the party. Oh well, it’s a definite must make!
Elfi Juvrud says
On closer inspection I saw the link to a sawtooth star tutorial, which includes a size chart for the star. I think, I will be able to figure out the rest. Thank you so much for the inspiration; I love this quilt.
Lisa says
Thank you for posting this pattern. I made this quilt for my spouse's Christmas gift in honor of our 20th wedding anniversary, 20 flags, 20 years! I did make them alternating with the flags either horizontal or vertical with the blue field in the upper right and it turned out great. Thanks, he loves his new quilt.
Amy says
Oh, that is so awesome! What a great way to commemorate a 20th anniversary.
Rae J says
This is a quilt pattern that will never grow old or fade away like so many do. It's a wonderful piece of art. I've seen it over the years and am finally able to make it myself. (I was ill for a few years.) Thank you, Amy, for this amazing pattern.
Rae J
Amy says
Thank you Rae! And I'm so glad to hear that you're able to sew again. xo