To add images from the camera in Flutter, we'll use the image_picker package. For this, you'll need to use your real device.
Follow the below steps to display the images from the camera
Step 1: Create a new Flutter Application
Create a new Flutter application using the command Prompt. To create a new app, write the below command and run it.
flutter create app_name
To know more about it refer this article: Creating a Simple Application in Flutter
Step 2: Adding the Dependency
To add the dependency to the pubspec.yaml file, add image_picker as a dependency in the dependencies part of the pubspec.yaml file, as shown below:
Dart dependencies: flutter: sdk: flutter image_picker: ^1.1.2
Now run the below command in the terminal.
flutter pub get
Step 3: Importing the Dependency
Use the below line of code in the main.dart file to import the image_picker dependency.
import 'package:image_picker/image_picker.dart';
Step 4: Follow the below flow
- Create a button: To access the camera.
Dart ElevatedButton( style: ElevatedButton.styleFrom( backgroundColor: Colors.green, foregroundColor: Colors.white ), child: Text('Select Image from Camera'), onPressed: selectFromCamera, ),
selectFromCamera:
Dart Future<void> selectFromCamera() async { final ImagePicker picker = ImagePicker(); // Use the instance method pickImage from the ImagePicker instance final XFile? pickedFile = await picker.pickImage(source: ImageSource.camera); if (pickedFile != null) { setState(() { cameraFile = File(pickedFile.path); }); } }
- Display the captured picture
Show the captured picture, if the user doesn't capture anything, then show "Sorry, nothing selected!".
Dart SizedBox( height: 200.0, width: 300.0, child: cameraFile == null ? Center(child: Text('Sorry, nothing selected!')) : Center(child: Image.file(cameraFile!)), ),
Complete Source Code
main.dart:
Dart import 'dart:io'; import 'package:flutter/material.dart'; import 'package:image_picker/image_picker.dart'; void main() { runApp(MyApp()); } class MyApp extends StatelessWidget { @override Widget build(BuildContext context) { return MaterialApp( home: CameraAccess(), debugShowCheckedModeBanner: false, ); } } class CameraAccess extends StatefulWidget { @override State<StatefulWidget> createState() { return CameraAccessState(); } } class CameraAccessState extends State<CameraAccess> { File? cameraFile; // Use nullable File as initially there's no image Future<void> selectFromCamera() async { final ImagePicker picker = ImagePicker(); // Use the instance method pickImage from the ImagePicker instance final XFile? pickedFile = await picker.pickImage(source: ImageSource.camera); if (pickedFile != null) { setState(() { cameraFile = File(pickedFile.path); }); } } @override Widget build(BuildContext context) { return Scaffold( appBar: AppBar( title: Text("Camera Access"), backgroundColor: Colors.green, foregroundColor: Colors.white, actions: <Widget>[ Text("GFG", textScaleFactor: 3), ], ), body: Center( child: Column( mainAxisAlignment: MainAxisAlignment.center, children: <Widget>[ ElevatedButton( style: ElevatedButton.styleFrom( backgroundColor: Colors.green, foregroundColor: Colors.white), child: Text('Select Image from Camera'), onPressed: selectFromCamera, ), SizedBox( height: 200.0, width: 300.0, child: cameraFile == null ? Center(child: Text('Sorry, nothing selected!')) : Center(child: Image.file(cameraFile!)), ), ], ), ), ); } }
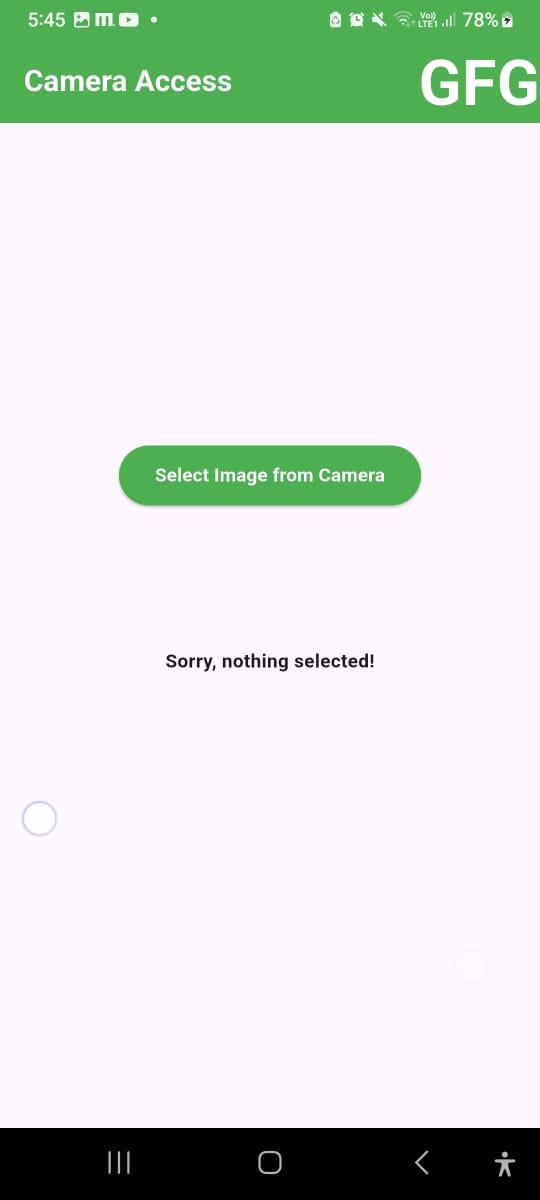
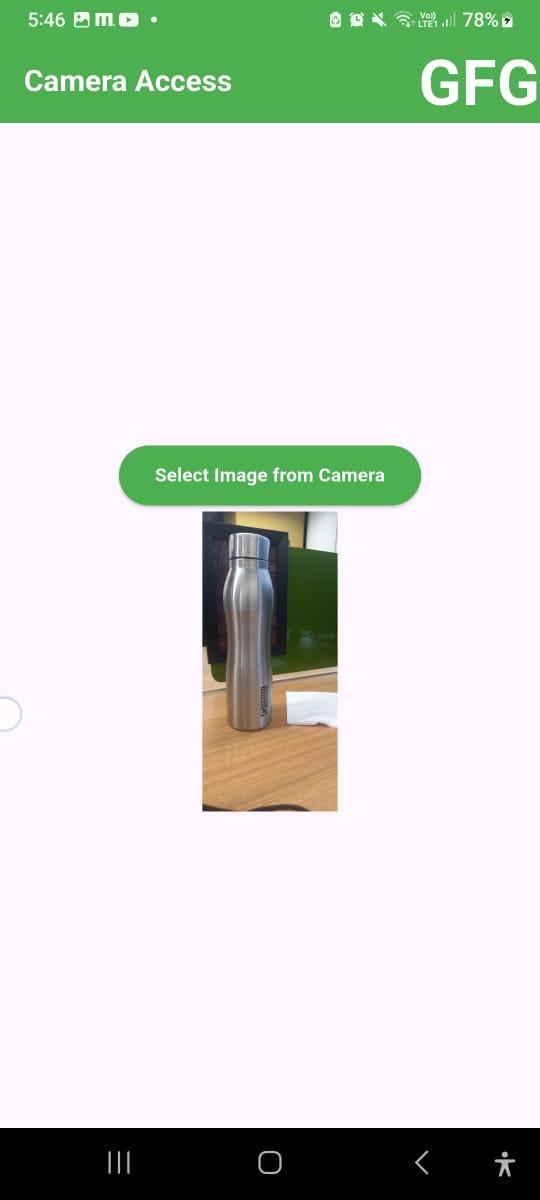
Output:
When no image is selected, the following will result:
When the button is tapped, the mobile's camera will be opened to capture the image, as shown below:
When the image is captured, it will be displayed on the screen, as shown below:
Explore
Basics
Key Widgets
UI Components
Design & Animations
Forms & Gestures
Navigation & Routing
Hardware Interaction
Sample Flutter Apps
Advance Concepts