Android LinearLayout in Kotlin
Last Updated : 24 Feb, 2025
LinearLayout in Android is a ViewGroup subclass, used to arrange child view elements one by one in a singular direction either horizontally or vertically based on the orientation attribute. We can specify the linear layout orientation using the android:orientation attribute.
All the child elements arranged one by one in either multiple rows or multiple columns.
- Horizontal list: One row, multiple columns.
- Vertical list: One column, multiple rows.
Can illustrate the Horizontal and Vertical List with an Image.

In this article, we are going to discuss the declaration and implementation of LinearLayout.
How to Declare LinearLayout in an XML file?
Here's an example of how to declare a LinearLayout in an XML file
activity_main.xml <?xml version="1.0" encoding="utf-8"?> <LinearLayout xmlns:android="http://schemas.android.com/apk/res/android" xmlns:tools="http://schemas.android.com/tools" android:layout_width="match_parent" android:layout_height="match_parent" android:orientation="vertical" tools:context=".MainActivity"> <!--sub view 1--> <View android:layout_width="wrap_content" android:layout_height="wrap_content" /> <!--sub view 2--> <View android:layout_width="wrap_content" android:layout_height="wrap_content" /> <!--sub view 3--> <View android:layout_width="wrap_content" android:layout_height="wrap_content" /> </LinearLayout>
Steps of Implementation
Step 1: Adding LinearLayout in activity_main.xml
Following is a sample code for LinearLayout in xml file which includes a TextView, an EditText and a Button in Vertical orientation.
activity_main.xml:
activity_main.xml <?xml version="1.0" encoding="utf-8"?> <LinearLayout xmlns:android="http://schemas.android.com/apk/res/android" xmlns:tools="http://schemas.android.com/tools" android:layout_width="match_parent" android:layout_height="match_parent" android:orientation="vertical" android:gravity="center" android:padding="24dp" tools:context=".MainActivity"> <!-- sub-view 1 :TextView --> <TextView android:id="@+id/txtVw" android:layout_width="match_parent" android:layout_height="wrap_content" android:text="Name:" android:layout_margin="16dp" android:textStyle="bold" android:textSize="24sp" /> <!-- sub-view 2 :EditText --> <EditText android:id="@+id/editText" android:layout_width="match_parent" android:layout_height="wrap_content" android:layout_margin="16dp" android:autofillHints="name" android:hint="Enter you name here..." android:inputType="text"/> <!-- sub-view 3 :Button --> <Button android:id="@+id/showInput" android:layout_width="wrap_content" android:layout_height="wrap_content" android:backgroundTint="@color/black" android:layout_margin="16dp" android:text="Click here" android:textColor="@color/white" /> </LinearLayout>
Design UI:
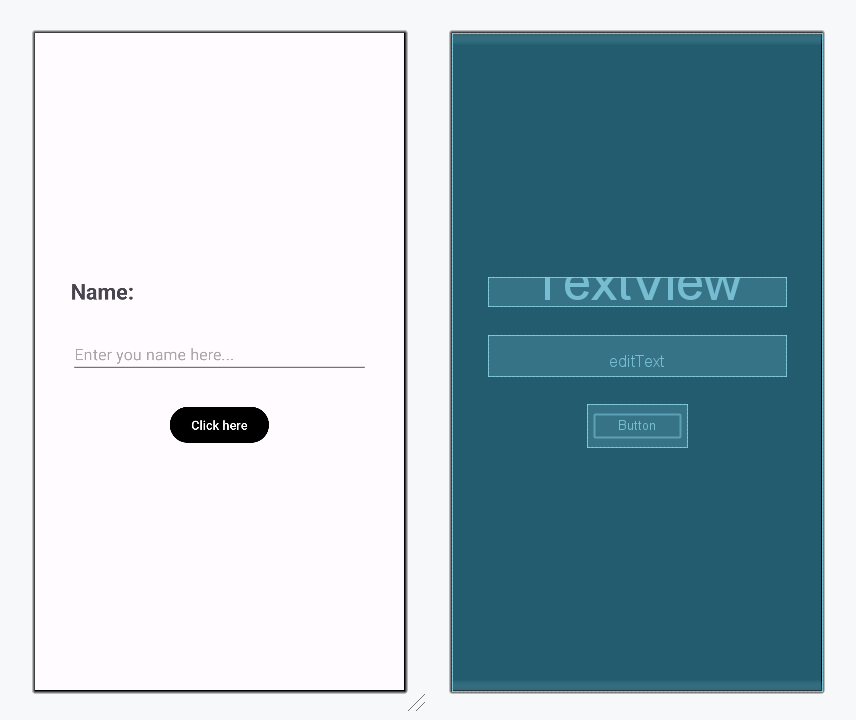
Step 2: Working with MainActivity.kt
When the layout is created, you can access the UI elements from the activity_main.xml file by using the findViewById() method in the onCreate() call back function in the MainActivity.kt file.
MainActivity.kt:
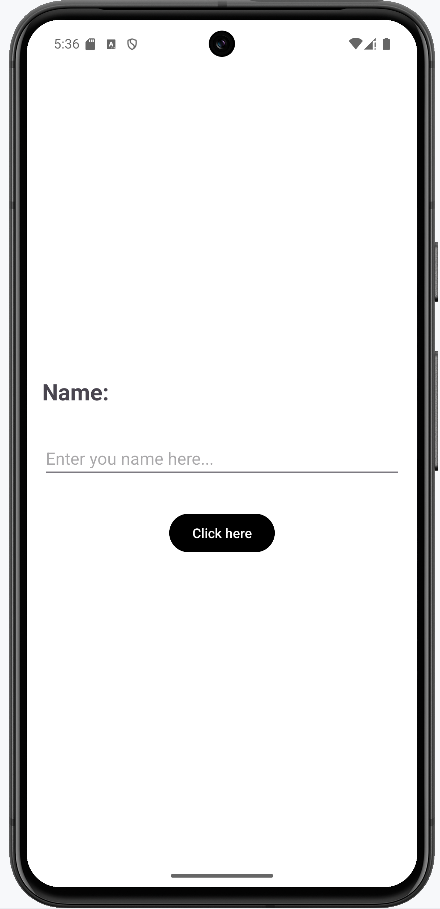
MainActivity.kt package com.example.text_view_application import androidx.appcompat.app.AppCompatActivity import android.os.Bundle import android.widget.Button import android.widget.EditText import android.widget.TextView import androidx.activity.ComponentActivity import androidx.activity.compose.setContent import androidx.activity.enableEdgeToEdge import androidx.compose.foundation.layout.fillMaxSize import androidx.compose.foundation.layout.padding import androidx.compose.material3.Scaffold import androidx.compose.material3.Text import androidx.compose.runtime.Composable import androidx.compose.ui.Modifier import androidx.compose.ui.tooling.preview.Preview import com.example.text_view_application.ui.theme.Text_View_ApplicationTheme class MainActivity : ComponentActivity() { override fun onCreate(savedInstanceState: Bundle?) { super.onCreate(savedInstanceState) enableEdgeToEdge() setContentView(R.layout.activity_main) val showButton:Button = findViewById(R.id.showInput) val editText:EditText = findViewById(R.id.editText) val textView:TextView = findViewById(R.id.txtVw) } } Output:
After running the application, this is the expected result from the above code:
Explore
Overview
Basics
Control Flow
Array & String
Functions
Collections
OOPs Concept
Exception Handling
Null Safety
Regex & Ranges