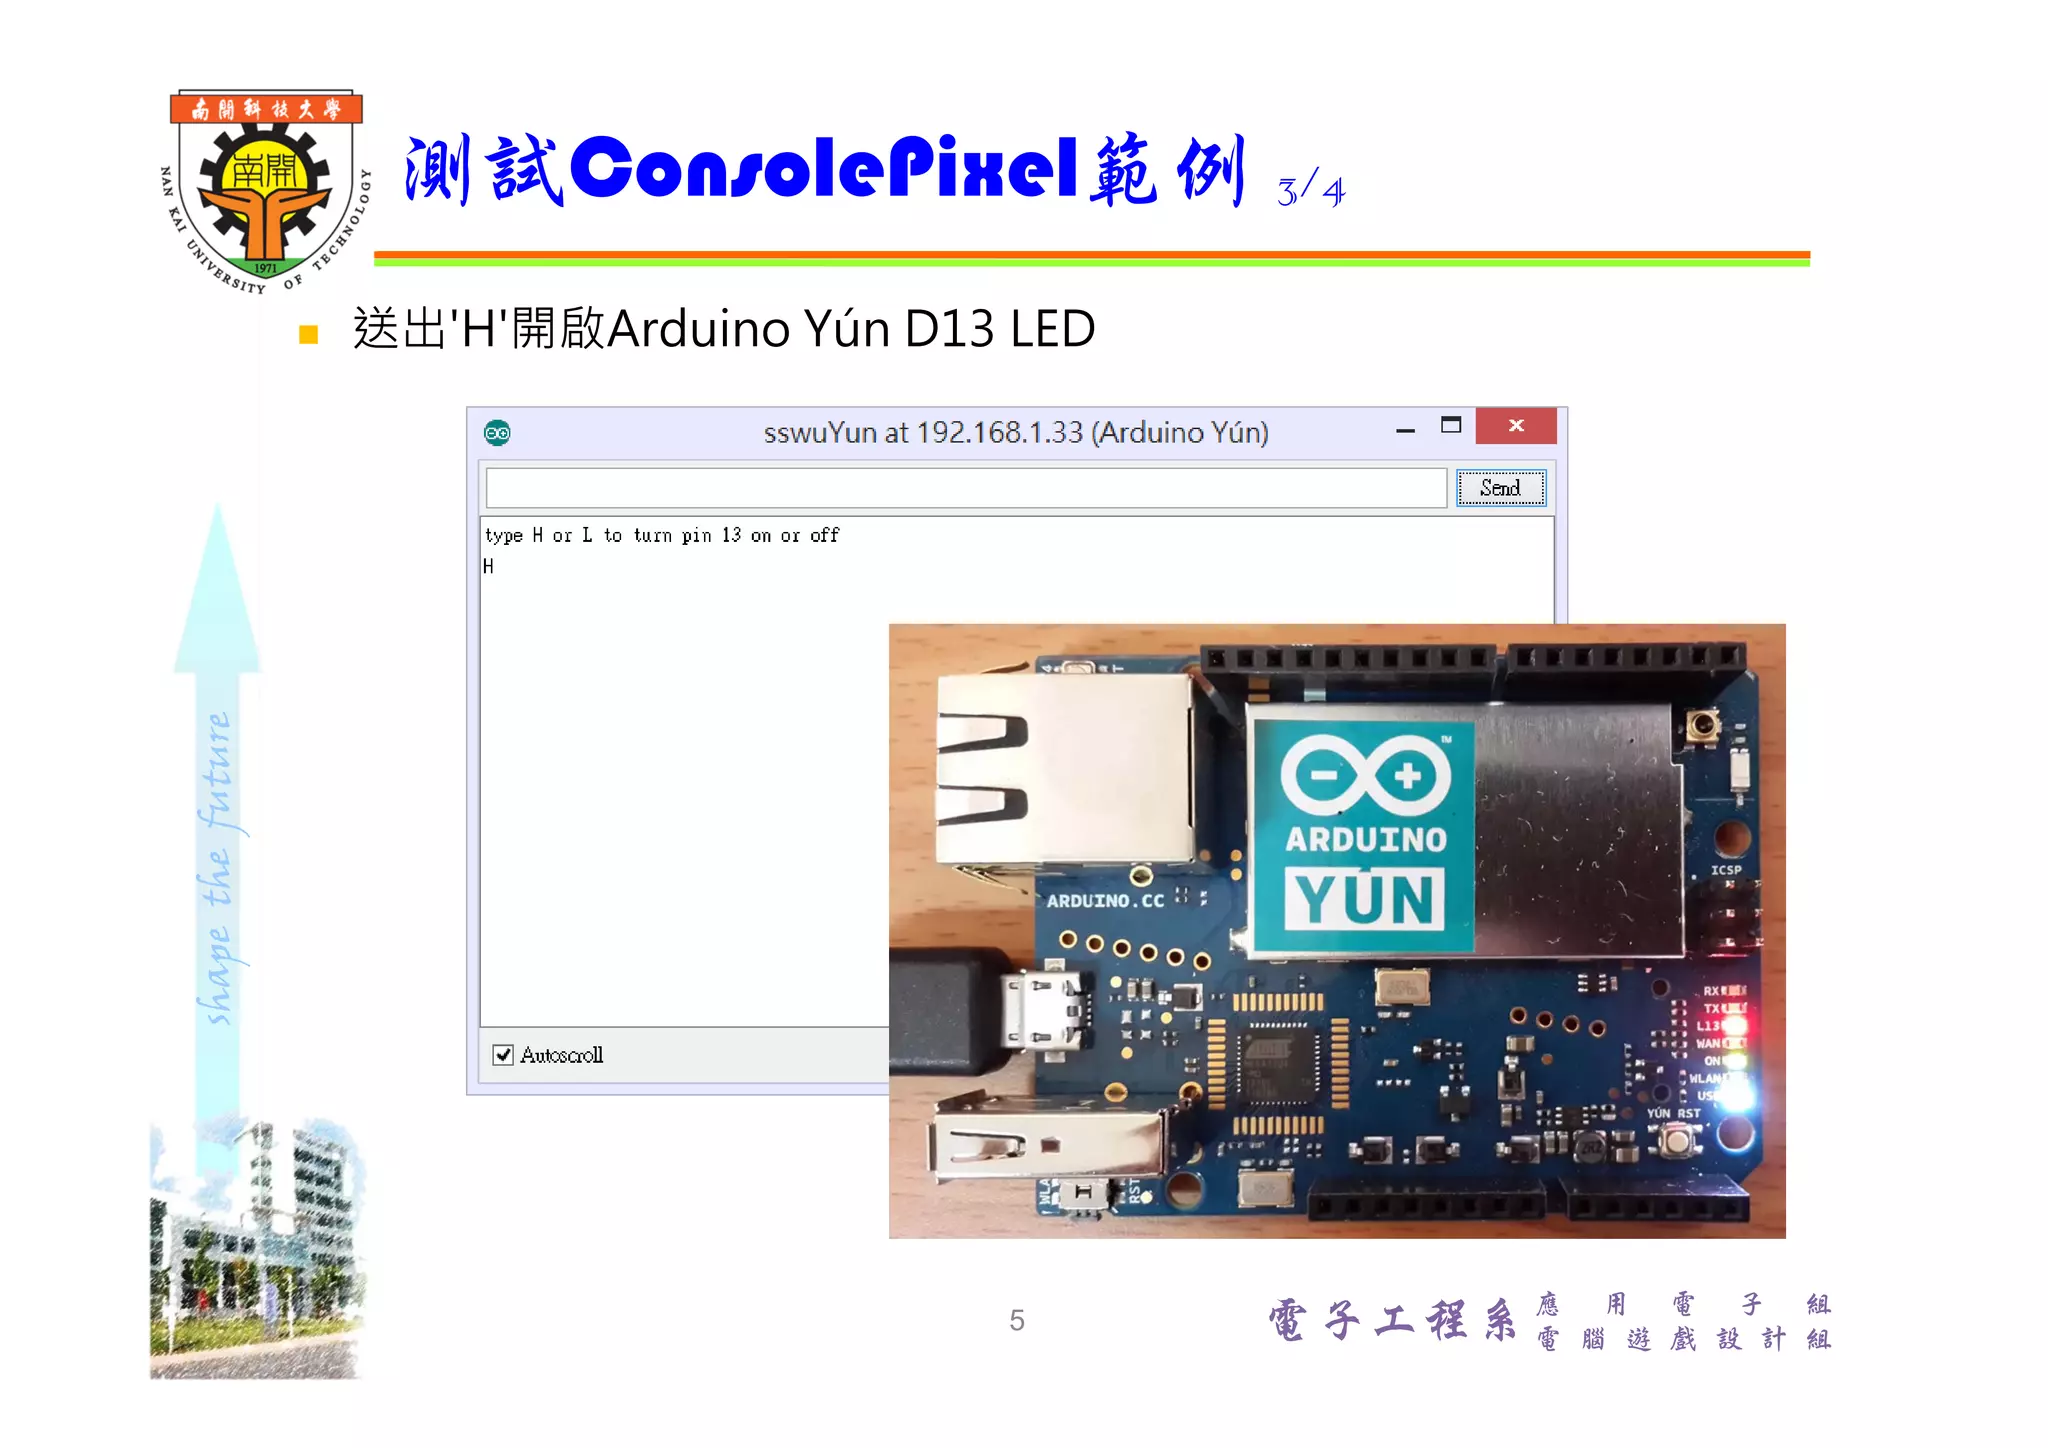
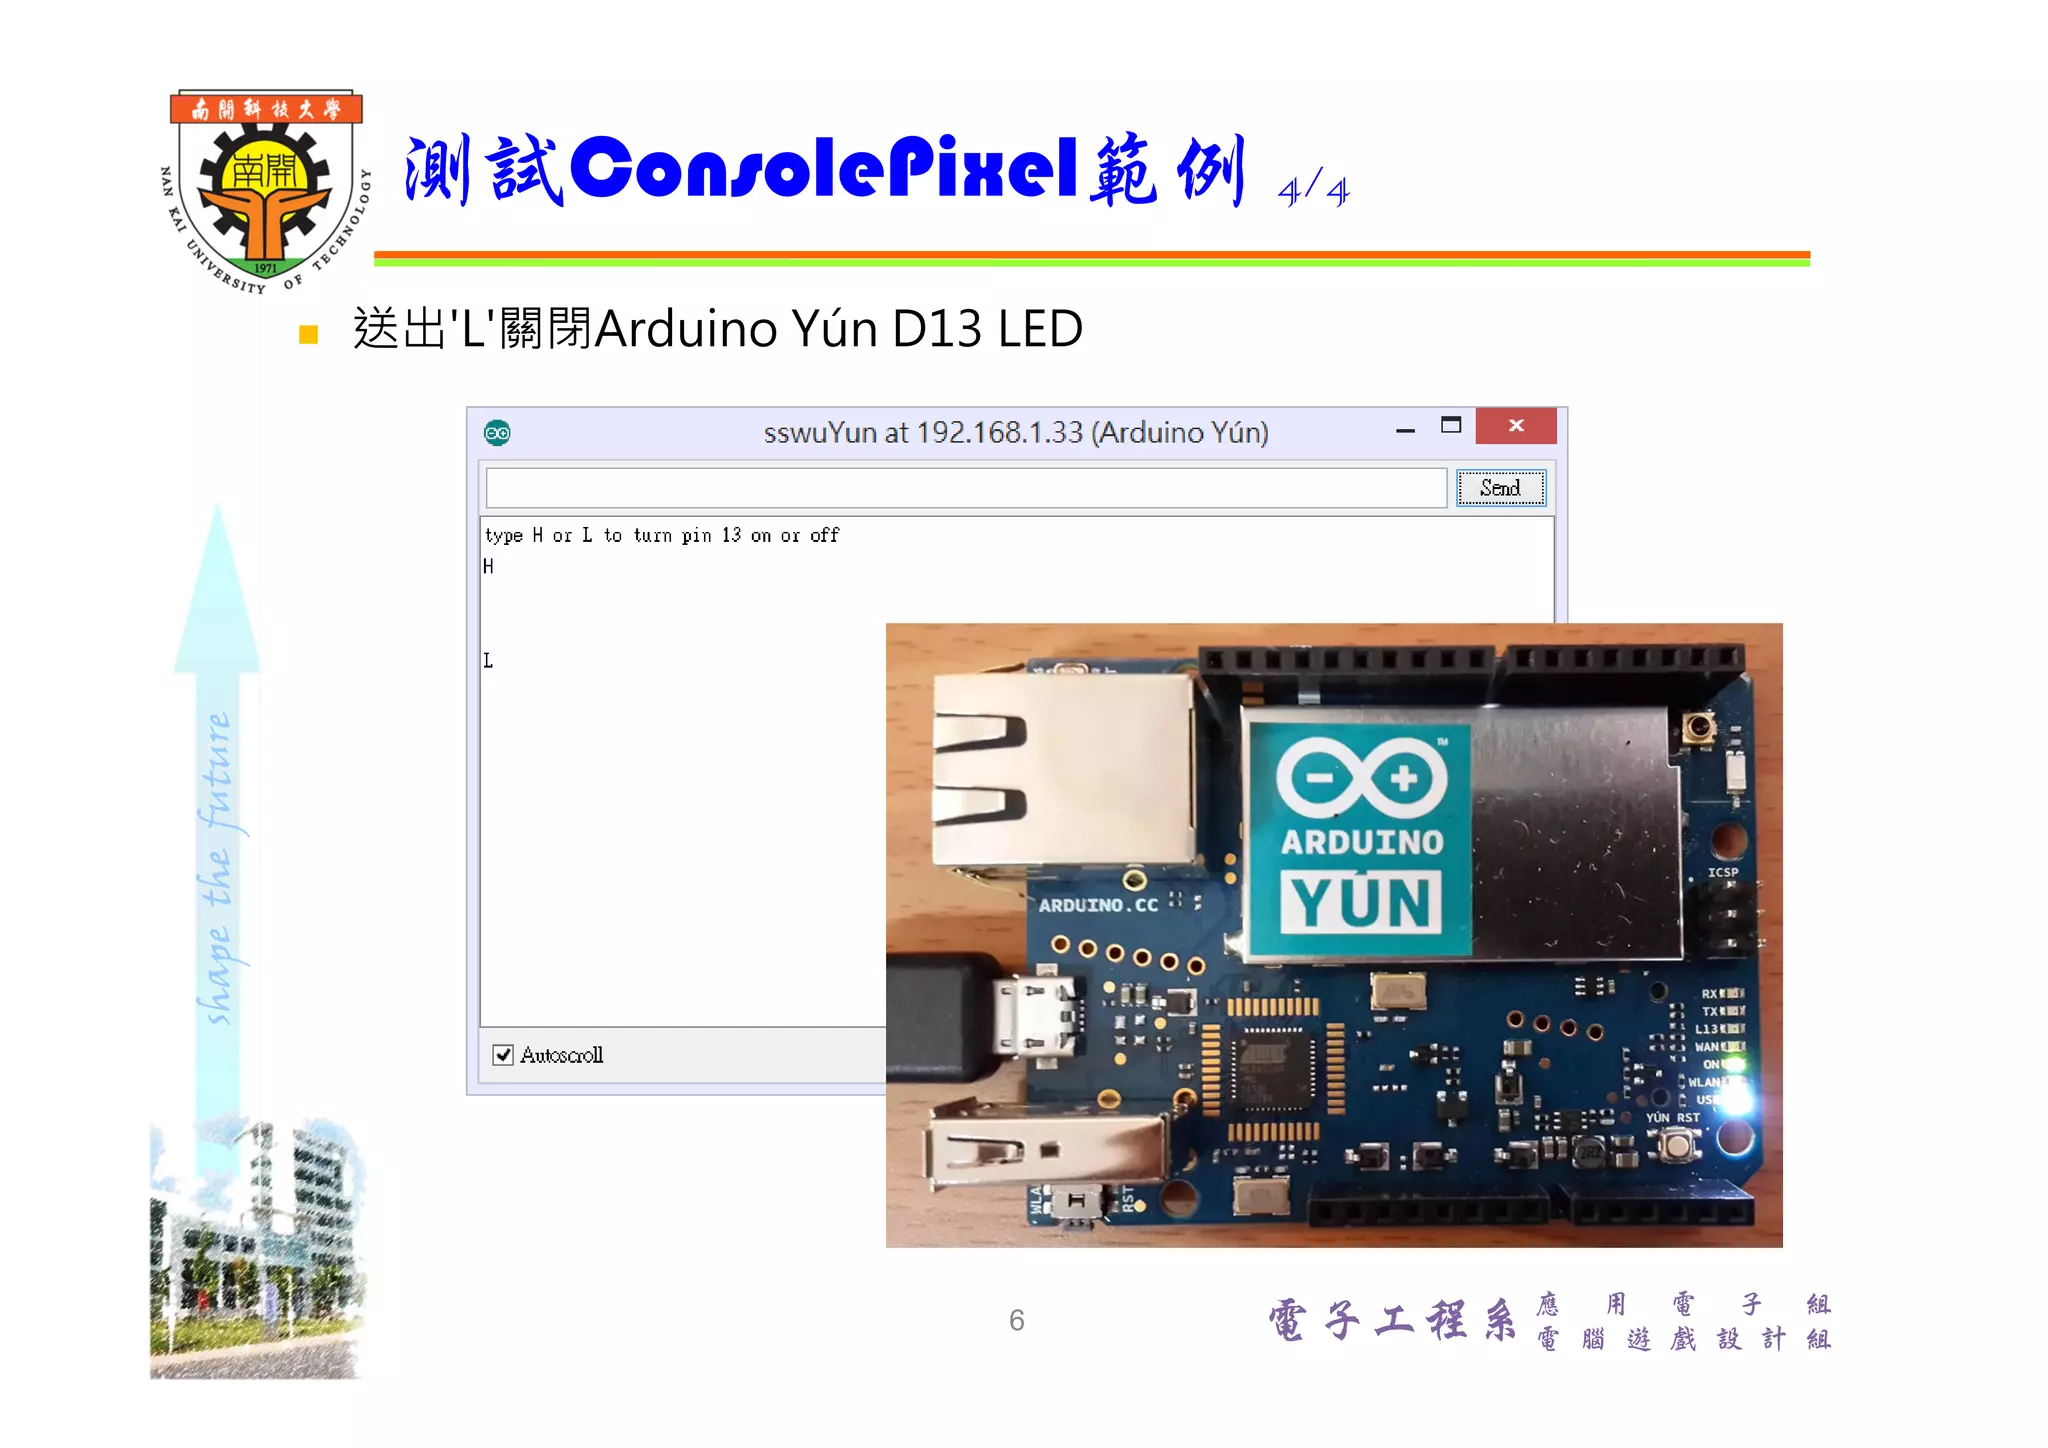
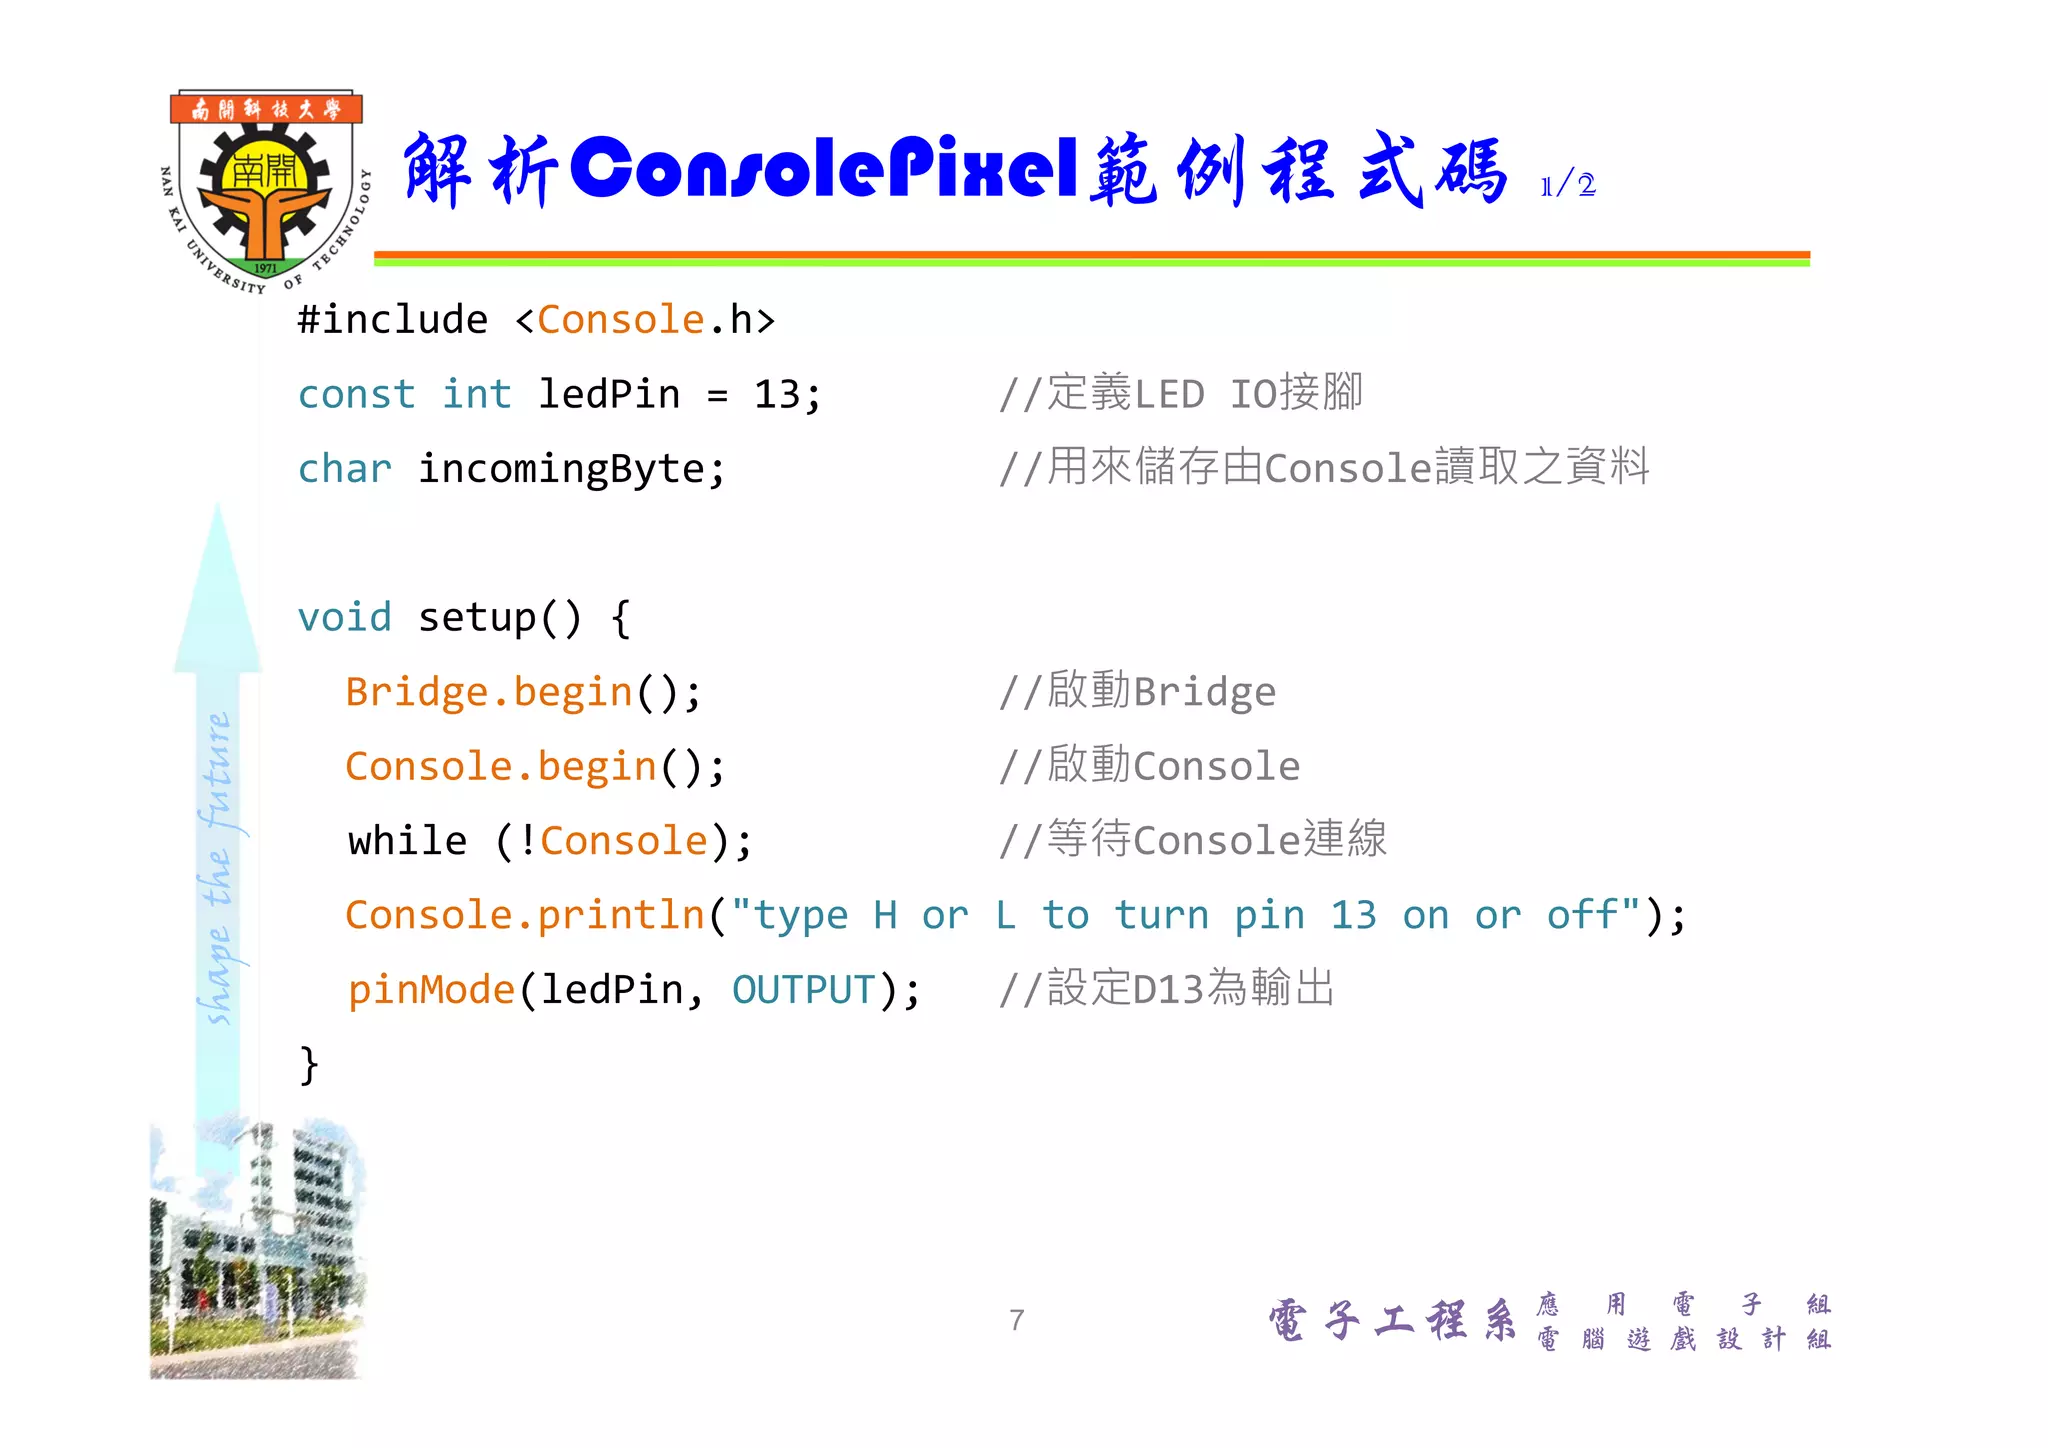
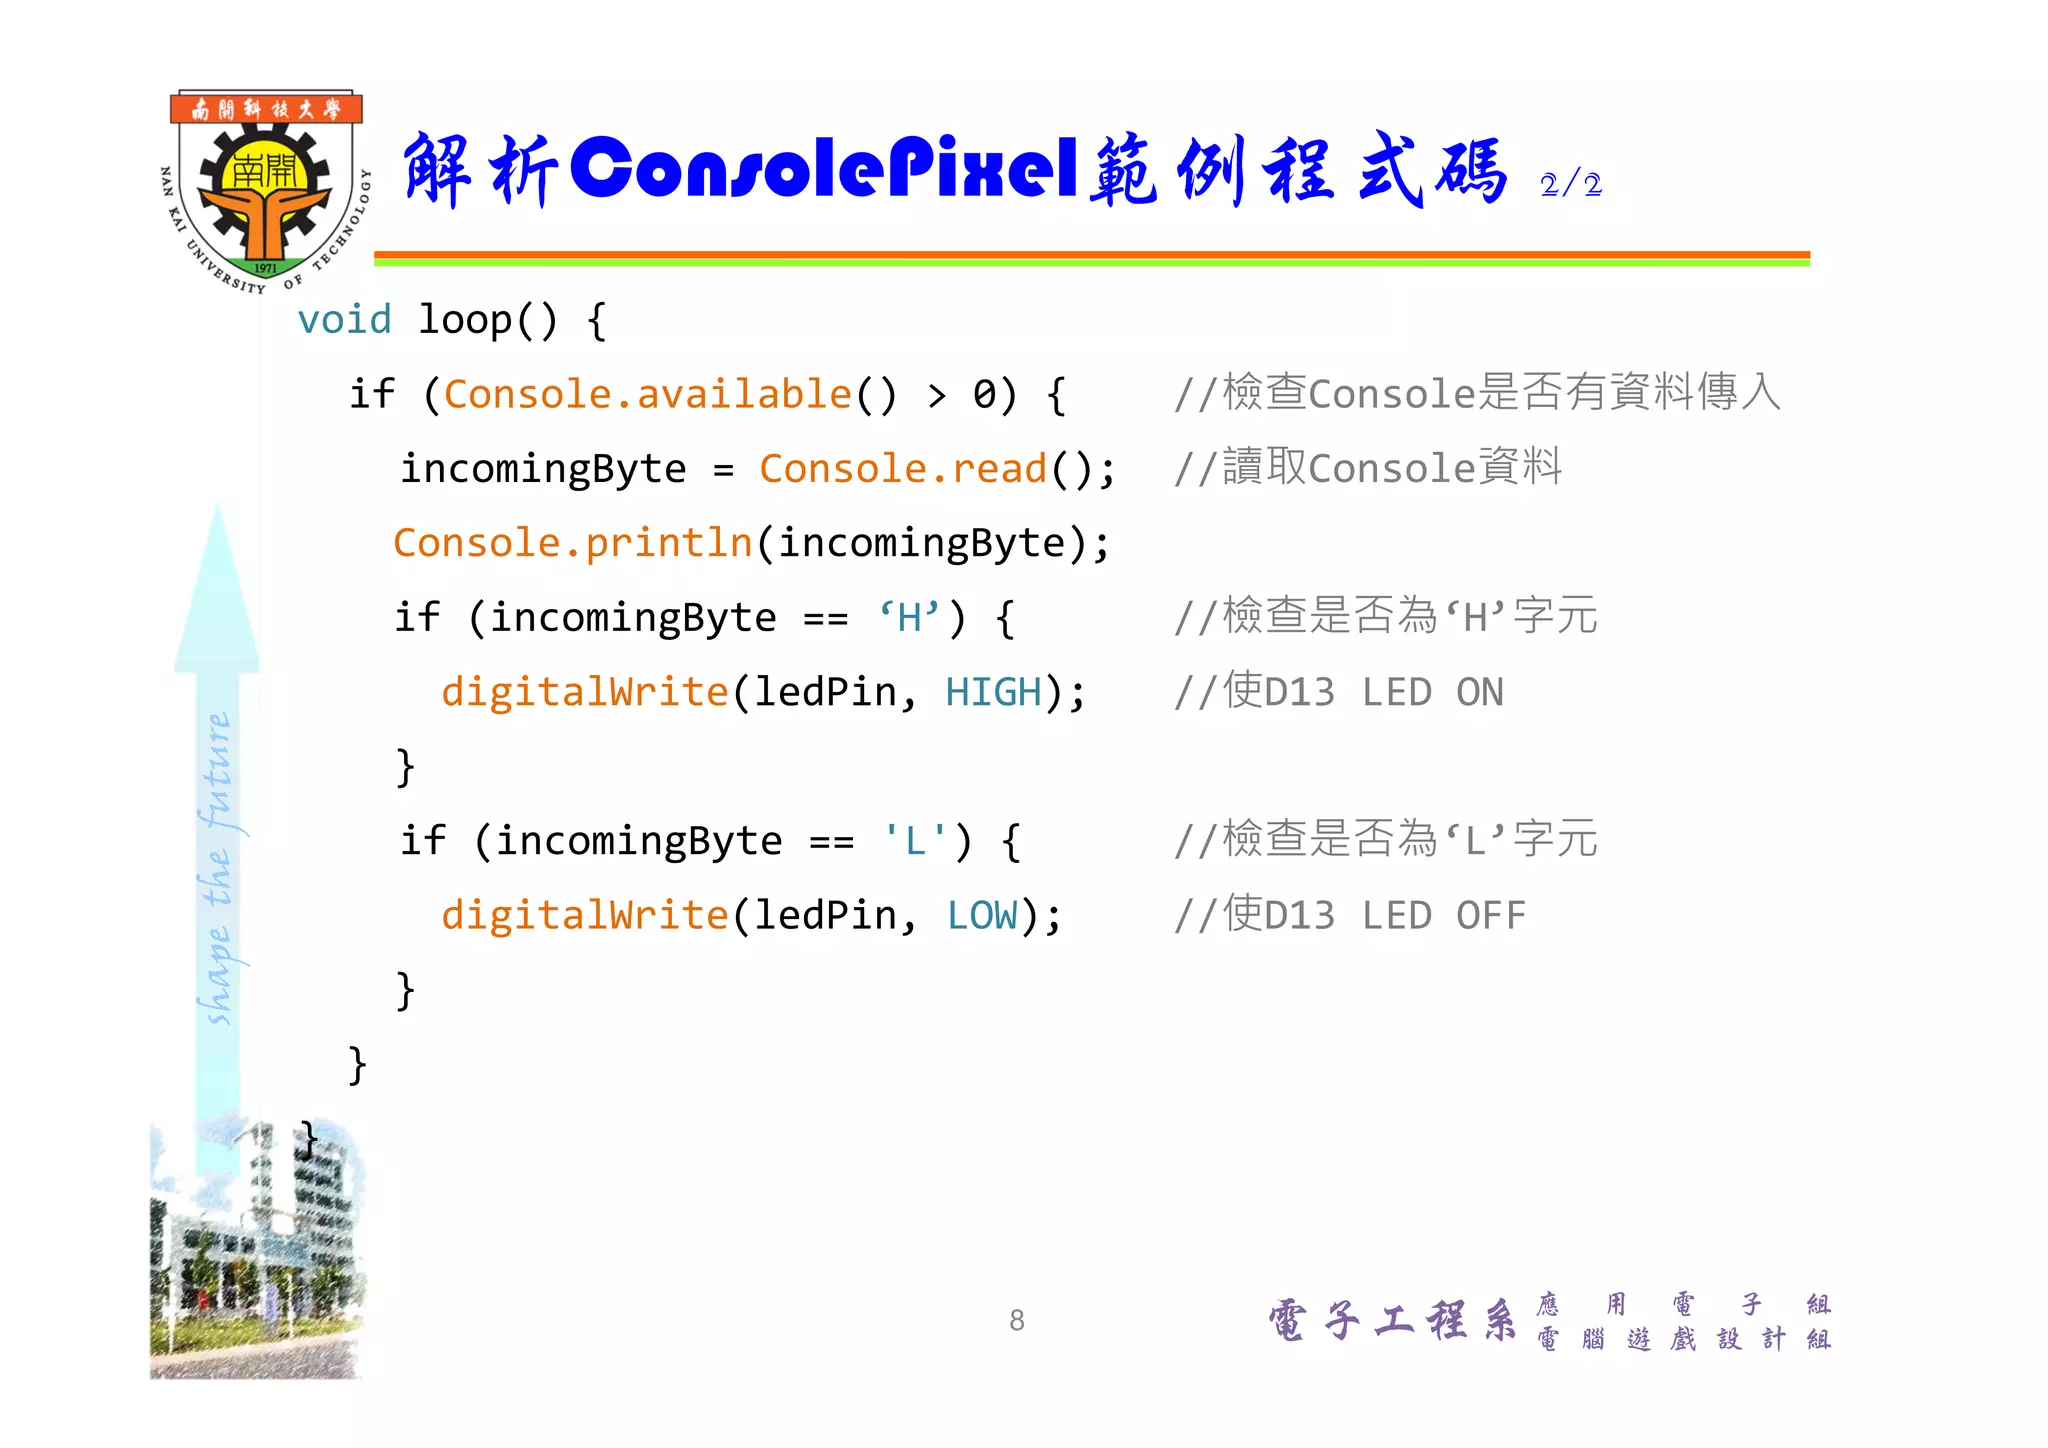
電子工程系應 用 電 子 組 電 腦 遊 戲 設 計 組 透過Console訊息 進行IO控制 吳錫修 November 21, 2015
shapethefuture 電子工程系 應 用 電 子 組 電 腦 遊 戲 設 計 組  範例:File/Examples/Bridge/ConsolePixel  ConsolePixel範例展示從Arduino Yún Console接收數據來控制 Arduino Yún控制板 IO。當收到‘H’字元,開啟Arduino板D13 LED;當收到'L'字元,關閉Arduino板D13 LED  線上解說 https://www.arduino.cc/en/Tutorial/ConsolePixel ConsolePixel範例 2
shapethefuture 電子工程系 應 用 電 子 組 電 腦 遊 戲 設 計 組  Arduino Yún與電腦連接到相同WiFi  確認已連接Arduino Yún 測試ConsolePixel範例 1/4 3
shapethefuture 電子工程系 應 用 電 子 組 電 腦 遊 戲 設 計 組  開啟Arduino Yún Console視窗 Tools/Serial Monitor 測試ConsolePixel範例 2/4 4
shapethefuture 電子工程系 應 用 電 子 組 電 腦 遊 戲 設 計 組  送出'H'開啟Arduino Yún D13 LED 測試ConsolePixel範例 3/4 5
shapethefuture 電子工程系 應 用 電 子 組 電 腦 遊 戲 設 計 組  送出'L'關閉Arduino Yún D13 LED 測試ConsolePixel範例 4/4 6
shapethefuture 電子工程系應 用 電 子 組 電 腦 遊 戲 設 計 組 #include <Console.h> const int ledPin = 13; //定義LED IO接腳 char incomingByte; //用來儲存由Console讀取之資料 void setup() { Bridge.begin(); //啟動Bridge Console.begin(); //啟動Console while (!Console); //等待Console連線 Console.println("type H or L to turn pin 13 on or off"); pinMode(ledPin, OUTPUT); //設定D13為輸出 } 解析ConsolePixel範例程式碼 1/2 7
shapethefuture 電子工程系應 用 電 子 組 電 腦 遊 戲 設 計 組 void loop() { if (Console.available() > 0) { //檢查Console是否有資料傳入 incomingByte = Console.read(); //讀取Console資料 Console.println(incomingByte); if (incomingByte == ‘H’) { //檢查是否為‘H’字元 digitalWrite(ledPin, HIGH); //使D13 LED ON } if (incomingByte == 'L') { //檢查是否為‘L’字元 digitalWrite(ledPin, LOW); //使D13 LED OFF } } } 解析ConsolePixel範例程式碼 2/2 8

使用console訊息操作Arduino Yún IO

  • 1.
    電子工程系應 用 電子 組 電 腦 遊 戲 設 計 組 透過Console訊息 進行IO控制 吳錫修 November 21, 2015
  • 2.
    shapethefuture 電子工程系 應 用 電子 組 電 腦 遊 戲 設 計 組  範例:File/Examples/Bridge/ConsolePixel  ConsolePixel範例展示從Arduino Yún Console接收數據來控制 Arduino Yún控制板 IO。當收到‘H’字元,開啟Arduino板D13 LED;當收到'L'字元,關閉Arduino板D13 LED  線上解說 https://www.arduino.cc/en/Tutorial/ConsolePixel ConsolePixel範例 2
  • 3.
    shapethefuture 電子工程系 應 用 電子 組 電 腦 遊 戲 設 計 組  Arduino Yún與電腦連接到相同WiFi  確認已連接Arduino Yún 測試ConsolePixel範例 1/4 3
  • 4.
    shapethefuture 電子工程系 應 用 電子 組 電 腦 遊 戲 設 計 組  開啟Arduino Yún Console視窗 Tools/Serial Monitor 測試ConsolePixel範例 2/4 4
  • 5.
    shapethefuture 電子工程系 應 用 電子 組 電 腦 遊 戲 設 計 組  送出'H'開啟Arduino Yún D13 LED 測試ConsolePixel範例 3/4 5
  • 6.
    shapethefuture 電子工程系 應 用 電子 組 電 腦 遊 戲 設 計 組  送出'L'關閉Arduino Yún D13 LED 測試ConsolePixel範例 4/4 6
  • 7.
    shapethefuture 電子工程系應 用 電子 組 電 腦 遊 戲 設 計 組 #include <Console.h> const int ledPin = 13; //定義LED IO接腳 char incomingByte; //用來儲存由Console讀取之資料 void setup() { Bridge.begin(); //啟動Bridge Console.begin(); //啟動Console while (!Console); //等待Console連線 Console.println("type H or L to turn pin 13 on or off"); pinMode(ledPin, OUTPUT); //設定D13為輸出 } 解析ConsolePixel範例程式碼 1/2 7
  • 8.
    shapethefuture 電子工程系應 用 電子 組 電 腦 遊 戲 設 計 組 void loop() { if (Console.available() > 0) { //檢查Console是否有資料傳入 incomingByte = Console.read(); //讀取Console資料 Console.println(incomingByte); if (incomingByte == ‘H’) { //檢查是否為‘H’字元 digitalWrite(ledPin, HIGH); //使D13 LED ON } if (incomingByte == 'L') { //檢查是否為‘L’字元 digitalWrite(ledPin, LOW); //使D13 LED OFF } } } 解析ConsolePixel範例程式碼 2/2 8