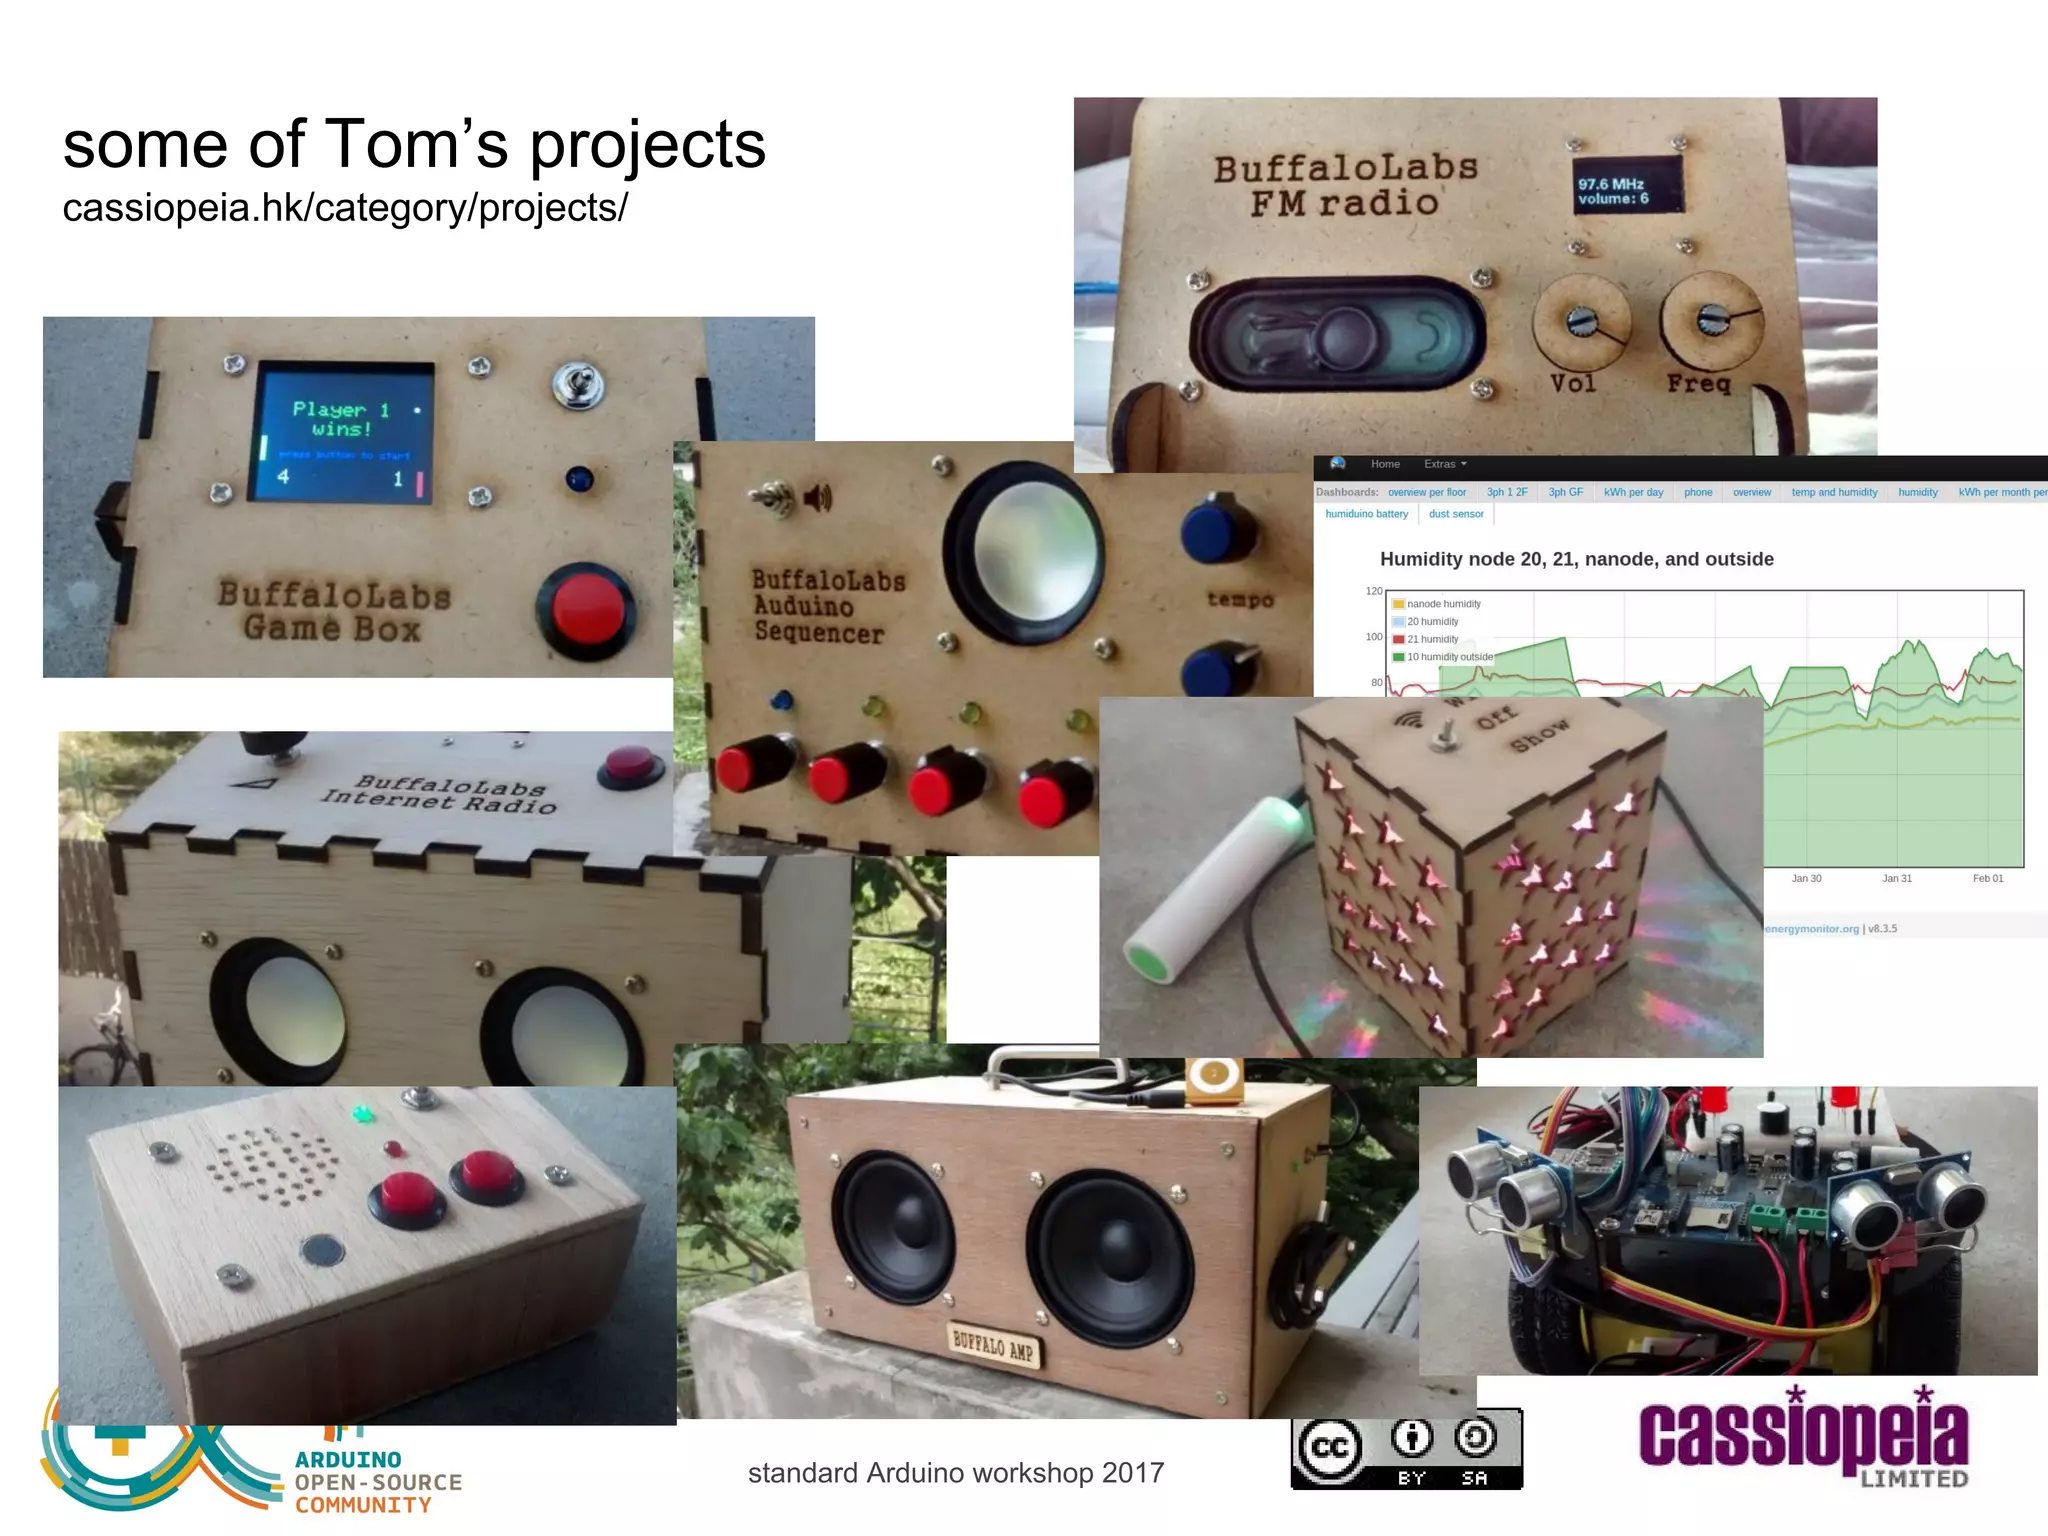
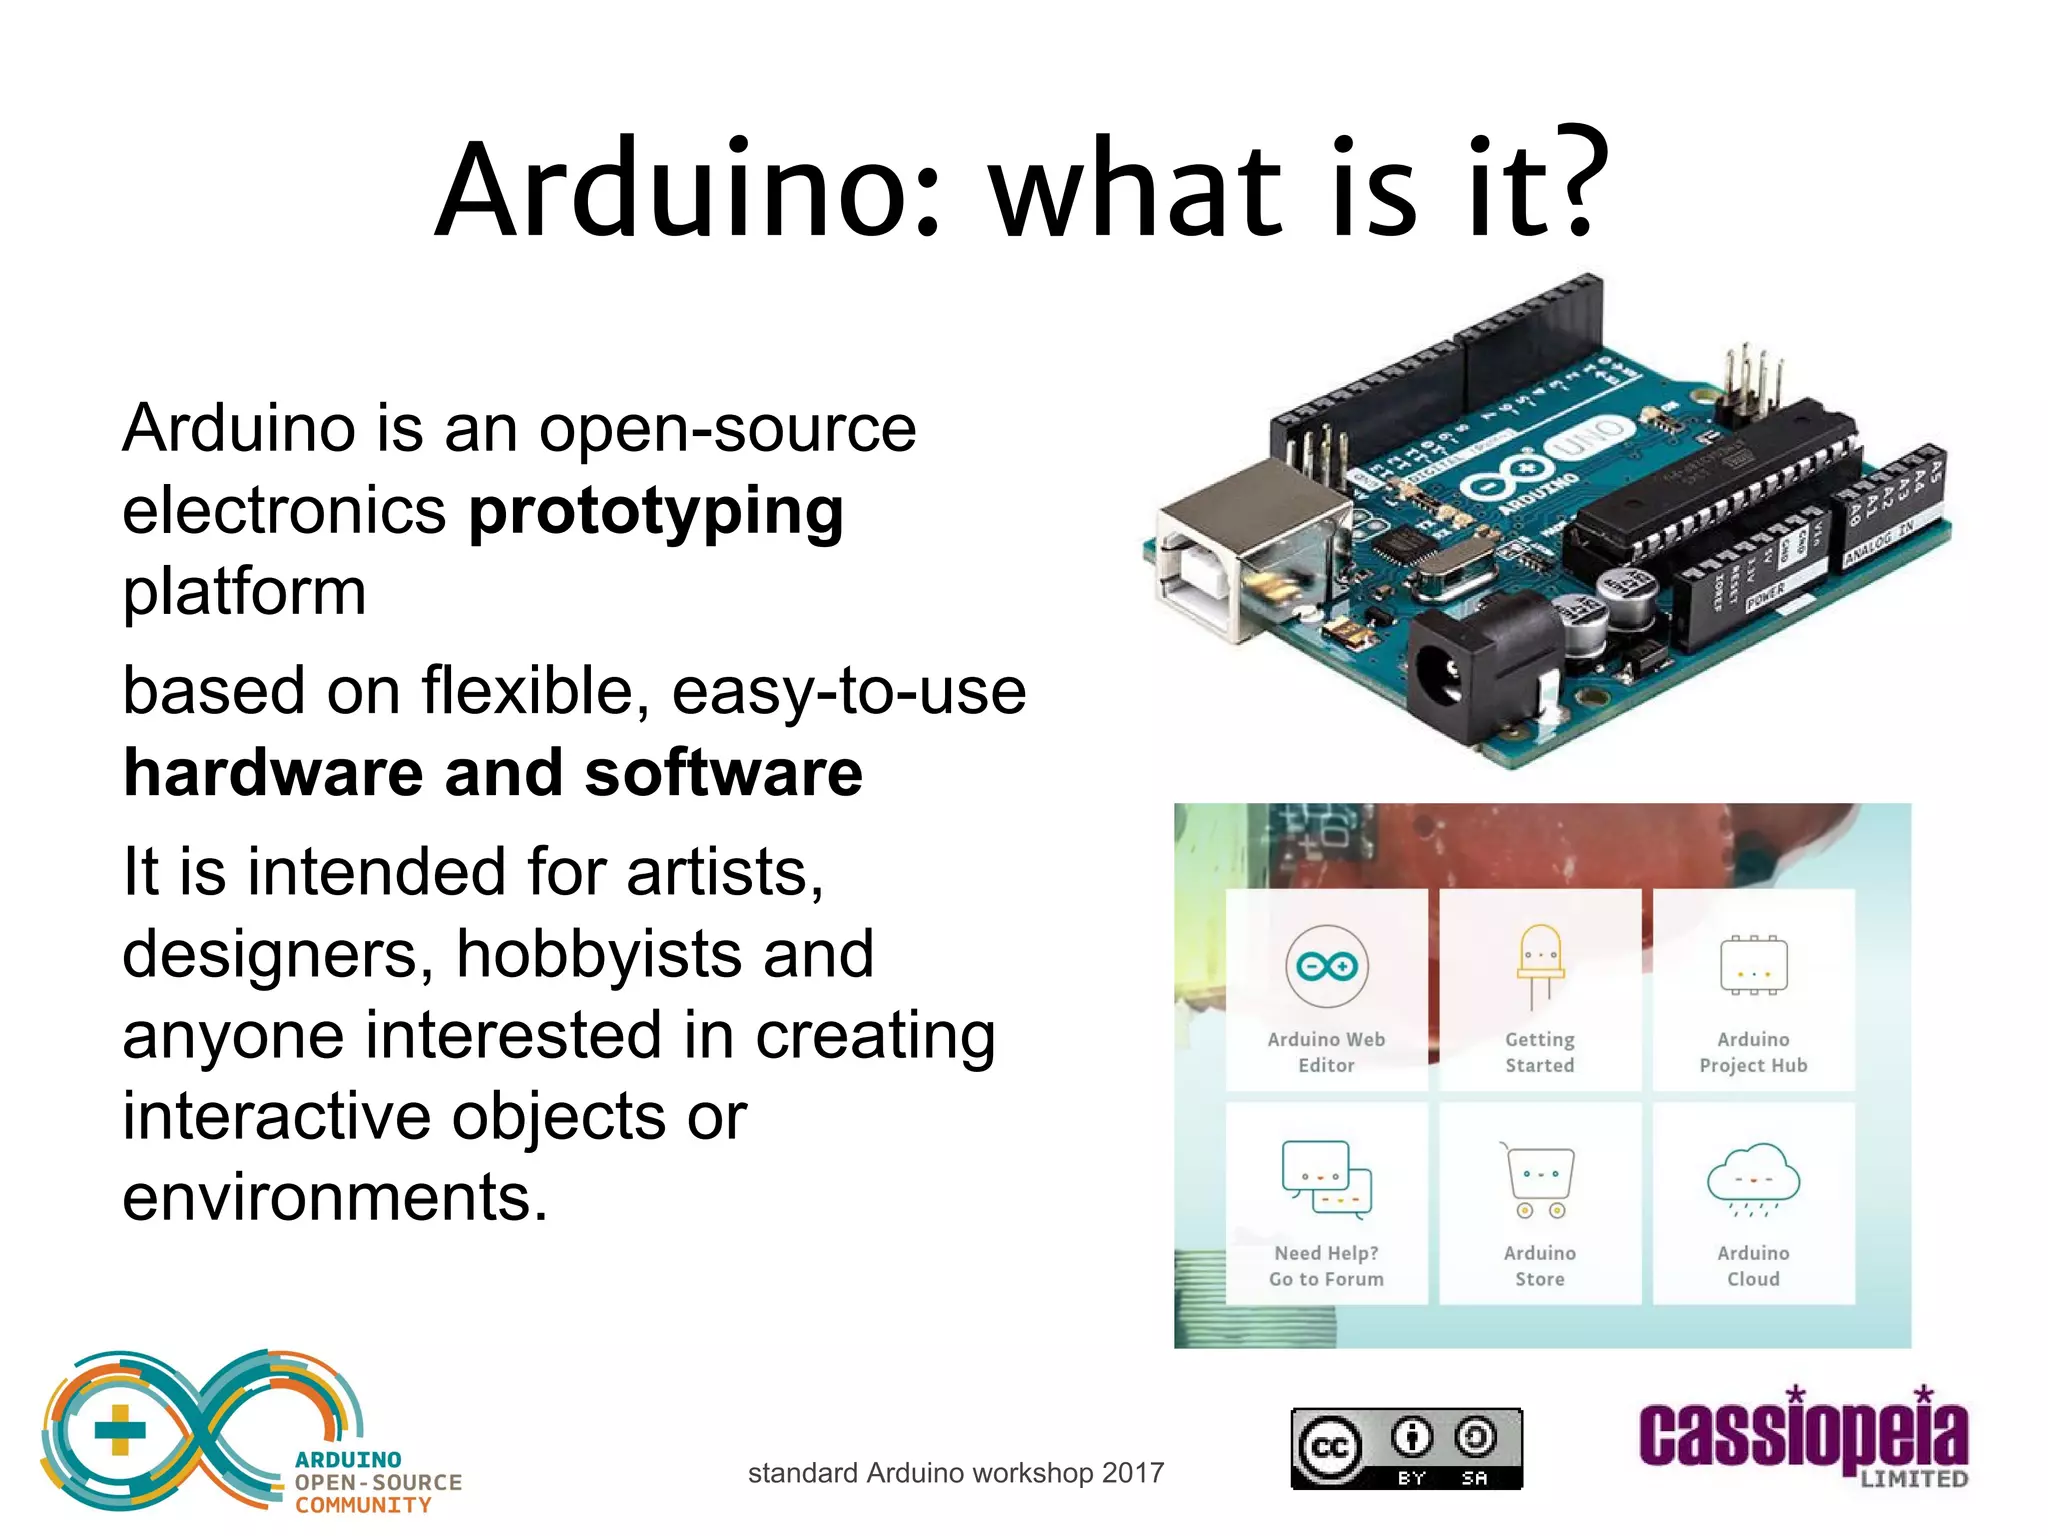
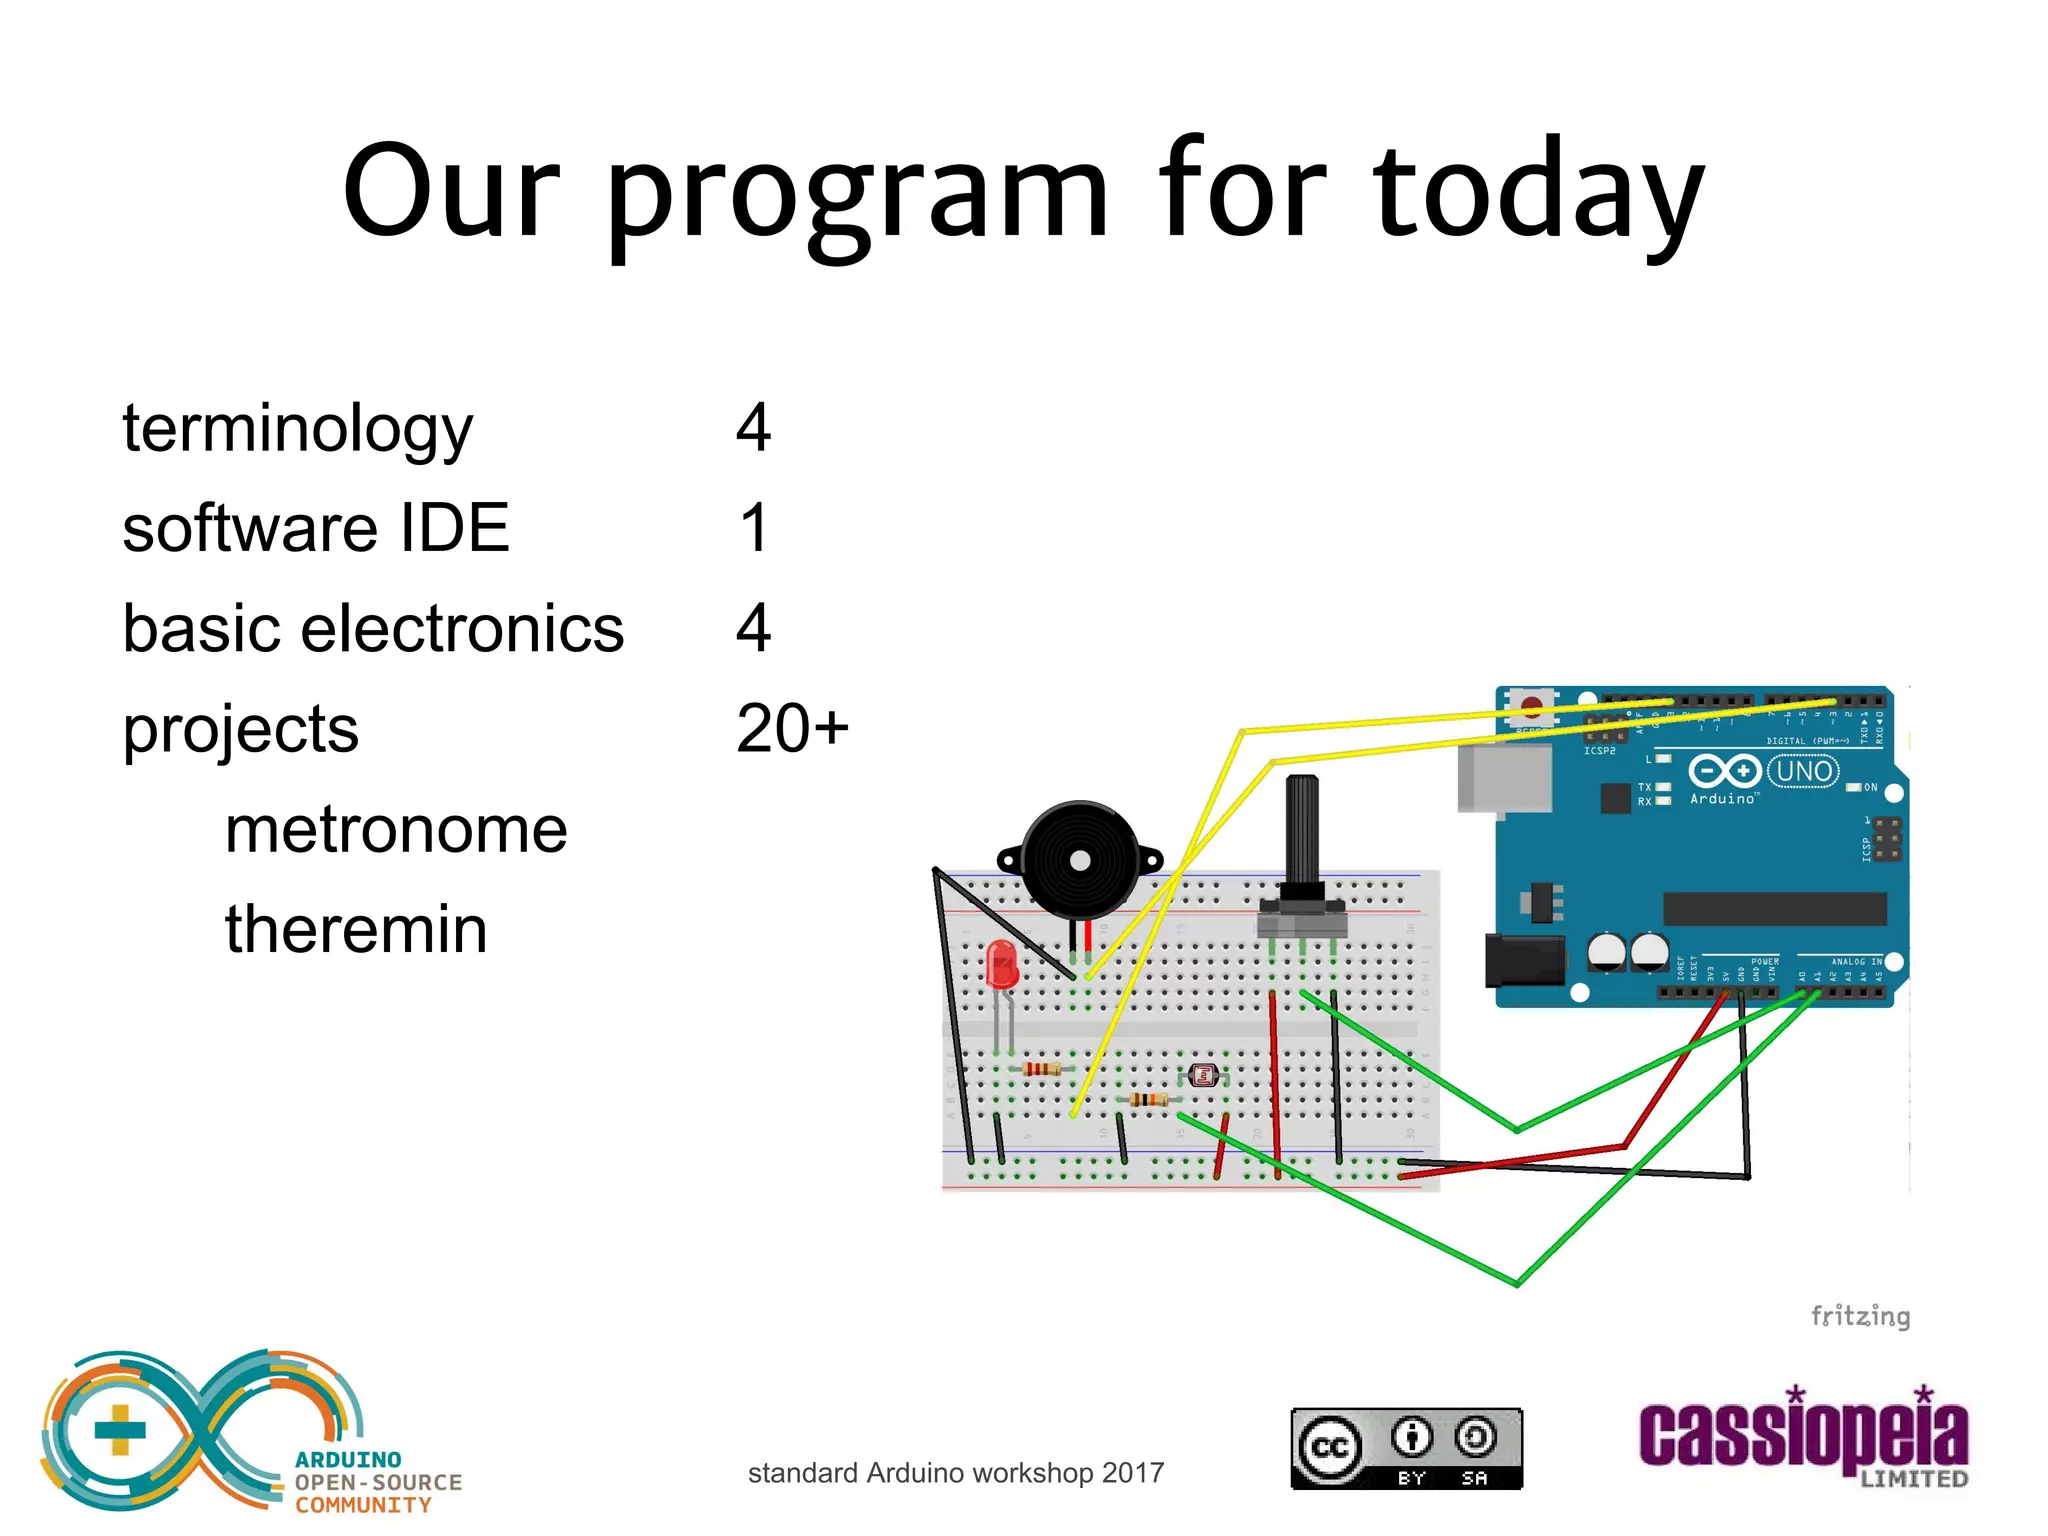
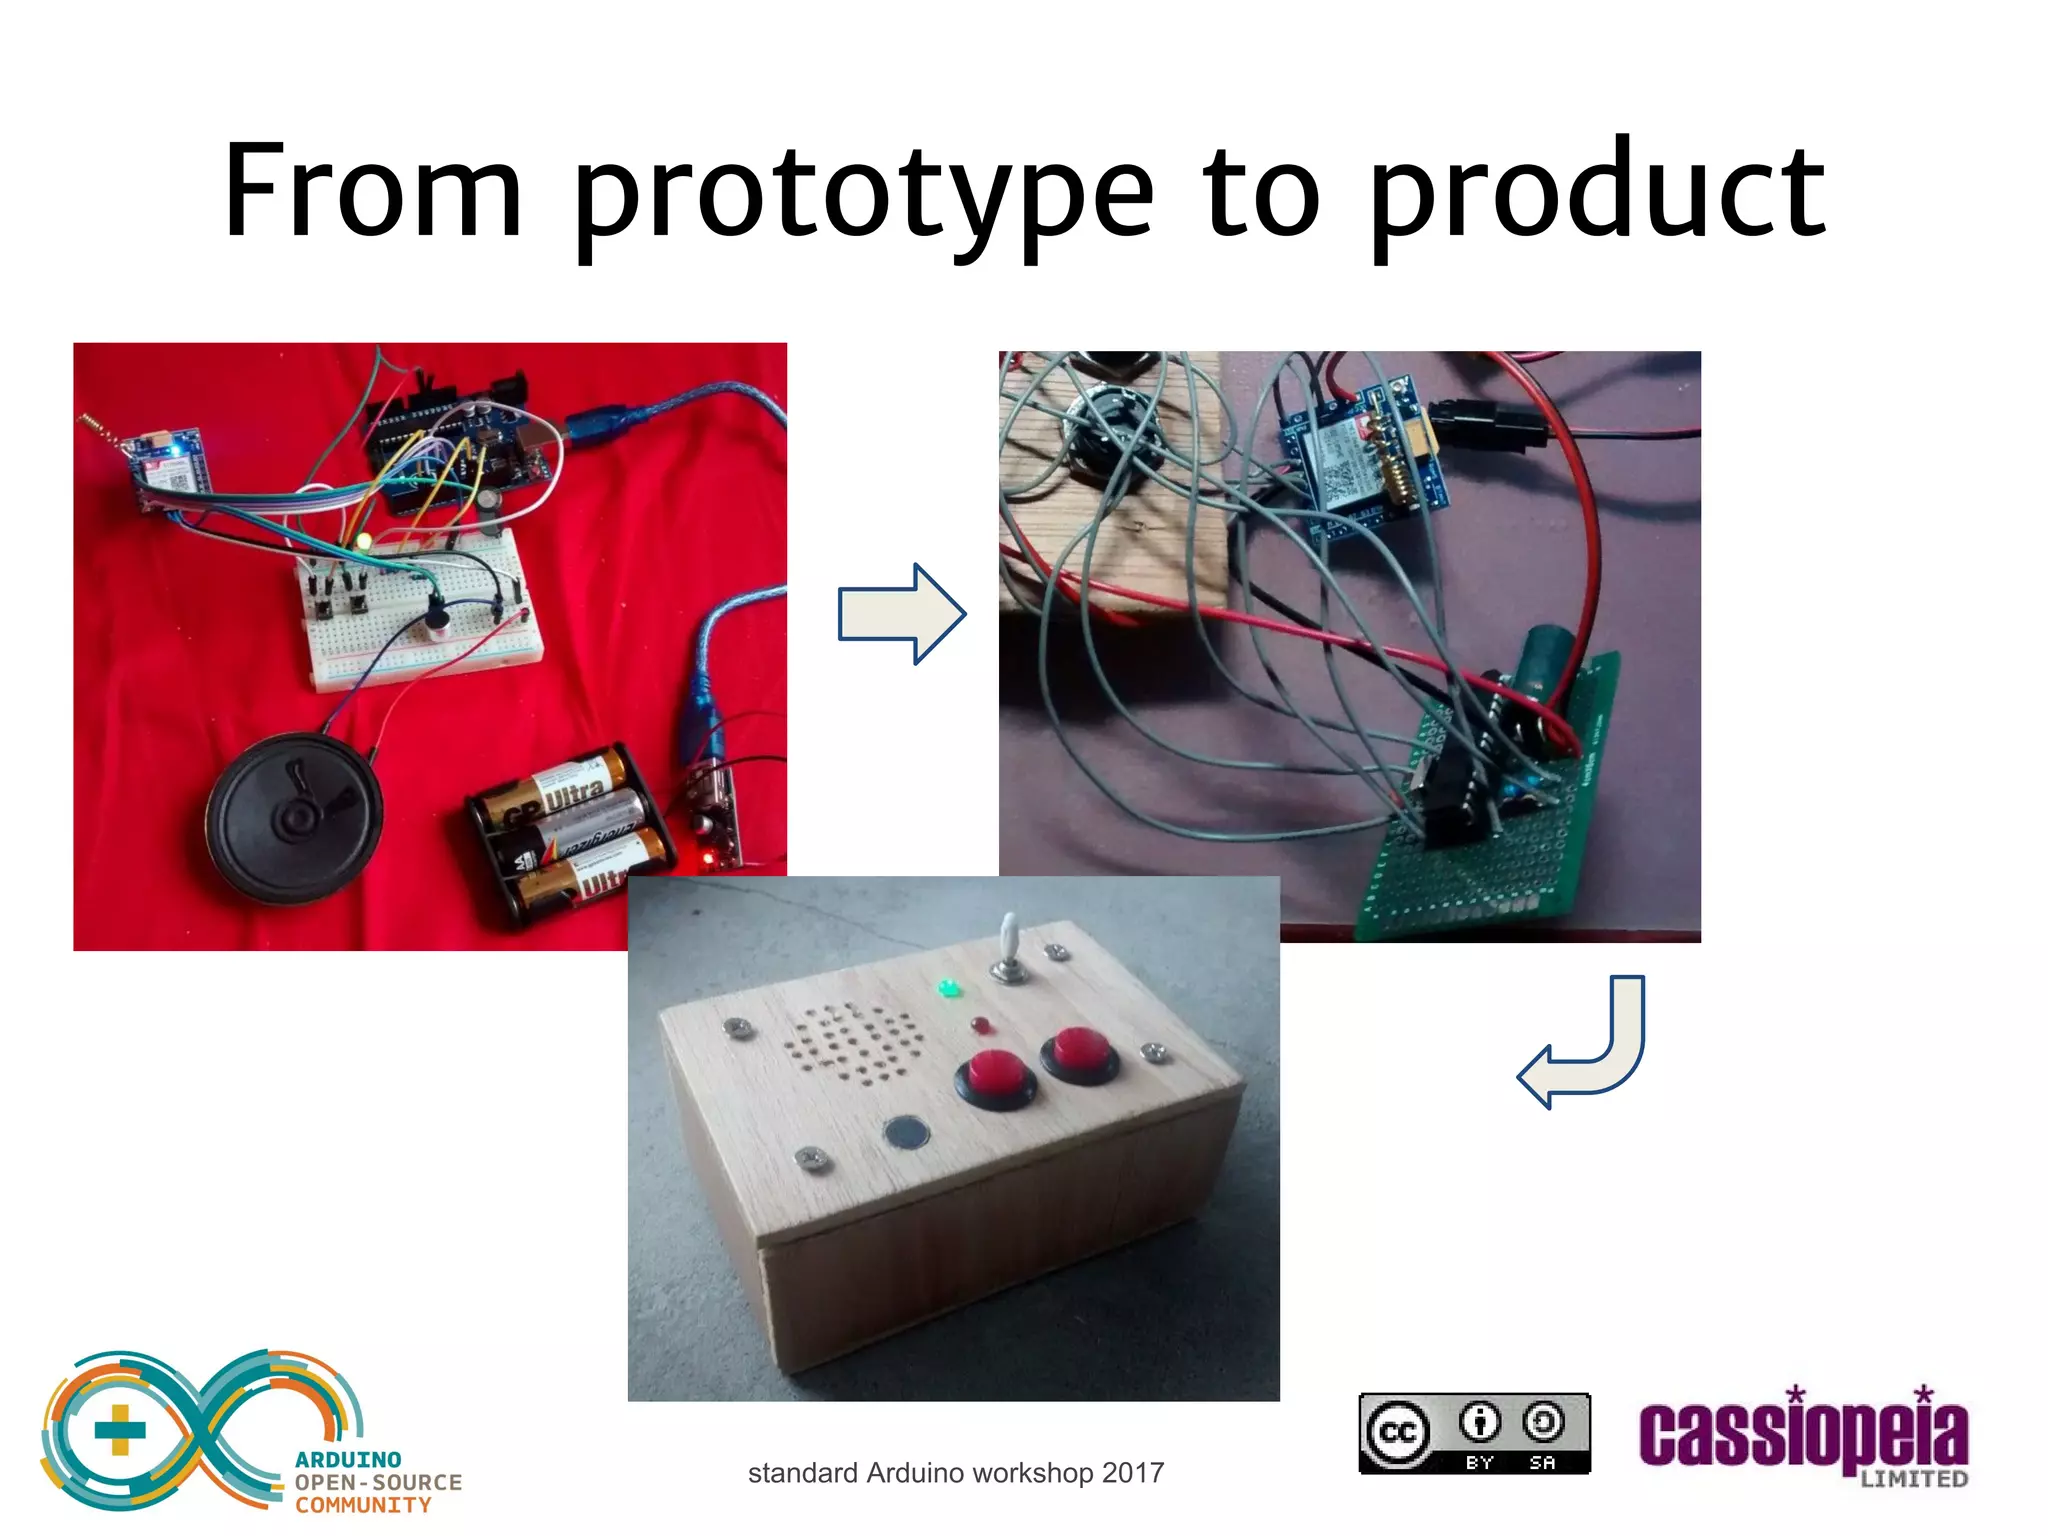
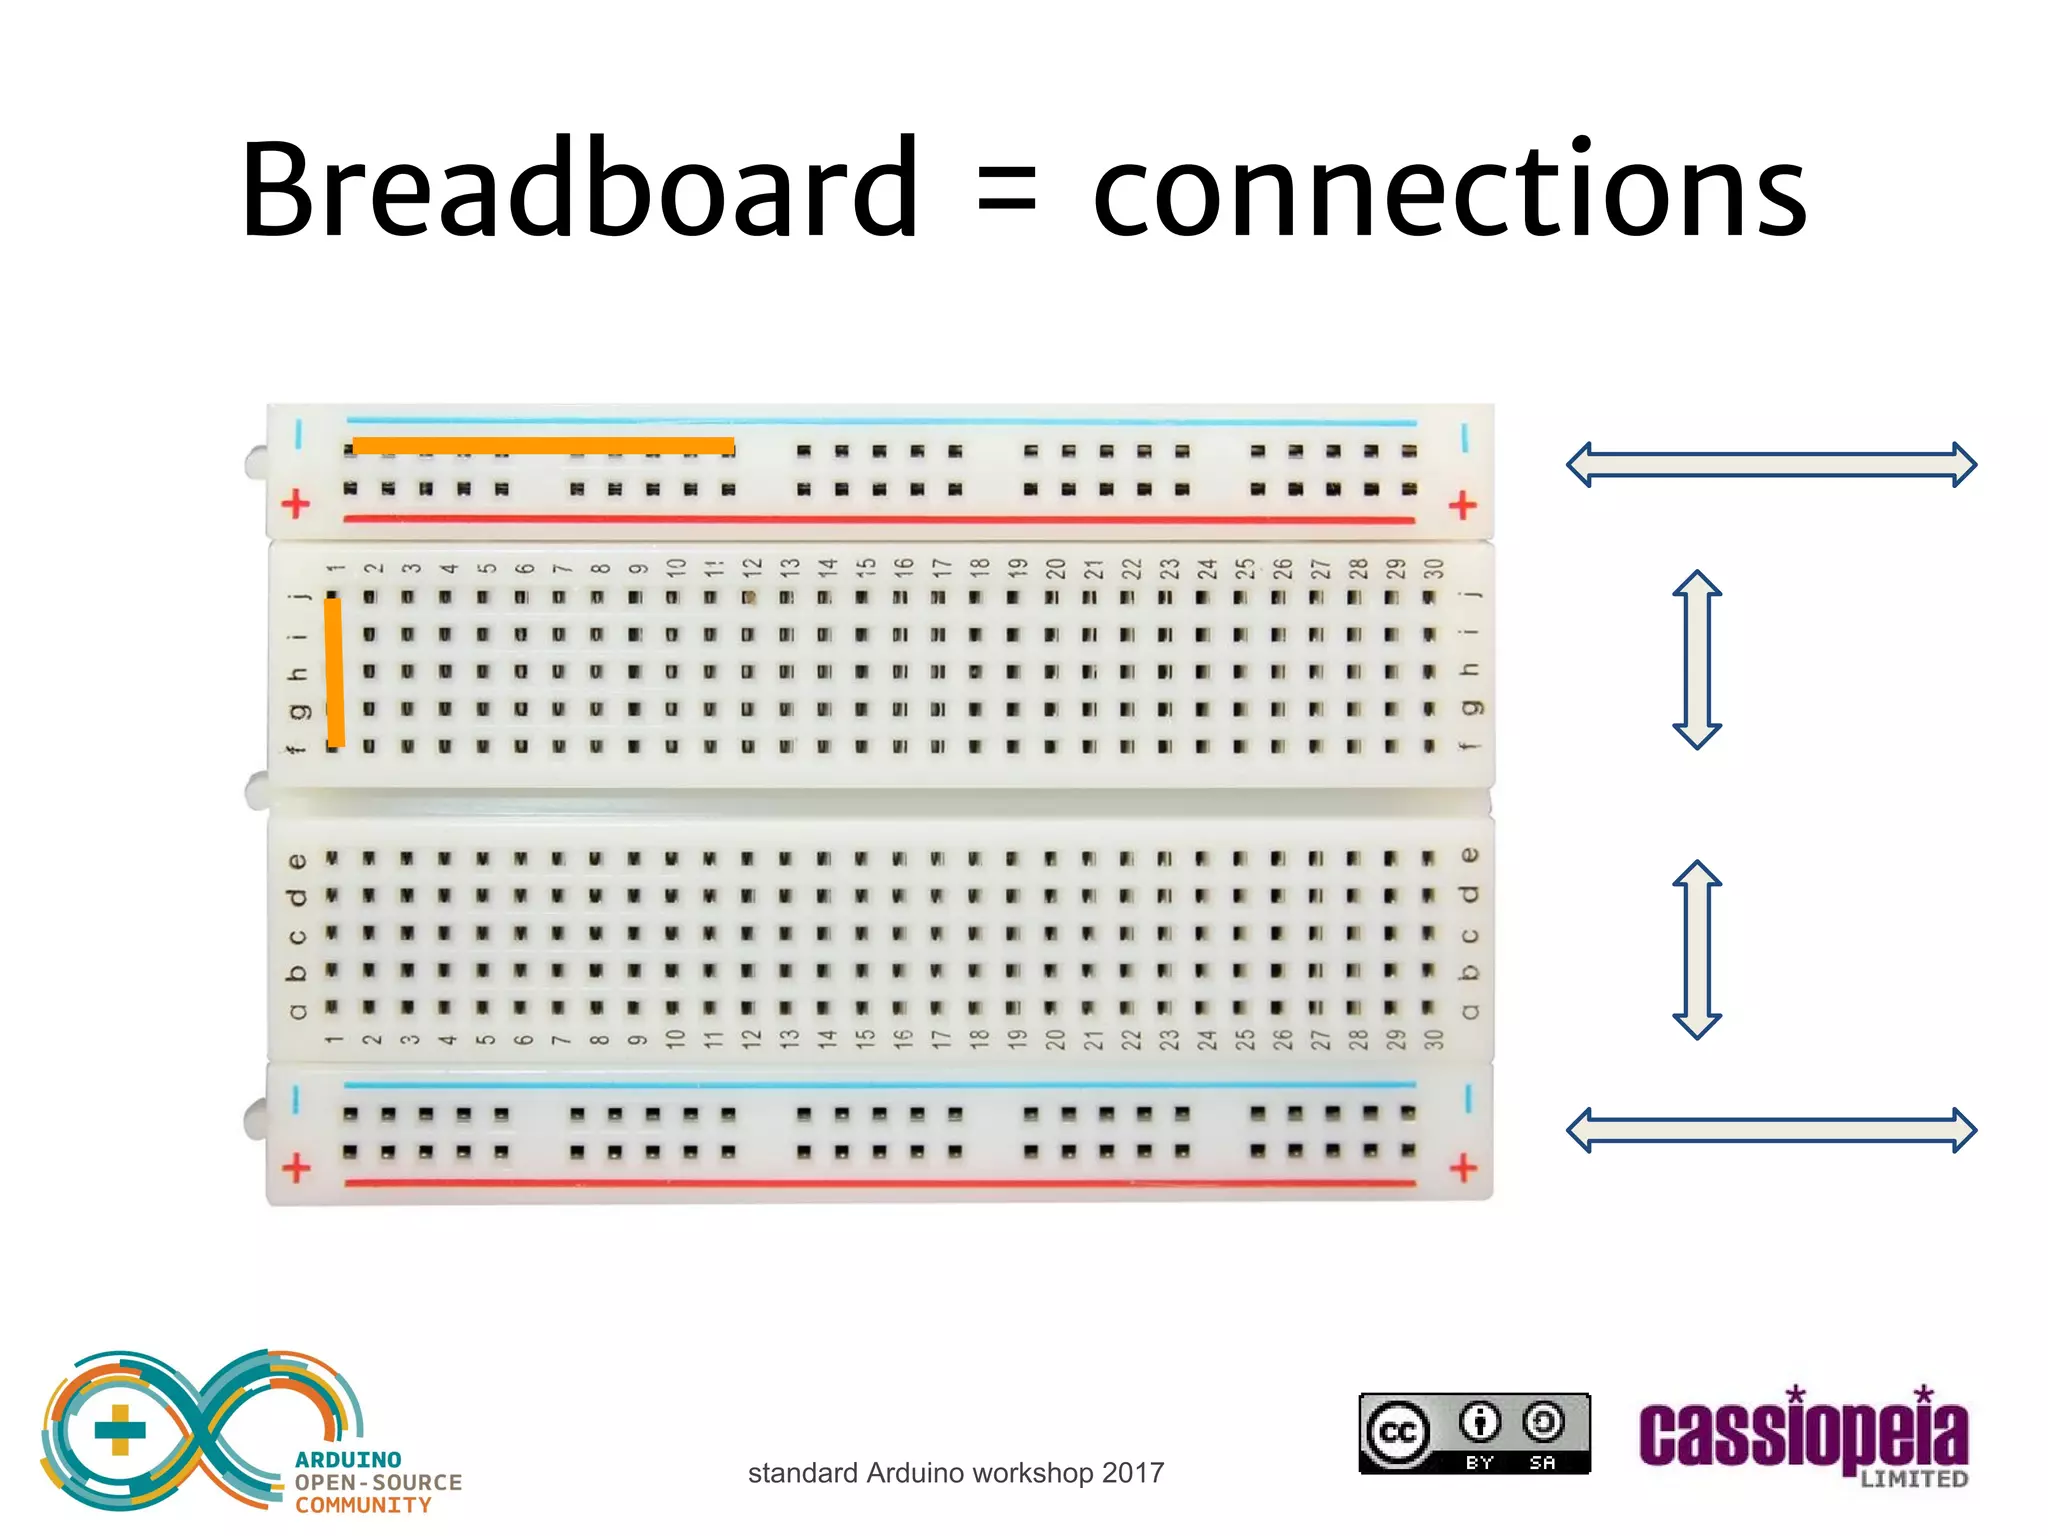
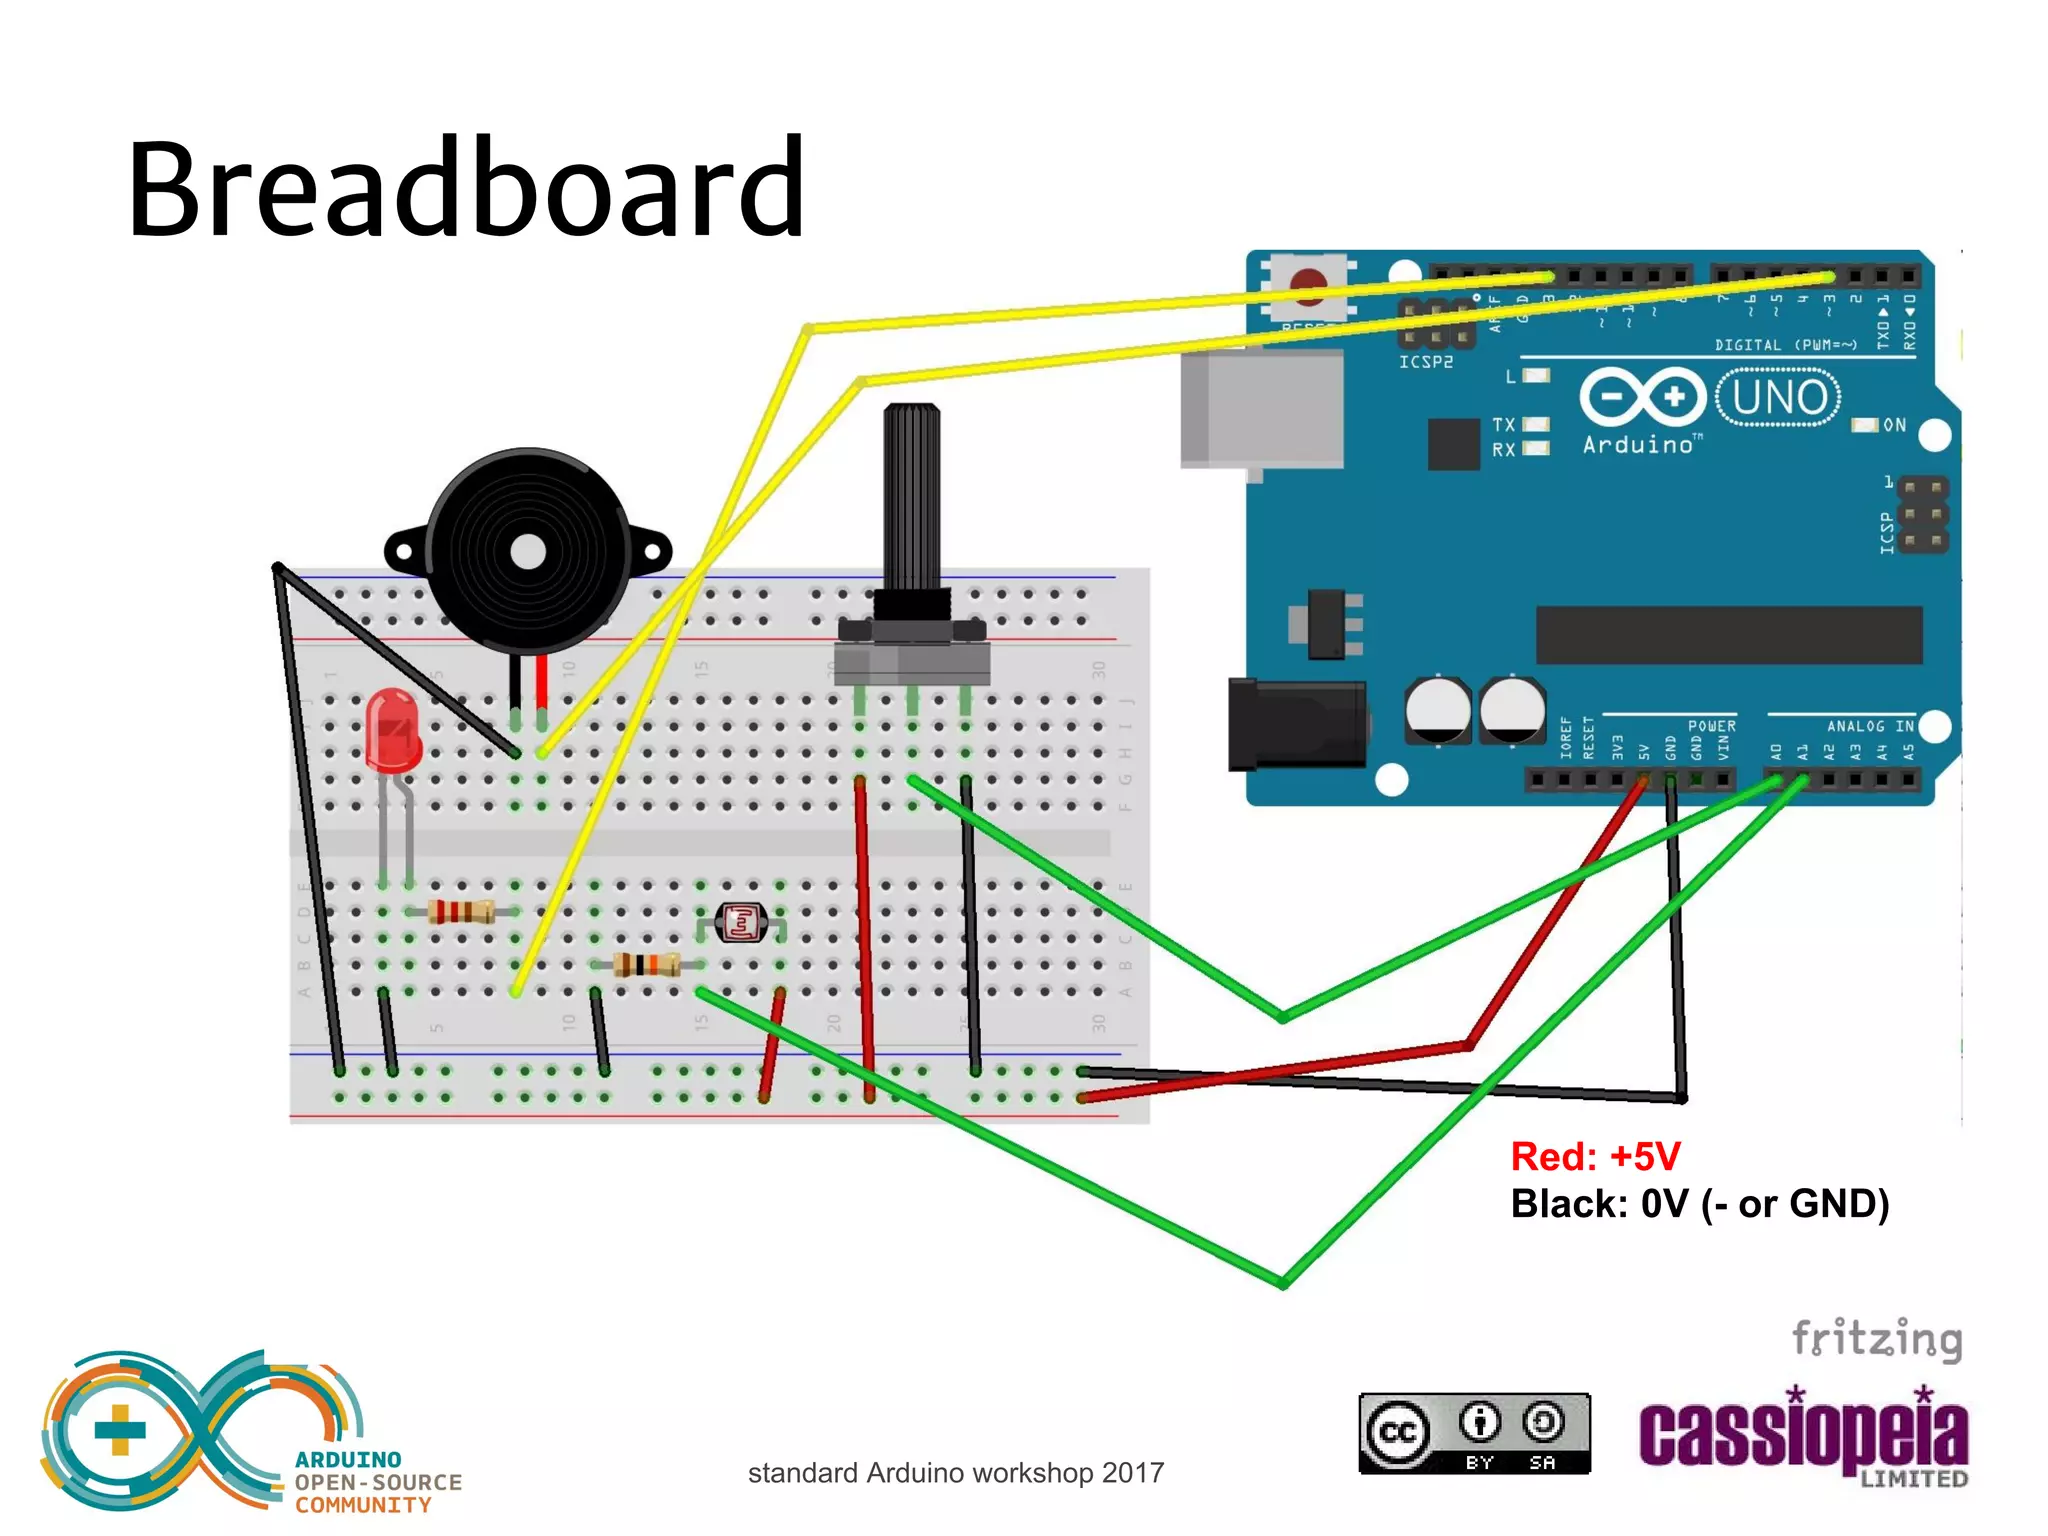
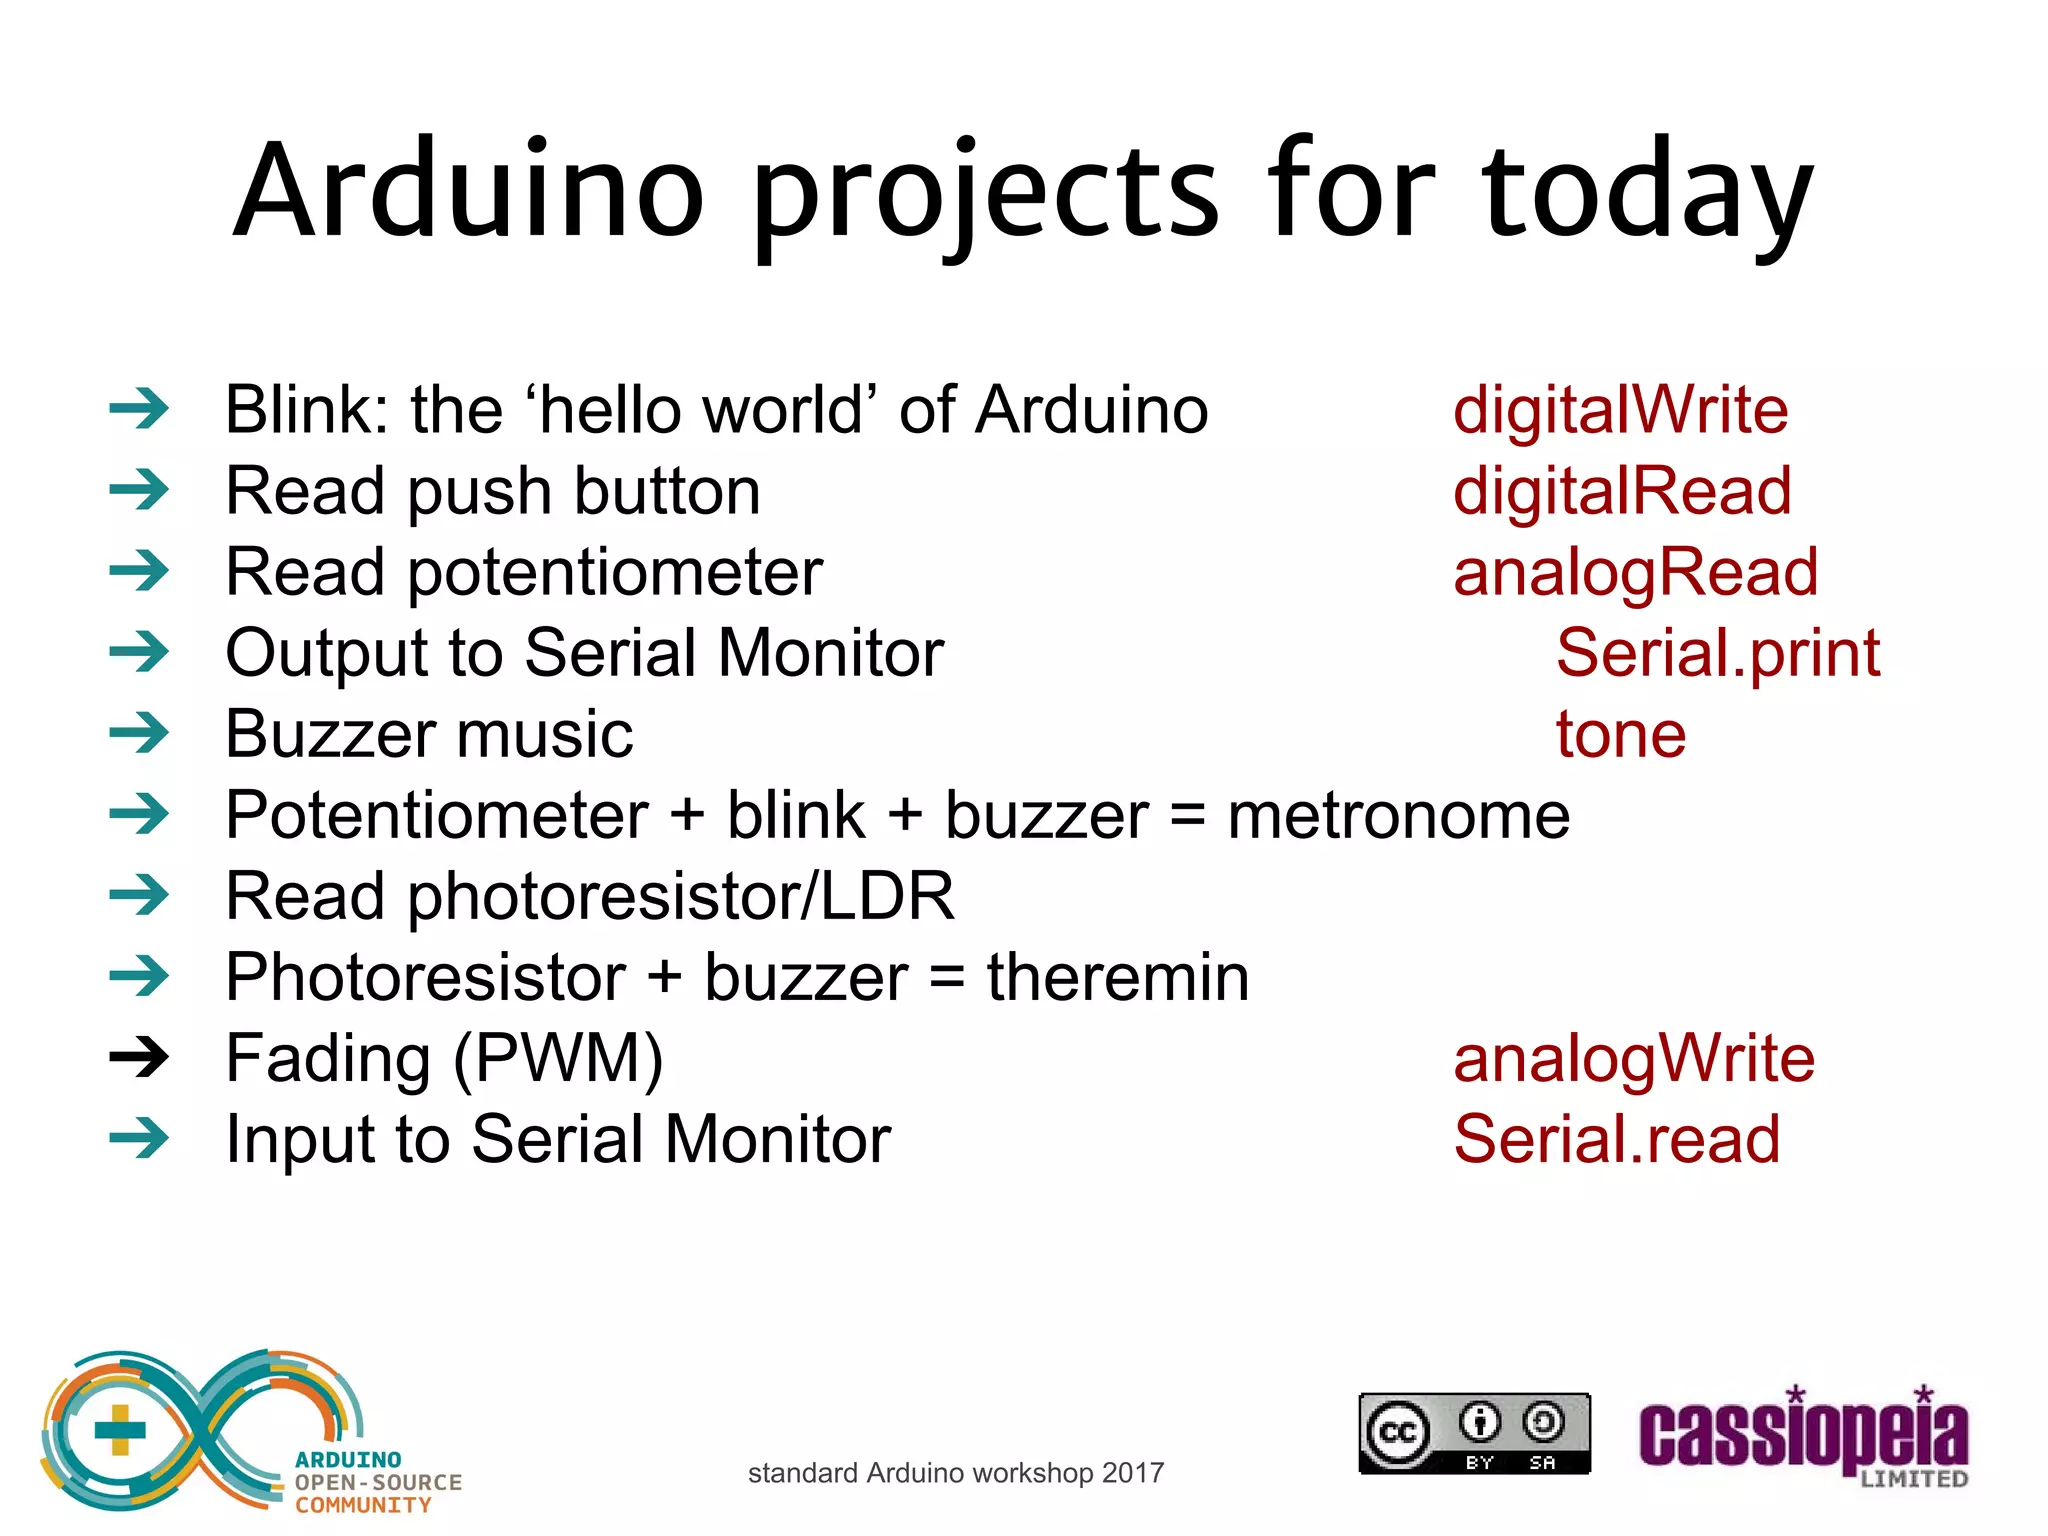
The document outlines a standard Arduino workshop conducted in 2017, covering the basics of Arduino, including setup, terminology, and fundamental electronics. It introduces various Arduino projects like blinking LEDs, metronomes, and sensors, and provides coding examples for each project. Additionally, it discusses Arduino's compatibility with different boards and platforms, and includes resources for further learning and purchasing components.


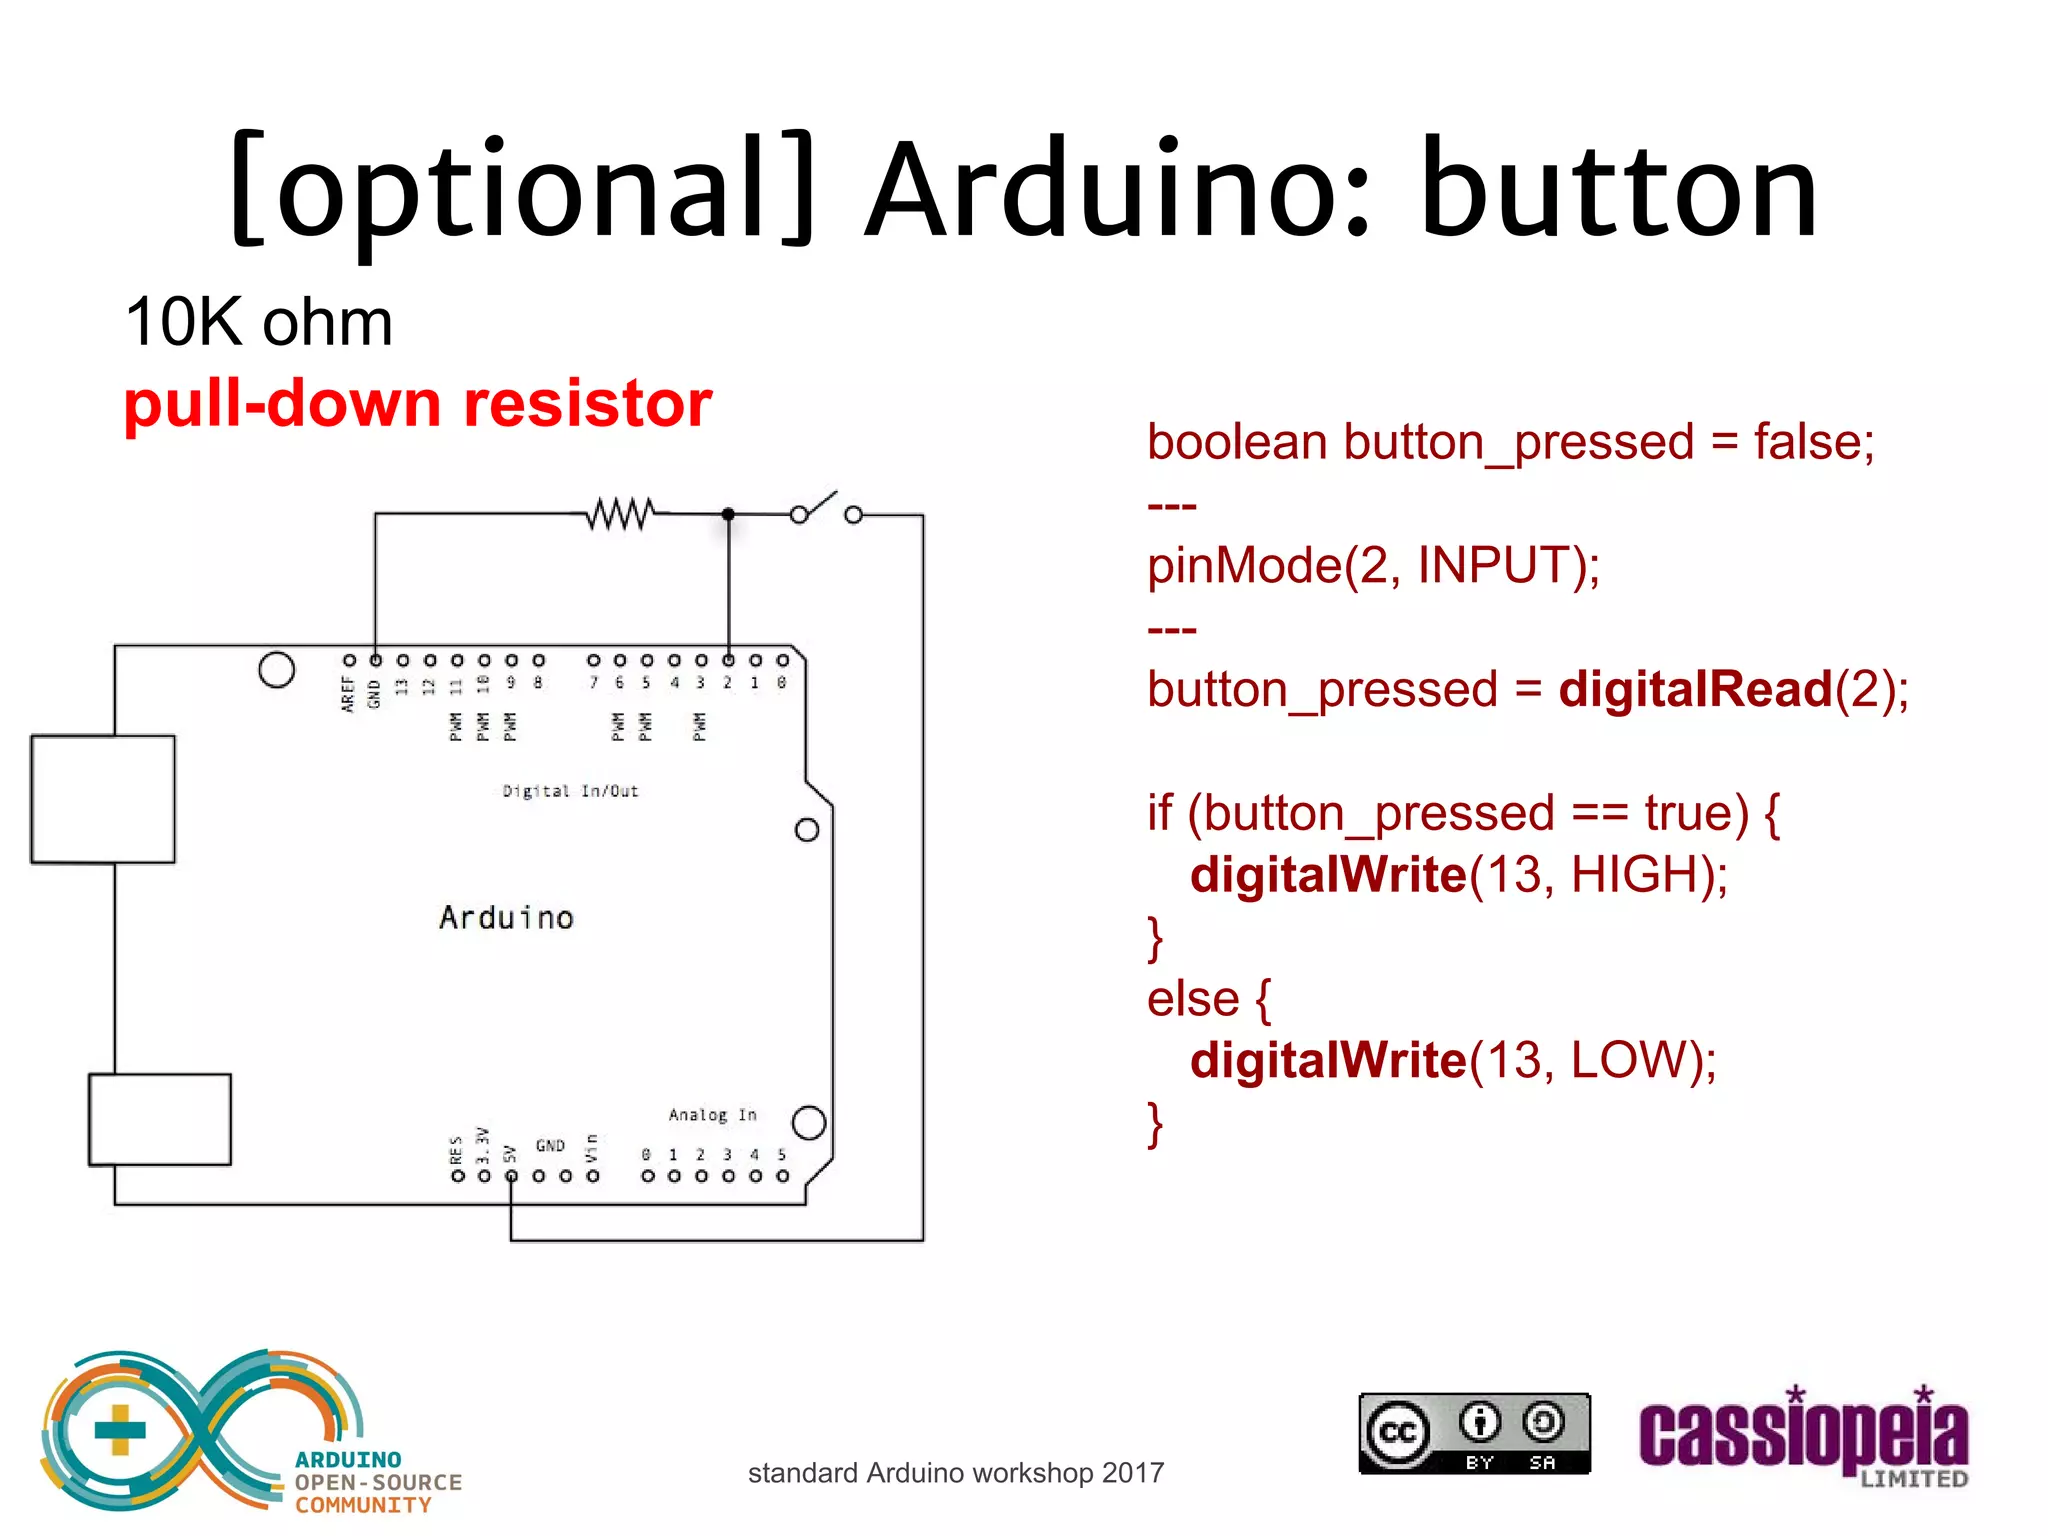
![standard Arduino workshop 2017 [optional] Arduino: button boolean button_pressed = false; --- pinMode(2, INPUT); --- button_pressed = digitalRead(2); if (button_pressed == true) { digitalWrite(13, HIGH); } else { digitalWrite(13, LOW); } use pinMode(2, INPUT_PULLUP); or: pull-down resistor (e.g. 10kΩ)](https://image.slidesharecdn.com/cassiopeialtd-standardarduinoworkshop-150131005926-conversion-gate01/75/Cassiopeia-Ltd-standard-Arduino-workshop-26-2048.jpg)
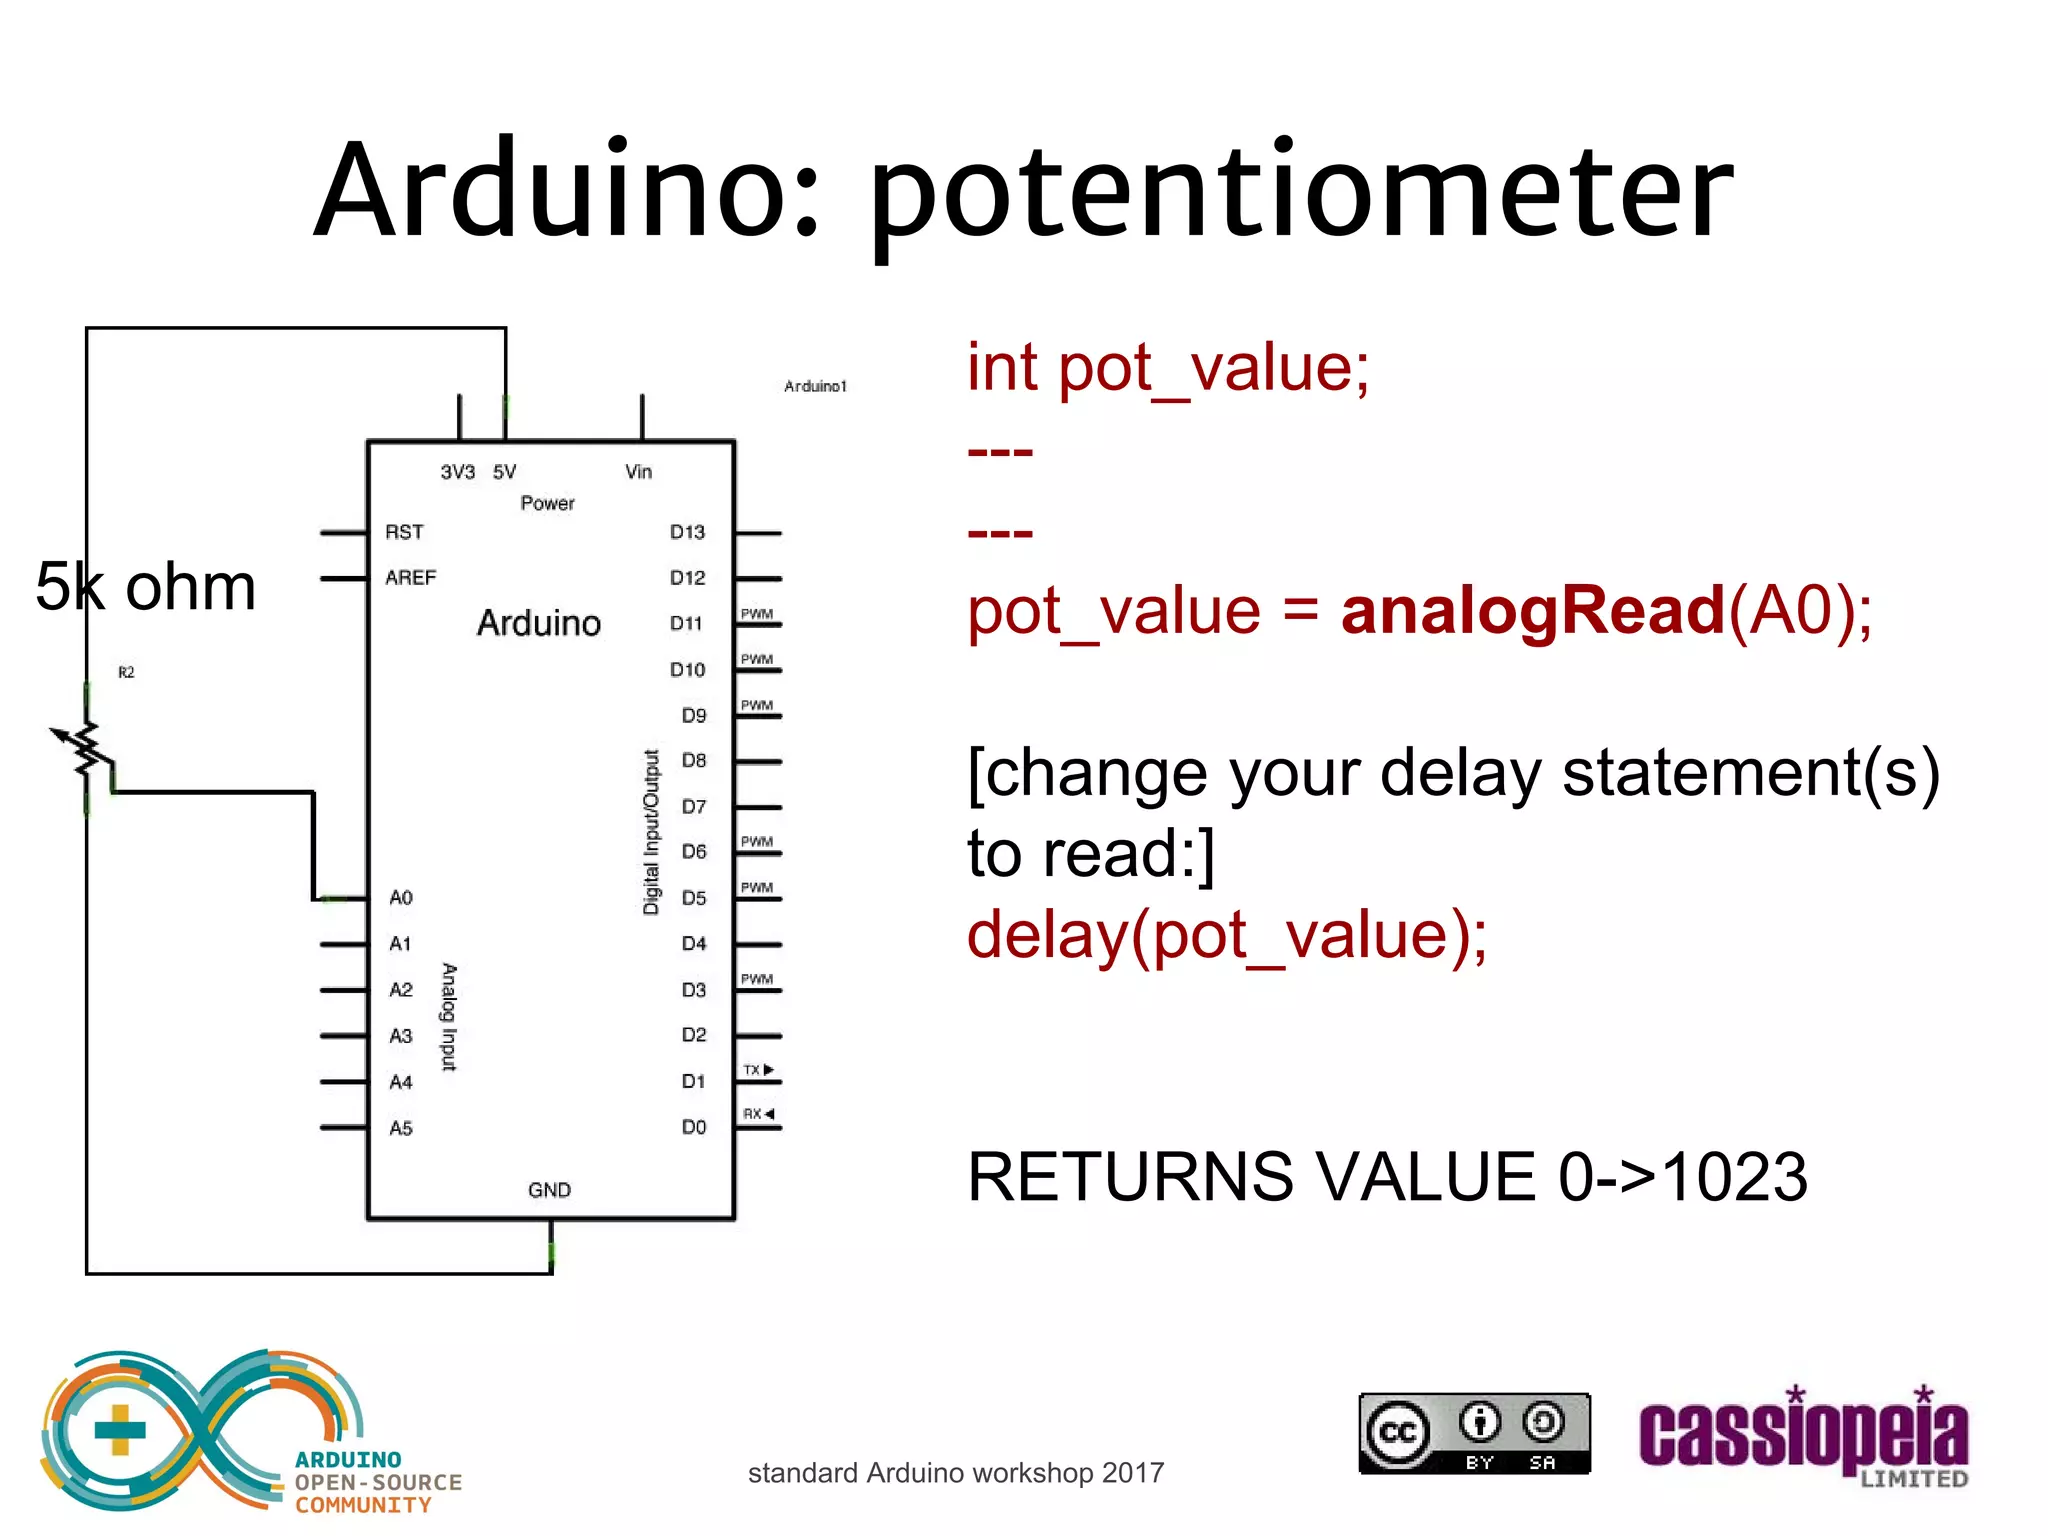
![standard Arduino workshop 2017 Arduino: potentiometer int pot_value; [VARIABLE] [SETUP] [LOOP] pot_value = analogRead(A0); [change your delay to:] delay(pot_value); [analogRead returns 0->1023] 5k ohm](https://image.slidesharecdn.com/cassiopeialtd-standardarduinoworkshop-150131005926-conversion-gate01/75/Cassiopeia-Ltd-standard-Arduino-workshop-28-2048.jpg)
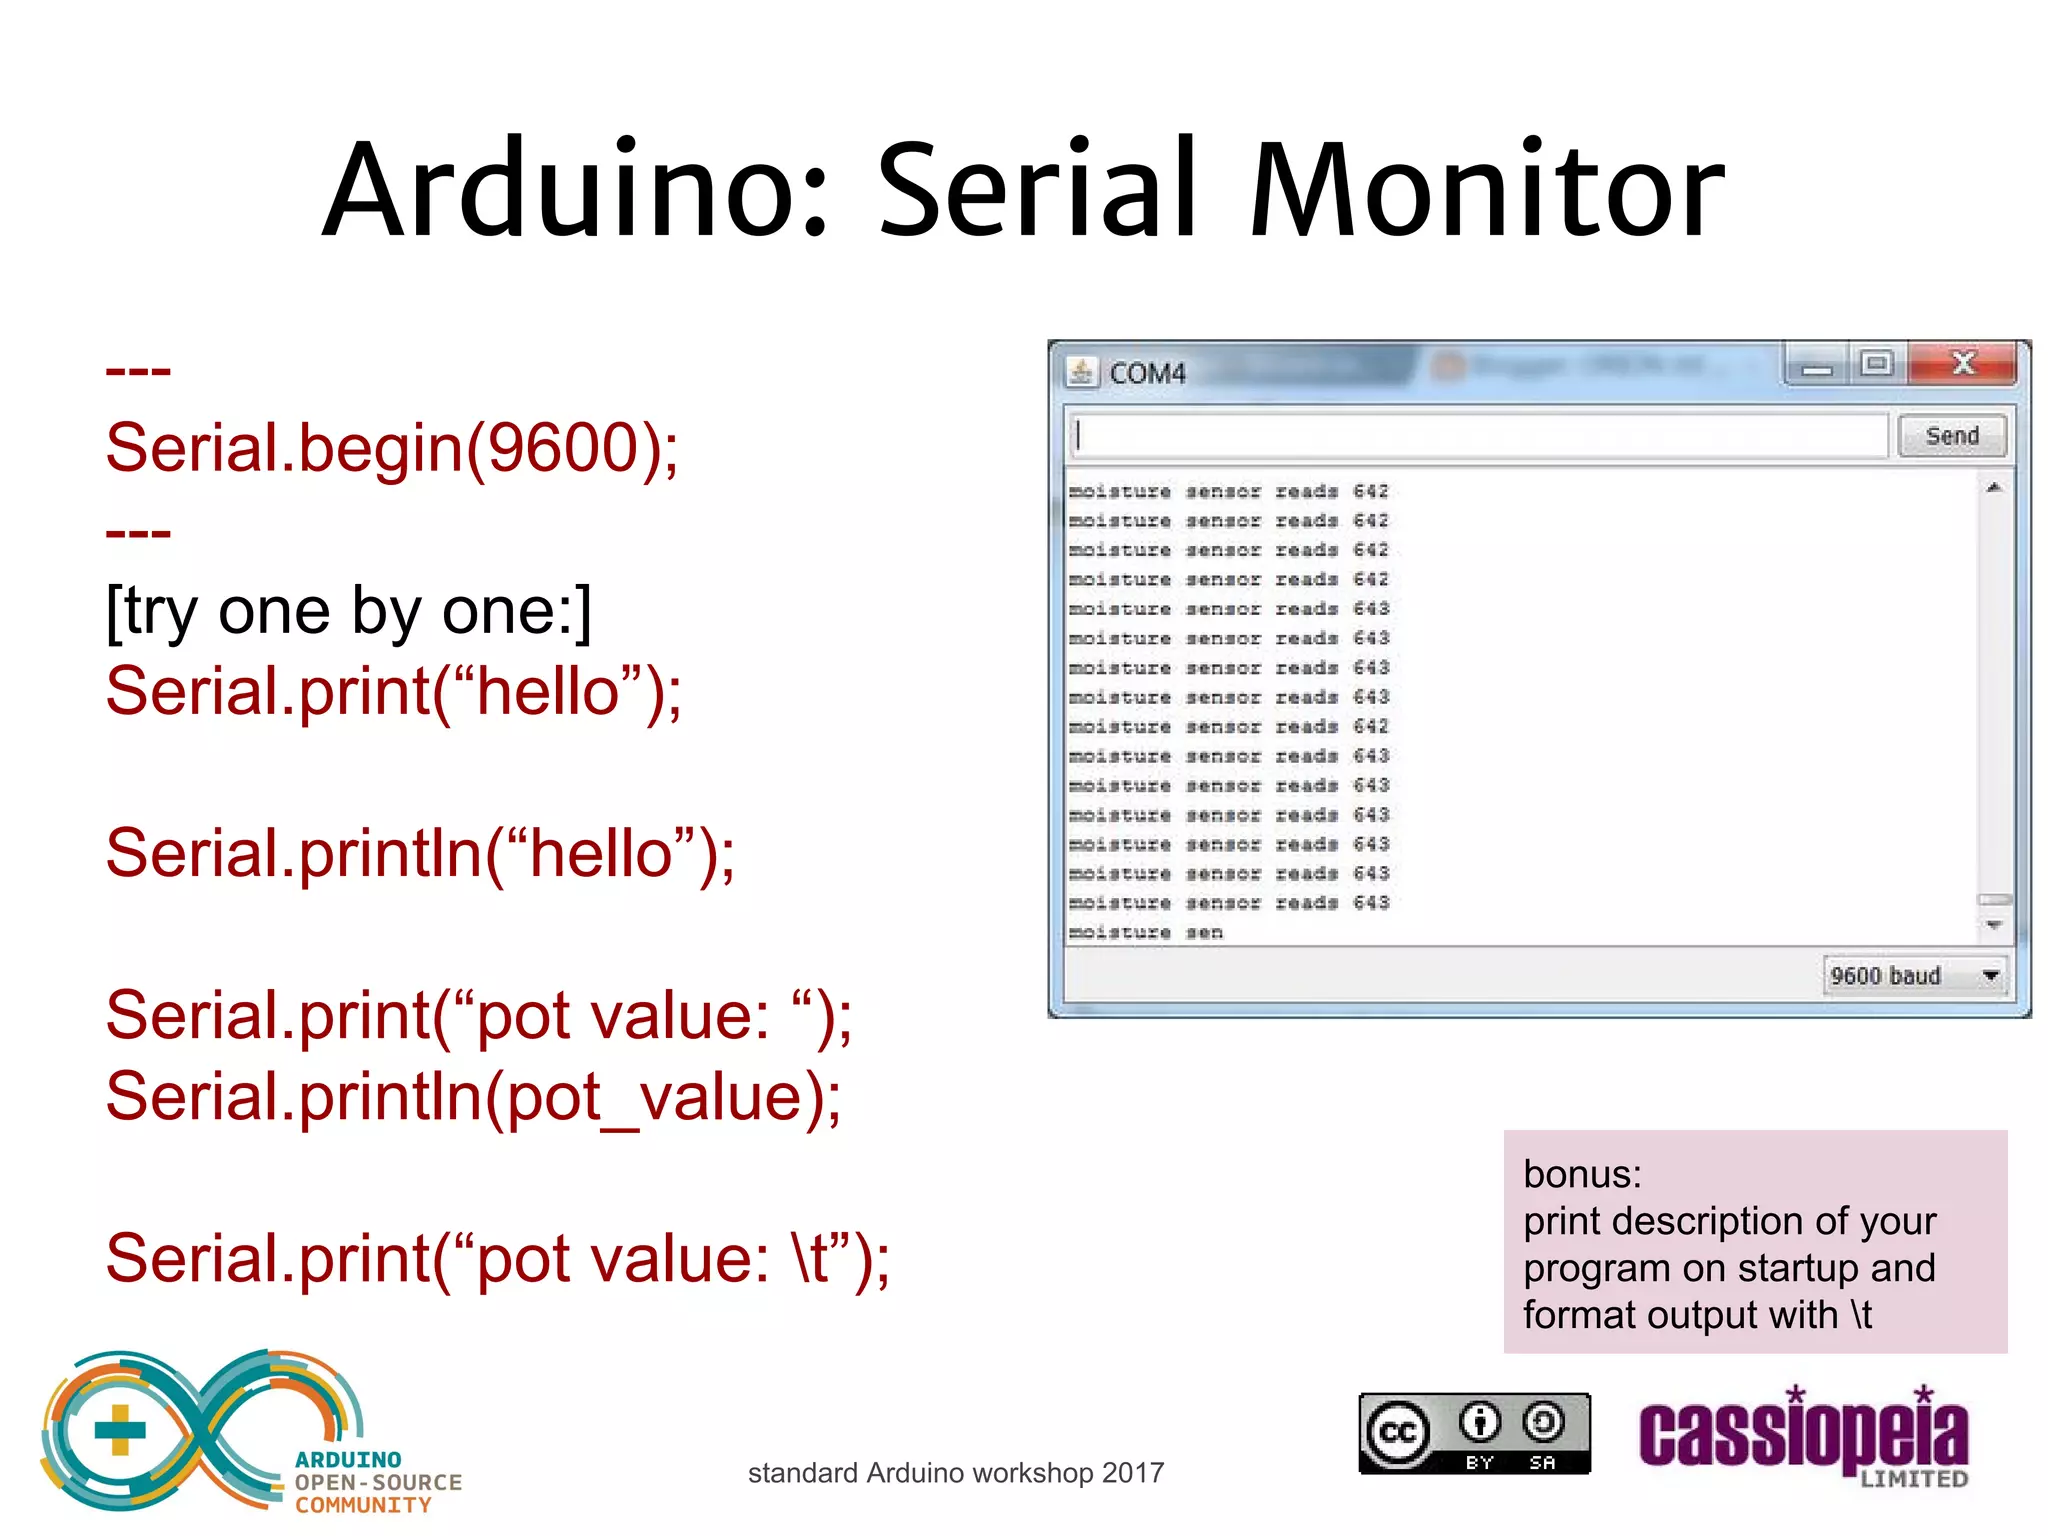
![standard Arduino workshop 2017 Arduino: Serial Monitor [SETUP] Serial.begin(9600); [LOOP] [try one by one:] Serial.print(“hello”); [or] Serial.println(“hello”); [or] Serial.print(“pot value: “); Serial.println(pot_value); bonus: print description of your program on startup and format output with t](https://image.slidesharecdn.com/cassiopeialtd-standardarduinoworkshop-150131005926-conversion-gate01/75/Cassiopeia-Ltd-standard-Arduino-workshop-29-2048.jpg)
![standard Arduino workshop 2017 Arduino: Serial Plotter [LOOP] Serial.println(pot_value);](https://image.slidesharecdn.com/cassiopeialtd-standardarduinoworkshop-150131005926-conversion-gate01/75/Cassiopeia-Ltd-standard-Arduino-workshop-30-2048.jpg)
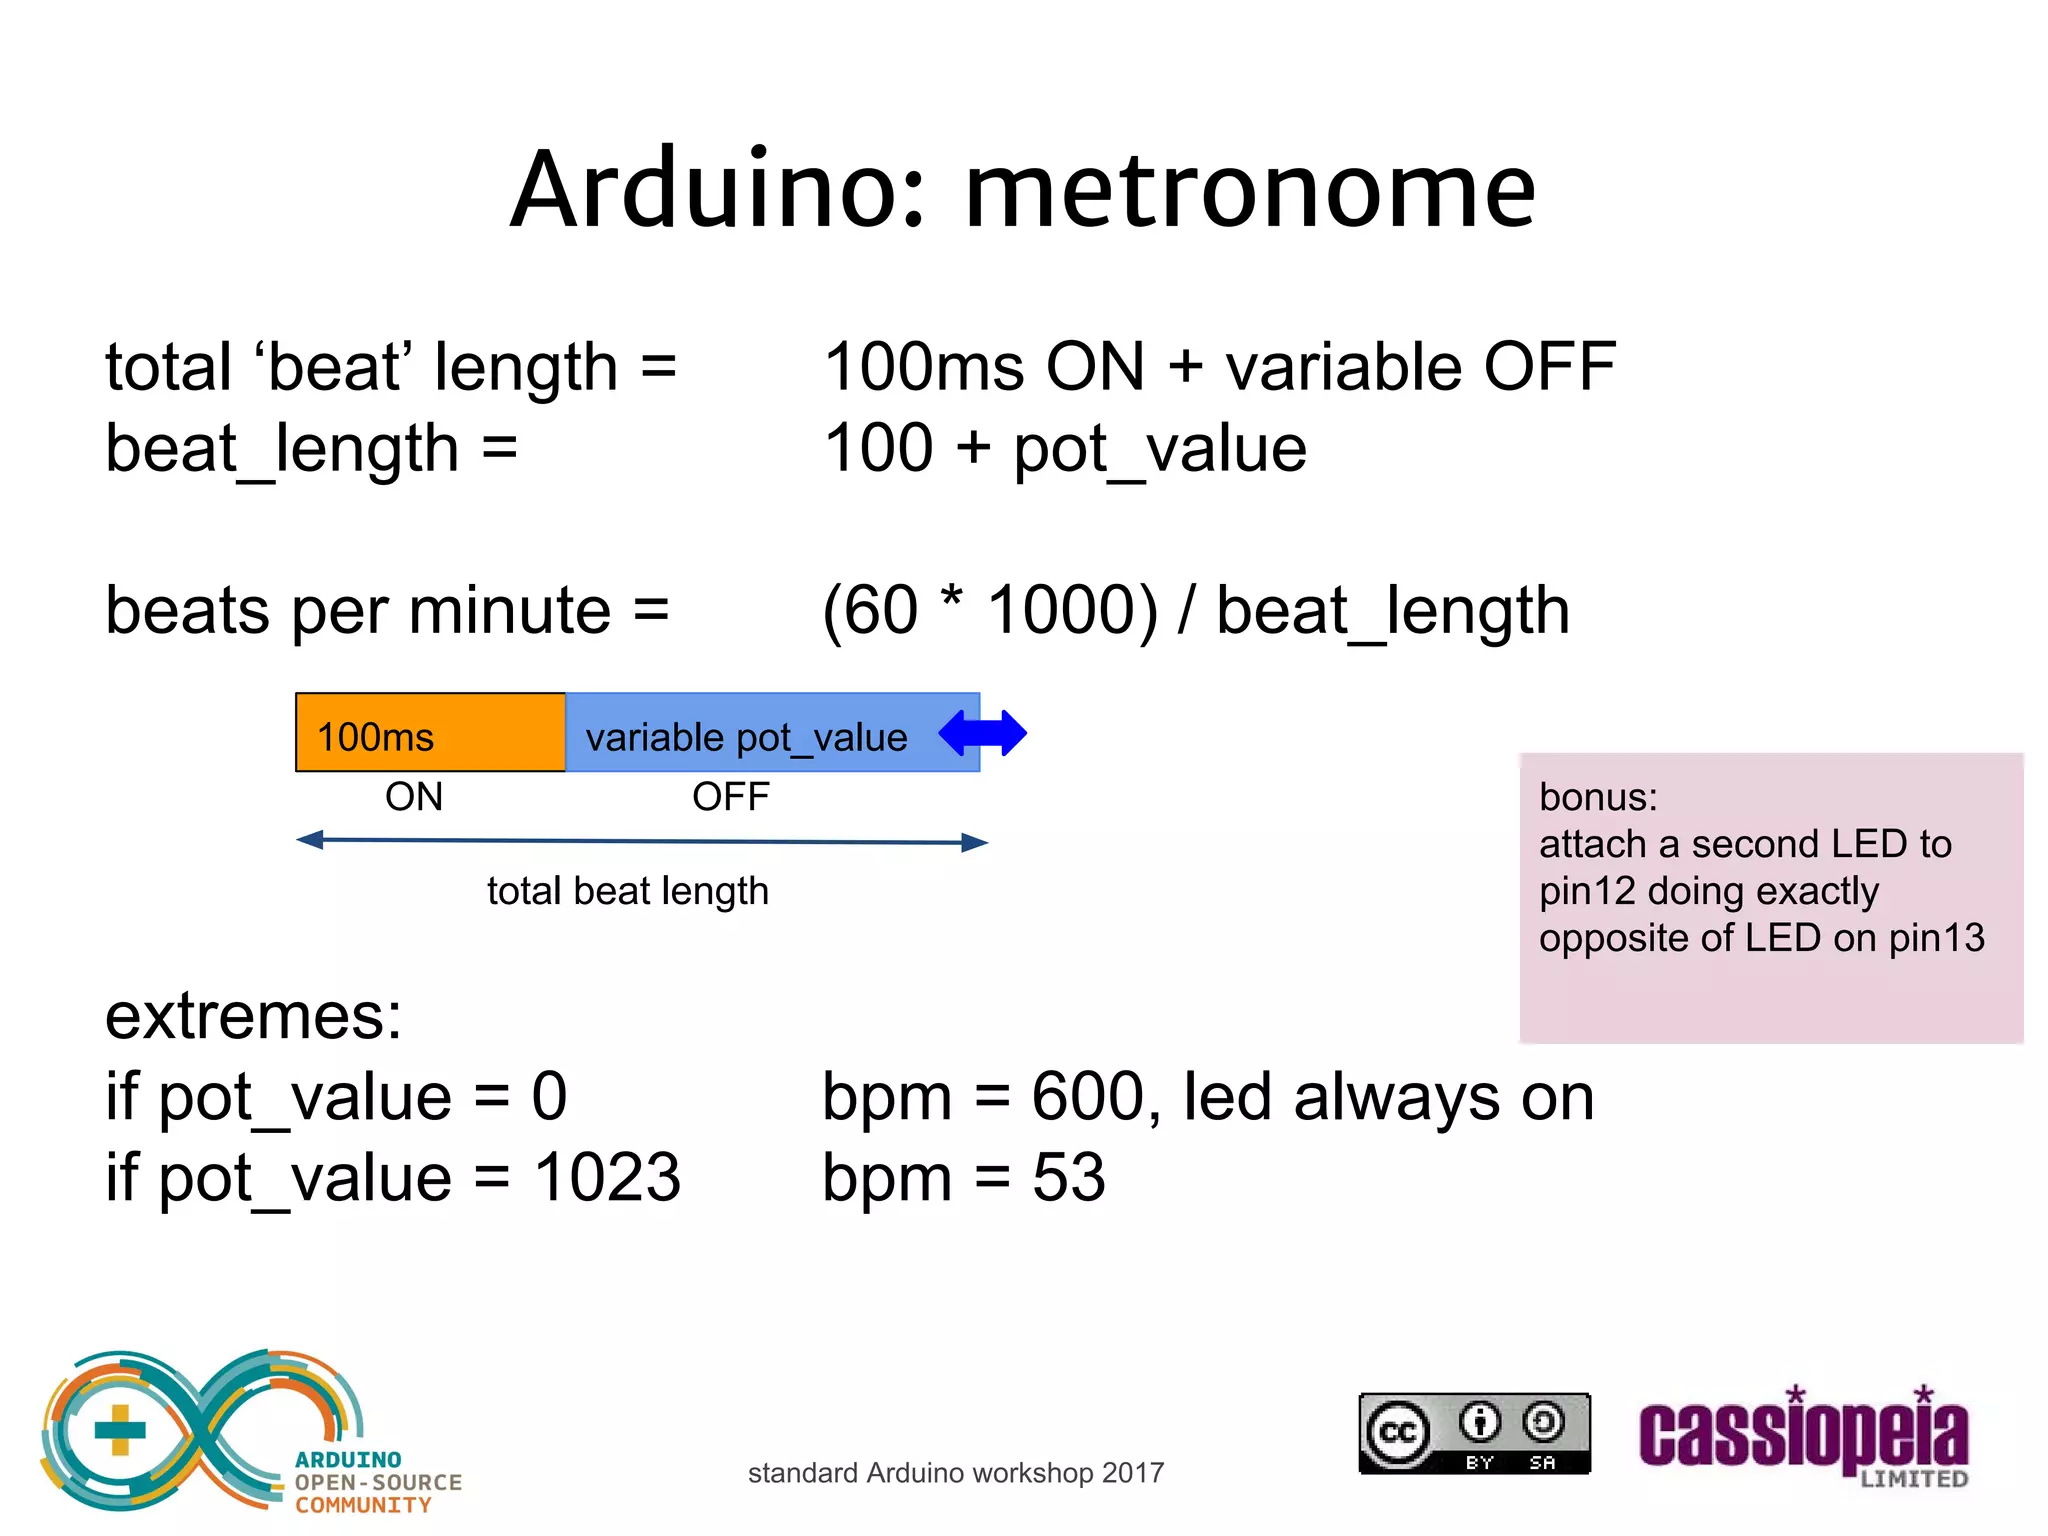
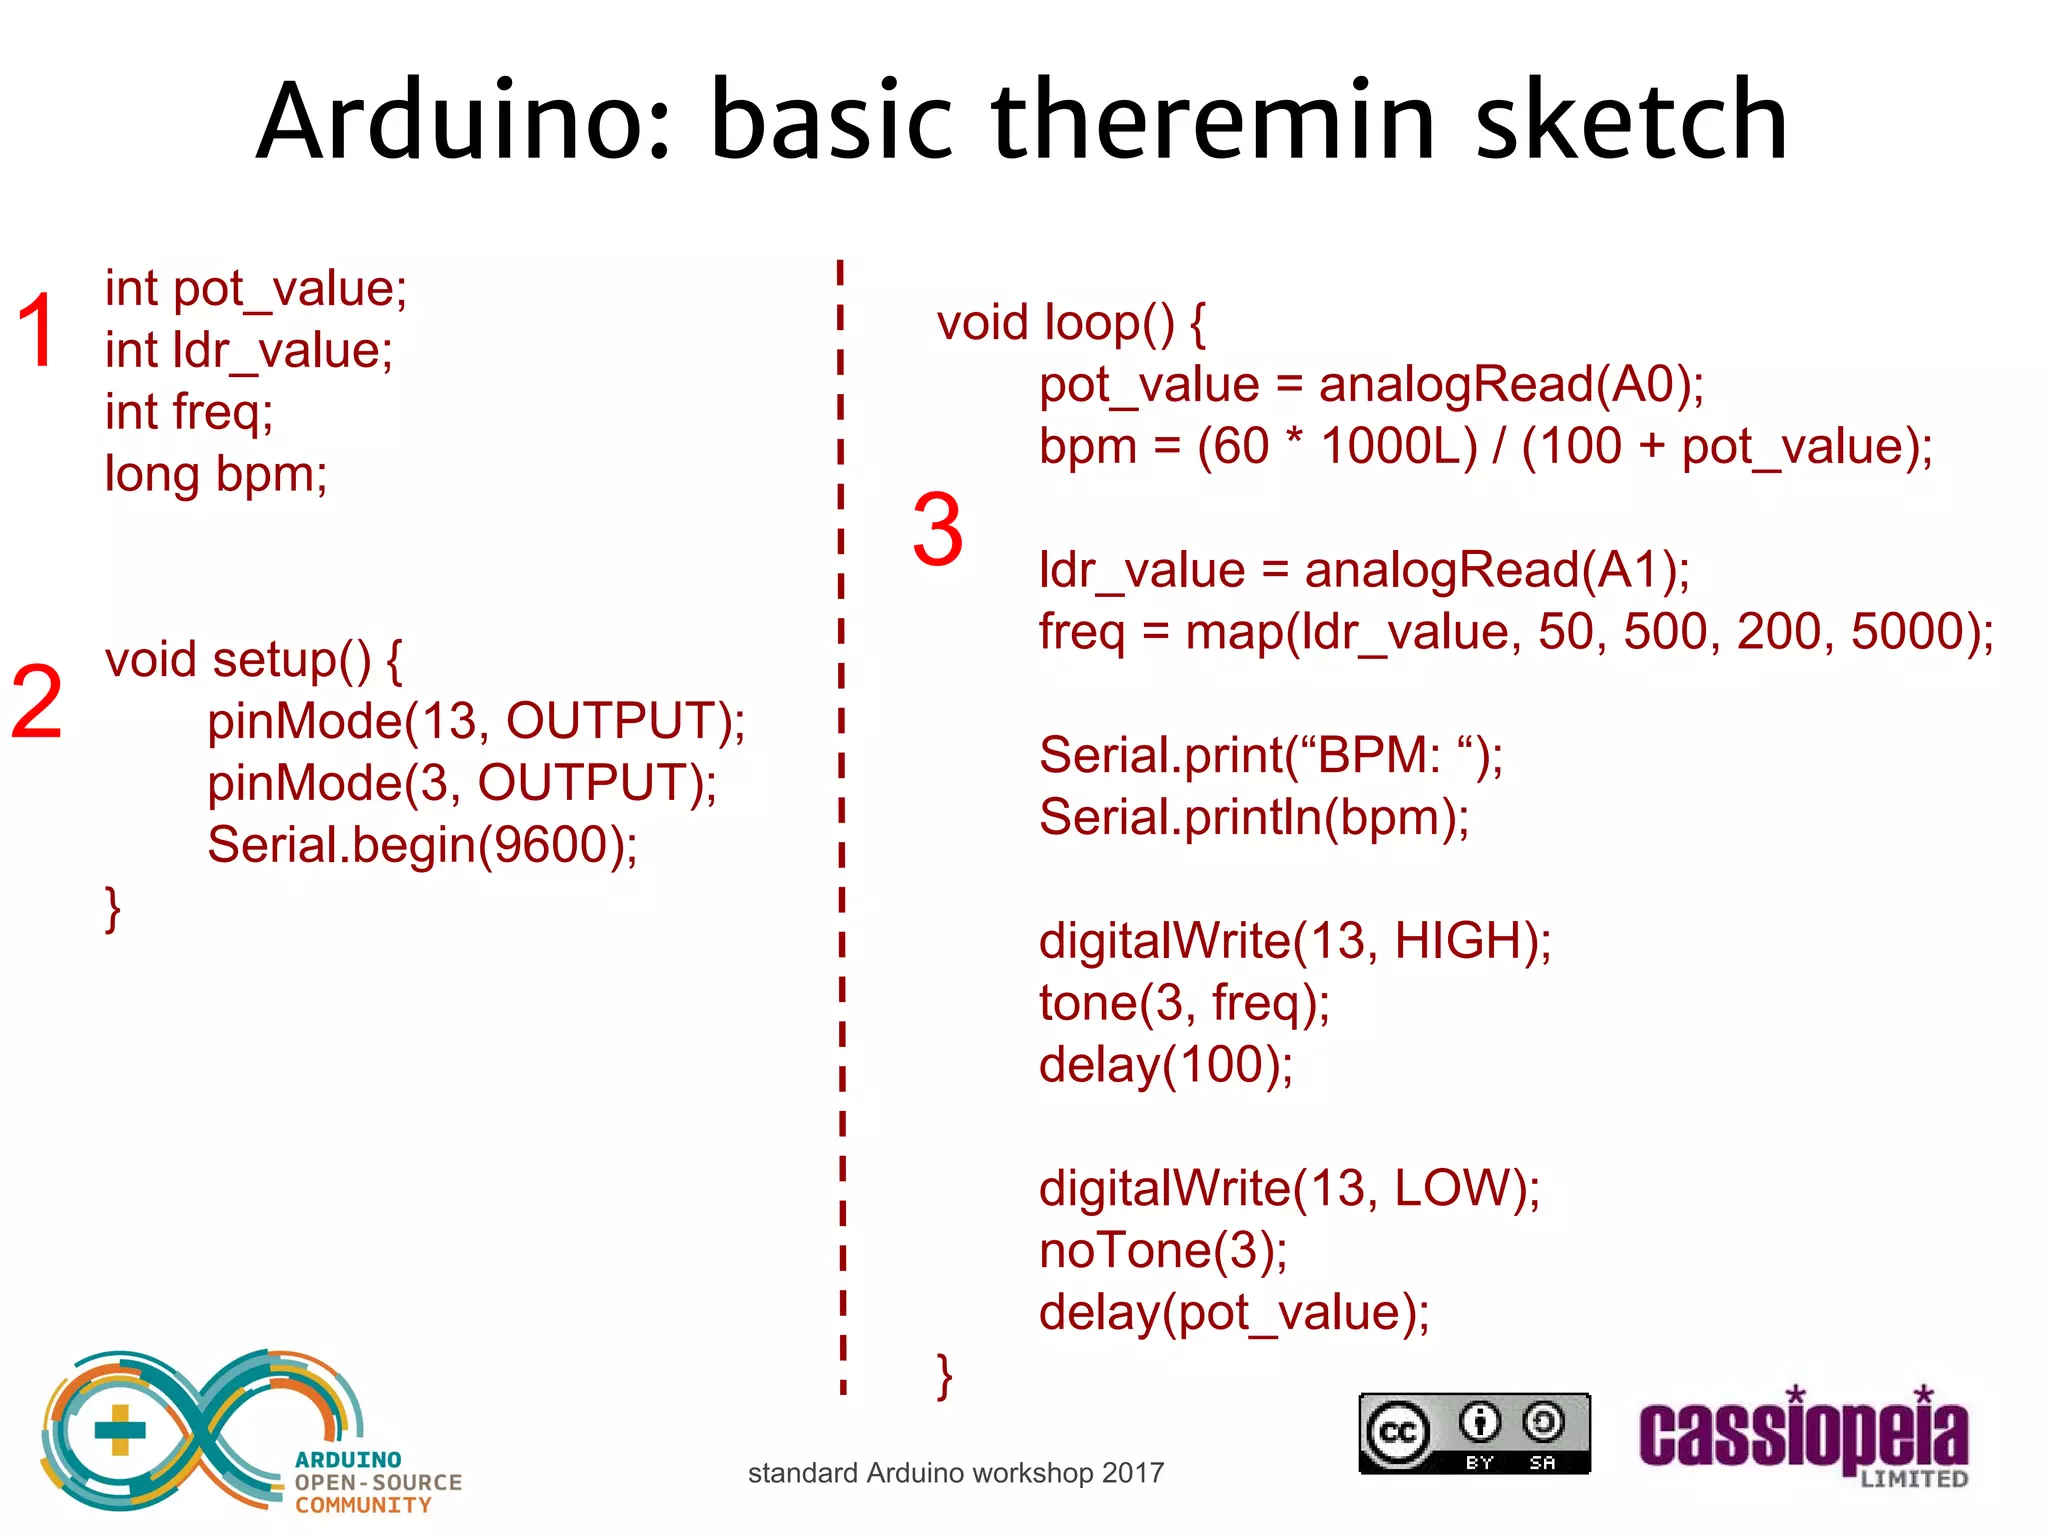
![standard Arduino workshop 2017 Arduino: metronome ‘int’ type does not work with large numbers (larger than around 32000, 16 bits) type to use = ‘long’ long bpm; [SETUP] [LOOP] bpm = (60 * 1000L) / (100 + pot_value); bonus: format your output with t](https://image.slidesharecdn.com/cassiopeialtd-standardarduinoworkshop-150131005926-conversion-gate01/75/Cassiopeia-Ltd-standard-Arduino-workshop-33-2048.jpg)
![standard Arduino workshop 2017 Arduino: sound Piezo buzzer = speaker SYNTAX: tone(pin, freq); tone(pin, freq, duration); noTone(pin); [SETUP] [LOOP] tone(3, 261); [put in correct place!] noTone(3); [put in correct place!]](https://image.slidesharecdn.com/cassiopeialtd-standardarduinoworkshop-150131005926-conversion-gate01/75/Cassiopeia-Ltd-standard-Arduino-workshop-34-2048.jpg)
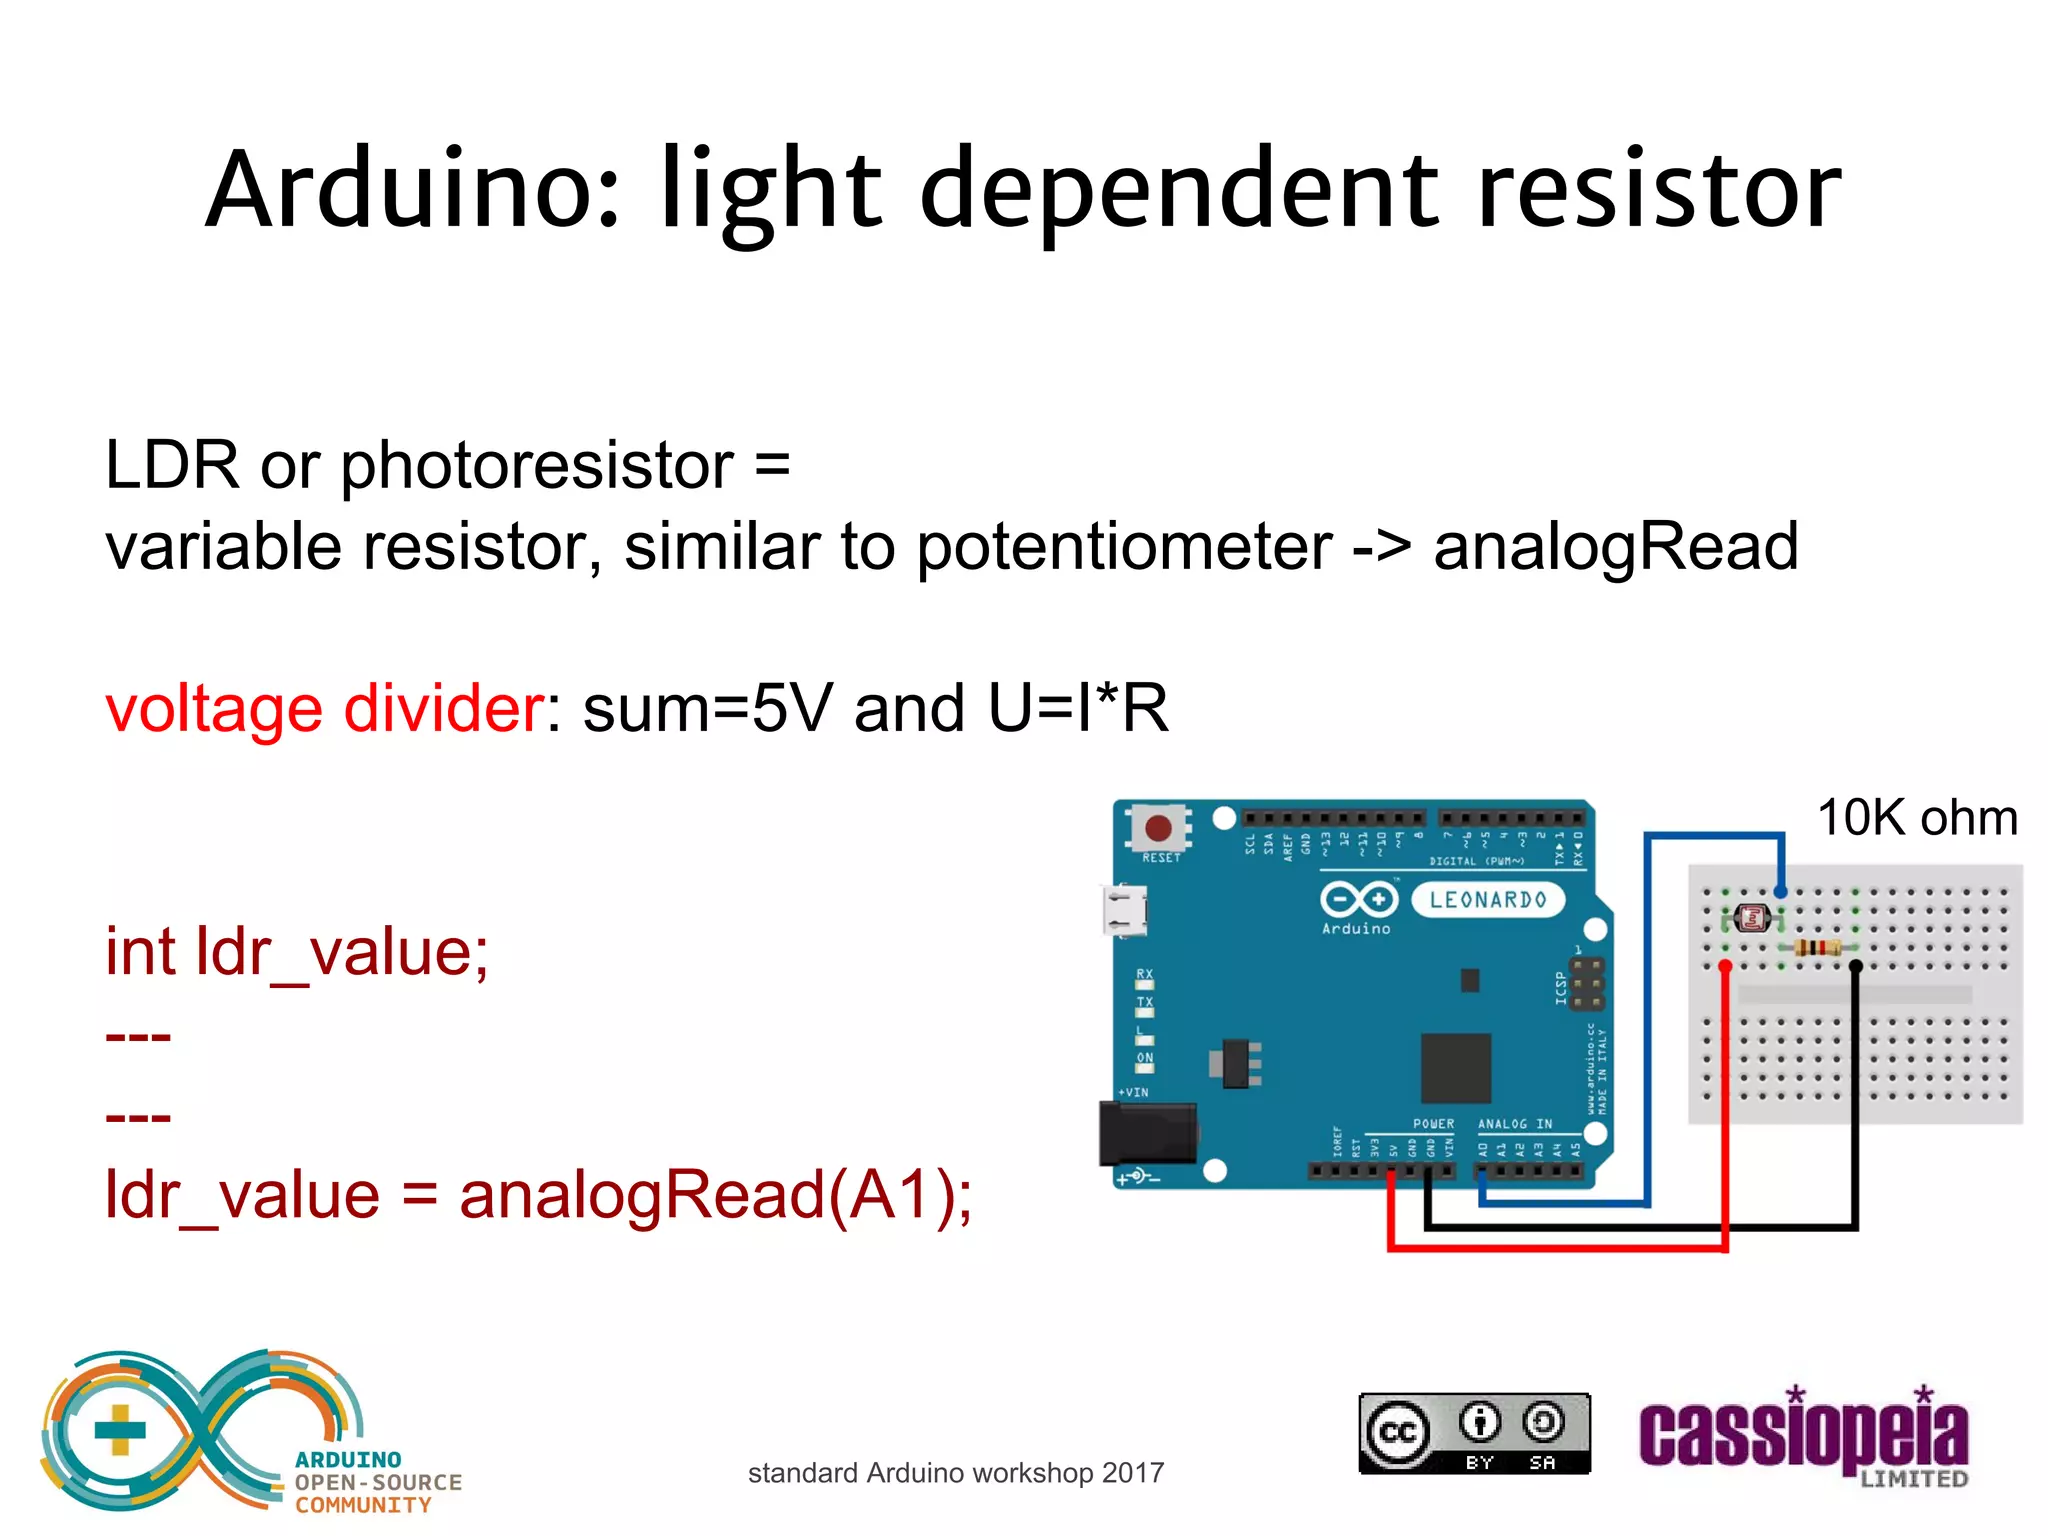
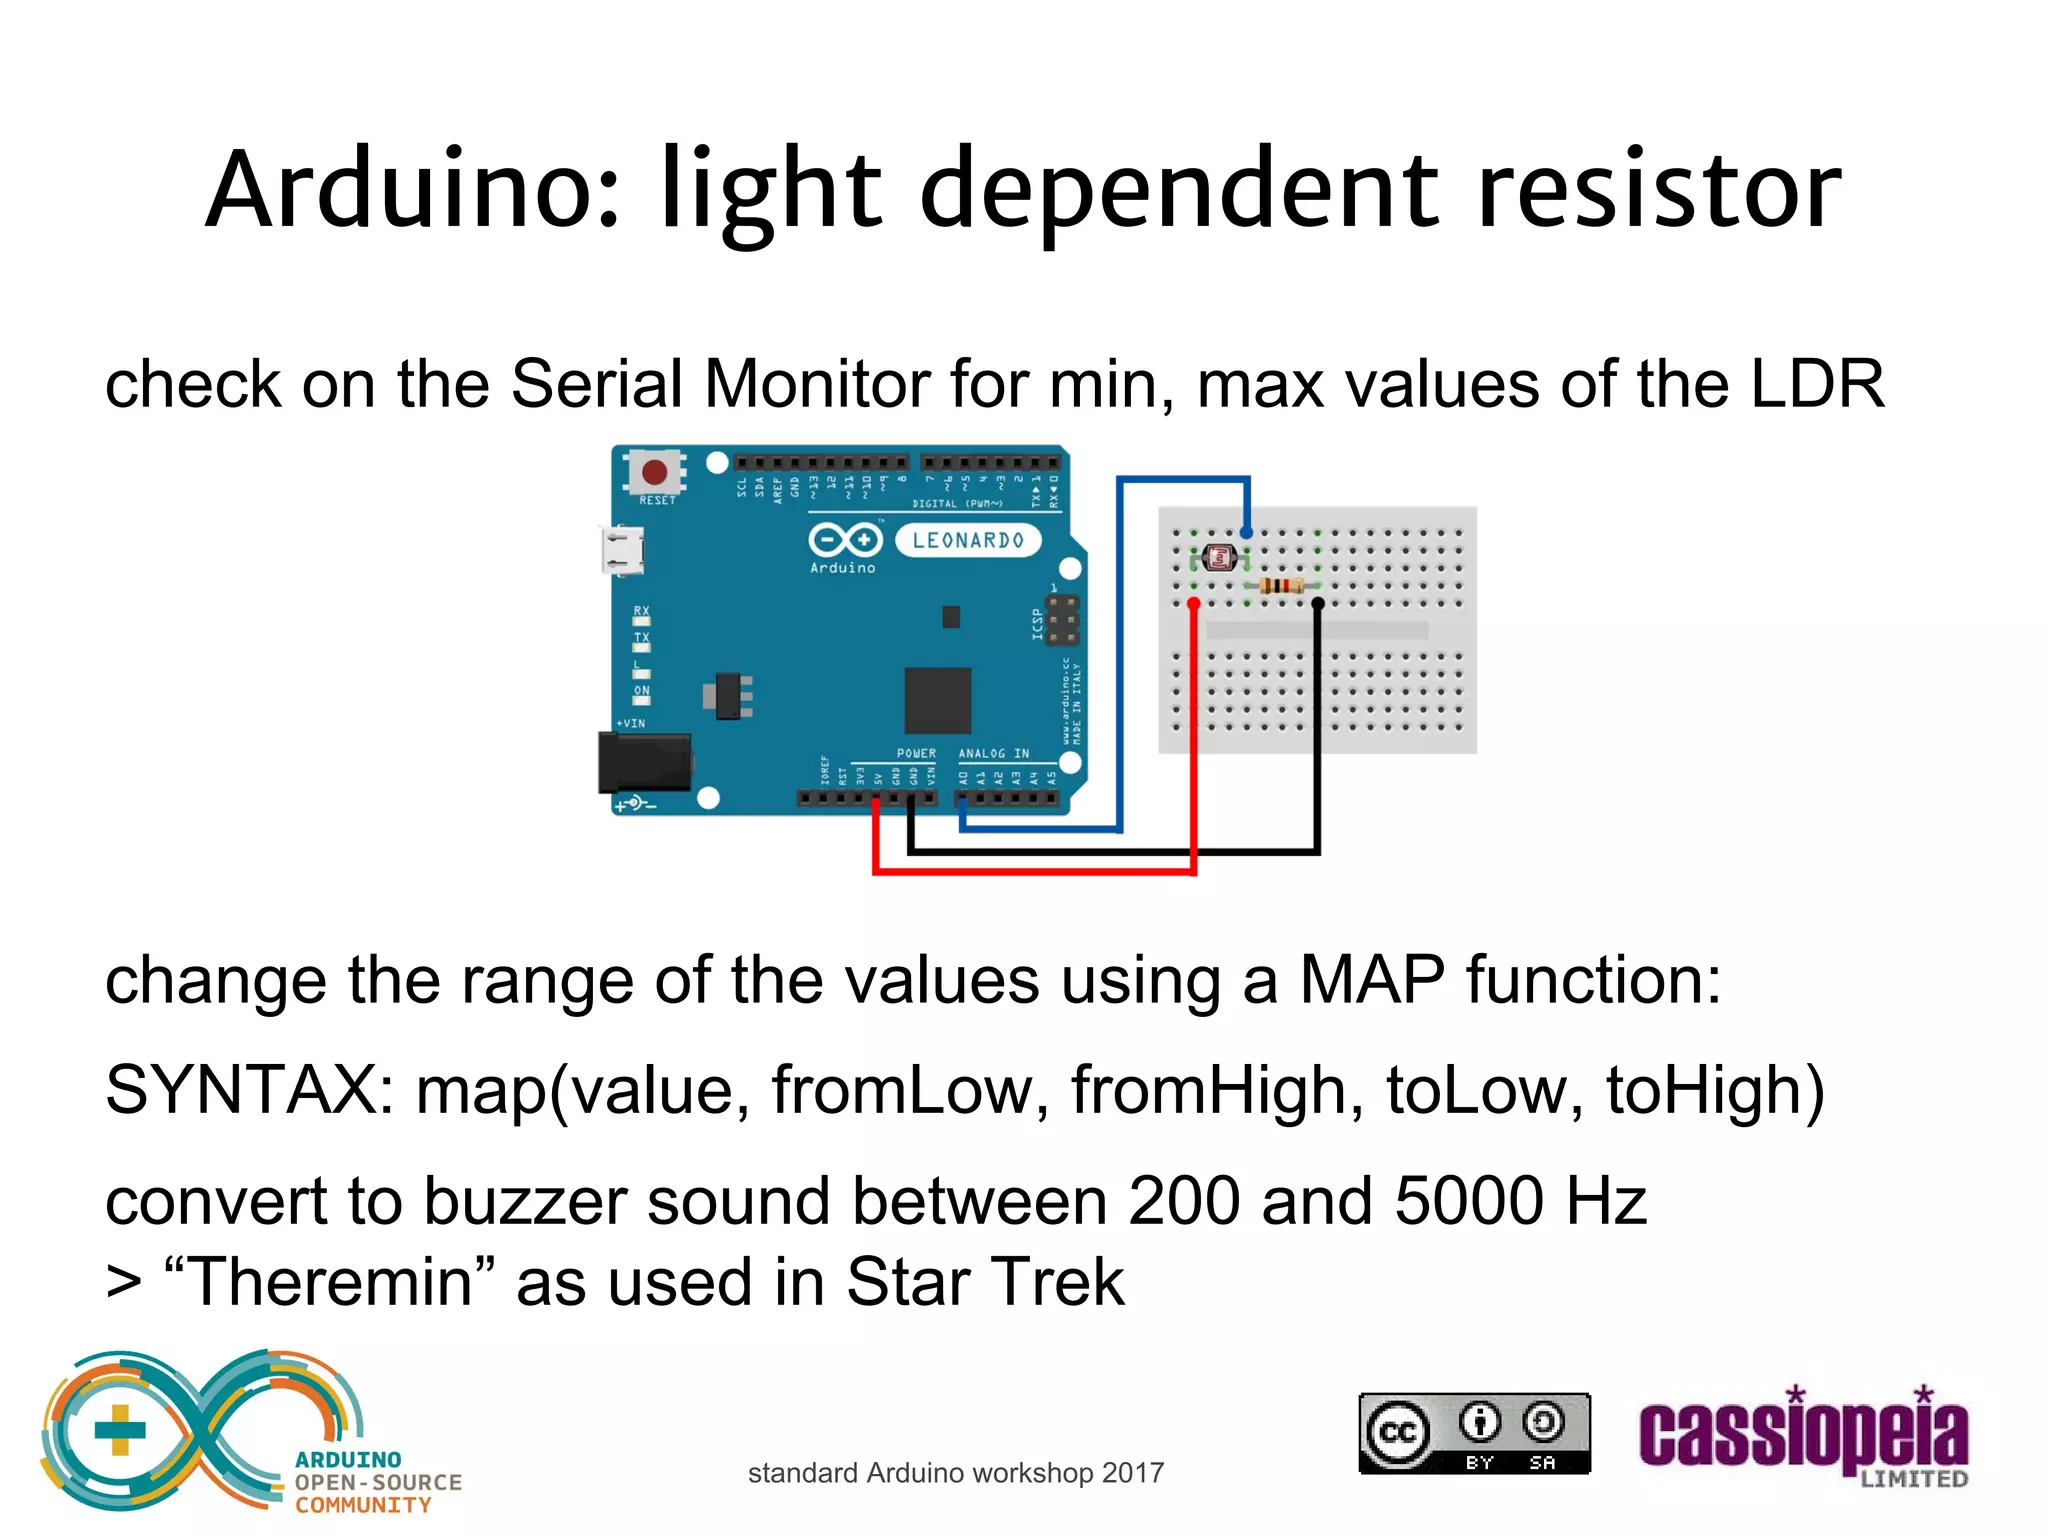
![standard Arduino workshop 2017 Arduino: light dependent resistor int ldr_value; [SETUP] [LOOP] ldr_value = analogRead(A1); Serial.println(ldr_value); check on the Serial Monitor for min, max values of the LDR how to go from e.g. 50-500 values to 200-5000Hz frequencies? use ‘map’ function](https://image.slidesharecdn.com/cassiopeialtd-standardarduinoworkshop-150131005926-conversion-gate01/75/Cassiopeia-Ltd-standard-Arduino-workshop-37-2048.jpg)
![standard Arduino workshop 2017 Arduino: light dependent resistor int freq; [SETUP] [LOOP] freq = map(ldr_value, 50, 500, 200, 5000); tone(3, freq); [just update this line] SYNTAX: map(value, fromLow, fromHigh, toLow, toHigh)](https://image.slidesharecdn.com/cassiopeialtd-standardarduinoworkshop-150131005926-conversion-gate01/75/Cassiopeia-Ltd-standard-Arduino-workshop-38-2048.jpg)
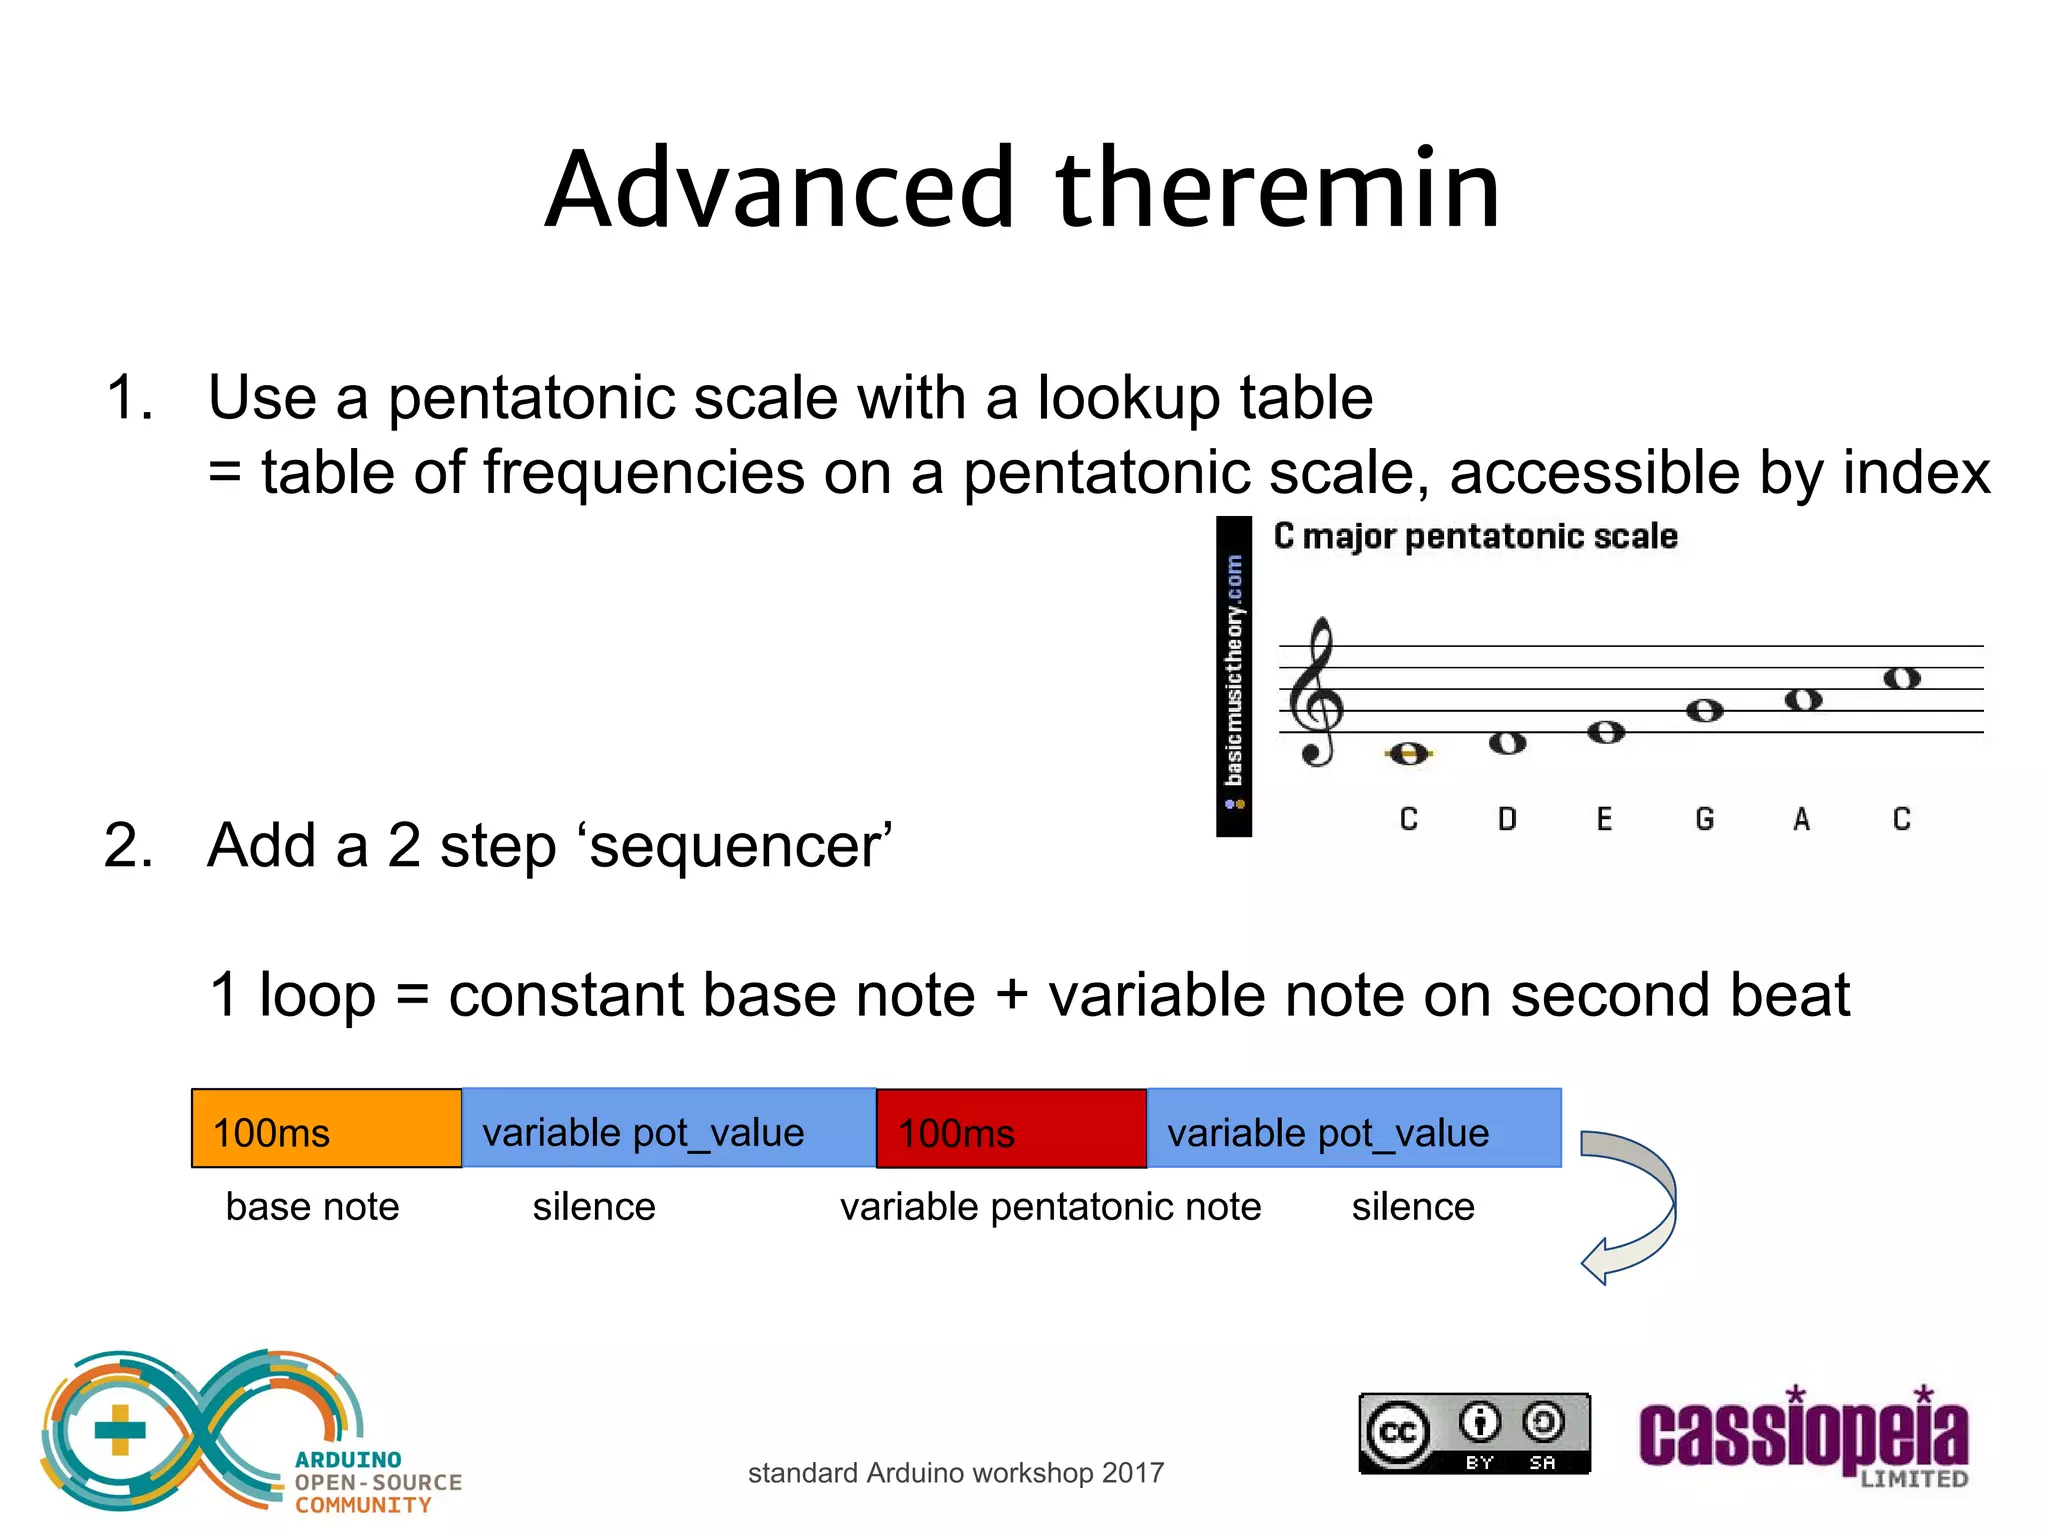
![standard Arduino workshop 2017 Pentatonic theremin Pentatonic scale with a lookup table int pentatonicTable[50] = { 0, 19, 22, 26, 29, 32, 38, 43, 51, 58, 65, 77, 86, 103, 115, 129, 154, 173, 206, 231, 259, 308, 346, 411, 461, 518, 616, 691, 822, 923, 1036, 1232, 1383, 1644, 1845, 2071, 2463, 2765, 3288, 3691, 4143, 4927, 5530, 6577, 7382, 8286, 9854, 11060, 13153, 14764 }; OLD: freq = map(ldr_value, 50, 500, 200, 5000); NEW: freq = pentatonicTable[map(ldr_value, 50, 500, 20, 45)];](https://image.slidesharecdn.com/cassiopeialtd-standardarduinoworkshop-150131005926-conversion-gate01/75/Cassiopeia-Ltd-standard-Arduino-workshop-42-2048.jpg)
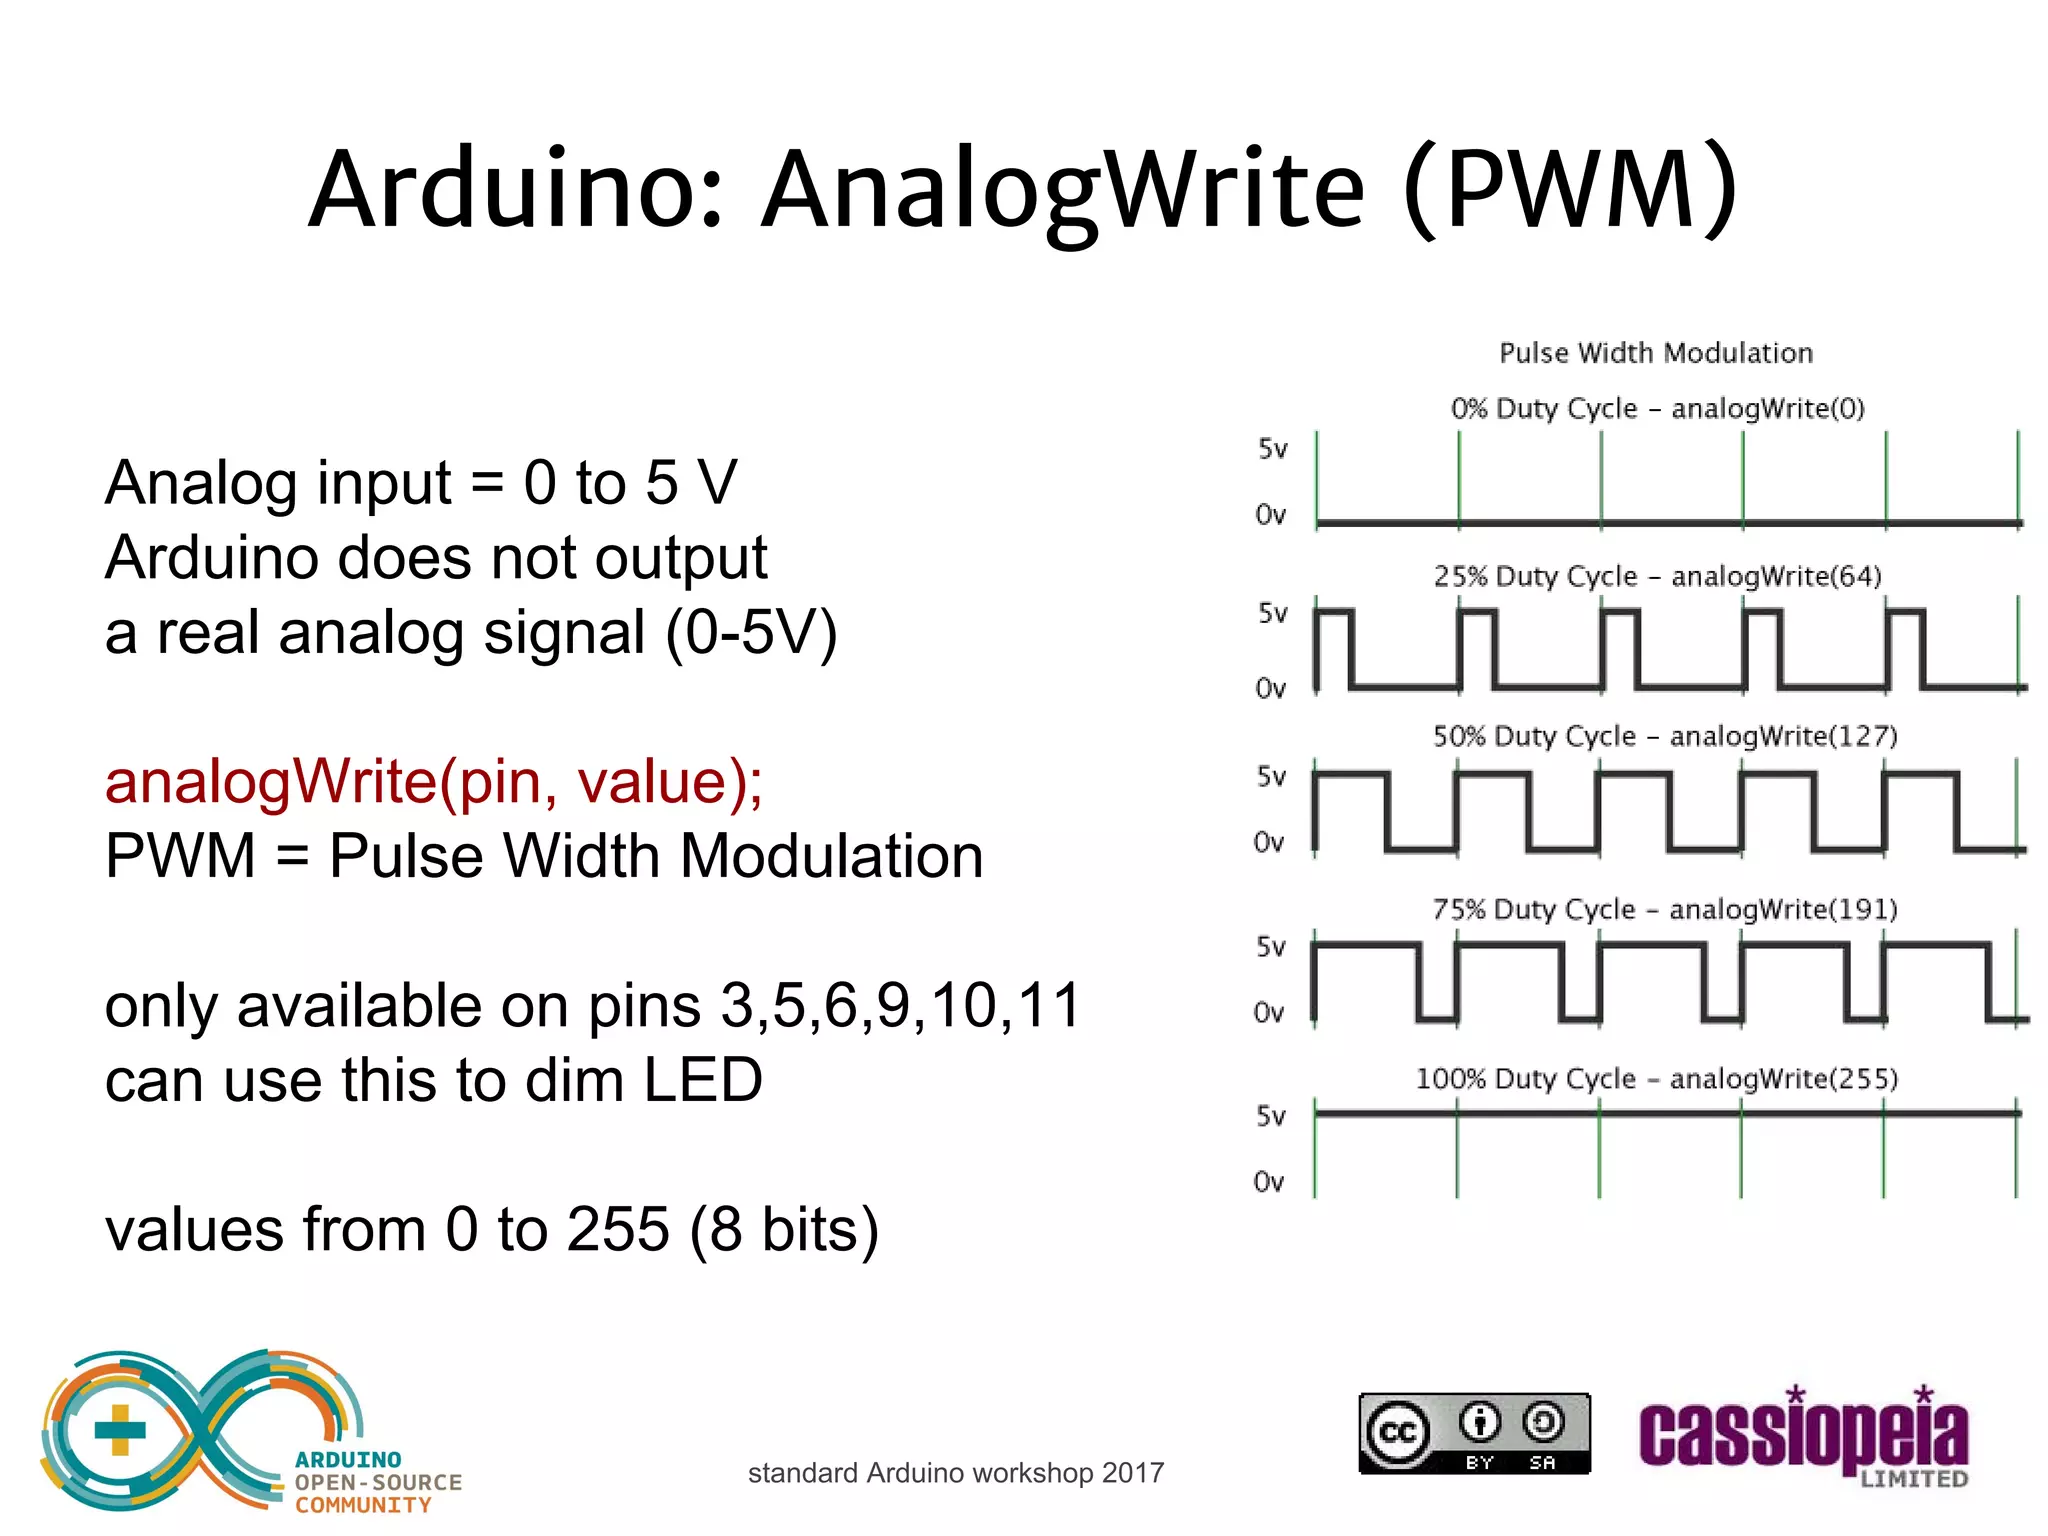
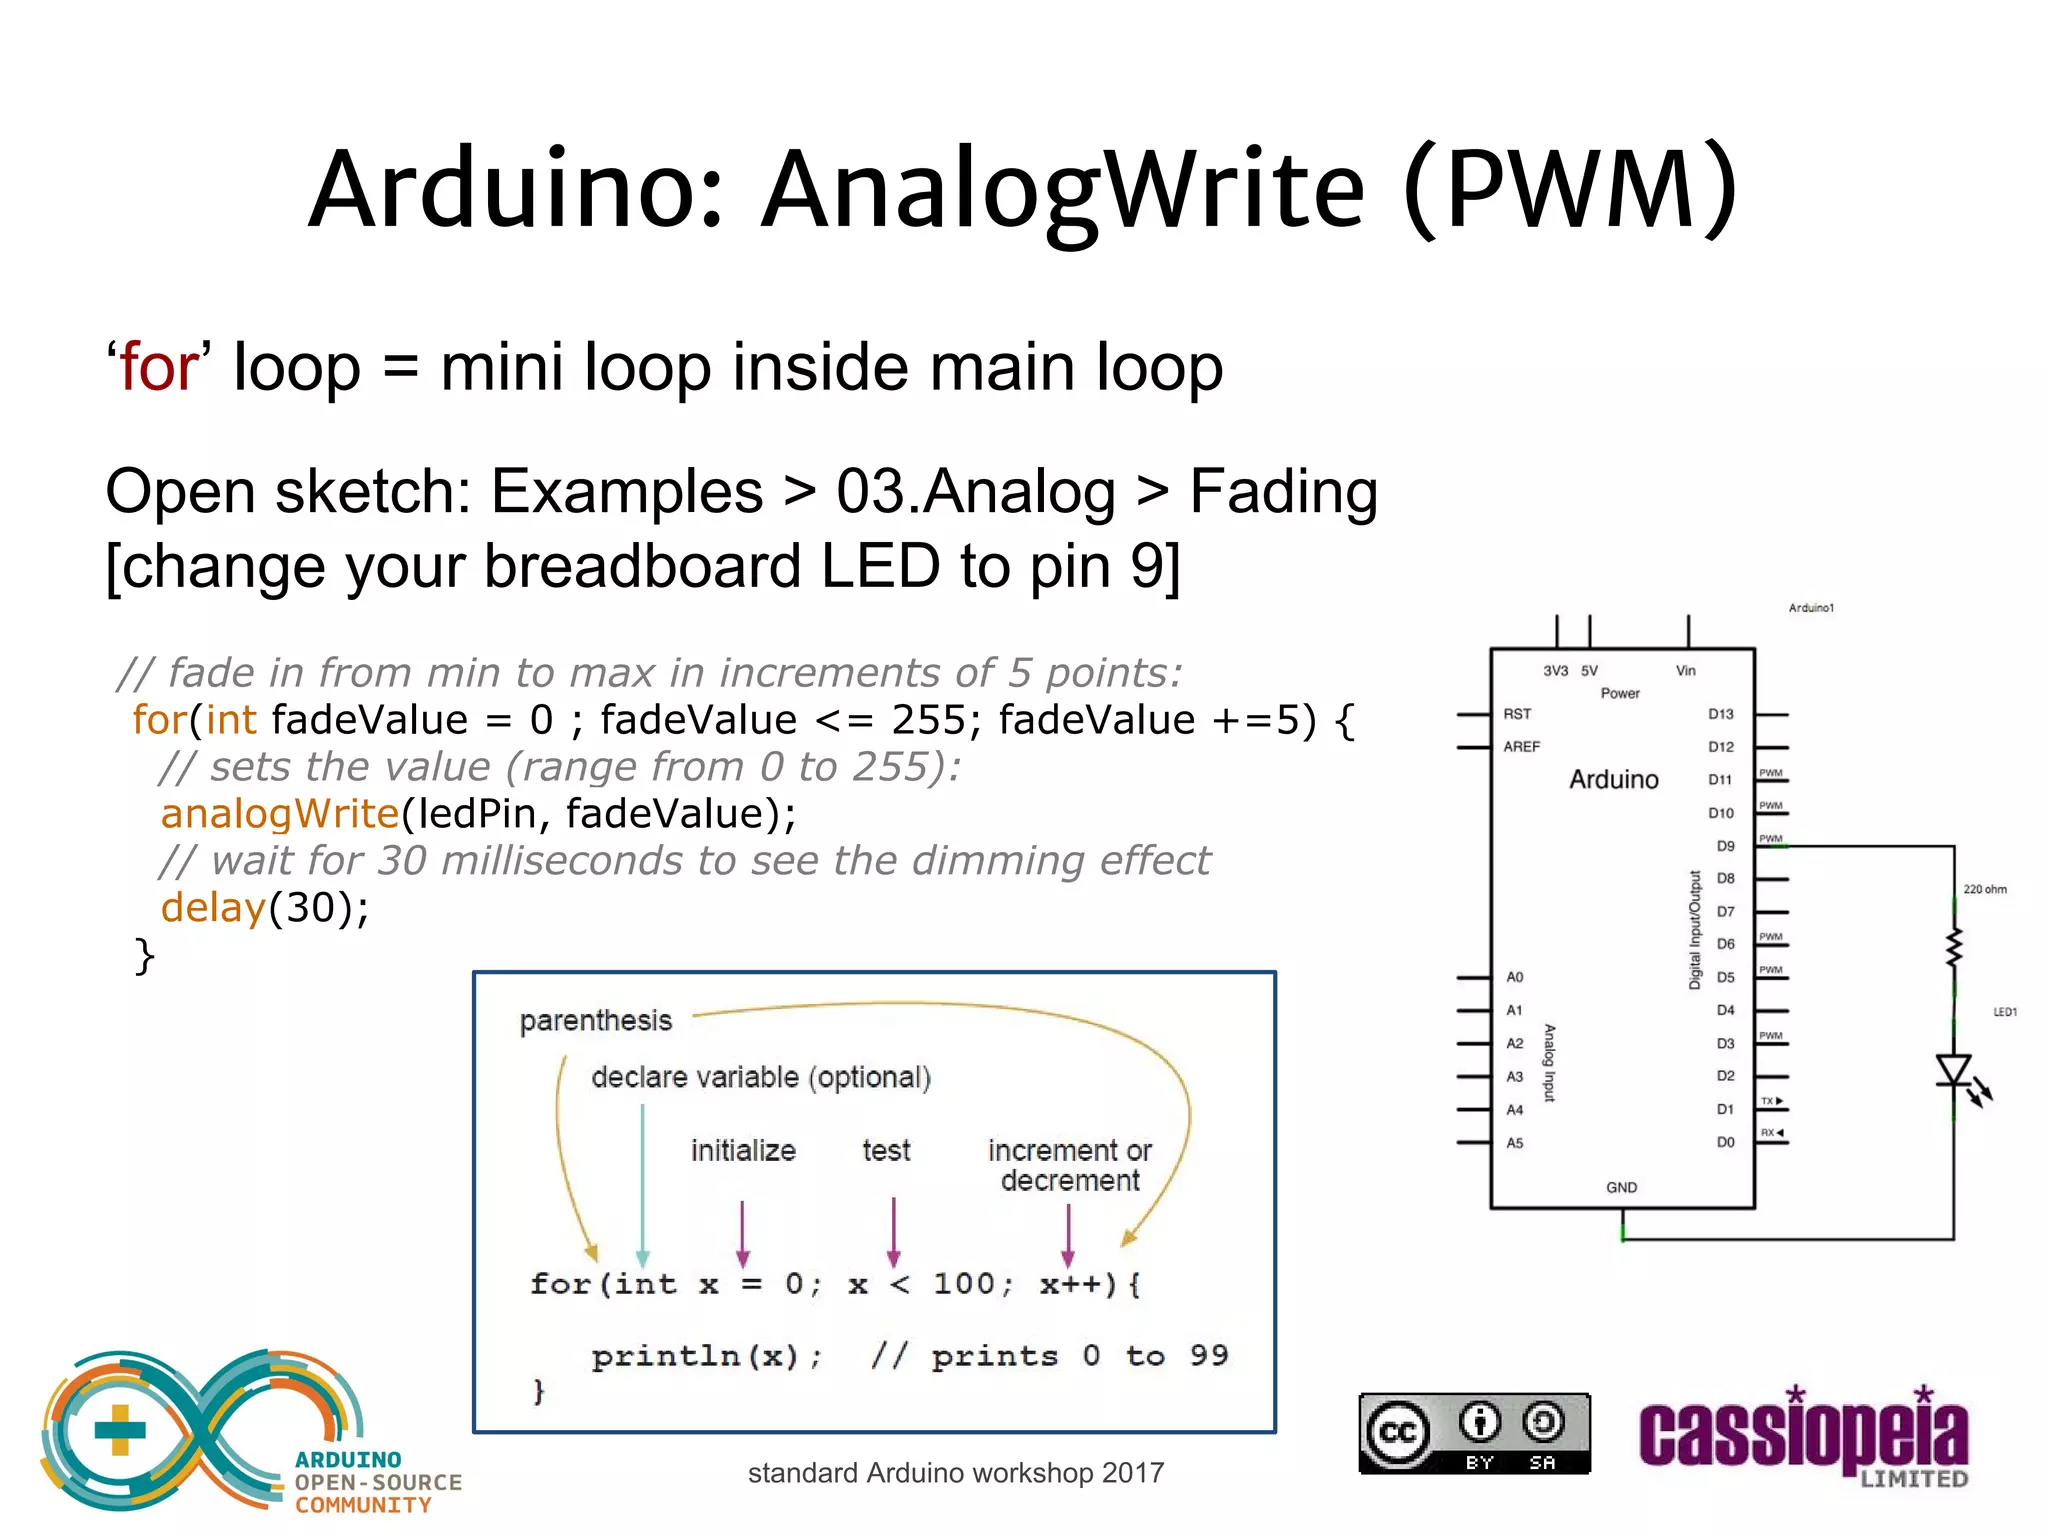
![standard Arduino workshop 2017 Arduino: AnalogWrite (PWM) ‘for’ structure = loop for X times Open sketch: Examples > 03.Analog > Fading [change your breadboard LED to pin 9] // fade in from min to max in increments of 5 points: for(int fadeValue = 0 ; fadeValue <= 255; fadeValue +=5) { // sets the value (range from 0 to 255): analogWrite(ledPin, fadeValue); // wait for 30 milliseconds to see the dimming effect delay(30); }](https://image.slidesharecdn.com/cassiopeialtd-standardarduinoworkshop-150131005926-conversion-gate01/75/Cassiopeia-Ltd-standard-Arduino-workshop-45-2048.jpg)

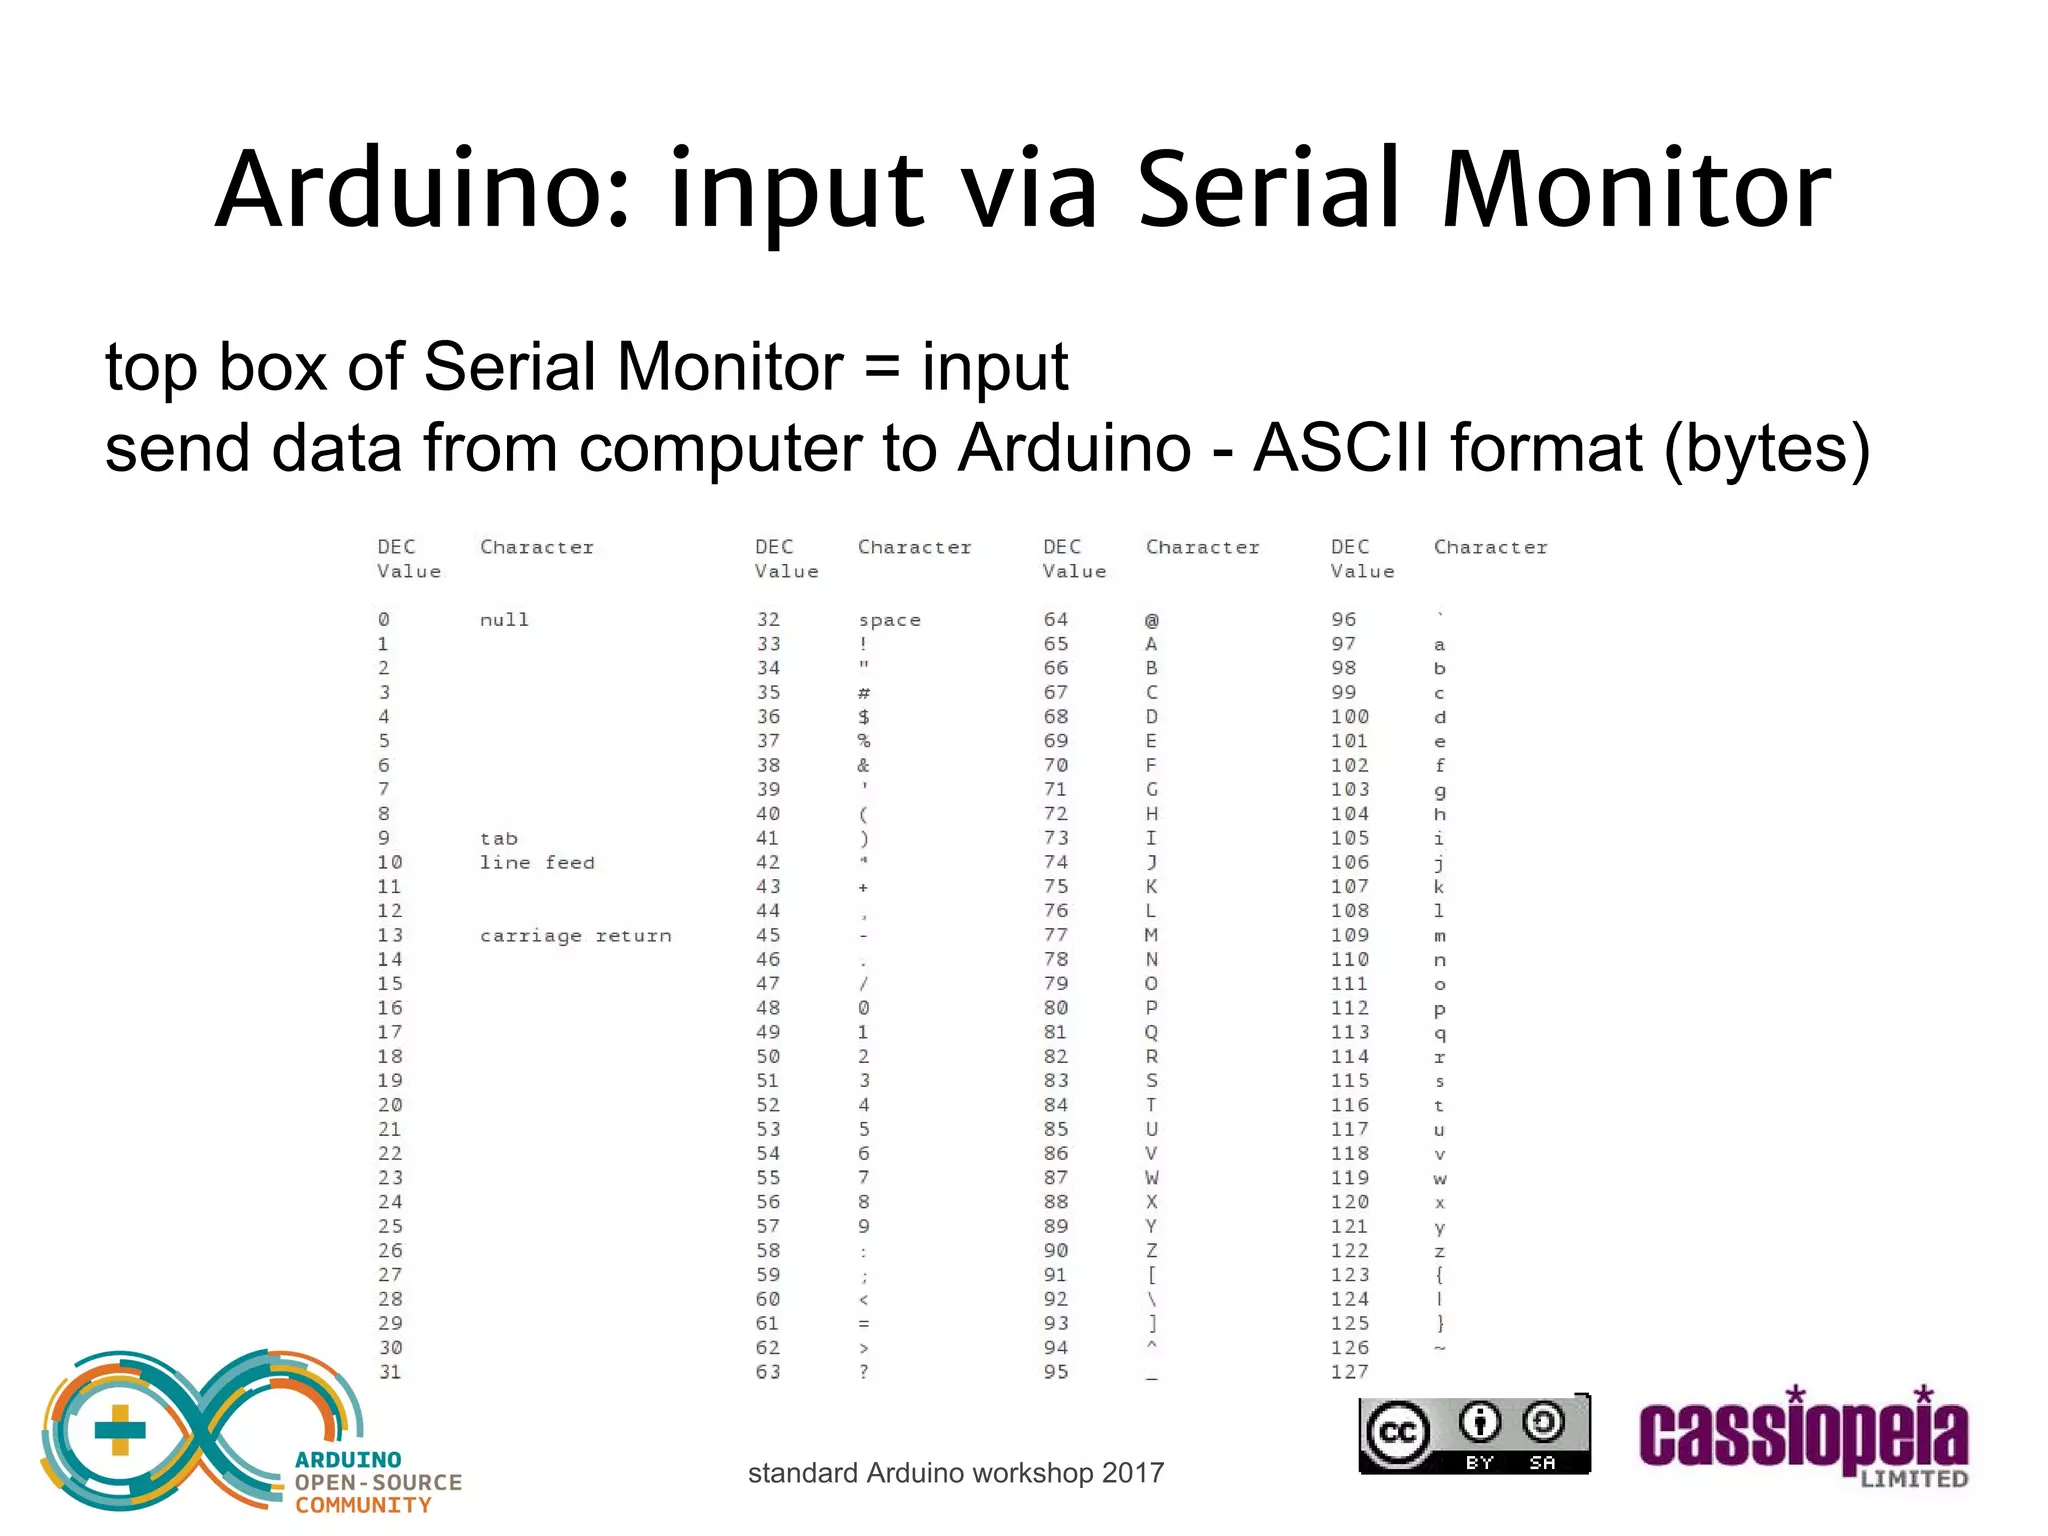
![standard Arduino workshop 2017 Arduino: input via Serial Monitor Let’s read a number 0-9 for intensity of LED [remove all commands from loop] int brightness; [SETUP] Serial.begin(9600); [LOOP] if (Serial.available()) { brightness = Serial.read(); Serial.print("Arduino received: "); Serial.println(brightness); } [switch to ‘No line ending’ at bottom of Serial Monitor?]](https://image.slidesharecdn.com/cassiopeialtd-standardarduinoworkshop-150131005926-conversion-gate01/75/Cassiopeia-Ltd-standard-Arduino-workshop-47-2048.jpg)
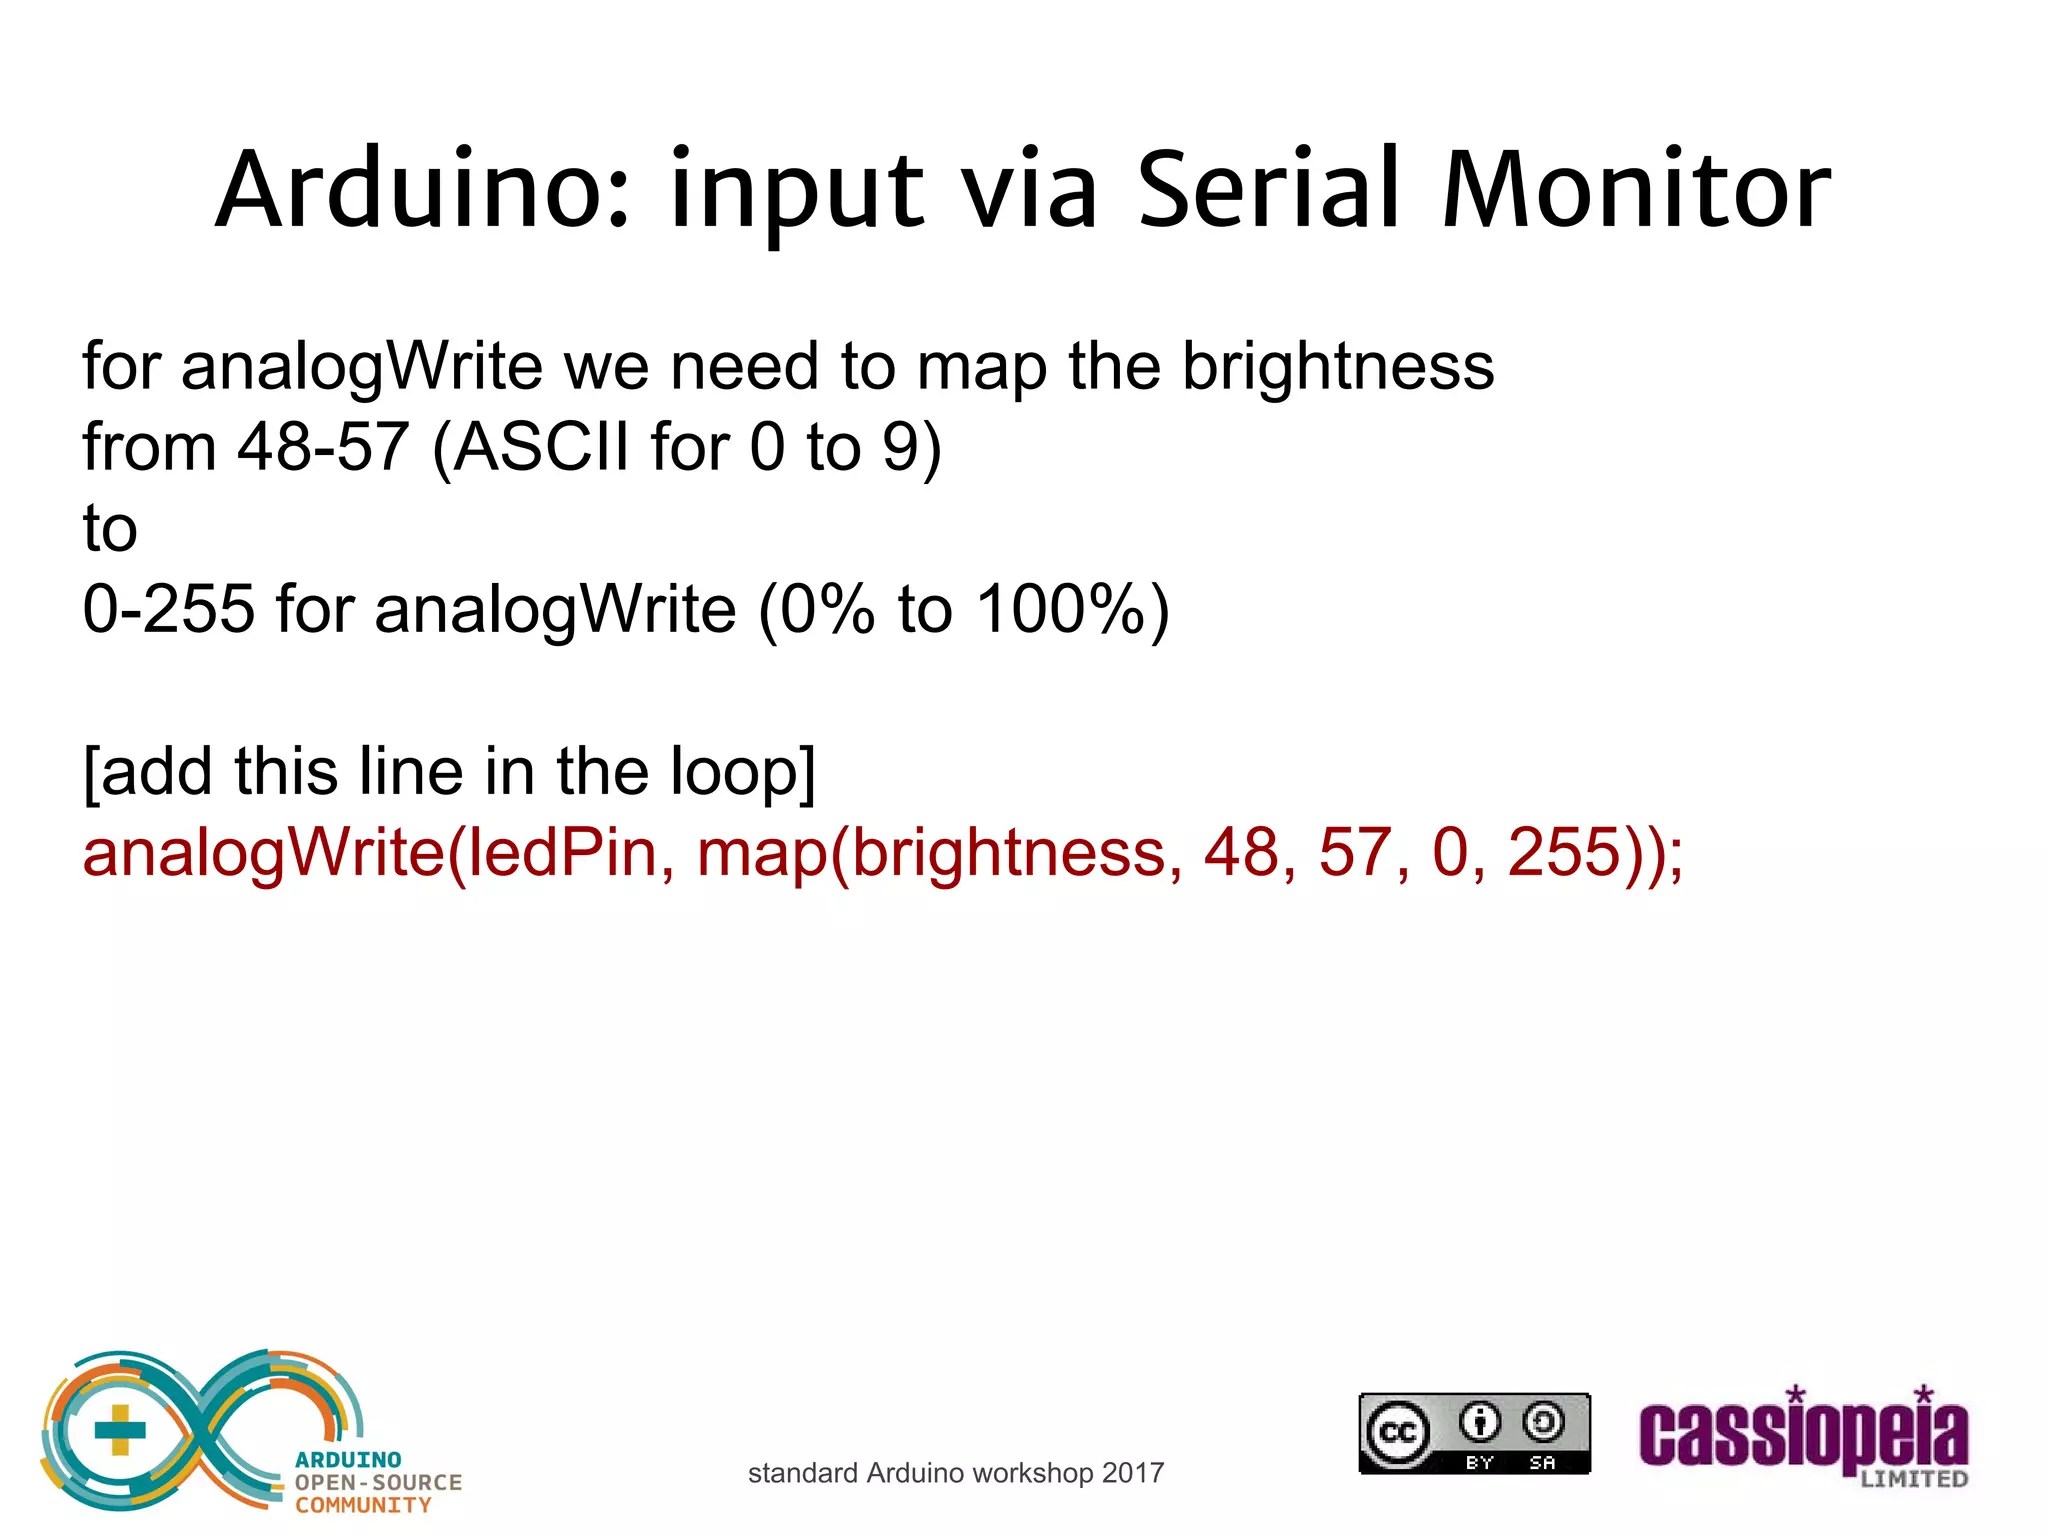
![standard Arduino workshop 2017 Arduino: input via Serial Monitor for analogWrite we need to map the brightness from 48-57 (ASCII for 0 to 9) to 0-255 for analogWrite (0% to 100%) [add this line in the loop] analogWrite(ledPin, map(brightness, 48, 57, 0, 255));](https://image.slidesharecdn.com/cassiopeialtd-standardarduinoworkshop-150131005926-conversion-gate01/75/Cassiopeia-Ltd-standard-Arduino-workshop-48-2048.jpg)


