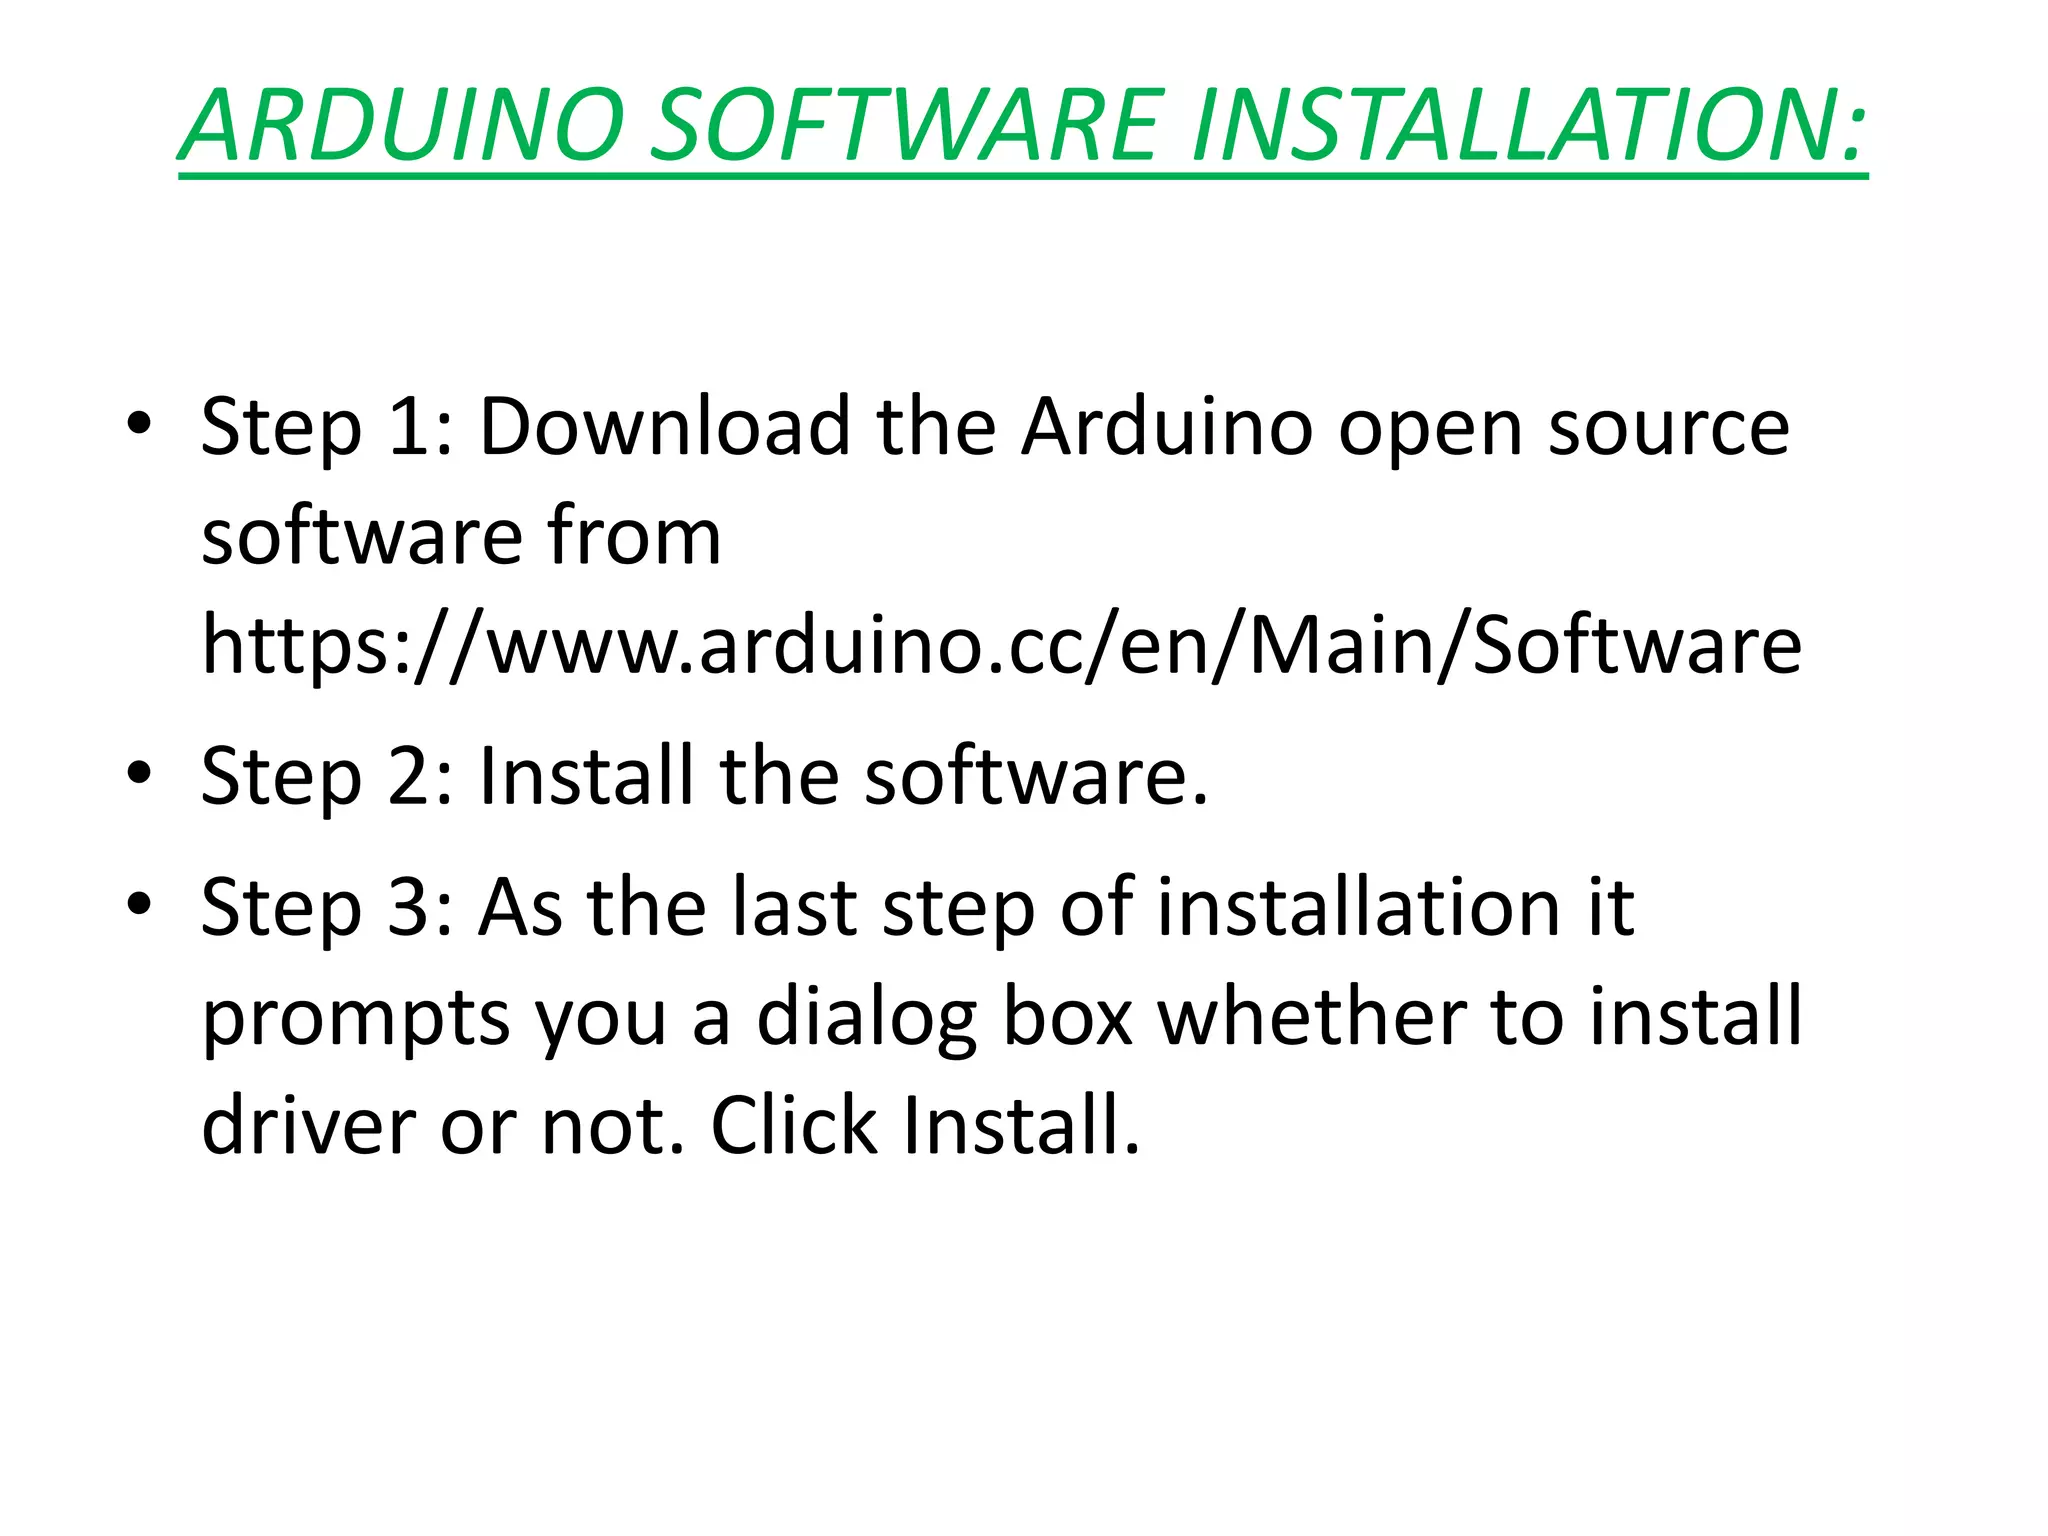
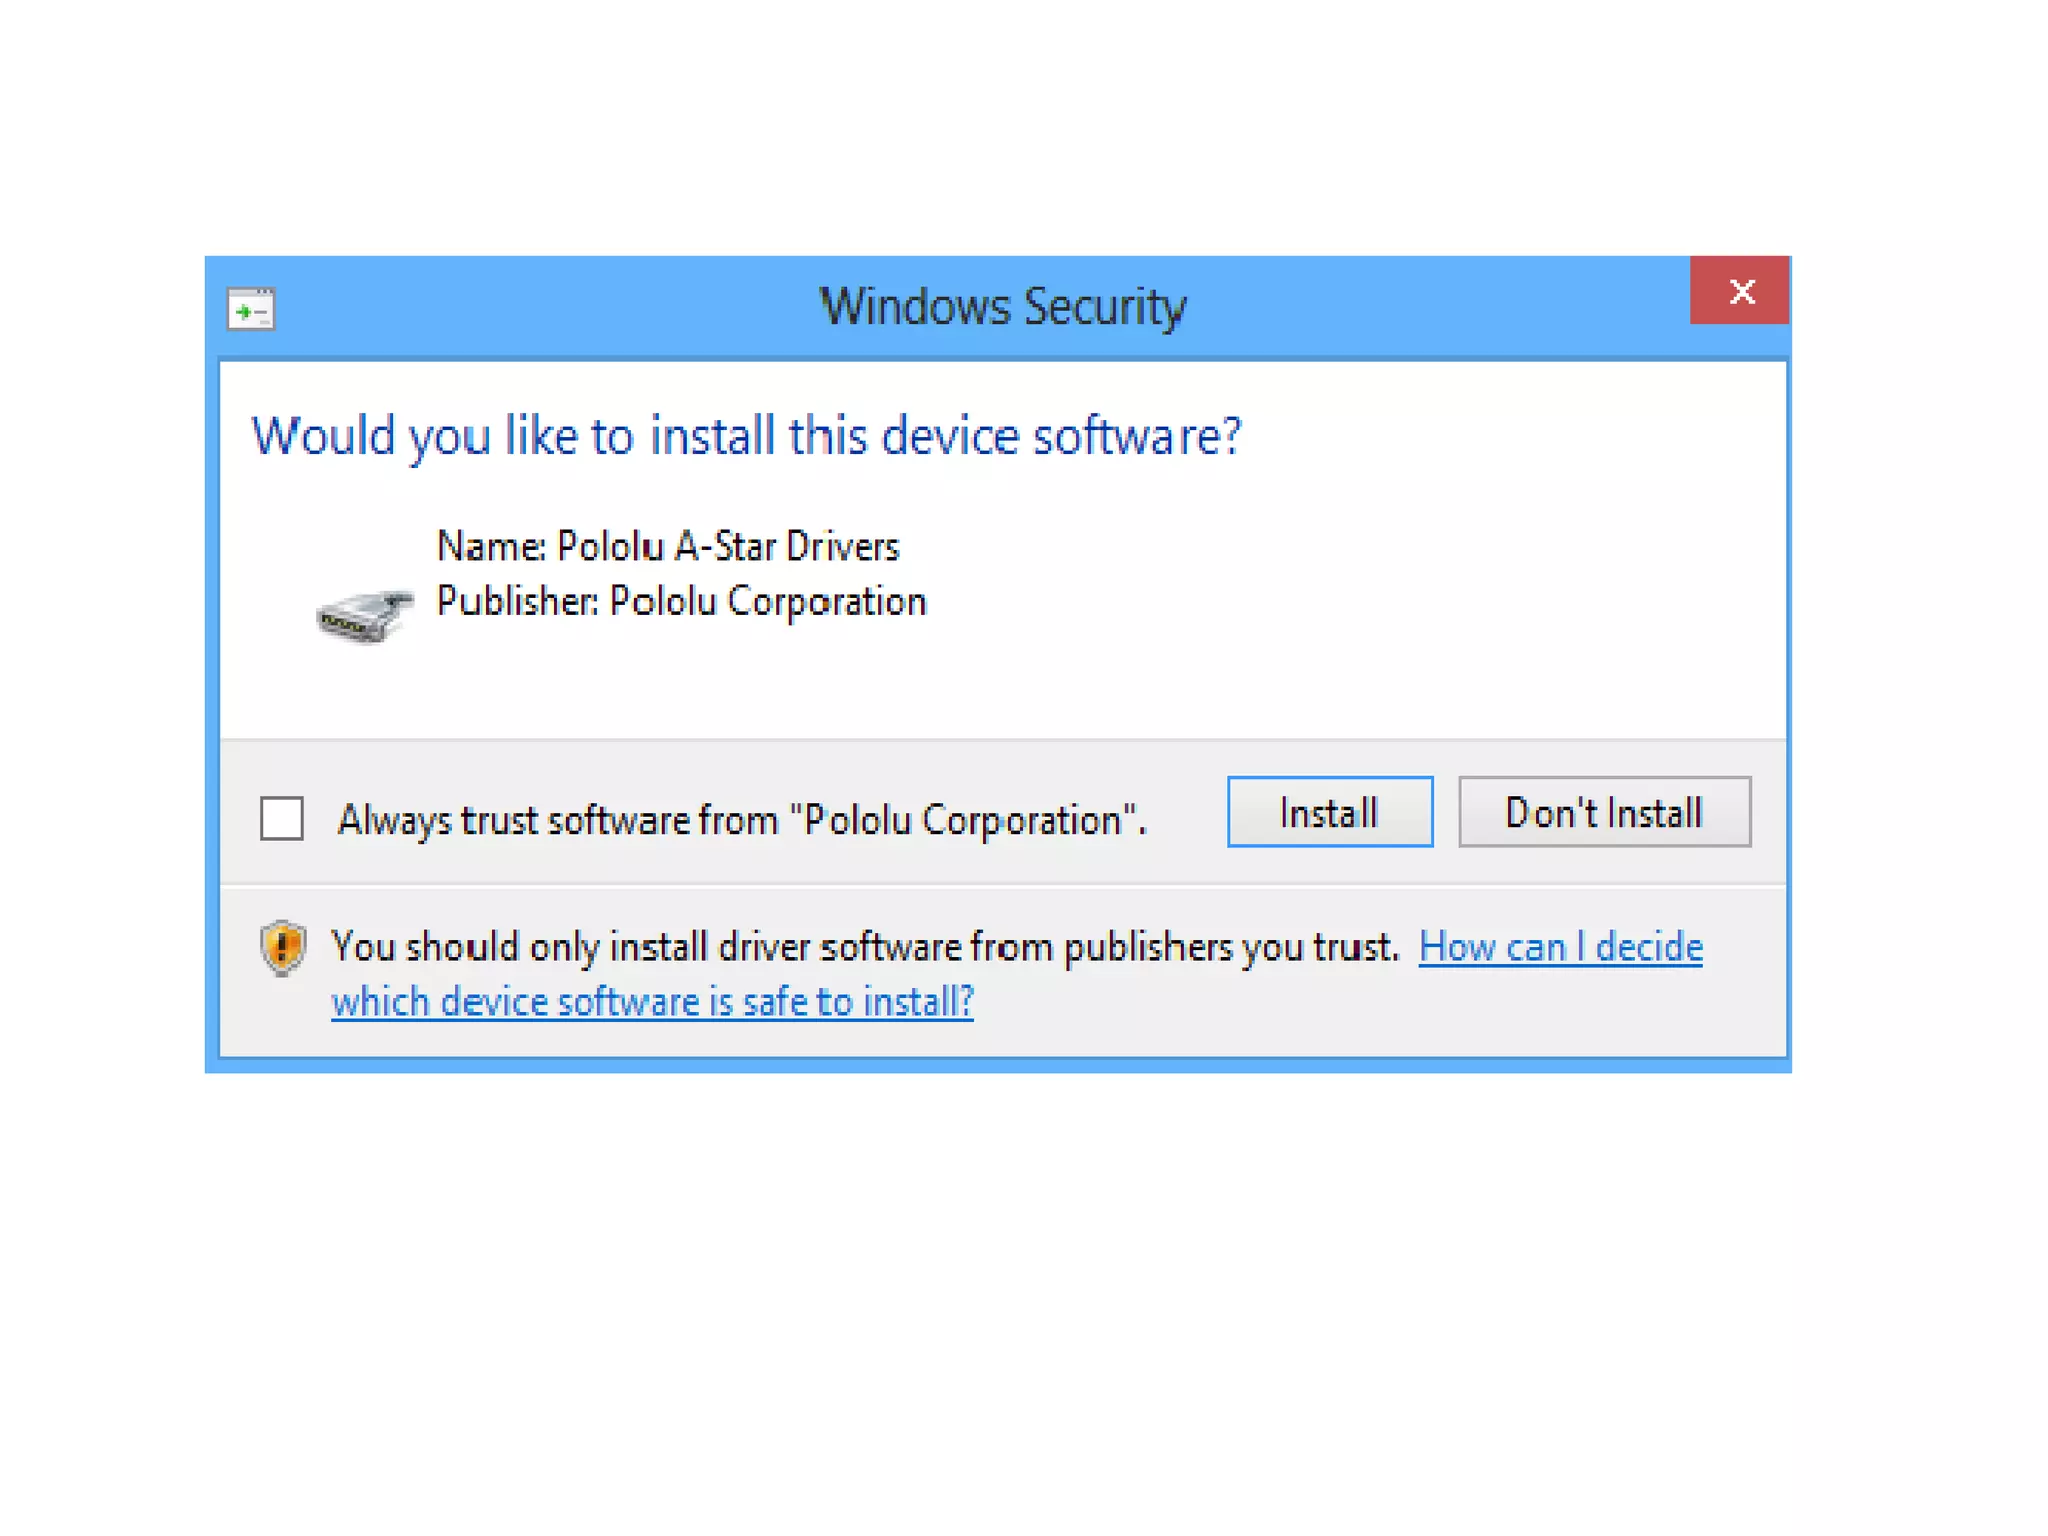
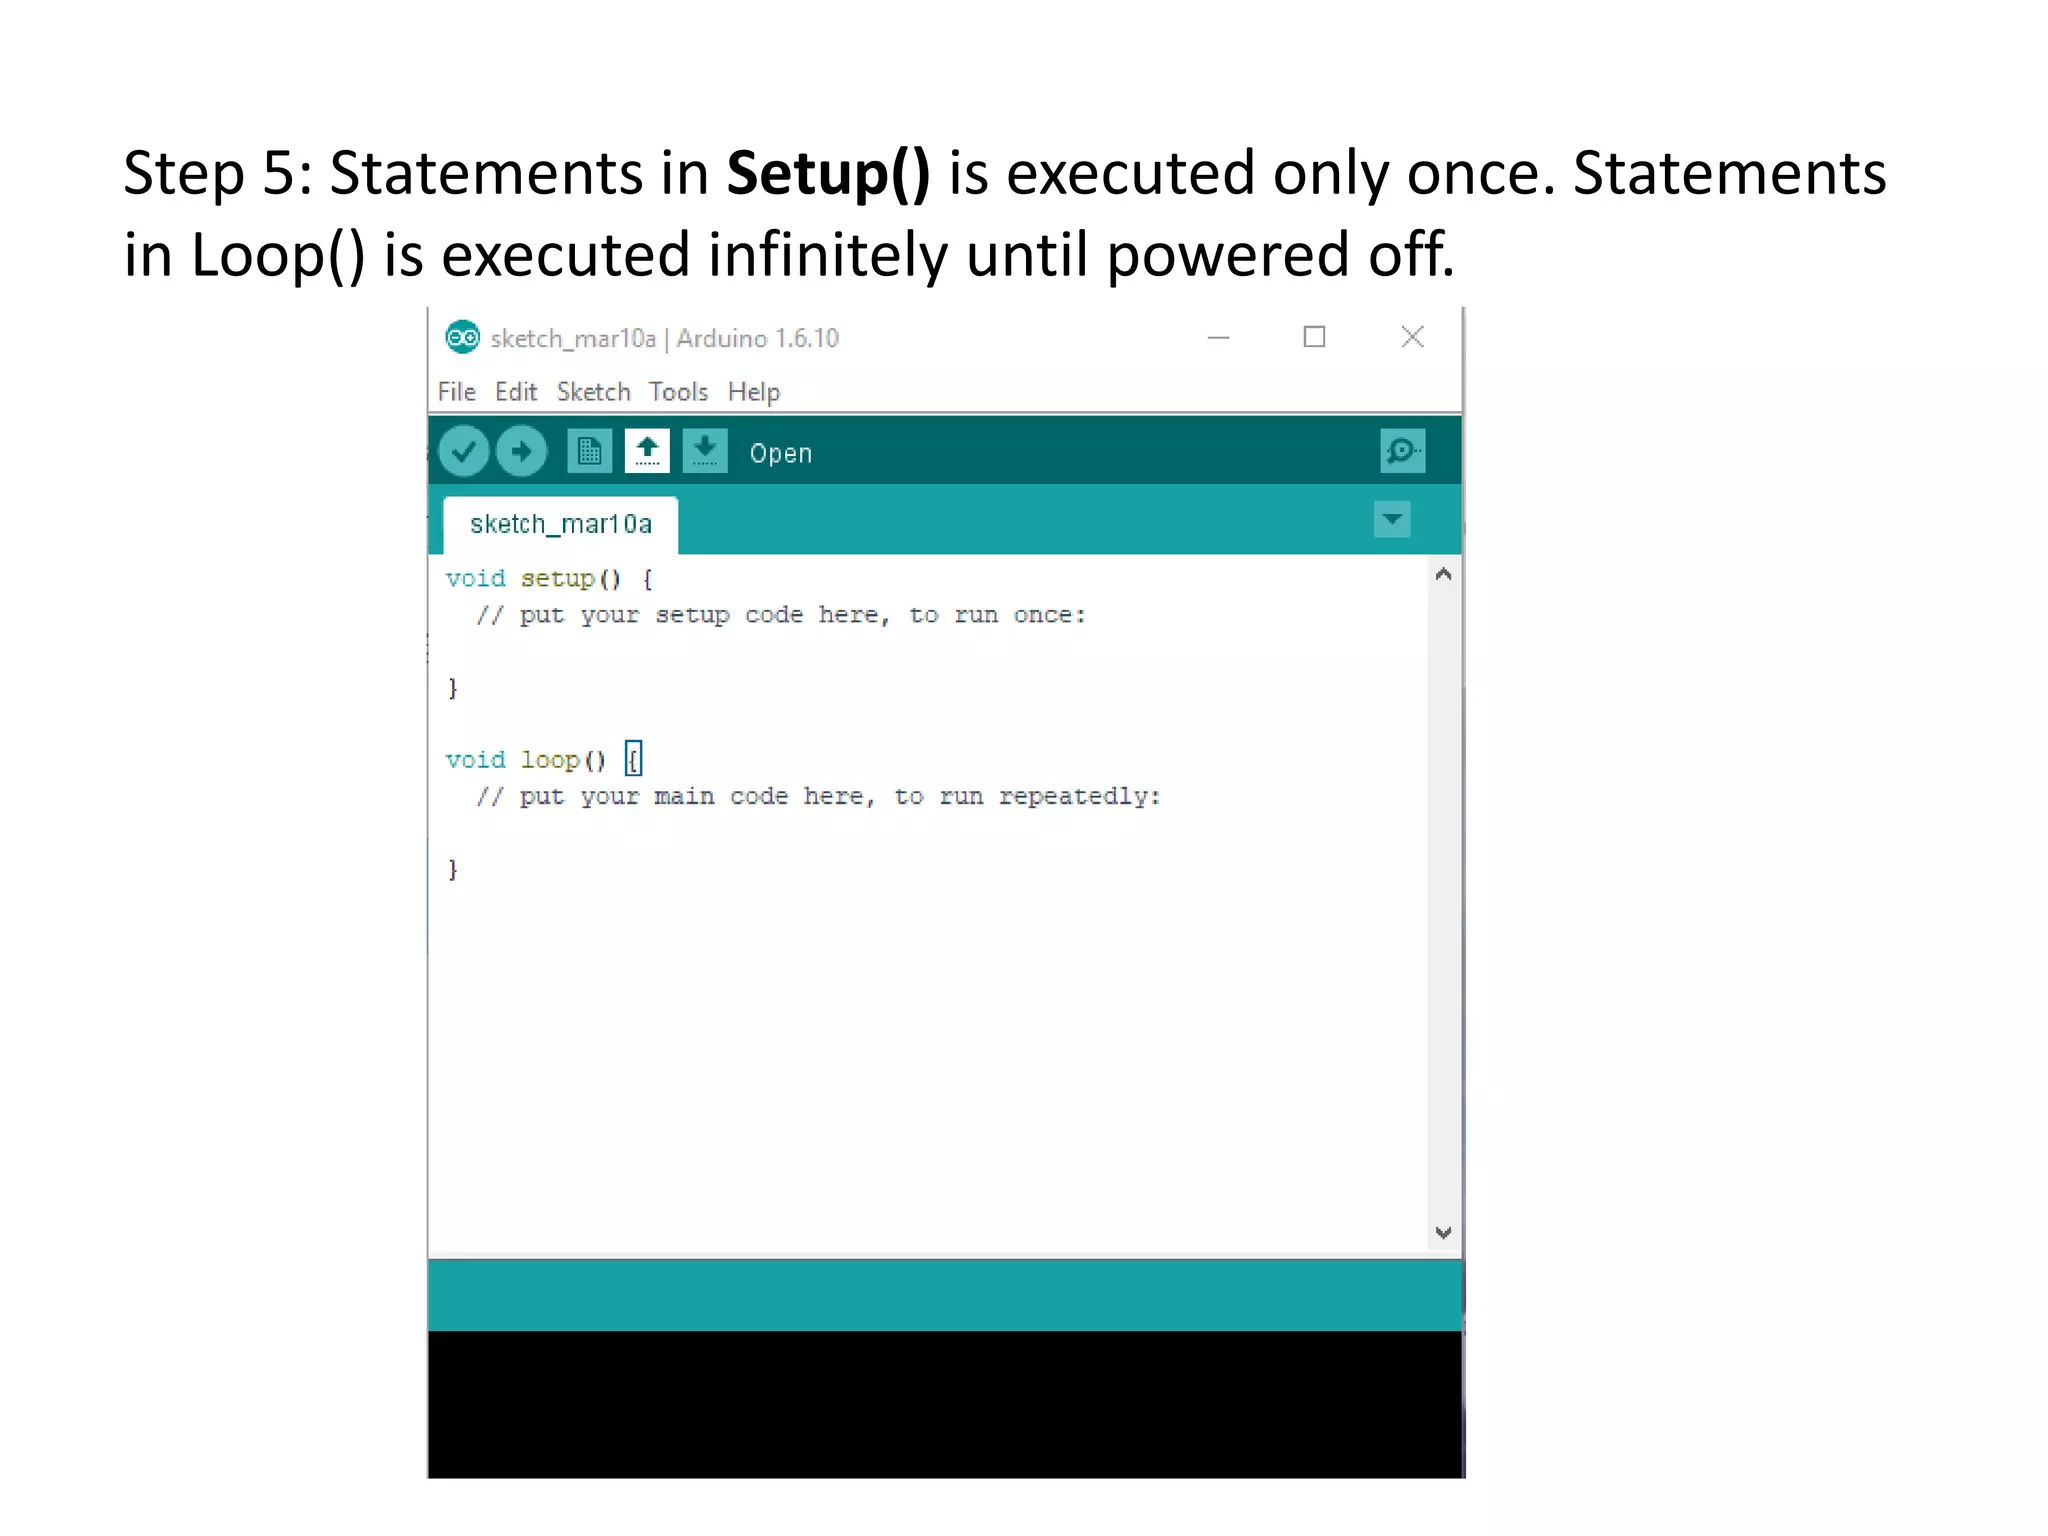
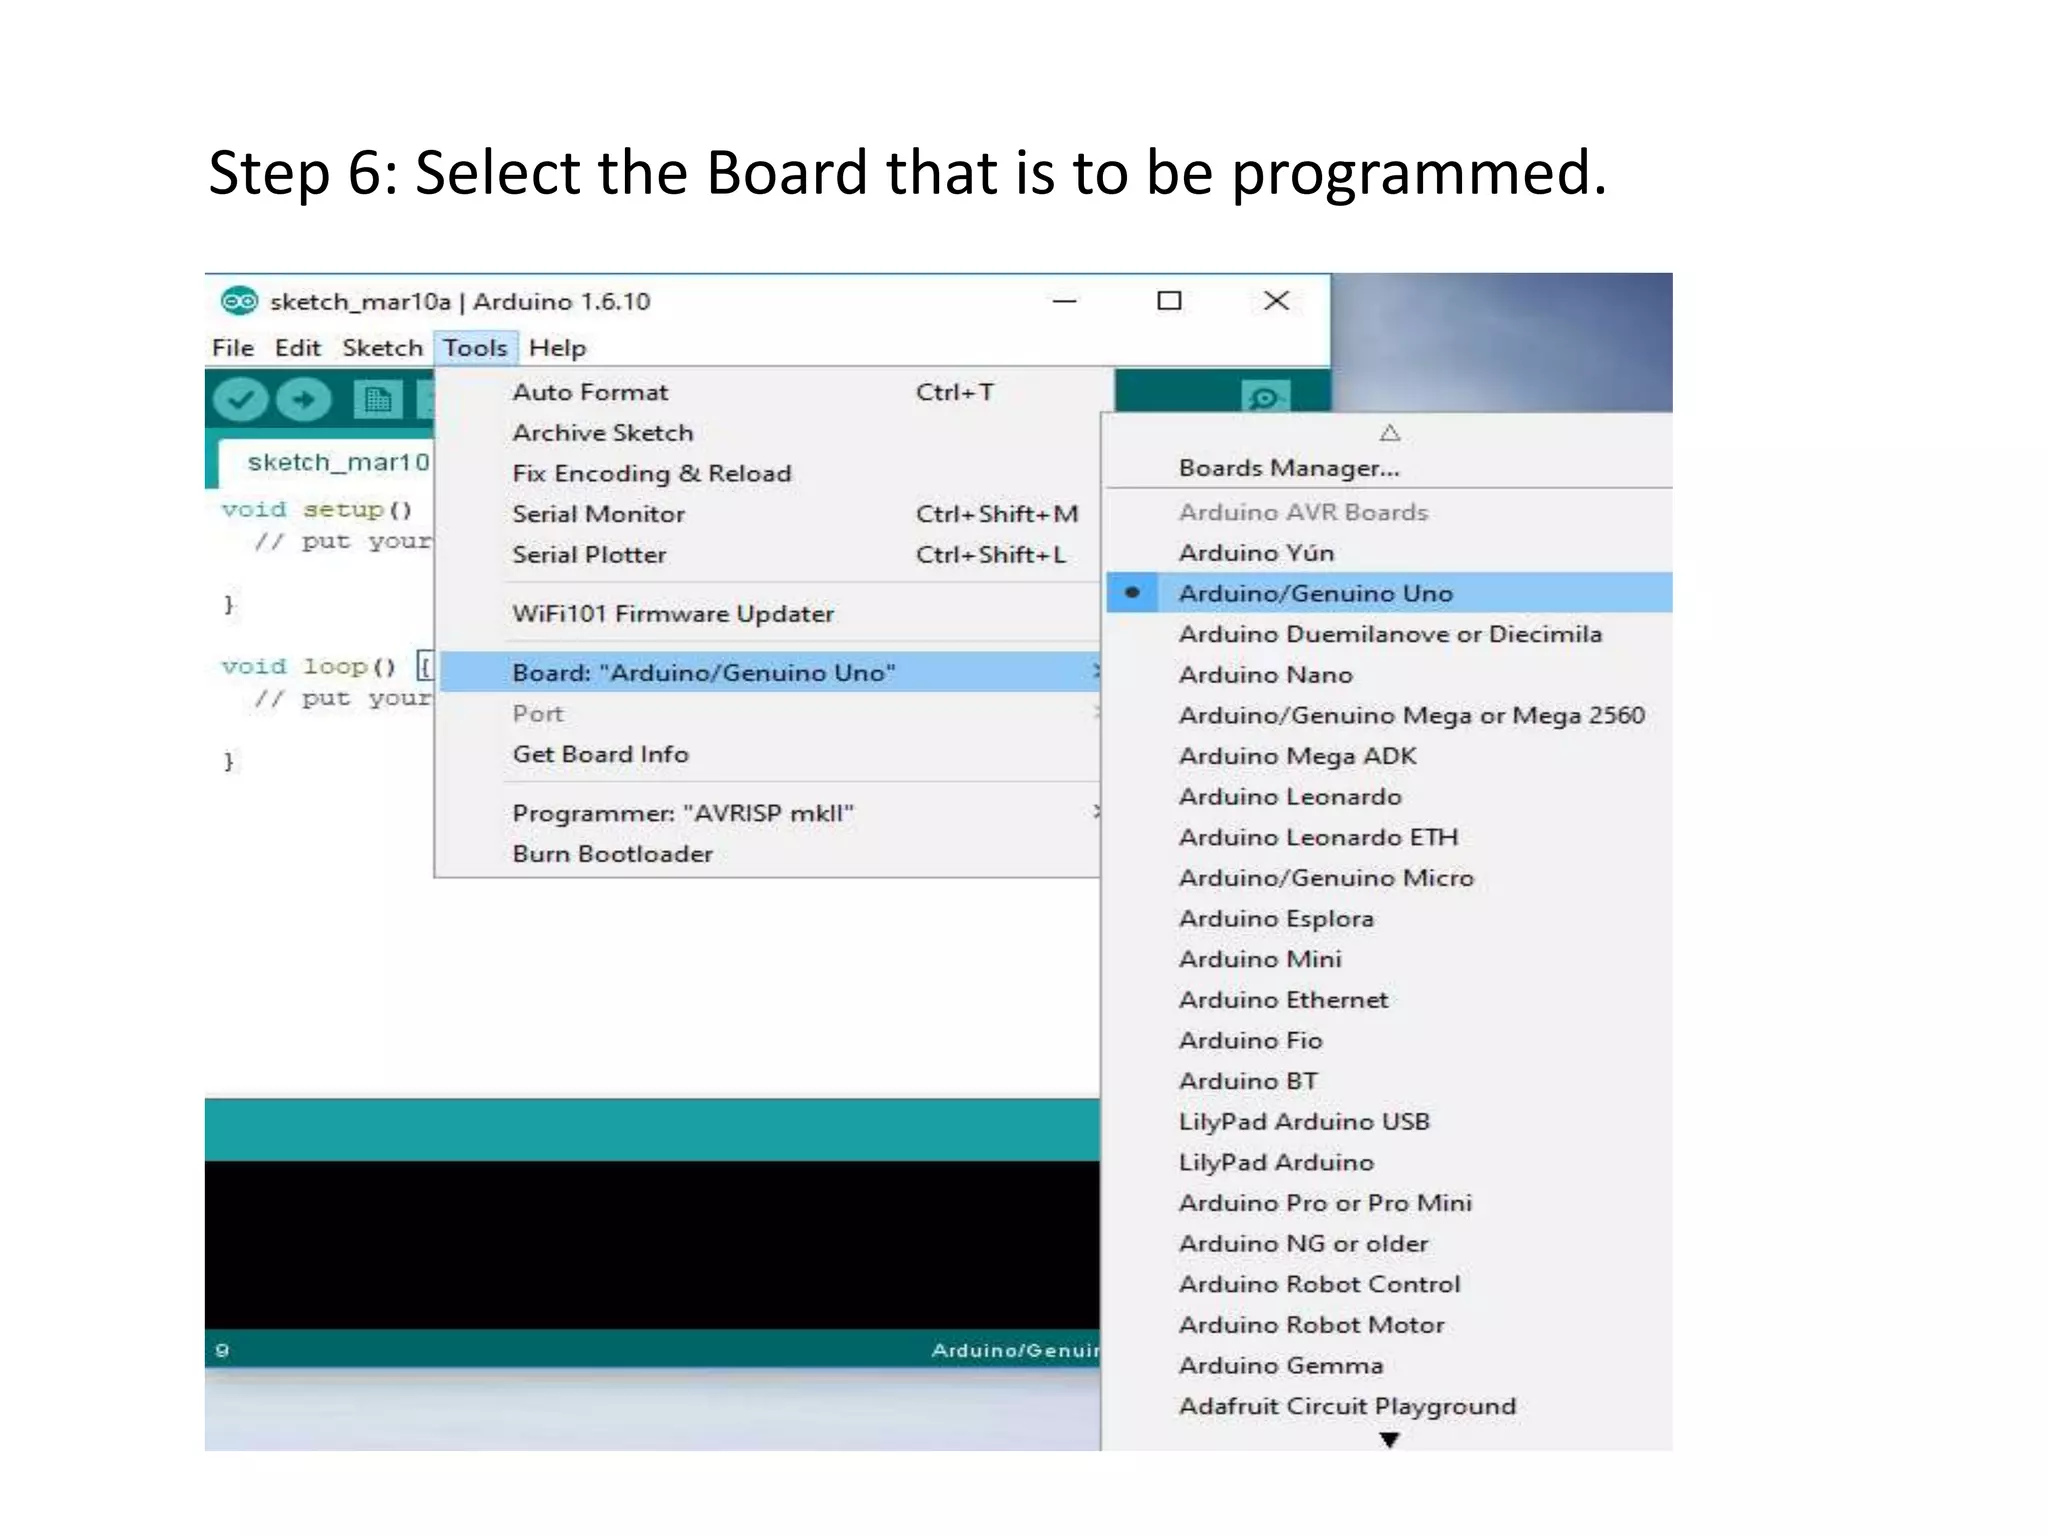
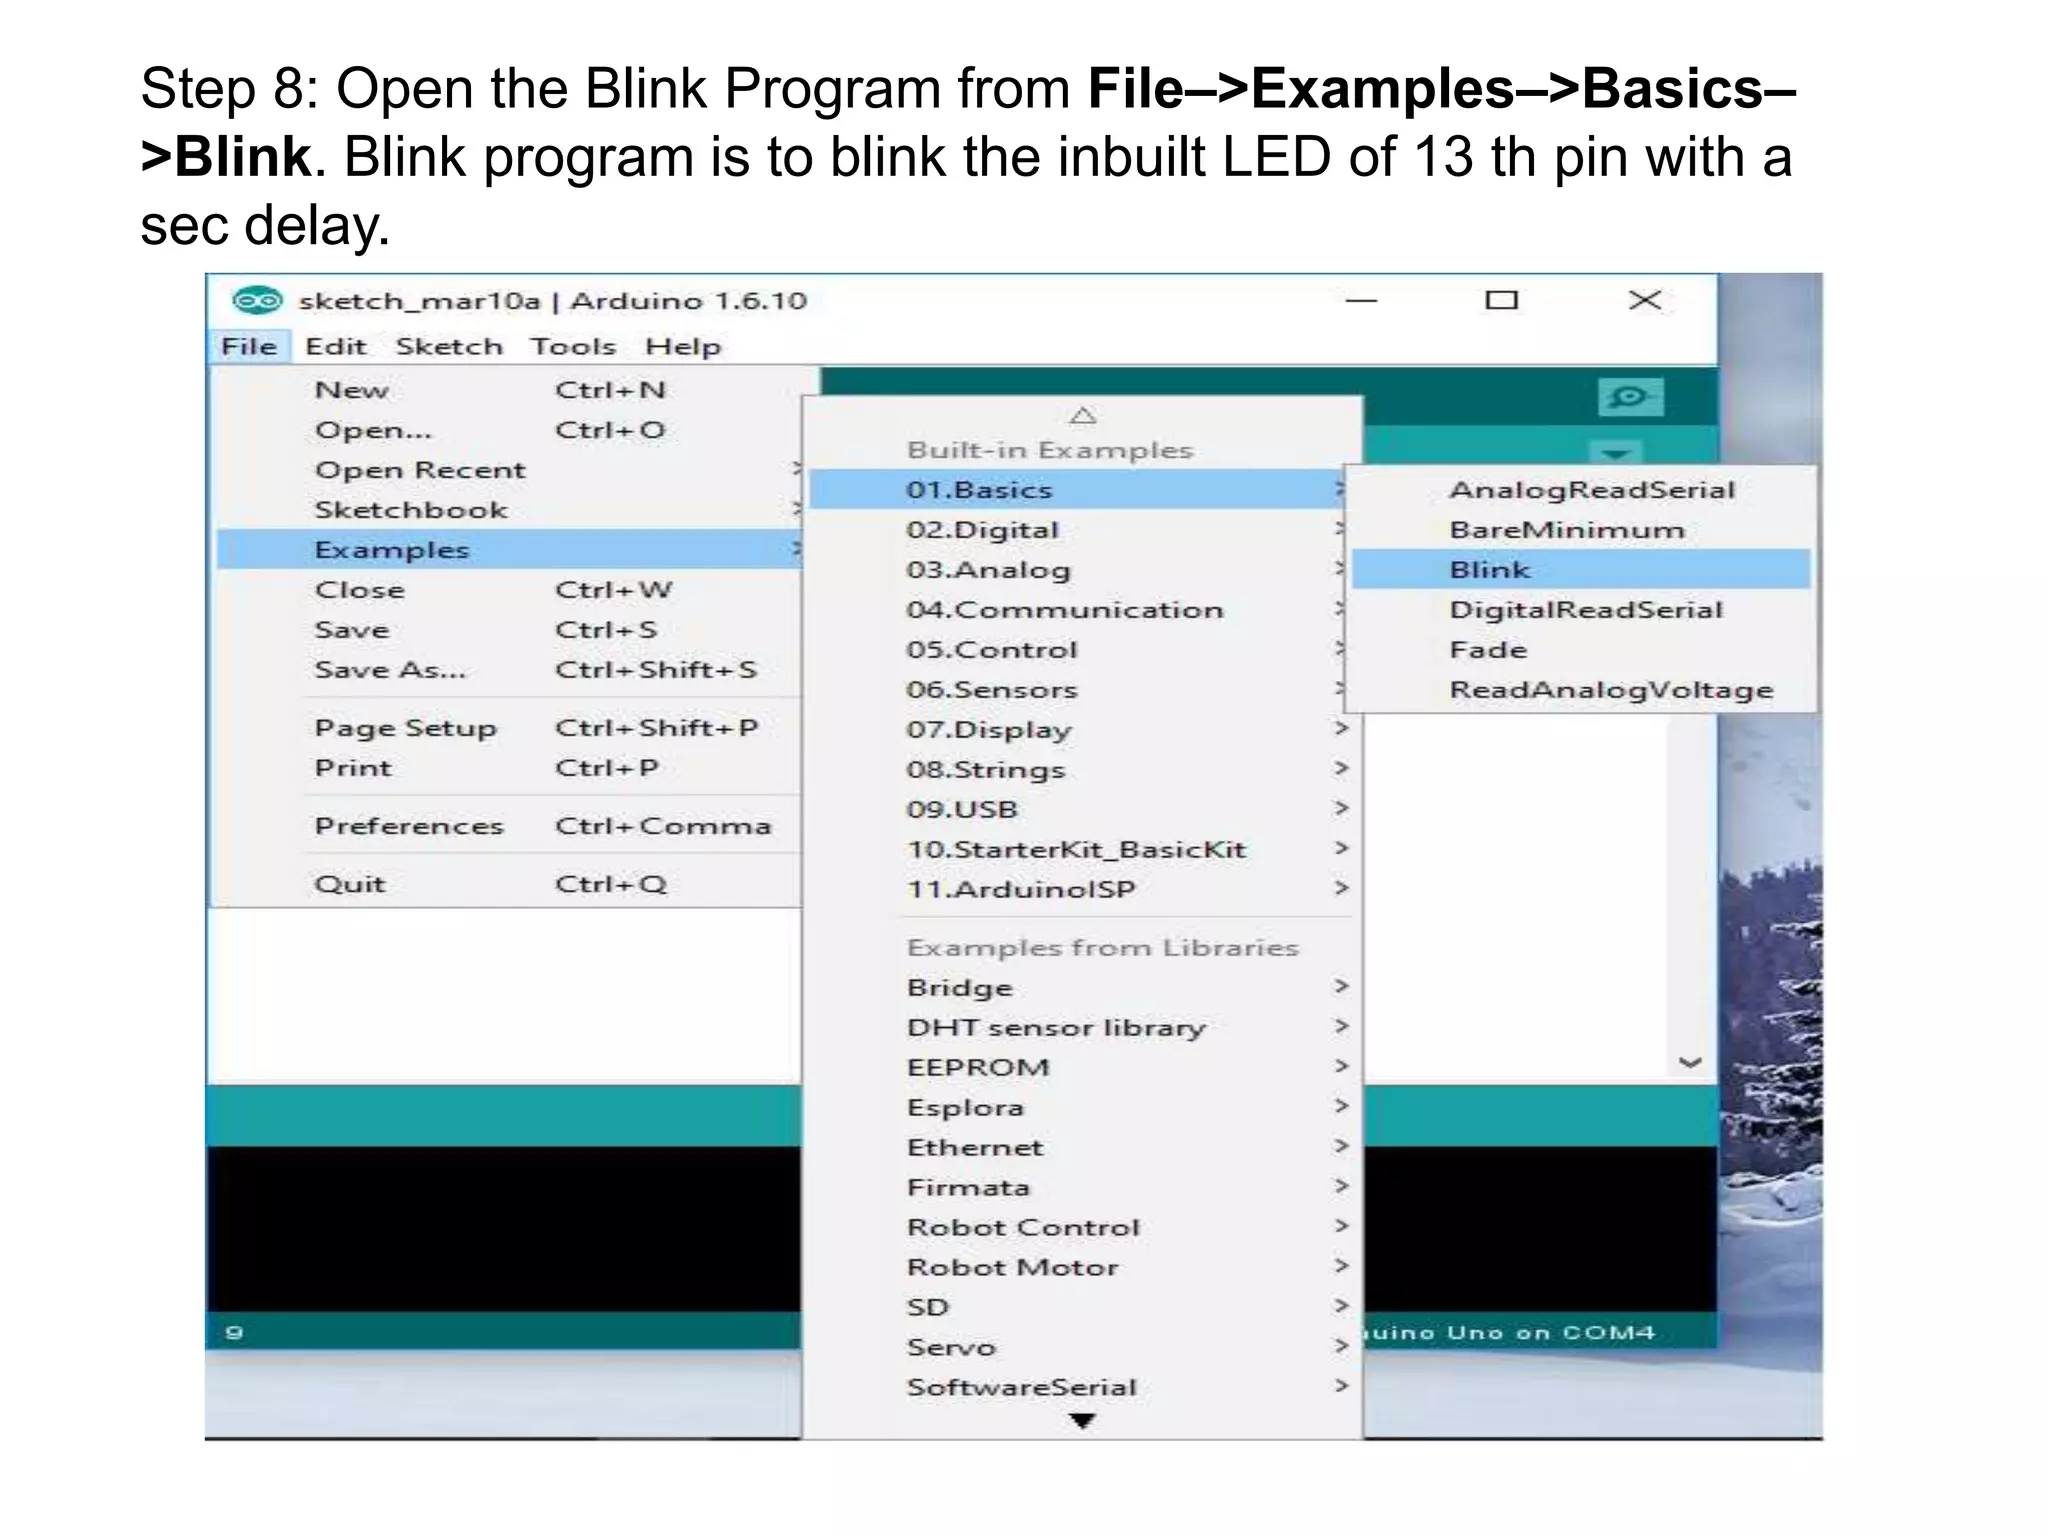
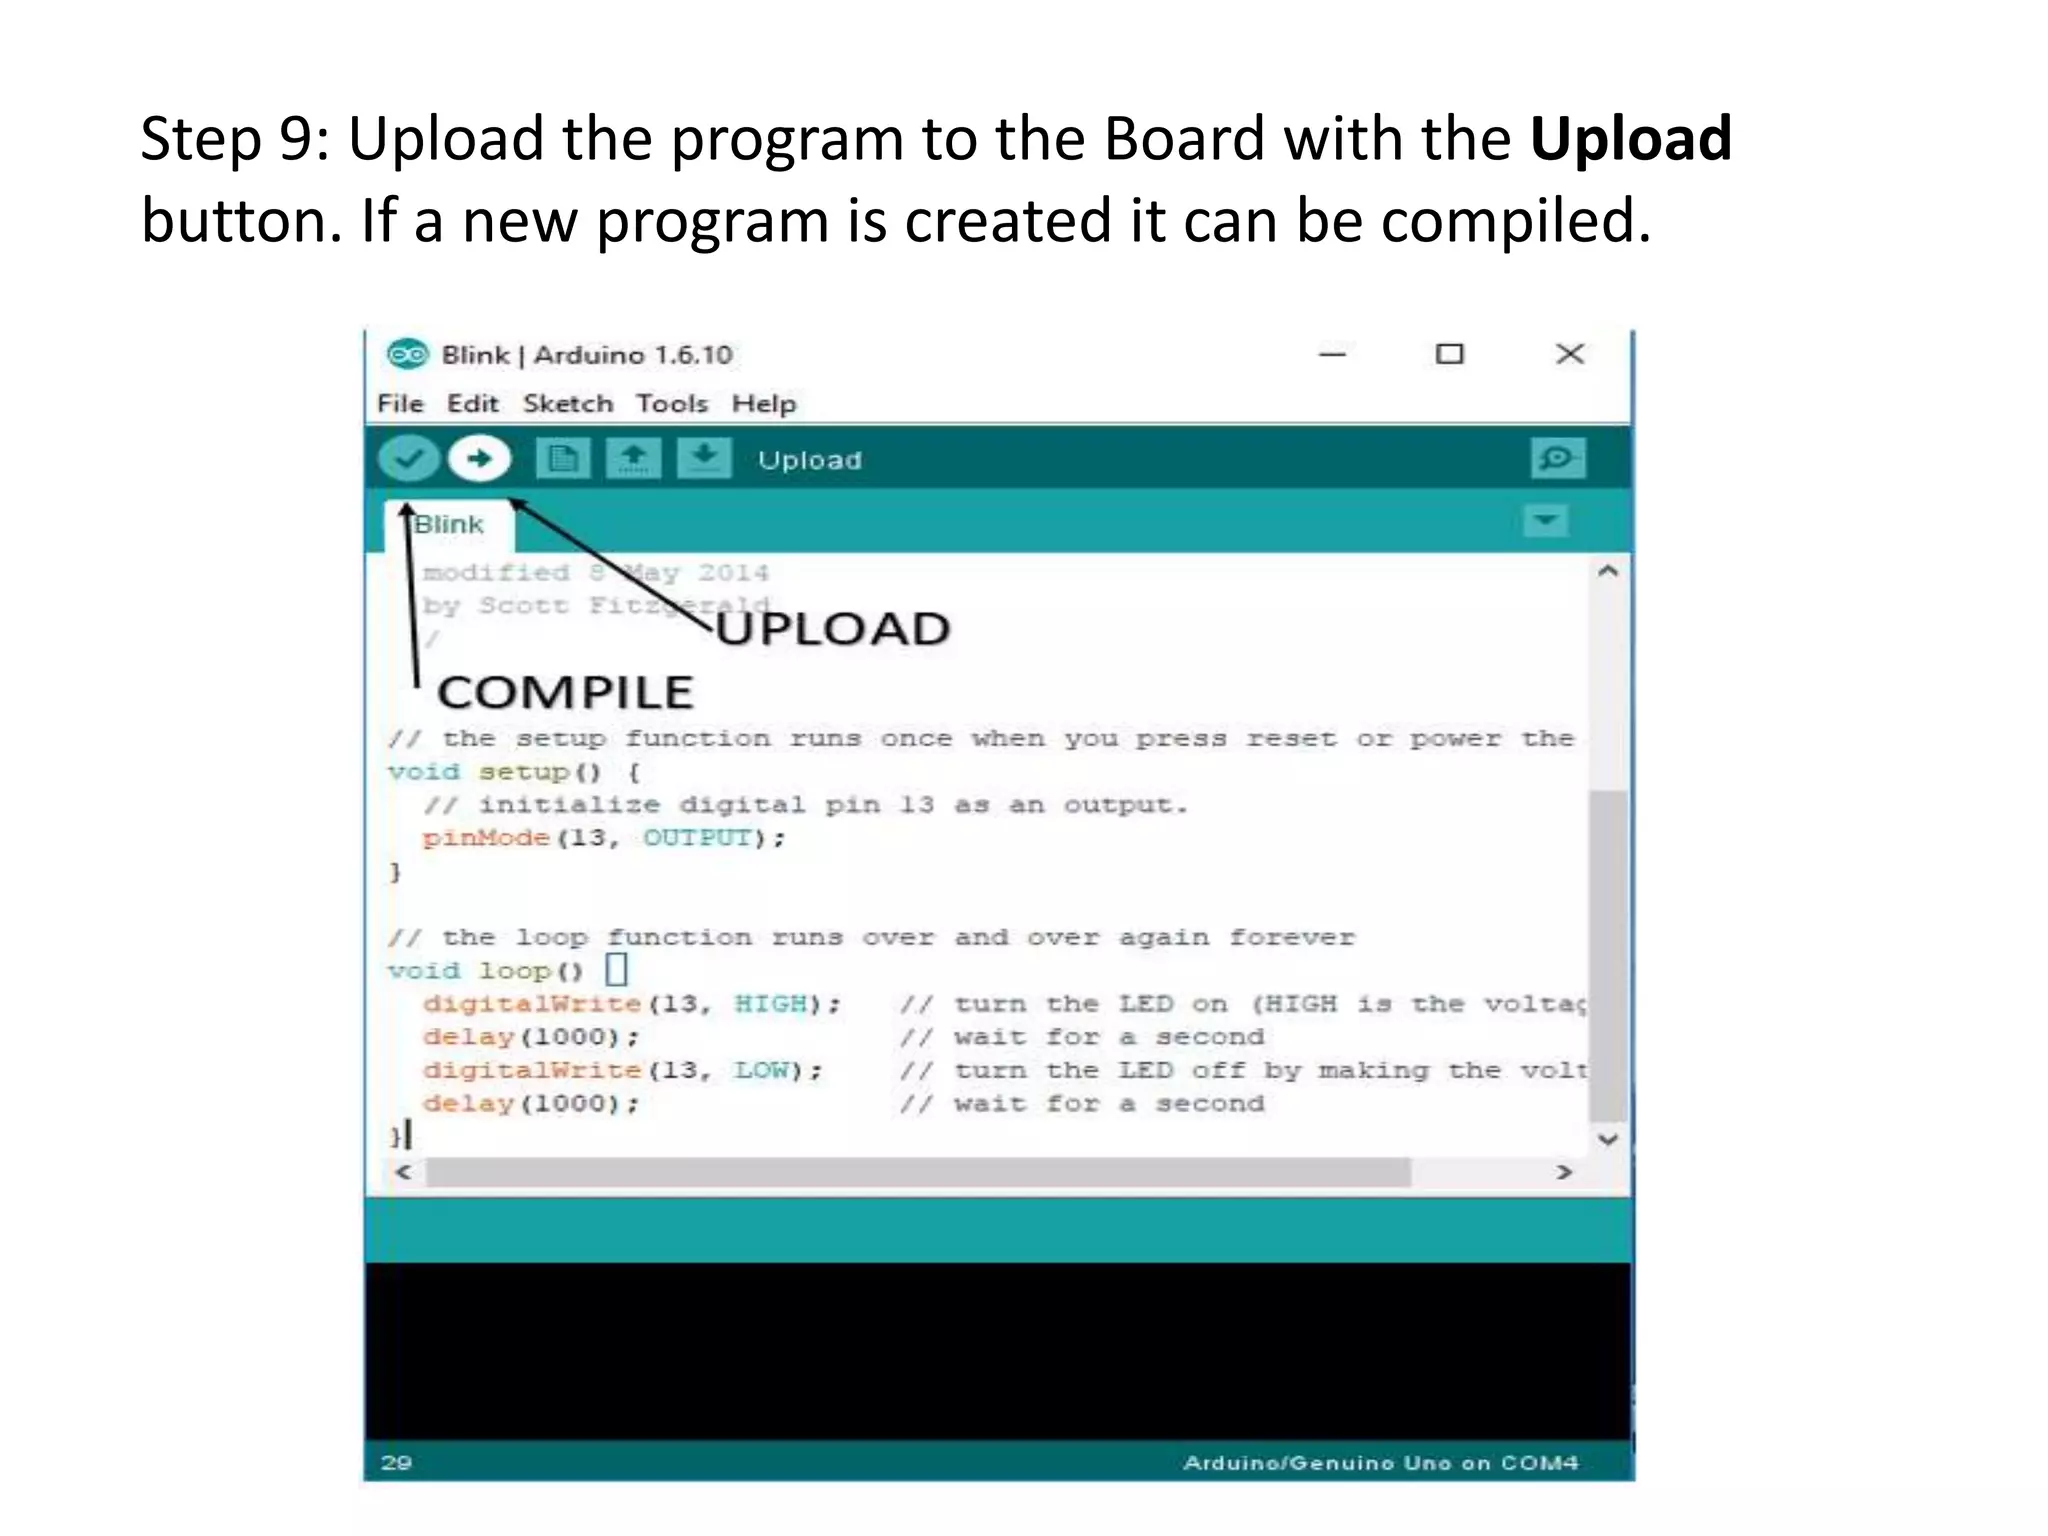
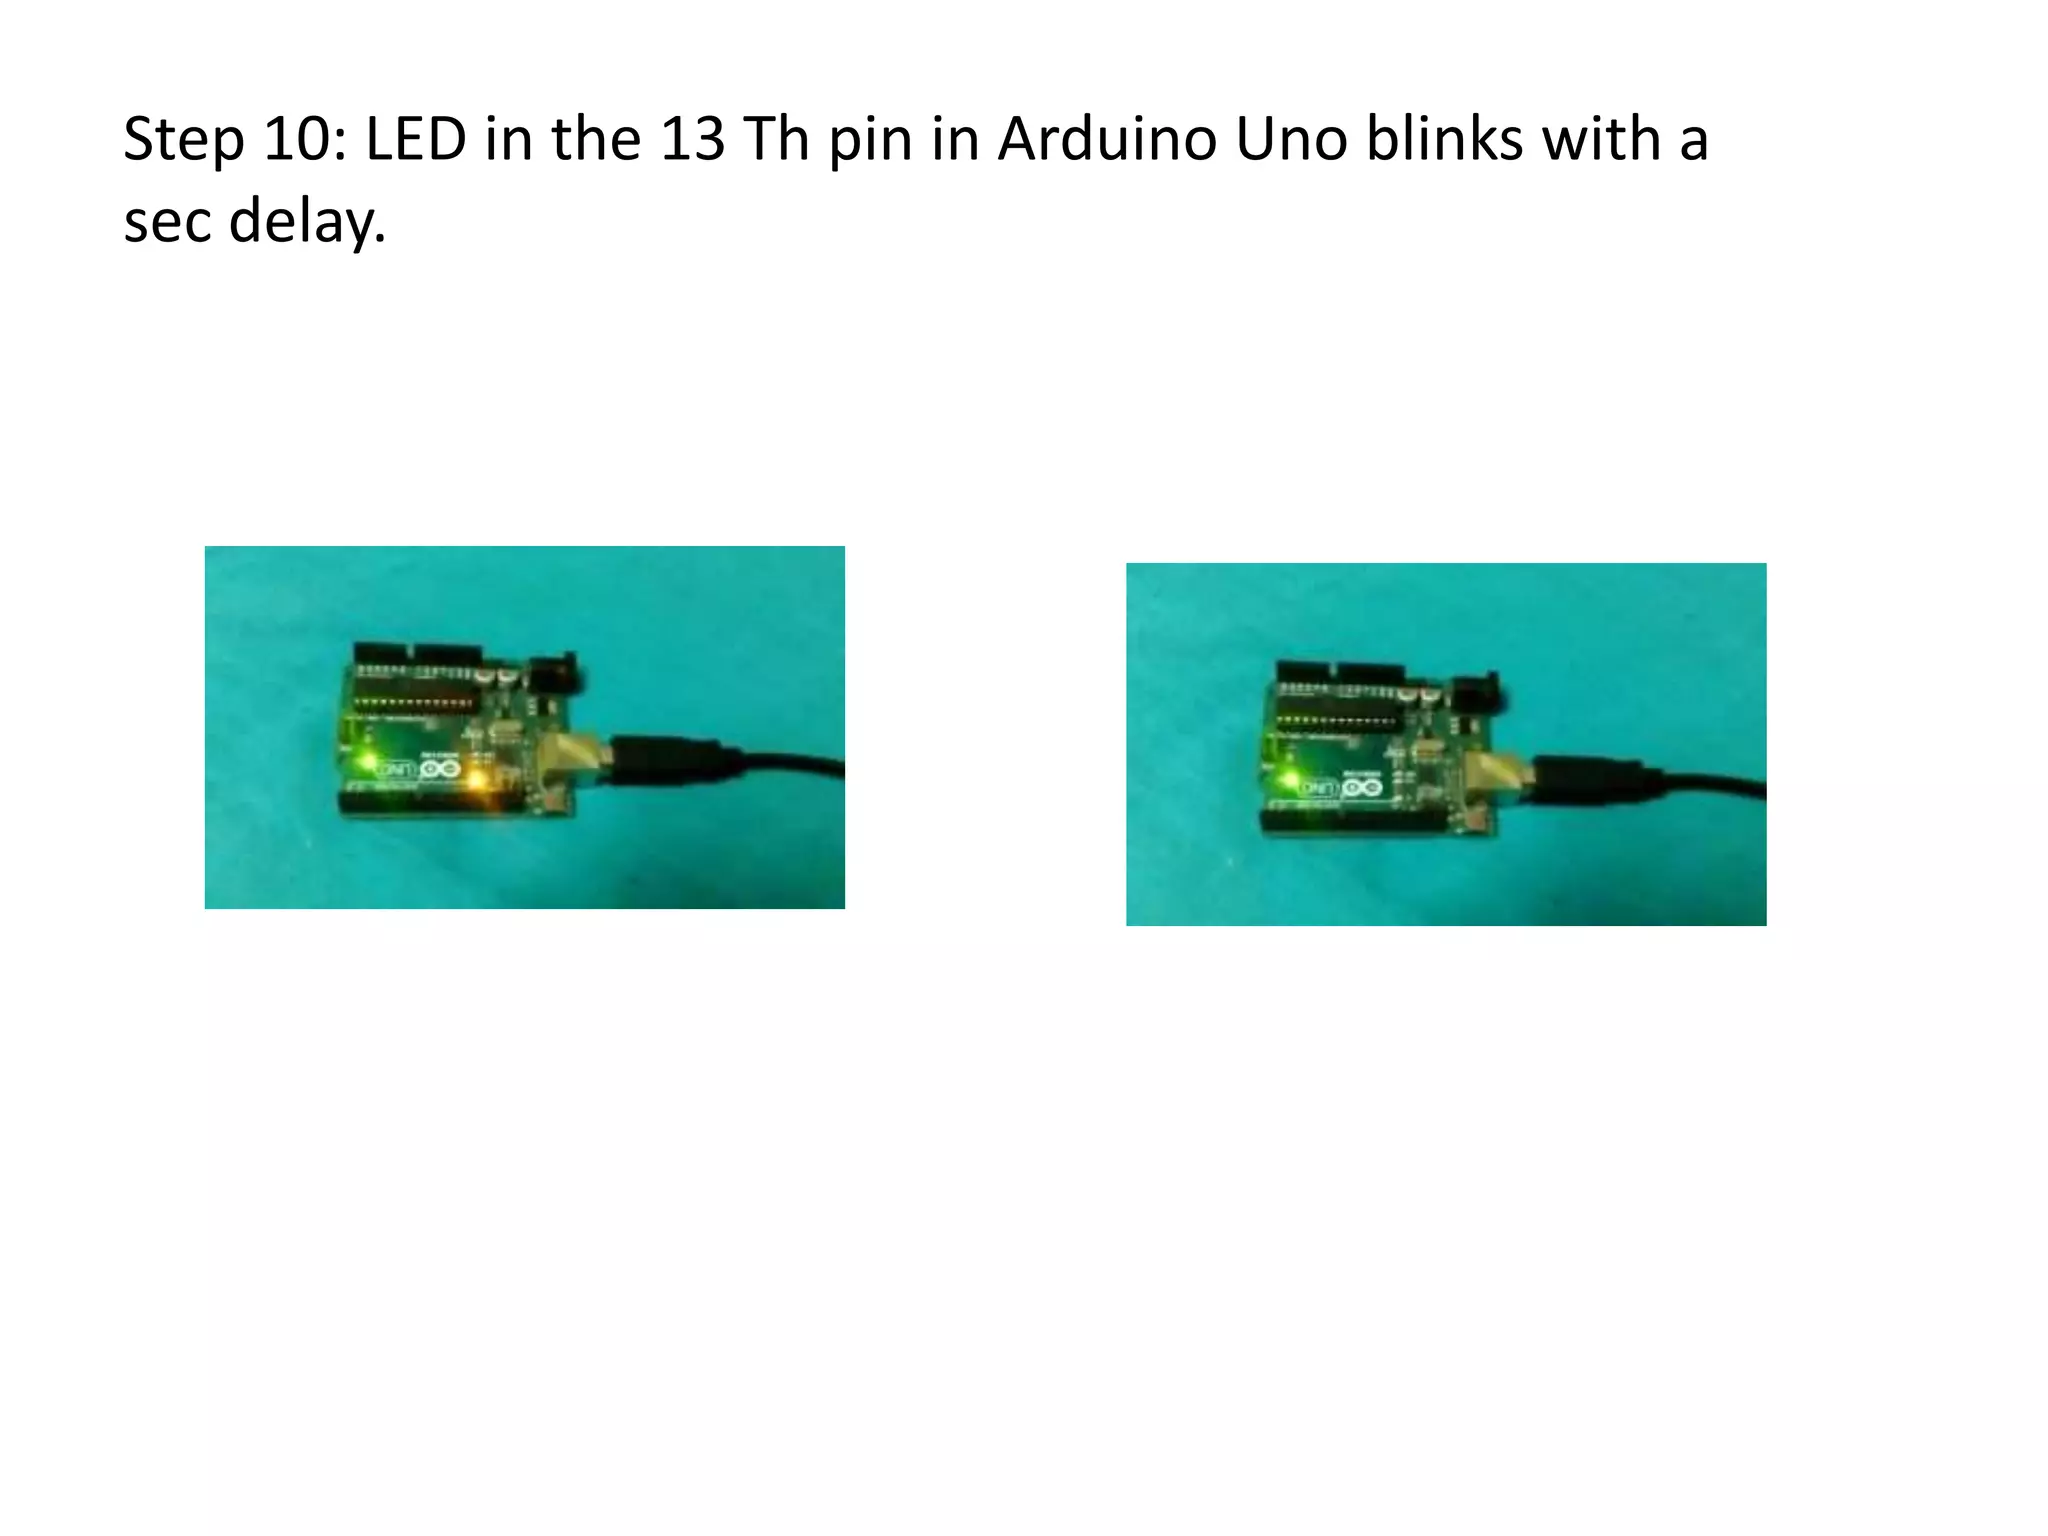
Introduction-to-Arduino
INTRODUCTION TO ARDUINO • Arduino is an open-source computer hardware that designs and manufactures single-board microcontrollers and microcontroller kits.The boards are equipped with sets of digital and analog input/output (I/O) pins.
Operating system None CPU Atmel AVR (8-bit), ARM Cortex-M0+ (32-bit), ARM Cortex-M3 (32-bit), Intel Quark (x86) (32-bit) Memory SRAM Storage Flash, EEPROM
Various types of Arduino’s available
ARDUINO SOFTWARE INSTALLATION: • Step 1: Download the Arduino open source software from https://www.arduino.cc/en/Main/Software • Step 2: Install the software. • Step 3: As the last step of installation it prompts you a dialog box whether to install driver or not. Click Install.
Step 4: After installing open the Arduino software.
Step 5: Statements in Setup() is executed only once. Statements in Loop() is executed infinitely until powered off.
Step 6: Select the Board that is to be programmed.
Step 7: Connect the Arduino board with Laptop via USB and select the port in the Arduino Software.
Step 8: Open the Blink Program from File–>Examples–>Basics– >Blink. Blink program is to blink the inbuilt LED of 13 th pin with a sec delay.
Step 9: Upload the program to the Board with the Upload button. If a new program is created it can be compiled.
Step 10: LED in the 13 Th pin in Arduino Uno blinks with a sec delay.
Thank you….

Introduction to Arduino

  • 1.
  • 2.
    INTRODUCTION TO ARDUINO •Arduino is an open-source computer hardware that designs and manufactures single-board microcontrollers and microcontroller kits.The boards are equipped with sets of digital and analog input/output (I/O) pins.
  • 3.
    Operating system None CPU AtmelAVR (8-bit), ARM Cortex-M0+ (32-bit), ARM Cortex-M3 (32-bit), Intel Quark (x86) (32-bit) Memory SRAM Storage Flash, EEPROM
  • 4.
    Various types ofArduino’s available
  • 6.
    ARDUINO SOFTWARE INSTALLATION: •Step 1: Download the Arduino open source software from https://www.arduino.cc/en/Main/Software • Step 2: Install the software. • Step 3: As the last step of installation it prompts you a dialog box whether to install driver or not. Click Install.
  • 8.
    Step 4: Afterinstalling open the Arduino software.
  • 9.
    Step 5: Statementsin Setup() is executed only once. Statements in Loop() is executed infinitely until powered off.
  • 10.
    Step 6: Selectthe Board that is to be programmed.
  • 11.
    Step 7: Connectthe Arduino board with Laptop via USB and select the port in the Arduino Software.
  • 12.
    Step 8: Openthe Blink Program from File–>Examples–>Basics– >Blink. Blink program is to blink the inbuilt LED of 13 th pin with a sec delay.
  • 13.
    Step 9: Uploadthe program to the Board with the Upload button. If a new program is created it can be compiled.
  • 15.
    Step 10: LEDin the 13 Th pin in Arduino Uno blinks with a sec delay.
  • 16.