Have you ever spent hours creating the perfect ‘how-to’ article, only to see it get lost in Google’s search results? It’s a common frustration when your helpful content doesn’t get the visibility it deserves, especially while competitors land those eye-catching rich snippets.
The fix is often simpler than you think. At WPBeginner, we found that giving Google a clear roadmap to our tutorials with ‘how-to’ schema makes a huge difference in our visibility, helping us win those eye-catching rich results.
In this guide, we’ll show you the exact, beginner-friendly method we use on our own sites to add this powerful feature. You won’t need to touch any complex code to help your articles stand out.

You can navigate through this article using the links below:
- Why Add 'How To' Schema in WordPress?
- Google's 'How To' Schema Guidelines
- How To Add 'How To' Schema in WordPress
- Optional: Create a Reusable' How To' Schema Template
- How to Test Your 'How to' Schema in WordPress
- Frequently Asked Questions About How-To Schema
- Expert Guides on Schema Markup in WordPress
Why Add ‘How To’ Schema in WordPress?
‘How to’ schema markup is a special type of code (called structured data) that you add to your website. It creates a standardized description of your content that search engines like Google can easily understand.
This code isn’t visible to your regular visitors. It works ‘behind the scenes’ to give search engines a detailed summary of your tutorial, including step-by-step instructions, a list of tools and supplies, and how long it takes to complete.
This helps the search engines understand your pages and posts and show them to people who are looking for content just like yours.
Even better, search engines such as Google may use the ‘how to’ schema to create rich snippets and results. For example, Google might show your ‘how to’ steps in an ordered list.
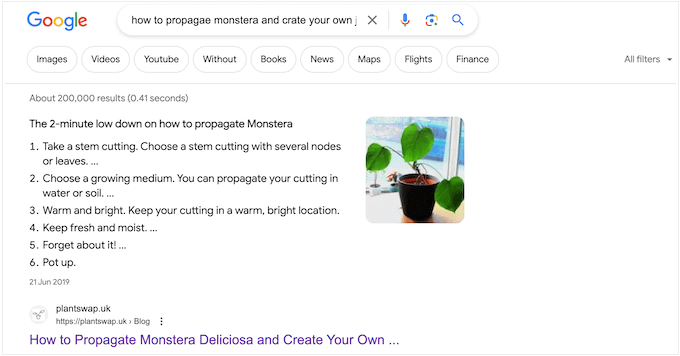
Depending on how your schema is set up, search engines may even display this information in the ‘people also ask’ section.
These boxes appear for many search queries and offer a list of additional questions, each linked to a website for more information.
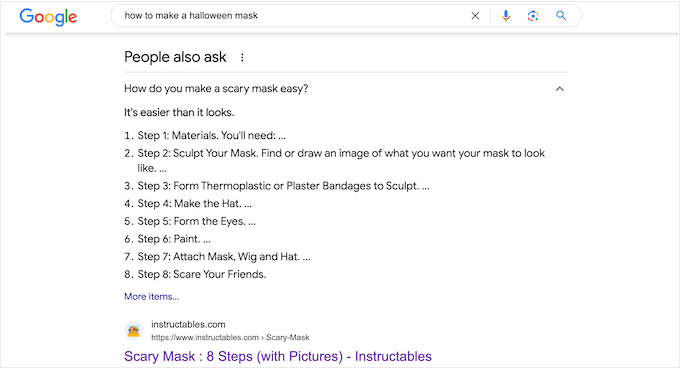
This section appears at the very top of the search results, so they can get you even more clicks and increase your blog traffic.
Some rich results even include useful information, such as a list of required tools or how much money readers need to spend to complete the guide. This can help people quickly decide whether your ‘how to’ guide is right for them, which will improve the user experience.
It’s important to note that adding a ‘how to’ schema in WordPress will not guarantee that your content appears as a rich result. However, it will improve your chances, especially if your website is already SEO-optimized.
Google’s ‘How To’ Schema Guidelines
Before adding a ‘how to’ schema to your pages and posts, it’s important to understand Google’s content guidelines.
Firstly, you can’t use the ‘how to’ schema for advertising purposes or include any content that’s obscene, explicit, or violent. You also shouldn’t add a ‘how to’ schema to any content that promotes dangerous or illegal activities.
You can only use the ‘how to’ schema once per page, and all the content in your schema markup must also be visible to visitors on that page. For example, if you list 4 steps in your schema, those exact same 4 steps must be written out in the body of your article. You can’t hide information in the schema that isn’t available to the user.
Finally, you can’t use the ‘how to’ schema for recipes. For this type of content, you will get much better results by using the SEO-friendly recipe schema.
How To Add ‘How To’ Schema in WordPress
The easiest way to add ‘how to’ schema in WordPress is with All in One SEO (AIOSEO). It’s the best SEO plugin for WordPress, used by over 3 million sites.
AIOSEO allows you to add a growing number of schema types to your pages, posts, custom post types, categories, tags, custom taxonomies, and more. This can help search engines understand your content and increase your chances of getting rich snippets.
For more information, see our complete AIOSEO review.
The first thing you need to do is install and activate AIOSEO. For more details, see our guide on how to install a plugin in WordPress.
Note: There is a free version of AIOSEO that allows you to optimize your site no matter what your budget is. However, you will need the premium version to add the ‘how to’ schema in WordPress.
Upon activation, the plugin will run a setup wizard, so simply follow the onscreen instructions. If you need more detailed instructions, then you can see our guide on how to properly set up All in One SEO for WordPress.

Once you have completed the setup wizard, AIOSEO will take you back to the WordPress dashboard.
Now that All in One SEO is installed and activated, simply open the page, post, custom post type, or any other content where you want to add the ‘how to’ schema.
After that, scroll to the bottom of the WordPress content editor, where you will see a new ‘AIOSEO Settings’ section.
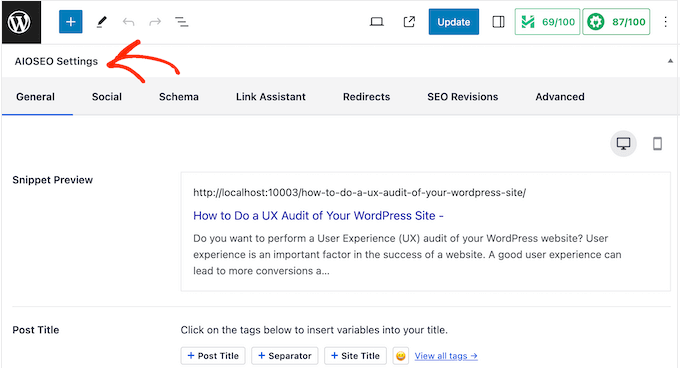
Go ahead and click on the ‘Schema’ tab.
Here, you will see the schema settings are enabled by default.

To add the ‘how to’ schema, just click on the ‘Generate Schema’ button.
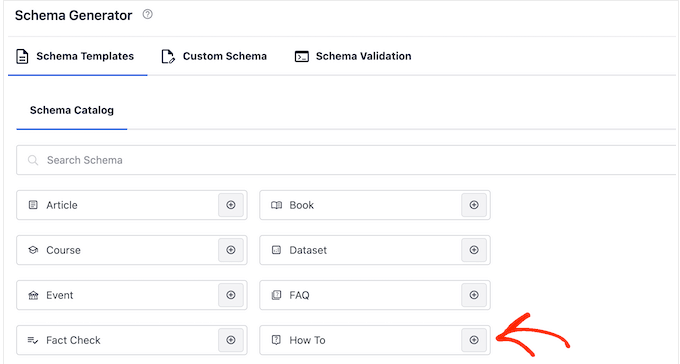
This will open AIOSEO’s Schema Catalog, where you can choose from a wide range of different schema types. For example, you can add FAQ schema in WordPress, add GTIN, ISBN, and MPN schema, and more.
Here, simply find the ‘how to’ option and click on its ‘Add Schema’ button.
This opens a window where you can type in all the information you want to use in the schema.
By default, AIOSEO adds a ‘Post Title’ smart tag to the ‘Title’ field. AIOSEO automatically replaces its smart tags with real values from your post, so you can create unique schema for each article without having to manually type in all the information.
If you want to use a different title, then simply delete the ‘Post Title’ smart tag. You can then type in the information you would like to use instead.

Next, you will need to add a description. Search engines like Google typically show the description below the post title and above the list of steps, so it’s a great way to introduce the guide to potential readers.
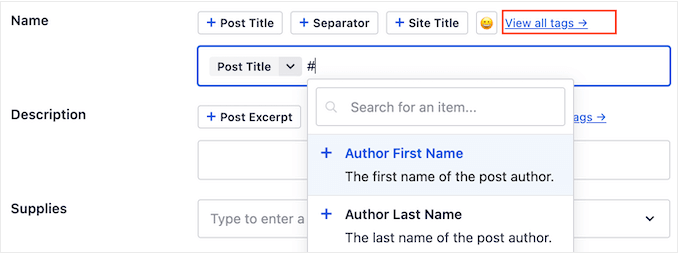
You can either type this information into the ‘Description’ box or click on any smart tag you want to use. To see the full list of smart tags, click the ‘View all tags’ link.
If the reader needs any specialist equipment or resources to complete the guide, then you should type them into the ‘Supplies’ field.
After each item, press the ‘Enter’ key on your keyboard to add it to the schema.
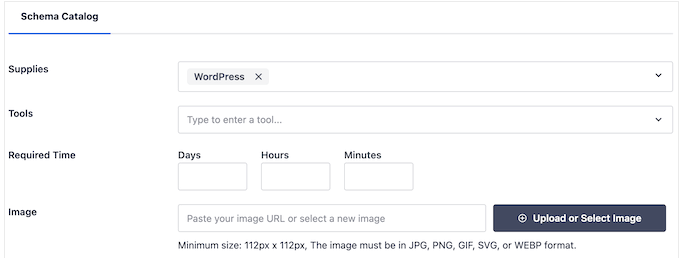
Similarly, if the reader needs any specialist tools, then just type these into the ‘Tools’ section.
Once that is done, you can specify how long it will take readers to complete the ‘how to’ guide. Simply type the correct numbers into the fields marked ‘Days’, ‘Hours’, and ‘Minutes’.

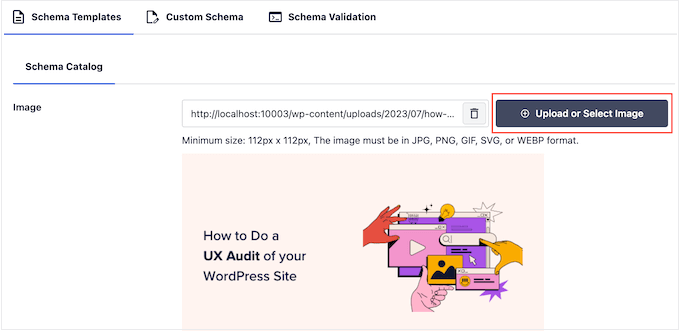
Sometimes, you may want to show the finished result. For example, if you are writing about how to create an email newsletter, then you might show a professionally-designed newsletter. If readers like what they see, then they are more likely to visit your website.
This ‘Final Result’ image represents the finished product of your tutorial. Remember that while this image shows the overall result, the images you add to each individual step later on should be unique to that specific step.
As always, any image used in your schema must also be visible on the page or post.
Simply click on the ‘Upload or select image’ button and then choose an image from the WordPress media library.
Sometimes, readers will need to spend money to complete a ‘how to’ guide. For example, if you are writing a post about how to start a WordPress blog, then readers will need to buy WordPress hosting.
In this case, enter the numerical value in the ‘Price’ field (such as 25.00), and then choose the correct currency from the dropdown menu next to it. You don’t need to add a currency symbol like ‘$’ in the price box itself.

With that done, you are ready to add each step to the ‘how to’ schema.
According to Google’s guidelines, each step must only include the information readers need to complete that step. With that in mind, you shouldn’t include any non-step data, such as an introduction section or a list of related posts.
To start, type in a title for the step and enter the instructions into the ‘Description’ section.
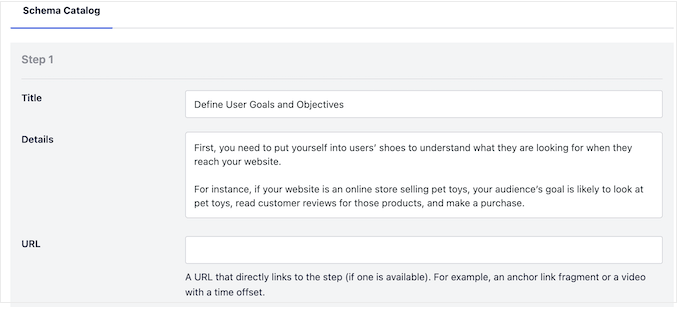
Have you added anchor links in WordPress? For example, you might help readers find their way around the page by creating a table of contents where each step is an anchor link.
If this is the case, then you can add the step’s anchor link to the ‘URL’ field.
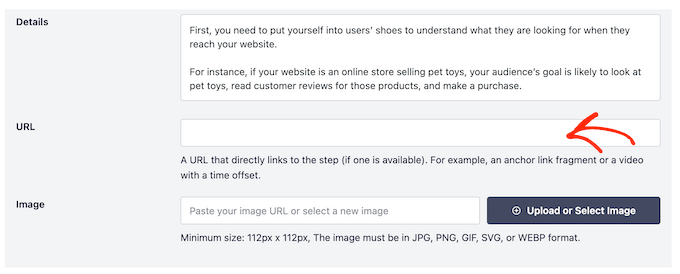
You may also want to add an image representing this step. This image must be unique and visible on the page or post.
According to Google’s guidelines, you should never use images that don’t reflect the step’s content or use the same image for multiple steps.
When you are happy with the way the first step is set up, click the ‘Add Another Step’ button.

This creates a section where you can add a title and description, plus an optional anchor link and image. Simply repeat this process to add all the steps to your ‘how to’ schema.
When you are happy with how the schema is set up, go ahead and click on the ‘Add Schema’ button.
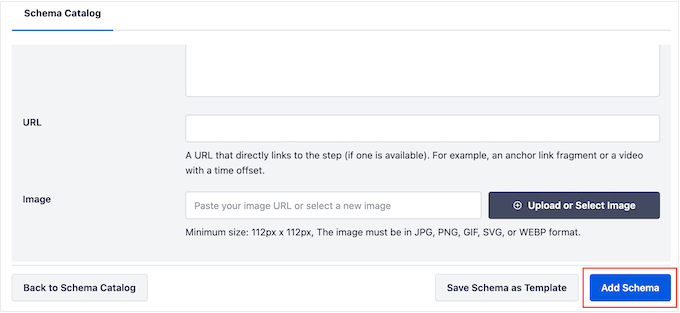
You can now go ahead and publish or update the page to make the schema live on your WordPress website.
If you want to test whether your ‘how to’ schema markup is working correctly, then scroll down to our section on how to test your WordPress ‘how to’ schema.
Optional: Create a Reusable’ How To’ Schema Template
If you publish lots of ‘how to’ guides, then you might create your own schema template. You can then apply this template to any page, post, custom taxonomy, custom post type, or other content with the click of a button.
Schema templates tend to work best when you use smart tags. For example, tags can automatically add the post’s title, excerpt, author, publication date, and other content. This allows you to create a unique schema without having to manually type in all the information.
Sometimes, you may even use the same tools, pricing, currency, or other information on all your posts.
For example, if you run a photography blog, nearly all of your tutorials might require a ‘DSLR Camera’ and a ‘Tripod.’ By adding these to the ‘Tools’ field of your template, AIOSEO will automatically include them every time you create a new ‘how-to’ guide, saving you time.
Even better, you can override these default settings every time you use the template, so you can still customize the template for individual pages.
To create a reusable template, you need to open any page or post and then click on the ‘Generate Schema’ button.

In the popup that appears, click on the button next to ‘How to.’
This takes you to a screen where you can build the template. By default, AIOSEO will use the post’s title as the name.

To change this, simply delete the ‘Post Title’ tag and then click on ‘View all tags.’
You can now choose any tag from the dropdown menu.

You can also use a combination of plain text and tags or multiple tags.
For example, you might use ‘Post Title’ and ‘Post Date.’ AIOSEO will then replace these tags with real values every time you use the template.

When you are happy with how the title is set up, you can add a description.
Often, it makes sense to use the ‘Excerpt’ tag so that AIOSEO will use the WordPress post’s excerpt. However, you can use any smart tags you want or even type plain text into the ‘Description’ field.

With that done, you may want to add some plain text to the other fields. For example, there may be some tools and supplies that you use in all your ‘how to’ guides.
Using WPBeginner as an example, it might make sense to add a domain name or Bluehost WordPress hosting to the ‘Tools’ field since most of our ‘how to’ guides require a domain and web hosting.
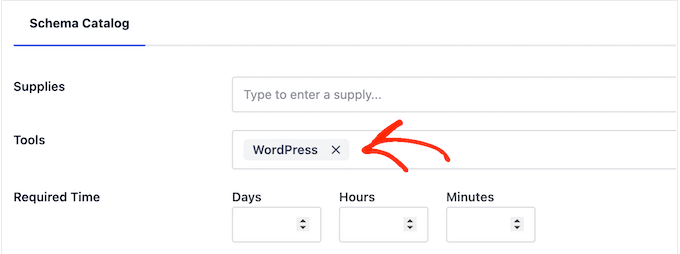
Remember, you can override these settings each time you use the template.
After typing in any extra information you want to use, it’s time to go ahead and create the template. Simply click on the ‘Save Schema as Template’ button.
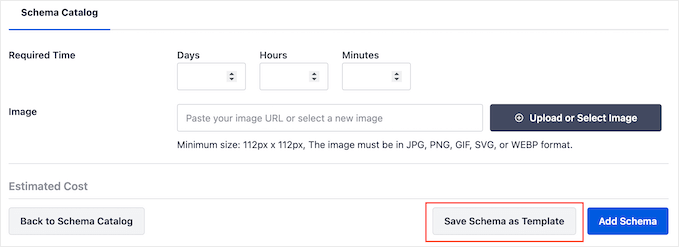
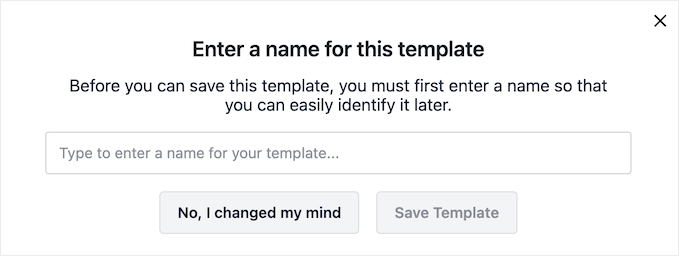
You can now type in a title for the schema template. This is just for your reference, so you can use anything that helps you identify the template in your WordPress dashboard.
With that done, click on the ‘Save Template’ button.
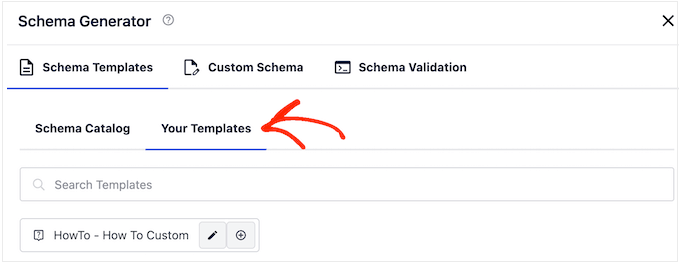
To apply the template to your content, simply click on the ‘Generate Schema’ button to open the schema catalog as normal.
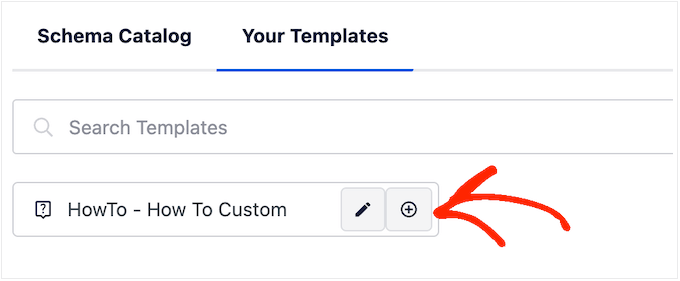
Then, click on the ‘Your Templates’ tab.
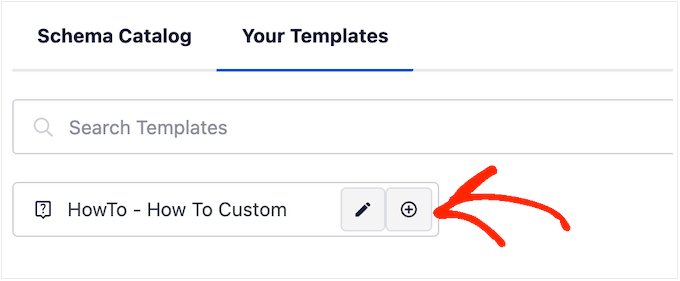
You will now see the template you created earlier.
If you want to apply the template without making any changes, then click on its ‘+’ button.
However, we recommend customizing the template as it typically creates a more SEO-friendly schema. This can improve your WordPress SEO and help you get valuable rich snippets in the search engine results.
To do this, simply click on the ‘pencil’ icon.
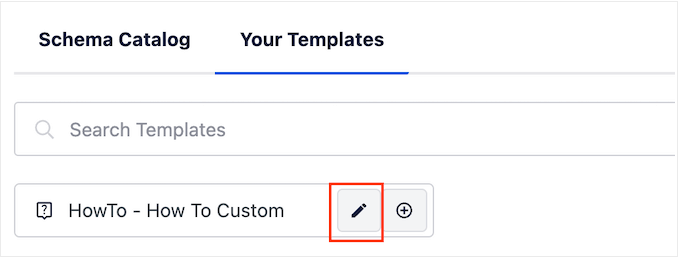
You can now make changes or type in any extra information you want to use for this specific ‘how to’ guide.
With that done, click on ‘Add Schema’.
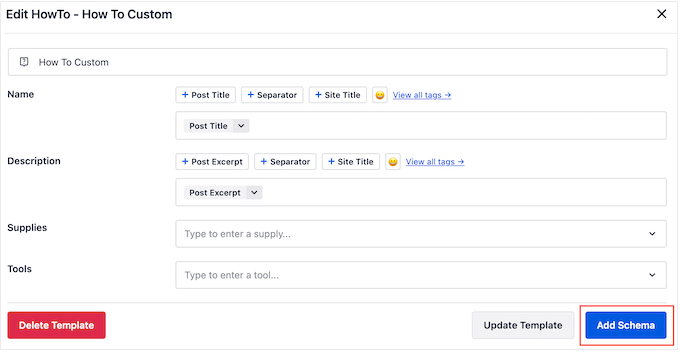
Simply repeat these steps to use the same template anywhere on your online store, website, or WordPress blog.
How to Test Your ‘How to’ Schema in WordPress
Since the ‘how to’ schema doesn’t appear on your website, you will need to test it using a free Google tool.
To check that the schema is formatted correctly, head over to Google’s Rich Results Test page. Here, simply type in the URL where you added the ‘how to’ schema and then click on ‘Test URL.’
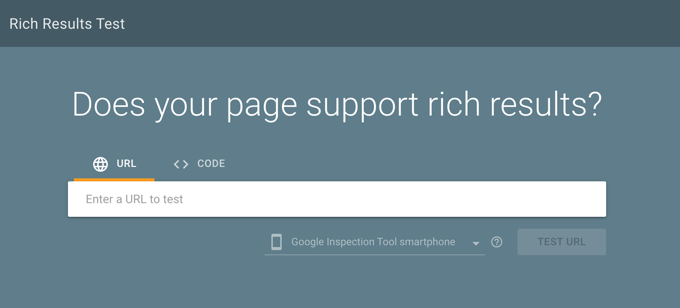
Google will now analyze your page for all kinds of schema markup. With that in mind, you may see multiple results if the page uses other kinds of schema, such as local business schema and FAQ schema.
Once the test is complete, click on the section marked ‘How to.’
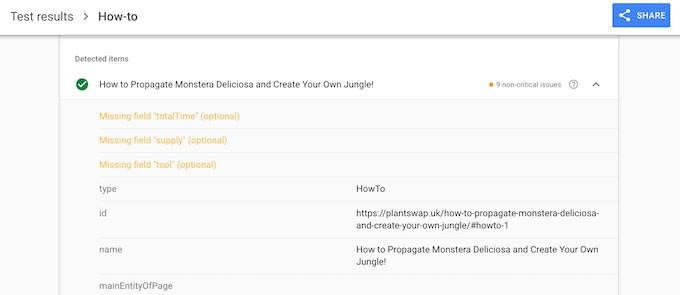
You should now see all the information you added to this page or post. If this data is correct, then your ‘how to’ schema is working perfectly.
If the information is wrong or it’s formatted incorrectly, then you will need to open that page or post in the WordPress content editor. Then, scroll to the AIOSEO Settings and select the ‘Schema’ tab.
Here, find the ‘how to’ schema you added earlier and click on its pencil icon.

You can then edit the schema by following the same process described above.
When you are happy with the changes you have made, just click on ‘Update Schema.’
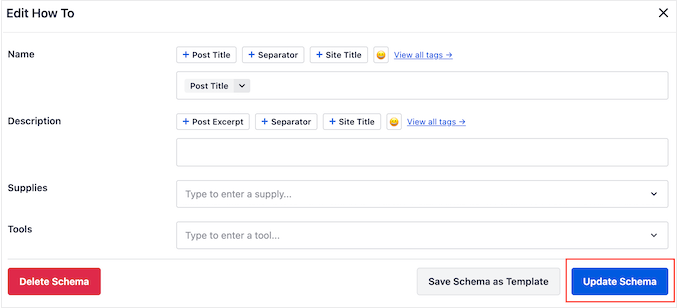
You can now re-test the URL using Google’s Rich Results Test page.
If you are still seeing the wrong information, then try clearing your WordPress cache because caching plugins may show an outdated version of your content to Google.
Frequently Asked Questions About How-To Schema
We often get questions about the specifics of adding how-to schema in WordPress. Below are answers to some of the most common ones to help you get started.
1. What is the main benefit of adding ‘how-to’ schema?
The primary benefit is making your content eligible for rich results in Google search. This can make your listing more eye-catching with step-by-step instructions, images, and time estimates, which often leads to a higher click-through rate.
2. Will adding ‘how-to’ schema guarantee I get a rich snippet?
No, it does not guarantee a rich snippet. Adding structured data like ‘how-to’ schema simply makes your content eligible. Google’s algorithm ultimately decides whether to display a rich result based on the search query, content quality, and other SEO factors.
3. Can I use ‘how-to’ schema for recipes?
No, you should not use ‘how-to’ schema for recipes. Google has a specific ‘Recipe’ schema type that includes fields for ingredients, cooking time, and nutrition information. Using the correct schema is important for getting the best results.
4. Do I need a plugin like All in One SEO to add ‘how-to’ schema?
While plugins like AIOSEO make the process very easy and error-free, you can add schema manually by writing the JSON-LD code yourself. However, this requires technical knowledge and can easily lead to errors that prevent Google from reading your markup correctly.
Expert Guides on Schema Markup in WordPress
We hope this article helped you learn how to add ‘how to’ schema in WordPress. You may also want to see some guides on adding other types of schema markup:
- How to Add Schema Markup in WordPress and WooCommerce
- How to Add FAQ Schema in WordPress
- How to Add Event Schema in WordPress (Step by Step)
- How to Add Video Schema Markup in WordPress
- How to Add SEO-Friendly Recipe Schema in WordPress (Easy Way)
- How to Add Multiple Locations Schema for Local Business in WordPress
- Best Schema Markup Plugins for WordPress
If you liked this article, then please subscribe to our YouTube Channel for WordPress video tutorials. You can also find us on Twitter and Facebook.


Jiří Vaněk
Hi, could you please explain to me what the actual difference is between this and a meta description? I’m still a bit confused about this. So, the meta description is below the article headline in the SERP, and this can appear in searches as a part of my article text? Am I understanding it correctly?
WPBeginner Support
In simpler terms, the meta description is text content that is shared to search engines to include while the schema tells search engines how to display/format the information in their results.
Admin
Jiří Vaněk
Thanks for the reply, I finally understood the meaning of markup schemes thanks to using AIO SEO. I started adding markup schemes back into the articles and was really pleasantly surprised when some parts got into advanced search and it started to improve my rankings as well. From the point of view of SEO, I consider markup schemes to be a very useful thing to make yourself more visible and thus help you get into the extended search results. So now I understand it too.
Chritt Lequia
I thought they just removed How To schema from all search results? mobile and desktop?
WPBeginner Support
They recently removed the schema from search results but that does not mean it does not help Google understand your content itself for ranking if you write how-to articles
Admin
Ralph
Hmmm I still get schema form time to time, very rarely but still. Could this be testing and they didn’t remove it at all?
WPBeginner Support
It could be a split test or a browser addon