Have you ever lost an important file that someone submitted through your WordPress site? Maybe it got buried in your email inbox or accidentally deleted from your downloads folder.
It’s frustrating. Especially when those files are job applications, client documents, or contest entries that you can’t afford to misplace.
Luckily, you can connect your WordPress forms to Google Drive so that every file submission is saved automatically in the cloud. This way, you can access files anywhere, share them with your team, and never worry about losing them again.
In this guide, I’ll show you step by step how to integrate WPForms with Google Drive. By the end, you’ll have a reliable system that automatically uploads files from a WordPress form straight to Google Drive. 🗂️

Why Upload Files From Your WordPress Form to Google Drive?
Uploading files from your WordPress forms directly to Google Drive helps you save website space, share files more easily, and keep everything backed up safely.
Normally, WordPress form plugins store uploaded files on your site. This works fine at first, but it can quickly become an issue if you need to share files with people outside your site. Or if large uploads start using too much of your hosting space.
Google Drive makes this process easier. It stores files in the cloud, allowing you to open them from any device and share them with your team with just a few clicks.
Here are some common scenarios where sending form uploads straight to Google Drive can help:
- Job applications – Collect resumes and have them instantly stored in a shared Drive folder for your hiring team.
- Writing or photo contests – Accept user submissions without filling up your website storage.
- Client projects – Gather documents, design files, or briefs directly from clients and keep them organized in one place.
- School or community forms – Collect assignments, permission slips, or registrations and make them easy to share with staff or volunteers.
This doesn’t just save space — it also adds an extra layer of security. So, even if your site ever goes down, your files will still be safe and accessible in Google Drive.
With that in mind, I’ll show you how to easily send WordPress form uploads to Google Drive. Here’s a quick overview of all the steps I’ll cover in this guide:
- Step 1: Install and Activate WPForms Pro
- Step 2: Connect WPForms to Google Drive
- Step 3: Create a File Upload Form
- Step 4: Set Up Google Drive Connection
- Step 5: Publish Your Google Drive Upload Form
- Bonus Tip: Sync Your Form Entries with Google Calendar
- FAQs About Uploading Files from a WordPress Form to Google Drive
- Further Reading to Optimize Your WordPress Forms
Ready? Let’s get started!
Step 1: Install and Activate WPForms Pro
In this guide, I’ll use WPForms, which is the best contact form plugin for WordPress.
What makes it especially helpful here is its Google Drive addon. It connects your forms to Google Drive without the need for custom code, APIs, or third-party services, so everything works seamlessly inside WordPress.
We use it on our own website to run our contact form and annual reader survey. To learn more about it, see our detailed WPForms review.
So, let’s get WPForms up and running.
First, you need to sign up for a WPForms account by going to the WPForms website and clicking on the ‘Get WPForms Now’ button.

📝 Note: You’ll need the WPForms Pro version or higher for the Google Drive integration. If you just want to test things out first, there’s also a free version of WPForms you can try.
Upon registration, you’ll receive a license key in your WPForms account dashboard. Be sure to copy it, as you’ll need it in a moment.
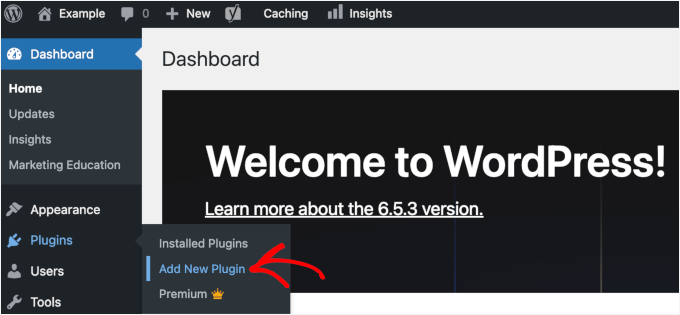
Next, you can go ahead and install the WPForms plugin. From your WordPress dashboard, go to Plugins » Add New Plugin.
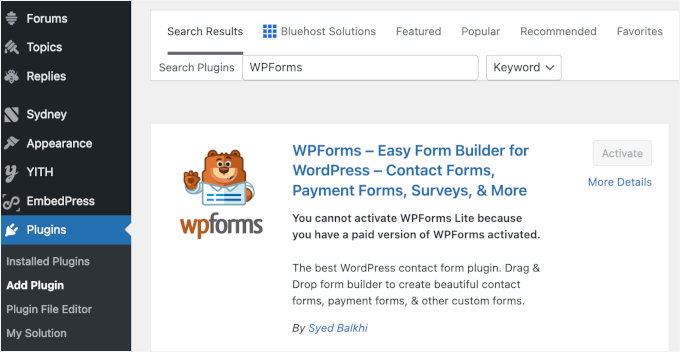
On the next screen, you can use the search bar to quickly find the WPForms plugin.
Click ‘Install Now’ and then ‘Activate’ when it appears.
If you need help, you can check out our guide on how to install a WordPress plugin.
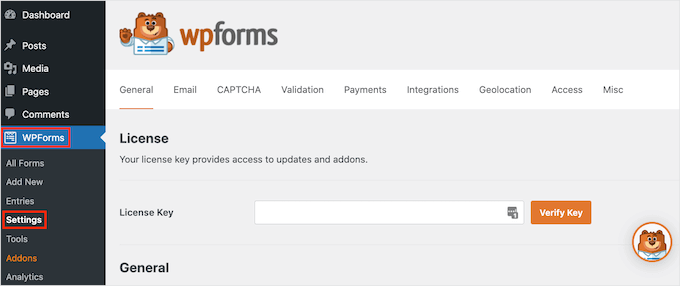
Once the plugin is active, you need to add your license key to unlock the Pro features. Simply go to WPForms » Settings, paste your license key into the field, and click ‘Verify Key.’
Step 2: Connect WPForms to Google Drive
Now let’s link WPForms with your Google account so that uploads will end up in the right place.
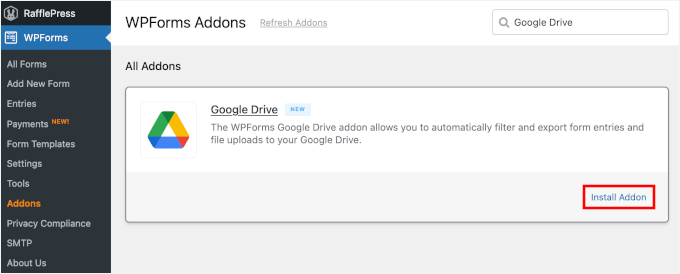
To do this, you need to navigate to WPForms » Addons and find the Google Drive addon. Then, click the button to install and activate it.
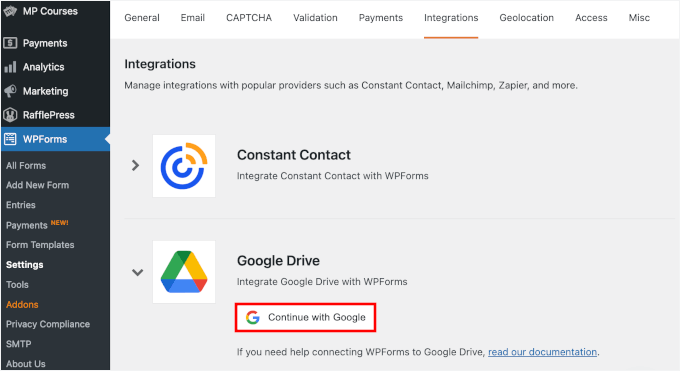
Then, jump over to WPForms » Settings » Integrations.
Here, click on Google Drive and click the ‘Continue with Google’ button to start the integration process.
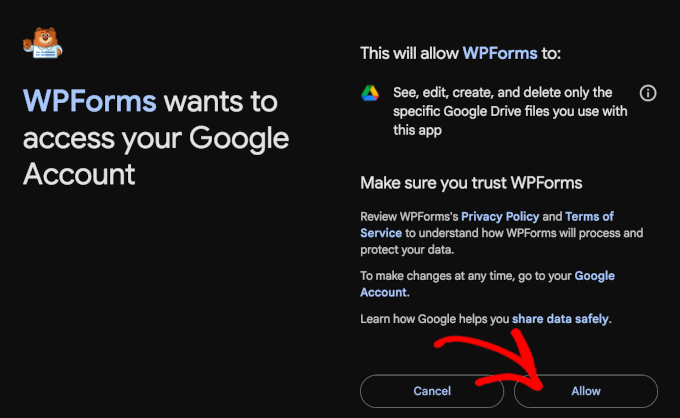
On the next screen, simply sign in and give WPForms permission to save files in your Drive.
Don’t worry — it only needs access to store uploads.
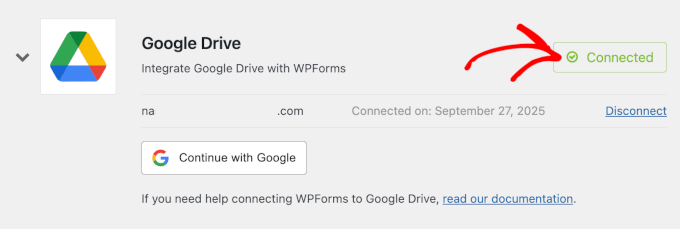
With that done, WPForms will take you back to the ‘Integrations’ page.
When you see the little ‘Connected’ badge, you’ll know it worked.
Step 3: Create a File Upload Form
With the connection in place, it’s time to create the form itself.
To start, let’s go to WPForms » Add New.
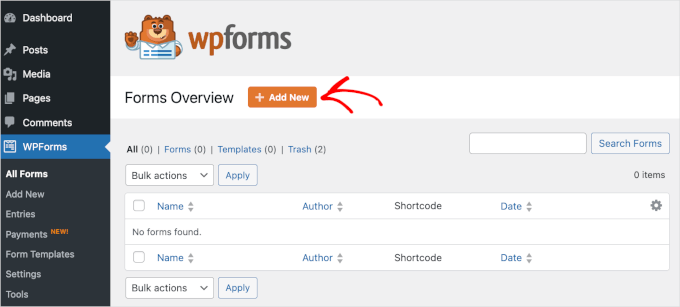
This will take you to the ‘Setup’ page inside the WPForms builder.
The first thing you’ll want to do here is give your form a name. This is for your reference, but I recommend using something clear and descriptive, such as “Halloween Photo Contest Entry,” instead of just “File Upload Form.”
As you create more WordPress forms, specific names will make it much easier to manage everything later on.

Next, you’ll decide how you want to create your form.
WPForms gives you three options: start from scratch, let AI build one for you, or customize a pre-made template.
If you’d like to try the AI-powered builder, just type a quick prompt describing what you need. WPForms AI will generate the form for you instantly.
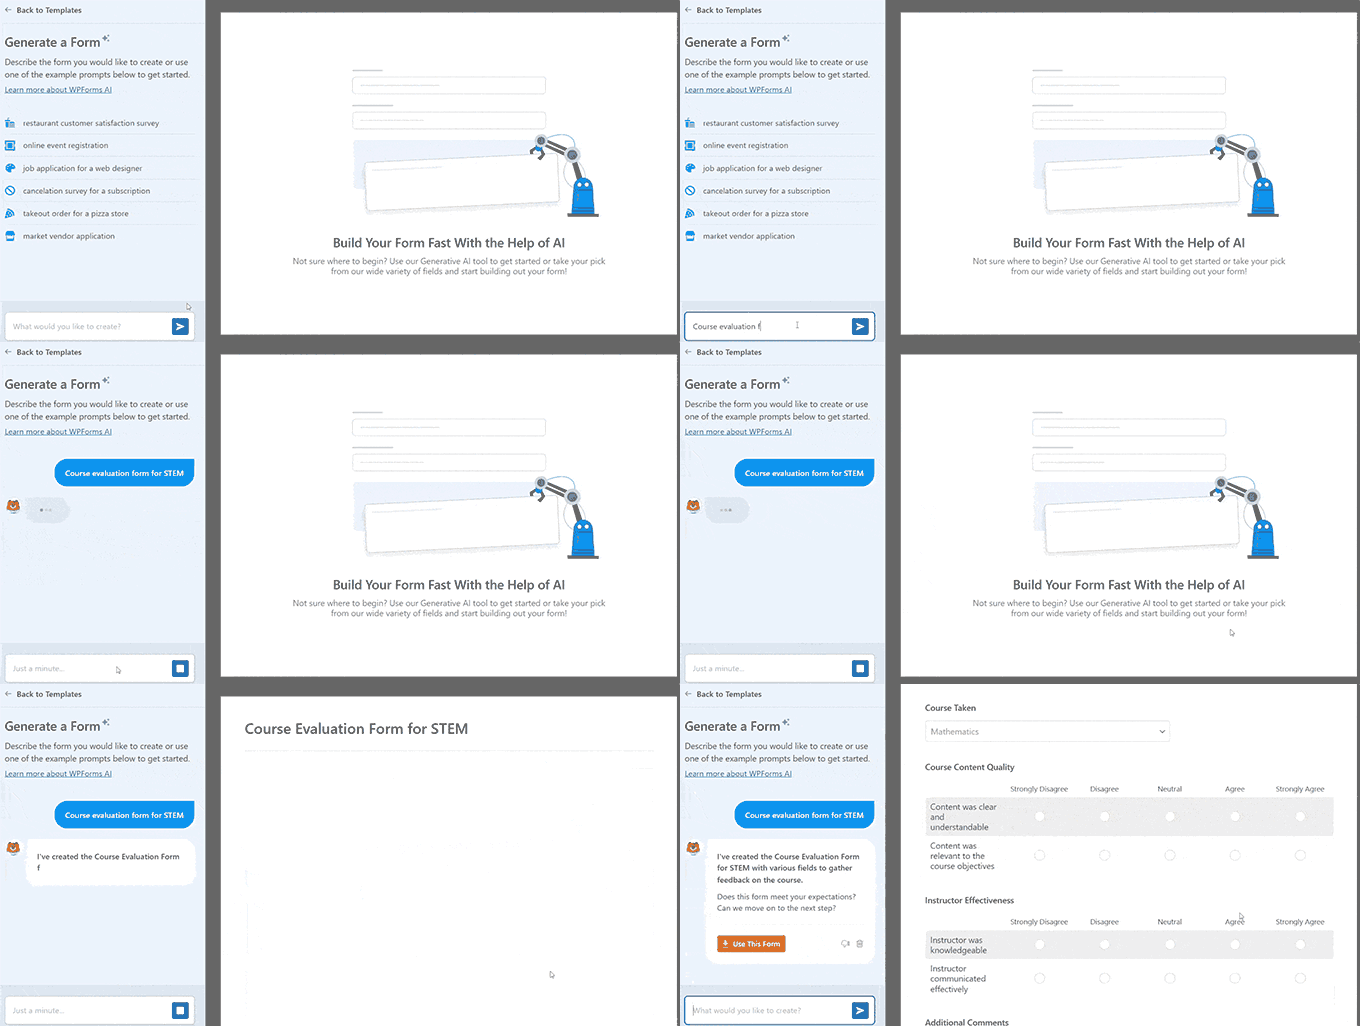
For this guide, I’ll walk you through the step-by-step process using the File Upload Form template to collect Halloween contest photos. It already includes a file upload field, but you can add or remove fields as needed.
Plus, WPForms offers more than 2,000 templates, and you can easily find one that has file upload functionality. To quickly find the template you want, you can use the search bar to narrow down your options.
When you spot the template you’d like to use, hover over it and click ‘Use Template.’

On the next screen, you’ll see the WPForms builder in action.
Customization options are on the left, while the live preview of your form is on the right.
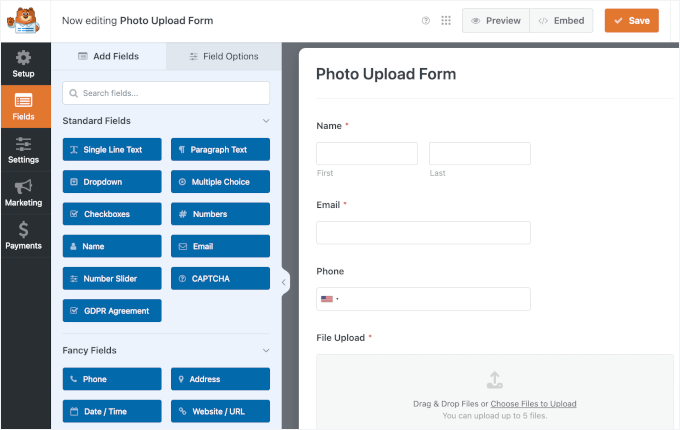
From here, let’s first click on the ‘File Upload’ field to customize it.
To prevent messy file names like “image(1).jpg” or “photo.jpeg,” you can add a simple naming guideline in ‘Description.’
For example, you could write: “Please name your file in this format: First-Last-PhotoName.jpg.”
This note will then appear below the File Upload field.
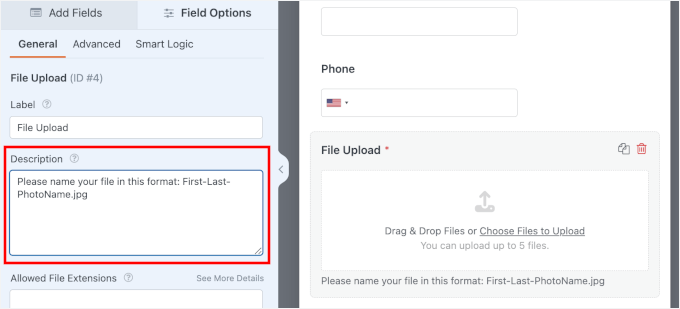
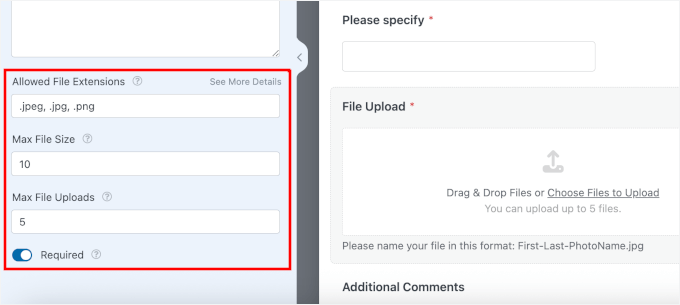
Under Description, you’ll also find more customization options for the file upload field:
- Restrict file types – Allow only certain formats, like .jpg or .png for images. Just type the extensions separated by commas.
- Set the maximum file size – Prevent users from uploading files that are too large.
- Limit the number of files – Control how many uploads each user can submit.
For example, for this contest form, I allowed .jpeg, .jpg, and .png files up to 10 MB each, with a maximum of 5 uploads per user.
At this point, your form is basically ready to go. But if you want to make adjustments, you can customize it further.
To add a new field, simply drag one from the left-hand panel and drop it into the form preview. For example, I’m going to add a multiple-choice question to ask users how they found out about the contest.
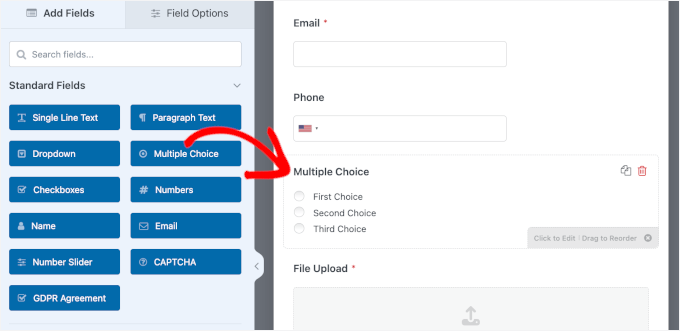
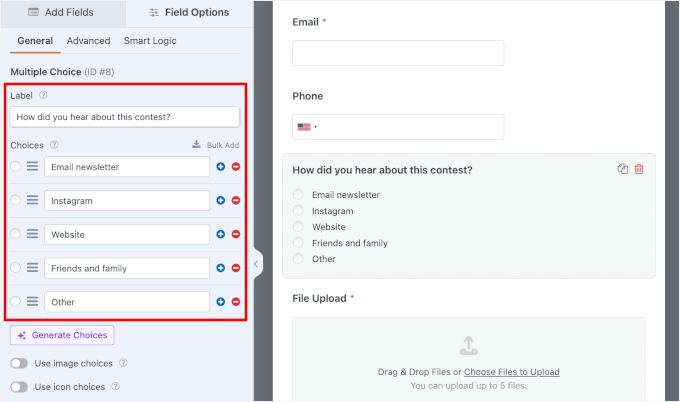
In the customization panel, you can adjust the field like this:
- Label – Changing the question to something like “How did you hear about this contest?”
- Choices – Listing different marketing channels for your photo contest. I recommend including an ‘Other’ choice so participants can type their own answer if needed.
- Required – Toggling this on to make sure everyone fills out the field before submitting the form.
🧑💻 Pro Tip: For fields like multiple choices, dropdowns, and checklists, you can use AI Choices to generate them with a simple prompt.
If you added the ‘Other’ option as suggested, you’ll want to give users a way to type in their answer.
This is where conditional logic comes in. This smart feature lets you show extra fields only when they’re needed.
To set this up, you can add a ‘Single Line Text’ field, label it “Please specify,” and make it required. Then, enable conditional logic so this field only appears when someone selects ‘Other.’

Then, let’s switch to the ‘Smart Logic’ tab and turn on ‘Enable Conditional Logic.’
Here, you can set up the condition to ‘Show’ this field if ‘How did you hear about this contest?’ ‘Is’ ‘Other.’

If you don’t need a field, removing it is just as easy.
Click the field in the preview, then hit the little trash icon to delete it.
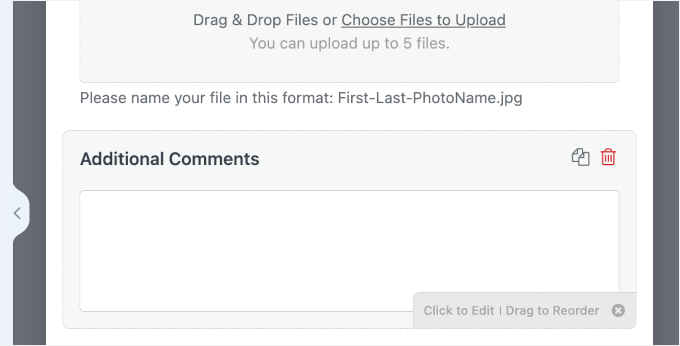
That’s all there is to navigating the WPForms builder. From here, you can keep customizing until your file upload form fits your exact needs.
When you’re happy with your form, the next step is to configure your form settings.
First, you can head over to Settings » General. Once inside, you can add a form description to give users more context about the contest.
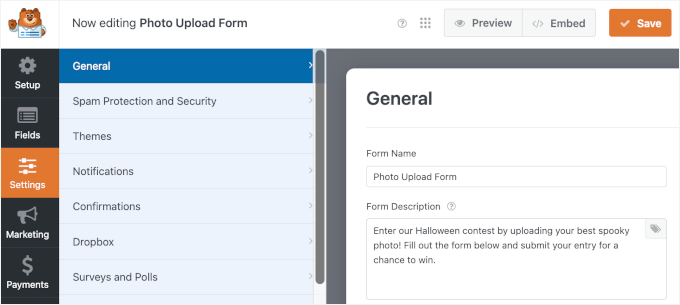
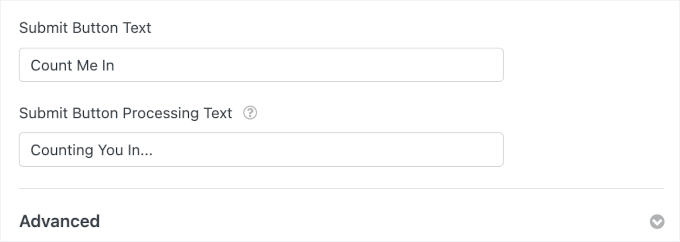
You will also find an option to update the submit button text with a clear call to action. For example, “Submit Your Entry” or something a little more fun, like “Count Me In!”
Next, you can adjust the processing message so users know their upload is being submitted successfully, for instance, “Submitting…” or “Counting You In…”
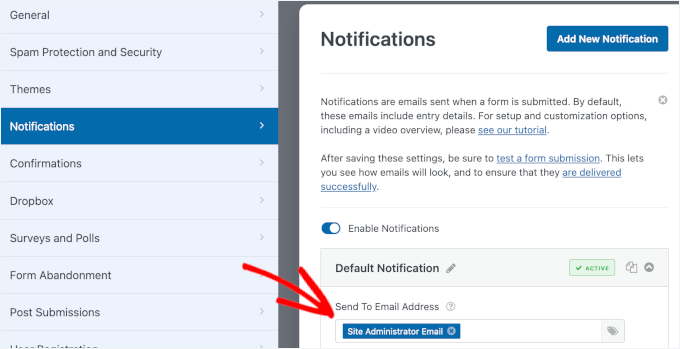
Next, you can switch to the ‘Notifications’ settings.
By default, WPForms will send new form entry notifications to your WordPress admin email address. If you’d like, you can add more recipients — for example, other team members who should also receive contest submissions.
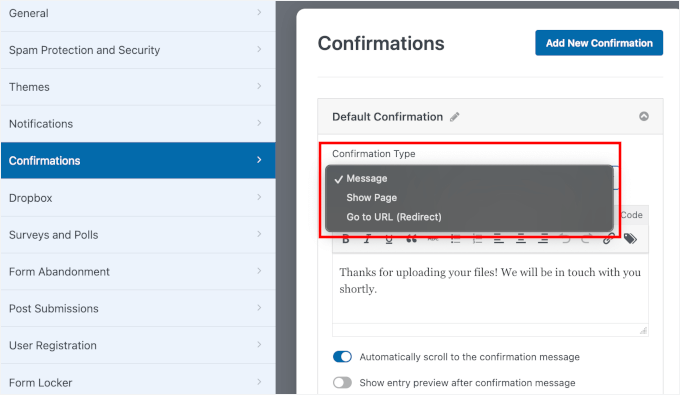
After that, go to the ‘Confirmations’ tab. This is what users will see right after submitting the form.
WPForms gives you three options:
- Message – Show a short thank-you note or confirmation message on the same page.
- Show Page – Redirect users to a specific page on your site, like a contest “Thank You” or “Next Steps” page.
- Go to URL (Redirect) – Send users to any link you want, such as a custom landing page or social media channel.
Now that the form is set up, you can move on to sending the uploads straight to your Google Drive account.
Step 4: Set Up Google Drive Connection
In this step, you’ll connect your file upload form to Google Drive and choose the folder where your files will be sent.
From the form builder, go to Settings » Google Drive, and click the ‘Add New Connection’ button.
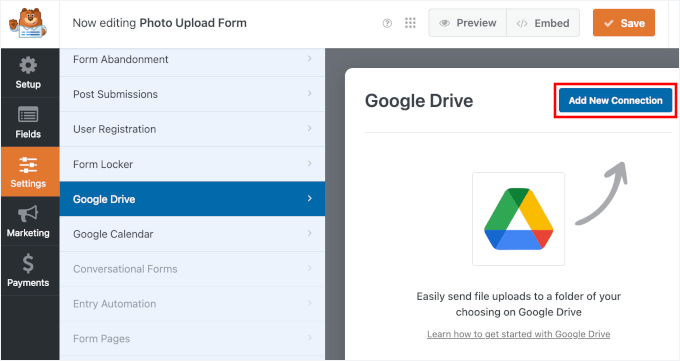
A popup will appear asking you to name the connection.
Giving it a clear nickname, like “Photo Contest Submissions,” will help you identify it later, especially if you connect other forms to Google Drive in the future.
Once you’ve entered a name, click ‘OK’.

With that done, you can pick your connected Google account from the dropdown field.
Then, go ahead and choose whether you’d like WPForms to create a fresh folder for you or use an existing one.
Finally, you can select the file upload fields that should sync to Drive.
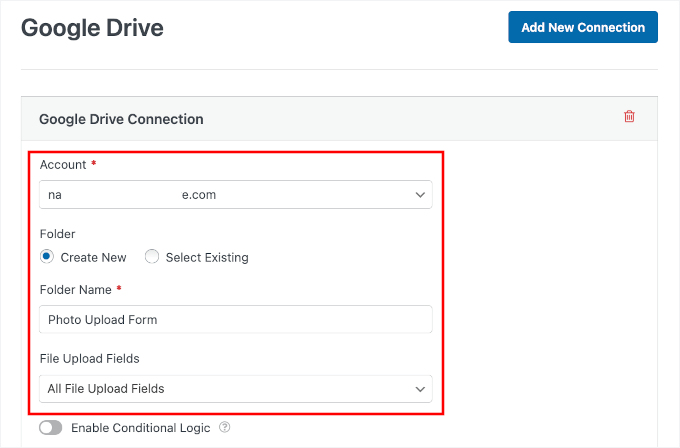
There’s also a conditional logic option for your file upload.
For example, you can turn this on if you only want specific files to be sent to Google Drive. Let’s say you have a job application form with fields to upload a photo and a resume. You can set it so that only resumes sync to Drive while the photos stay local.
Now, let’s scroll down to the ‘Advanced Options’ tab.
Here, you’ll find a toggle to delete local files after they’re uploaded to Google Drive. I recommend enabling this setting so that your website hosting doesn’t fill up with duplicate files.

🧑💻 Pro Tip: With this option enabled, the only copy of the submitted file will be in your Google Drive. If you prefer to have a backup within WordPress as well, you can leave this option turned off.
Once saved, you’ll see a handy button to open the folder directly in Google Drive, making it easy to double-check everything.
Here’s what it looks like in the builder:

Step 5: Publish Your Google Drive Upload Form
Now it’s time to add your form to your website.
To start, you can click the ‘Embed’ button in the form builder.

This will open a popup where you can choose whether to drop it into an existing page or create a brand-new one just for uploads.
For this tutorial, I’ll choose ‘Create New Page.’

On the next popup, you can go ahead and give your new page a headline.
After that, click ‘Let’s Go!’

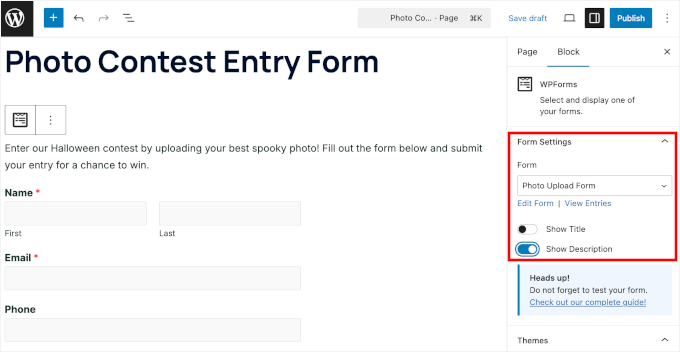
This will automatically load your file upload form in the WordPress content editor for the new page.
Here, you can turn on the switch for ‘Show Description’ in the Form settings on the right to display your form description.
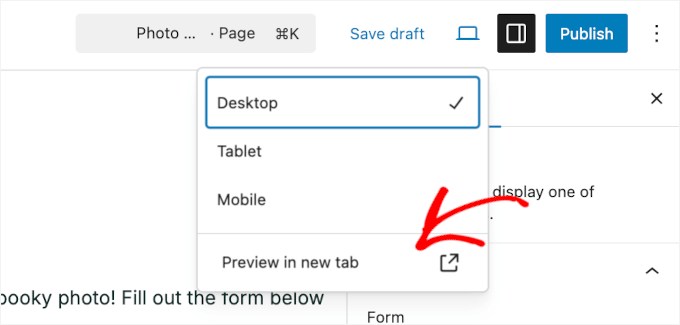
Before you hit publish, it’s a good idea to test your form.
For this, you can use the preview feature inside the block editor.
During testing, you can try entering a typo or leaving a required field blank to make sure form validation works.
It will show up on the preview as an error message:

You can also check if your conditional logic setup works.
Simply click ‘Other’ for ‘How did you hear about this contest?’ and see if the ‘Please Specify’ field shows up.

Then, upload real files and click the ‘Submit’ button.
If you’ve created a custom submit button, make sure that it looks and processes as expected, too.

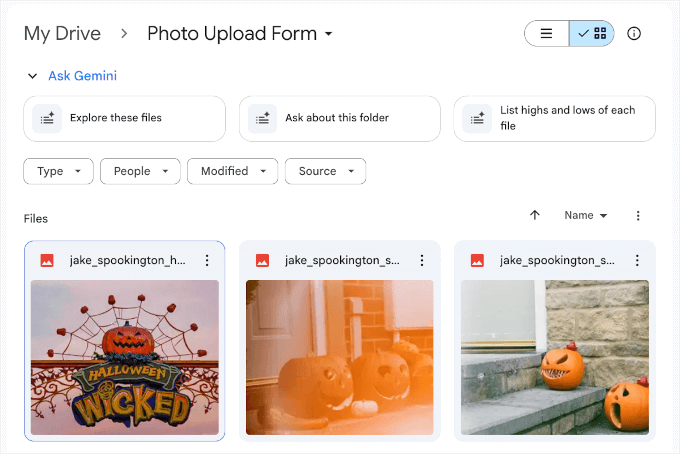
Finally, you’ll just need to confirm your uploaded files end up in the correct Google Drive folder.
If they do, then you’re good to go.
From here, you can make further adjustments to your page.
For example, you can upload an image, create a photo gallery with albums, or add other content to make the page more engaging.
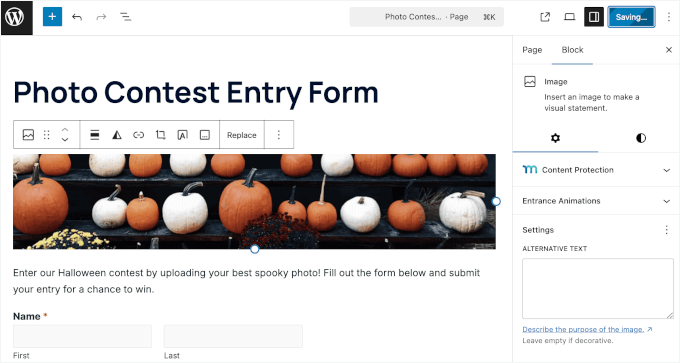
When you’re happy with how everything looks, go ahead and click ‘Publish.’ Your form will then be ready for contestants in just a few seconds.
Here’s what my file upload form looks like on my demo site:

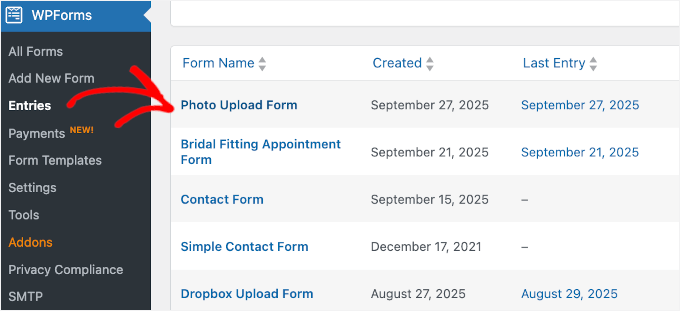
And to see all your form entries, you can head over to WPForms » Entries.
Then, go ahead and click on the form you just created.
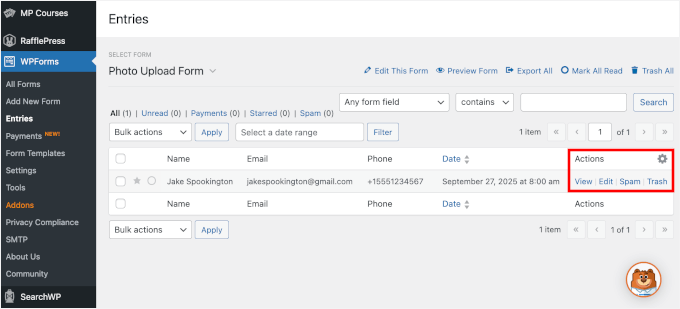
Now, you’ll see an overview of the users’ submissions — including their name, email, phone number, and submission date.
In the ‘Actions’ column, let’s click the ‘View’ link to open the full entry details.
On the next screen, you’ll see all the data the user submitted.
In the ‘File Upload’ section, you’ll see the Google Drive icon. This indicates that the uploaded files have been successfully sent to your Drive account.

That’s all there is to it! You’ve successfully uploaded files from a WordPress form to Google Drive – automatically.
Bonus Tip: Sync Your Form Entries with Google Calendar
Once your files are flowing into Google Drive, why stop there? You can take things further by syncing your form entries with other Google tools, like Google Calendar.
For instance, if you’re collecting documents along with appointment booking requests, then the WPForms Google Calendar addon can automatically create an event whenever someone submits the form.
That means the uploaded files go straight to Drive, and the meeting details land in your Google Calendar — no manual work required.

It’s an easy way to stay organized and ensure you always have the right files at the right time.
For details, see our guide on how to add Google Calendar events from WordPress contact forms. 🗓️
FAQs About Uploading Files from a WordPress Form to Google Drive
How do I integrate Google Drive with WordPress?
You can use a plugin like WPForms with its Google Drive addon. This lets you automatically send uploaded files from your WordPress forms directly into a chosen Google Drive folder, so you don’t have to move them manually.
Can I limit what types of files users can upload?
Yes. Most form plugins, including WPForms, let you restrict file types (like .jpg, .png, or .pdf), set size limits, and control the number of files users can upload. This helps keep your storage organized and avoids oversized uploads.
Will deleting files in WordPress also remove them from Google Drive?
No, once the files are uploaded to Google Drive, they remain there even if you delete them from your WordPress site. If you want to free up hosting space, you can turn on the option to delete local files after they’re sent to Google Drive.
Further Reading to Optimize Your WordPress Forms
I hope this article helped you learn how to upload files from a WordPress form to Google Drive.
Next, you might also want to check out our guides on:
- How to Create Conversational Forms in WordPress
- How to Show a Floating Contact Form in WordPress
- How to Restrict Your WordPress Forms to Logged-In Users Only
- How to Track User Journeys on WordPress Lead Form
- The Ultimate Guide to Using WordPress Forms (All You Need to Know)
If you liked this article, then please subscribe to our YouTube Channel for WordPress video tutorials. You can also find us on Twitter and Facebook.


Jiří Vaněk
Great tutorial. Is there any advantage in using google drive for uploading instead of storing data on FTP? Do I mean, for example, antivirus protection from Google?
WPBeginner Support
While Google’s scanning can help somewhat, this would be more to help prevent reaching any storage limits on a hosting provider should there be many submissions.
Admin
Jiří Vaněk
I understand. I recently started using this technique based on this guide when I was running out of space on one of my websites, and it’s really great because I have another 15 GB of free space on Google Drive. I also noticed that Google Drive has antivirus protection, and the data should be encrypted, which seems like an additional benefit to me. Anyway, thanks for your time and response.
Lauren
This is great, but why do the images turn into a txt.file when they get to my google drive!?
WPBeginner Support
You would want to ensure you selected the image to be uploaded in Zapier for the most likely reason that a text file is being added.
Admin