

Among the many great Linux distributions you can choose is Linux Mint. It's similar to Ubuntu, but it also comes with tons of useful programs and apps right out of the box and has a user interface similar to the Start Menu in Windows 11. If you're hoping to get started, the process is pretty straightforward. You'll need an ISO file, create a bootable installer, configure your PC for Linux, then boot from that ISO and proceed with installation.
Be sure to back up your data before installing Linux Mint. This guide covers installing it as a primary operating system.
Choose the right edition and ISO
We'll begin with some advice. There are three flavors of Linux Mint you can choose from: Cinnamon, MATE, and Xfxe. Cinnamon is ideal if you want the newest features; Mate is for older computers and laptops; and Xfce is a lightweight installation. We suggest most people pick Cinnamon.
You'll also want to ensure that you're picking the right edition. 32-bit versions of Linux Mint are no longer supported as of version 20 and higher, so make sure you install a 64-bit version. That said, you can head over to the Linux Mint downloads page and choose the right ISO and edition for your system by picking one of the proper download mirrors for your location.
Create a Linux Mint installer
Now that you have the right file, we're going to create the installer you need to boot your PC to install Linux Mint. We'll be using Rufus.
- Head to the Rufus website and download the latest version of the app. It's currently version 4.3.
- When the download is complete, launch the EXE file.
- With the app launched, select your USB drive from the list at Device.
- Under Boot Selection, choose Select and navigate to the ISO file you downloaded earlier. Click Open.

- Leave all the settings as default, as shown below.
- Partition scheme should be MBR.
- Target System should be BIOS or UEFI.
- You can label your drive under Volume Label. Be sure that File system is set to FAT32.

- Click Start
- In the warning message, choose Write in ISO image mode.

- In the next warning message, choose Yes and then Yes.
- Confirm the drive is about to be released with OK.


Your drive will be formatted. It could take a while, depending on the age of your PC and the drive's speed, so be patient.
Prepare Windows for Linux Mint
Now that you've created a USB installer, you can prepare to boot from the USB drive. You'll need to disable Fast Startup, so your PC can boot into BIOS and then from the installer and not jump right into Windows. You'll have to disable Secure Boot to avoid disk compatibility issues and boot from USB drives. On Windows Pro editions, you'll also have to turn off Bitlocker, so your hard disk will be available for Linux Mint.
Disable Fast Startup
- Open the Start Menu and search for Control Panel.
- Click the top result.
- Switch the Control Panel to the Category view from the top under View by.

- Choose Hardware and Sound.
- Select Power Options.

- Click on Choose what the power buttons do.

- Uncheck the box at the bottom for Turn on fast startup (recommended)


Disable BitLocker
- Open the Windows 11 Start Menu.
- Search for BitLocker.

- Click the top result for Manage BitLocker.
- In the window, click the Turn off BitLocker

- Agree to the prompts on the screen.


If you want to enable BitLocker again later, follow the steps in reverse.
Disable Secure Boot
- Boot into Windows 11 like you normally would
- Log out of your account and get to the lock screen.
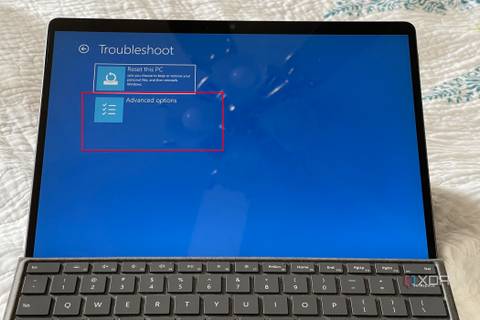
- Press the power button, and hold the Shift key, then select Restart.

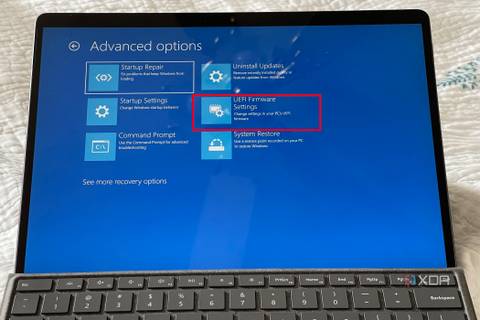
- On the recovery screen, go to Troubleshoot > Advanced Options: UEFI Firmware Settings.
- Navigate to the Authentication, Boot, or Security tab in your BIOS.
- Look for a Secure Boot option and set it to Disabled.


- If there's an option for it, under Authentication Boot, or Security, select the option for Enable Boot from USB devices.


Boot from the Linux Mint USB
Now, we're ready to boot from that USB drive. This, again, involves going into BIOS, but it's easy to do:
- Insert the USB drive you created into your computer.
- Some PCs might show a prompt to Select Boot Device or boot from a USB drive. If you see this prompt, press the corresponding key. If you don't see this, skip to the next step.

- While your PC is booting, press the key to boot into the BIOS loading screen. Check with your PC maker to see which key to press. For our example, it's F2.
- You can also get into the BIOS through Windows. Open the Settings app, choose System> Recovery > Advanced Startup > Restart Now. Then, click Troubleshoot > Advanced options > UEFI Firmware settings.
- Once in the BIOS, under the Boot menu, drag or move your USB drive up to be the first boot option. This will make your PC boot from the USB drive right away,
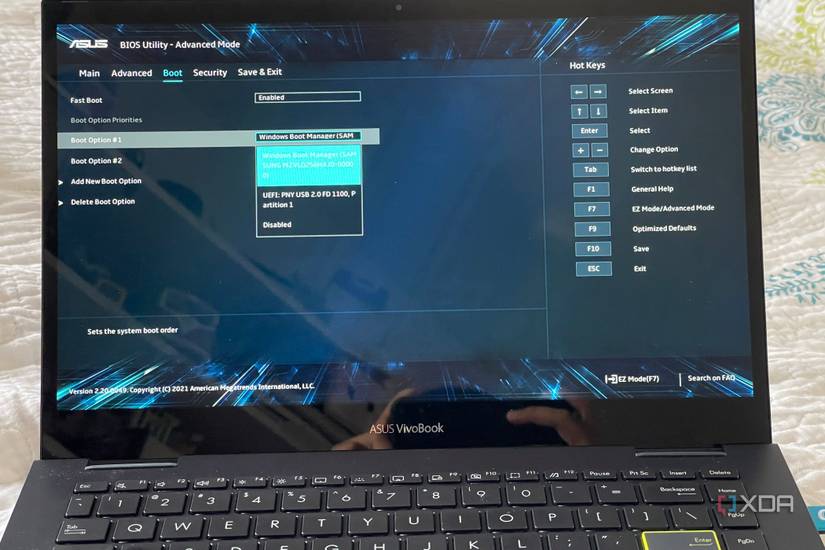


Once this is done, press Save and Exit. The next time you reboot your PC, you'll be able to begin installing Linux Mint.
Install Linux Mint
We're almost there! Now's the actual installation process! Once your PC turns on and boots from the installer, follow the steps below.
- On the GMU GRUB screen, choose Start Linux Mint.

- Once Linux Mint starts up, choose the option for Install Linux Mint. It's the CD icon on the top left of your screen.

- On the installation screen, choose your language and press Continue.
- Choose if you'd like to install multimedia codecs and press Continue.

- If you want to erase your disk and install Linux Mint in place of Windows, choose Erase disk and install Linux Mint. You also can choose to Install alongside Windows for an automatic dual boot. Press Install now to confirm, then confirm the partition sizes and press Continue.

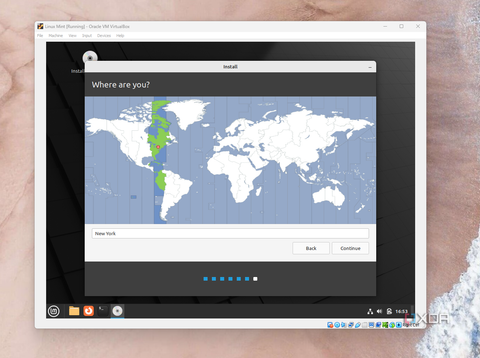
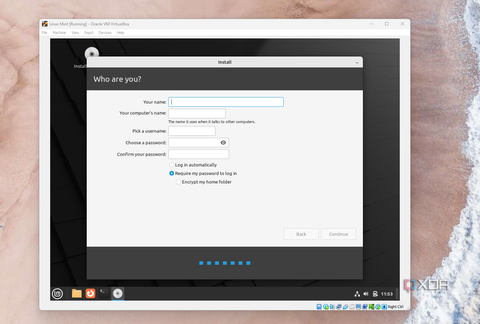
- Choose your region, set up a username and password, and wait for the files to copy and install.
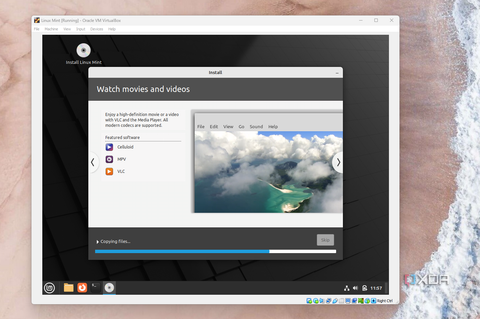
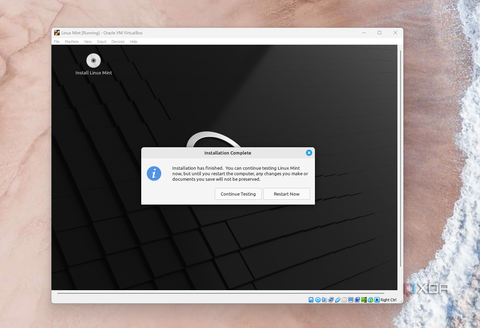


The process of installing Linux Mint could take a while. It typically takes about 10-15 minutes, but it could be shorter or longer. You'll know when things are finished, as you'll be taken straight to the Linux Mint desktop with the message that Installation is Complete. Choose the Restart Now option to restart your PC and get going! You'll be promoted with a Welcome window, teaching you the ropes of your new operating system.
Things to do post-installation
Now that Linux Mint is installed, you'll be good to go. You can play around and enjoy the operating system, but there are a few things you'd want to consider. Head to the Administration section in the Launch Menu, and launch Driver Manager, there might be new drivers for your display and graphics card to improve your experience. We really hope you enjoy using Linux Mint, but if you find that the operating system is struggling to run on your hardware, don't worry. There are lots of great laptops that run Linux for an even better experience.