Hardware deployment for reinforcement learning locomotion policies on the Unitree Go2 quadruped. This repo covers the deployment side — loading trained checkpoints and running them on the real robot with keyboard control.
For simulation training, see the companion repo: go2-sim2real-locomotion-rl
Full write-up: Project Page
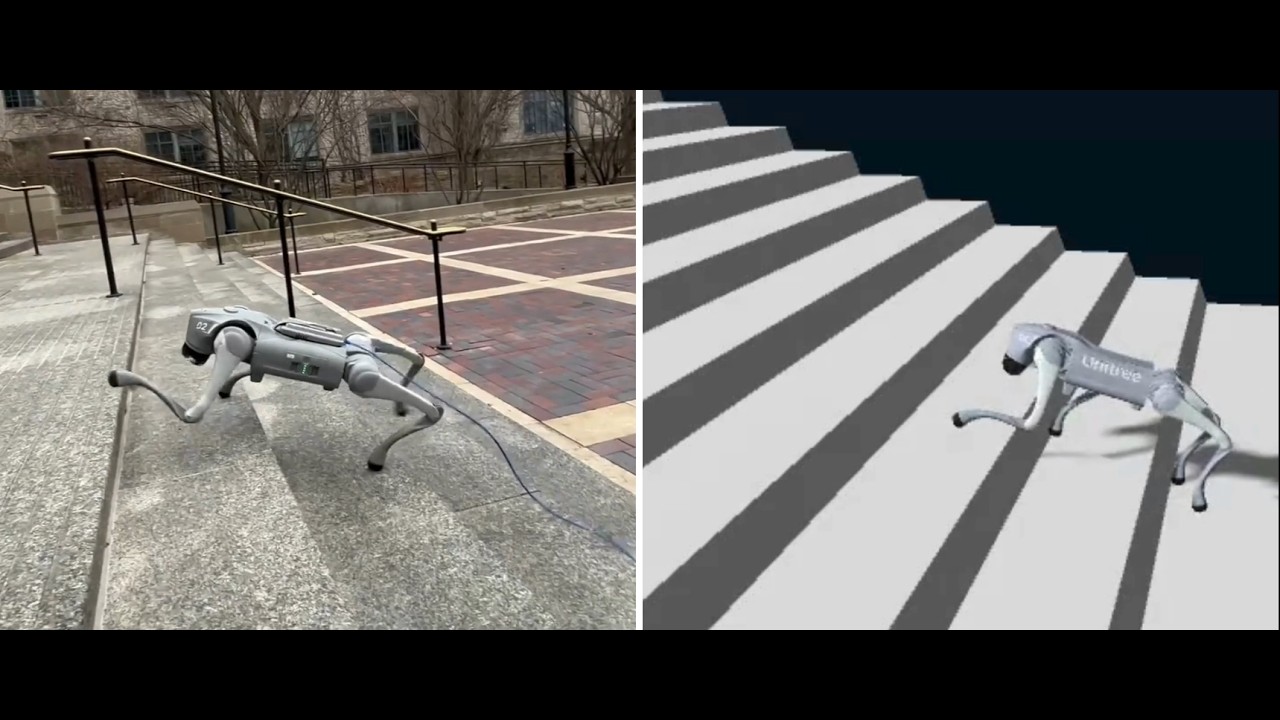 ▶ Click to watch on YouTube
| Policy | Script | Checkpoint | Description |
|---|---|---|---|
| Walk | example/go2/low_level/final/go2_policy_walk.py | walk.pt | Omnidirectional walking |
| Stairs | example/go2/low_level/final/go2_policy_stairs.py | stairs.pt | Stair climbing (39 cm tread depth) |
Both policies use 16 actions: 12 joint position targets + 4 per-leg adaptive stiffness scalars. Observation space is 49-dimensional (IMU + joint encoders + last action — no privileged information at deployment).
The SDK requires CycloneDDS 0.10.x. Pre-built packages often don't work — build from source:
cd ~ git clone https://github.com/eclipse-cyclonedds/cyclonedds -b releases/0.10.x cd cyclonedds && mkdir build install && cd build cmake .. -DCMAKE_INSTALL_PREFIX=../install cmake --build . --target installcd ~ git clone https://github.com/saifahmadgit/go2-sim2real-deploy.git cd go2-sim2real-deploy export CYCLONEDDS_HOME=~/cyclonedds/install pip3 install -e .Note: You need to
export CYCLONEDDS_HOMEbeforepip installso the build can find the CycloneDDS headers. You will also need to export it again in any new shell before running scripts (add it to your~/.bashrcto make it permanent).
pip install torch # PyTorch — for policy inference pip install rsl-rl-lib==2.2.4 # ActorCritic architecture used for training pip install pynput # Keyboard control at runtimeThe robot communicates over a wired Ethernet connection. You need to know which network interface on your machine is connected to the robot.
Find your interface:
ip link showLook for the interface that is UP and connected to the robot's subnet (typically 192.168.123.x). Common names are enp0s31f6, eth0, enp3s0 — this will differ per machine.
You can verify the robot is reachable:
ping 192.168.123.161Export the DDS environment variable in every shell you use:
export CYCLONEDDS_HOME=~/cyclonedds/installThe deployment scripts automatically release the robot's high-level sport mode before taking low-level control — no manual step needed.
cd ~/go2-sim2real-deploy export CYCLONEDDS_HOME=~/cyclonedds/install python3 example/go2/low_level/final/go2_policy_walk.py enp0s31f6Replace enp0s31f6 with your network interface name.
python3 example/go2/low_level/final/go2_policy_stairs.py enp0s31f6- Script releases sport mode — the robot calls
StandDown()and sits - Rule-based ramp to standing pose over ~4 seconds (
STAND_SECONDS = 4.0) - Terminal prints
*** ROBOT IS STANDING - READY TO START *** - Type
goand press Enter to hand control to the policy - Press any movement key to start walking — the policy activates on the first command
If you type anything other than go at step 4, the script aborts and holds the stand pose until you kill it.
| Key | Action |
|---|---|
W | Forward |
S | Backward |
A | Strafe left |
D | Strafe right |
Q | Yaw clockwise |
R | Yaw counter-clockwise |
Space | Stop (zero velocity command) |
E | Return to stand pose |
X | Exit (safe stop — sends zero-torque packets) |
Each script has a MODE variable near the top that controls behavior:
| Mode | Description |
|---|---|
"robot_run" | Live deployment — sends motor commands to the robot |
"robot_print" | Read-only — subscribes to lowstate and prints policy output, no commands sent |
"dummy" | Offline test — loads a sample state from dummy_state.yaml, no robot needed |
Change the mode by editing the line at the top of the script:
MODE = "robot_run" # "dummy" | "robot_print" | "robot_run"Start with "robot_print" to verify DDS communication and policy output before running live.
The example/go2/high_level/ directory contains utilities for high-level sport mode control (stand, velocity commands, special motions). These are useful for diagnostics or manual testing:
python3 example/go2/high_level/go2_sport_client.py enp0s31f6Replace enp0s31f6 with your interface name.
All tunable parameters are defined as constants near the top of each script. Edit them before running — no retraining needed.
These set the speed applied when you press each movement key:
FORWARD_VX = 0.4 # W key — forward speed (m/s) BACKWARD_VX = 0.4 # S key — backward speed (m/s) LEFT_VY = 0.5 # A key — lateral speed (m/s) RIGHT_VY = 0.5 # D key — lateral speed (m/s) YAW_CW_WZ = 0.7 # Q key — yaw rate (rad/s) YAW_CCW_WZ = 0.7 # R key — yaw rate (rad/s)The stair policy was trained with forward velocity only (lin_vel_x ∈ [0.3, 0.8] m/s, no lateral or yaw). Keep FORWARD_VX in that range for stairs — lateral and yaw keys exist in the script but are outside the training distribution.
The policy learns per-leg stiffness via the adaptive stiffness (PLS) mechanism — each leg's Kp and Kd are computed from the network output at runtime. The demo videos used no adjustment from the trained values (KP_FACTOR = 1.0, KD_FACTOR = 1.0).
However, if your actuators respond differently (e.g. due to wear, temperature, or hardware variation), you can scale the network-computed gains without retraining:
KP_FACTOR = 1.0 # Multiplies all per-joint Kp values KD_FACTOR = 1.0 # Multiplies all per-joint Kd valuesHow to read the robot's response:
| Symptom | Adjustment |
|---|---|
| Joints feel floppy, poor position tracking | Increase KP_FACTOR (e.g. 1.1–1.2) |
| Joints vibrate or oscillate | Decrease KP_FACTOR, or increase KD_FACTOR |
| Joints overshoot and bounce | Increase KD_FACTOR (e.g. 1.2–1.5) |
| Joints are sluggish / overdamped | Decrease KD_FACTOR |
The underlying formula applied before these factors:
Kp_per_leg = clamp(40.0 + action × 20.0, [20, 60]) # Nm/rad Kd_per_joint = 0.2 × √Kp final_Kp = Kp × KP_FACTOR final_Kd = Kd × KD_FACTOR Start at 1.0 and make small adjustments (±0.1 steps). The PLS mechanism already handles most stiffness variation across gait phases — these factors are a coarse global override for hardware-level differences only.
Note:
PLS_KP_DEFAULT,PLS_KP_ACTION_SCALE, andPLS_KP_RANGEmust match the training config exactly. Do not change these.
During the initial 4-second ramp to standing (before the policy runs), fixed gains are used:
STAND_KP = 40.0 # Proportional gain during stand ramp STAND_KD = 0.5 # Derivative gain during stand rampSTAND_SECONDS = 4.0 # Duration of stand ramp before policy starts MAX_STEP_RAD = 0.1 # Max joint position change per control cycle (slew limit, rad) POLICY_HZ = 50.0 # Policy inference rate (Hz) LOWCMD_HZ = 500.0 # Motor command publish rate (Hz)The policy runs at 50 Hz and motor commands are sent at 500 Hz — 10 interpolated command packets are sent per policy step. MAX_STEP_RAD caps how fast any joint can move per policy step regardless of network output, matching the training constraint.
Observation (49-dim, 50 Hz) ├─ Angular velocity (3) ← IMU gyroscope ├─ Projected gravity (3) ← from IMU quaternion ├─ Velocity commands (3) ← keyboard input ├─ Joint position error (12) ← encoders minus default pose ├─ Joint velocity (12) ← encoders └─ Last action (16) ← 12 pos + 4 stiffness Policy Network (ActorCritic MLP: 512 → 256 → 128) └─ Output: 16 actions Action Processing ├─ Clip to [−100, 100] ├─ Position: scale × 0.25, add to default pose ├─ Stiffness: 4 per-leg scalars → per-joint Kp/Kd │ Kp = clamp(40 + action × 20, [20, 60]) │ Kd = 0.2 × √Kp └─ Slew limit: max 0.1 rad/step LowCmd (500 Hz) → robot motors Could not locate cyclonedds during pip install:
export CYCLONEDDS_HOME=~/cyclonedds/install pip3 install -e .ModuleNotFoundError: rsl_rl:
pip install rsl-rl-lib==2.2.4No DDS messages / script hangs at "Waiting for rt/lowstate...":
- Verify the correct network interface is passed as the argument
- Check the robot is powered on and the Ethernet cable is connected
- Confirm
ping 192.168.123.161succeeds
Robot does not respond to commands but script runs:
- Make sure sport mode was fully released — the script does this automatically, but if a previous session crashed mid-release, restart the robot and try again
- Extreme Parkour with Legged Robots — asymmetric actor-critic, privileged observations
- Variable Stiffness for Robust Locomotion through RL — per-leg adaptive stiffness
- Unitree SDK2 Python — DDS communication layer
- Genesis Simulator — simulation environment used for training