
ELK + Filebeat 搭建日志系统
28 / 7 / 创建于 2年前 /
 my38778570 的个人博客
 es安装
www.elastic.co/guide/en/elasticsea...
wget https://artifacts.elastic.co/downloads/elasticsearch/elasticsearch-8.8.0-linux-x86_64.tar.gz tar -xzf elasticsearch-8.8.0-linux-x86_64.tar.gz cd elasticsearch-8.8.0/ 
启动
./bin/elasticsearchfatal exception while booting Elasticsearchjava.lang.RuntimeException: can not run elasticsearch as root
mkdir data adduser es passwd es chown -R es:es ./* chmod -R 775 ./* su es received plaintext http traffic on an https channel, closing connection
ES8默认开启了ssl认证,导致无法访问9200端口
elasticsearch.yml配置:xpack.security.enabled:把true改成false
curl -X GET "localhost:9200/?pretty"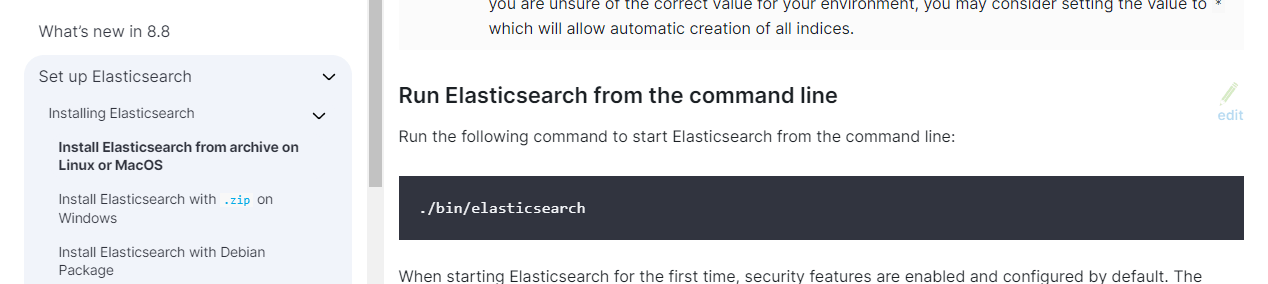
kibana安装
www.elastic.co/guide/en/kibana/cur...
curl -O https://artifacts.elastic.co/downloads/kibana/kibana-8.8.0-linux-x86_64.tar.gz tar -xzf kibana-8.8.0-linux-x86_64.tar.gz cd kibana-8.8.0/ [root@MiWiFi-RA81-srv kibana-8.8.0]# ./bin/kibana
Kibana should not be run as root. Use –allow-root to continue.
[root@MiWiFi-RA81-srv kibana-8.8.0]# ./bin/kibana –allow-root
vim ./config/kibana.yml#kibana.yml server.port: 5601 server.host: "0.0.0.0" elasticsearch.hosts: ["http://192.168.31.220:9200"] ./bin/kibana --allow-rootLogstas安装
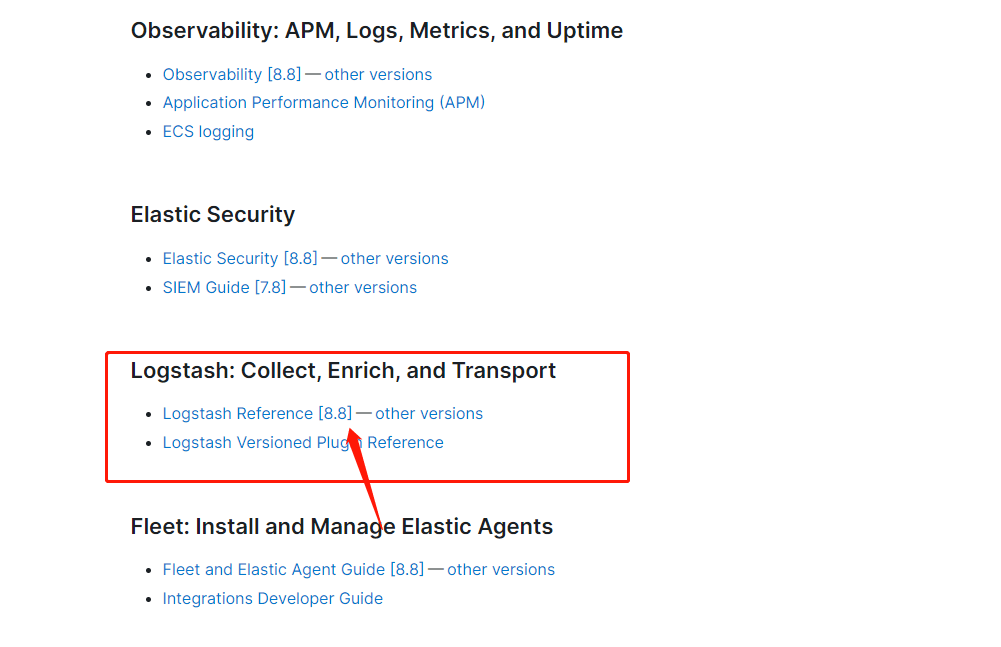
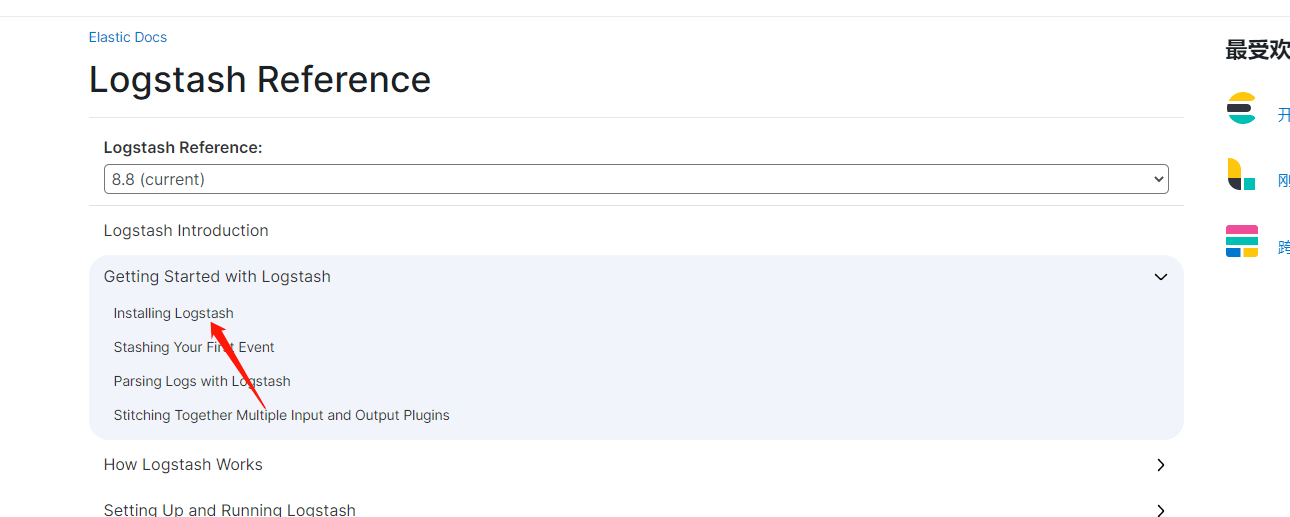
www.elastic.co/guide/en/logstash/c...
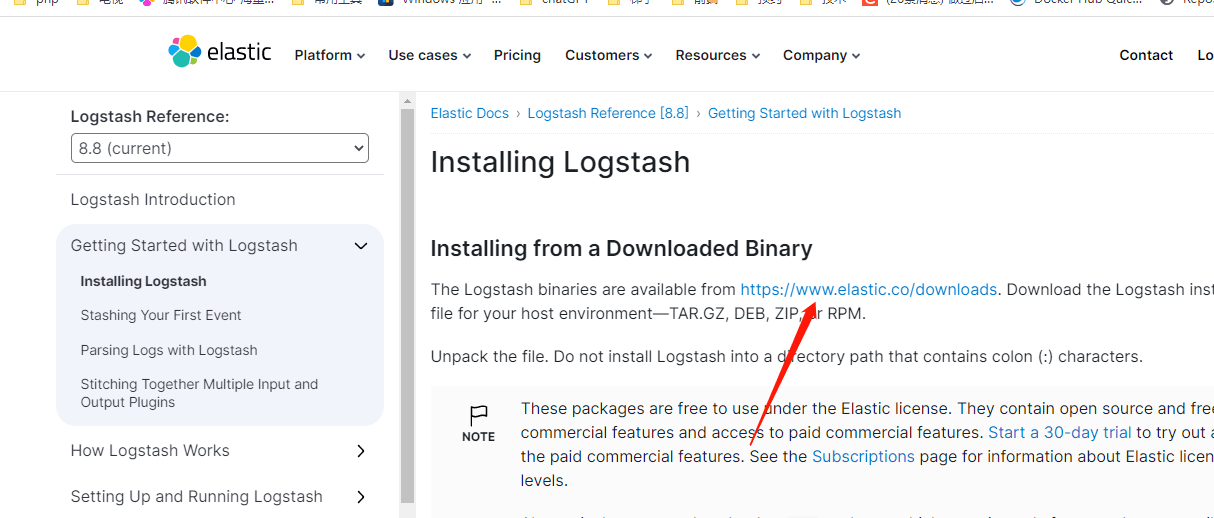
下载
www.elastic.co/cn/downloads/logsta...
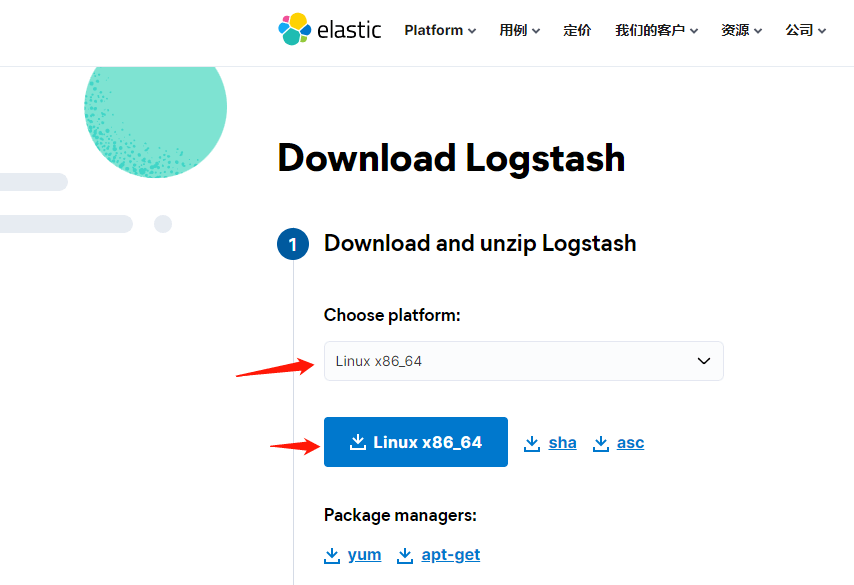
wget https://artifacts.elastic.co/downloads/logstash/logstash-8.8.0-linux-x86_64.tar.gz tar -xzf logstash-8.8.0-linux-x86_64.tar.gz cd logstash-8.8.0测试启动
bin/logstash -e 'input { stdin { } } output { stdout {} }'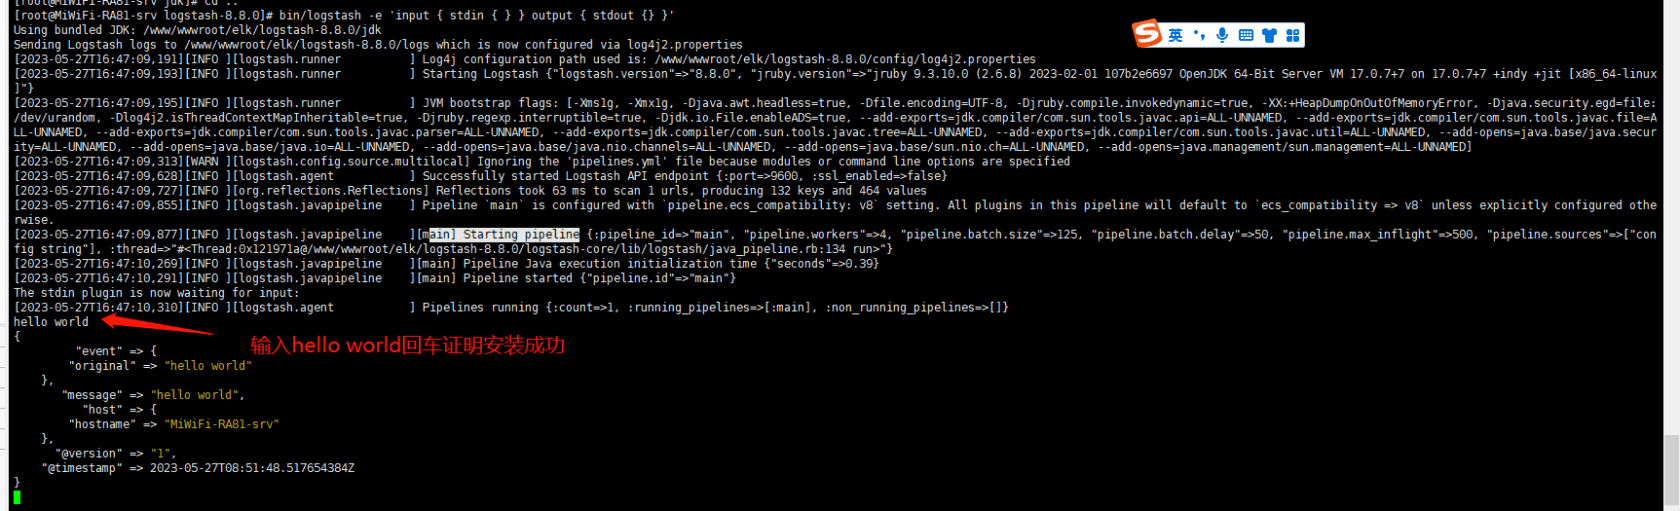
用filebeat发送日志到logstash
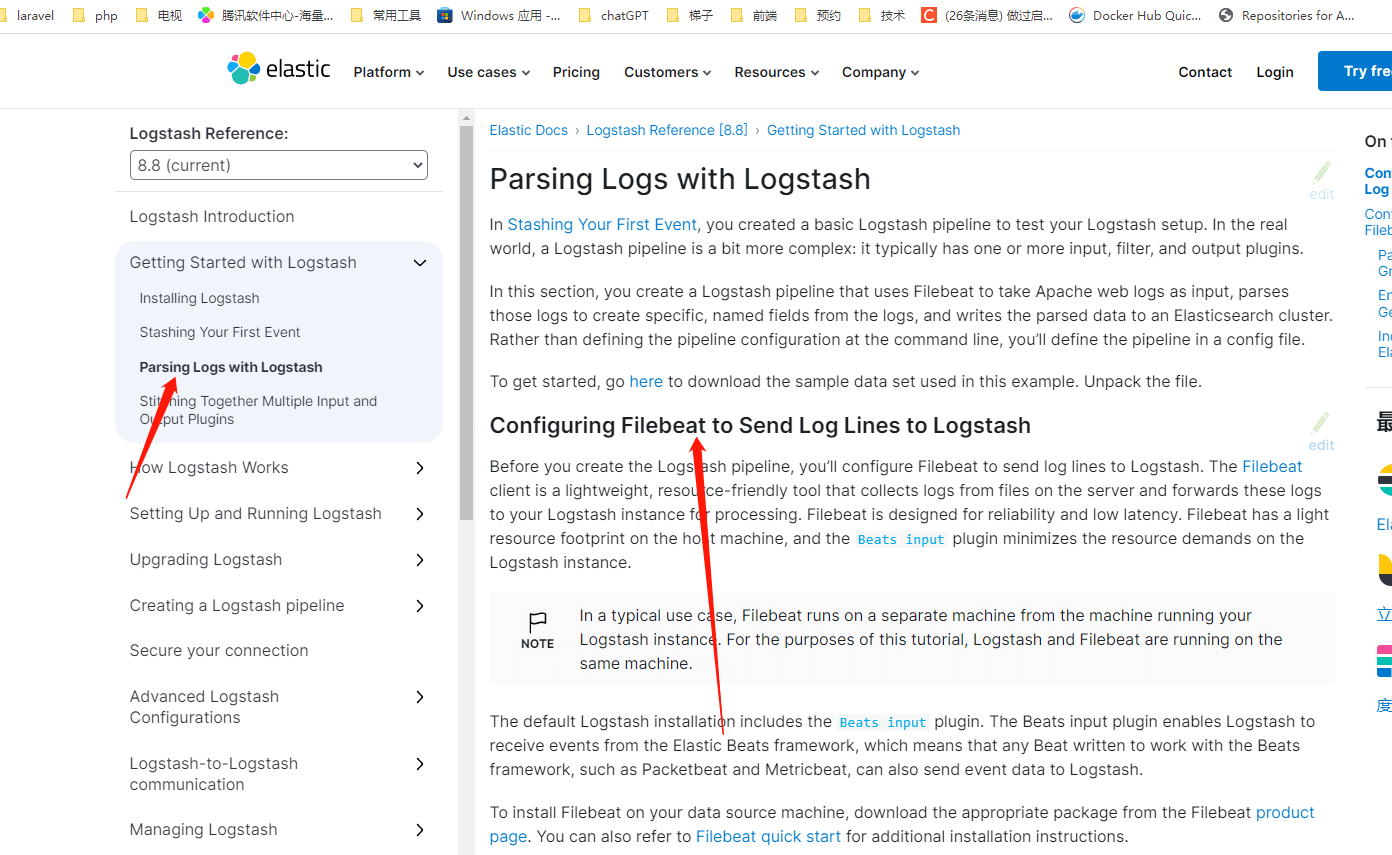
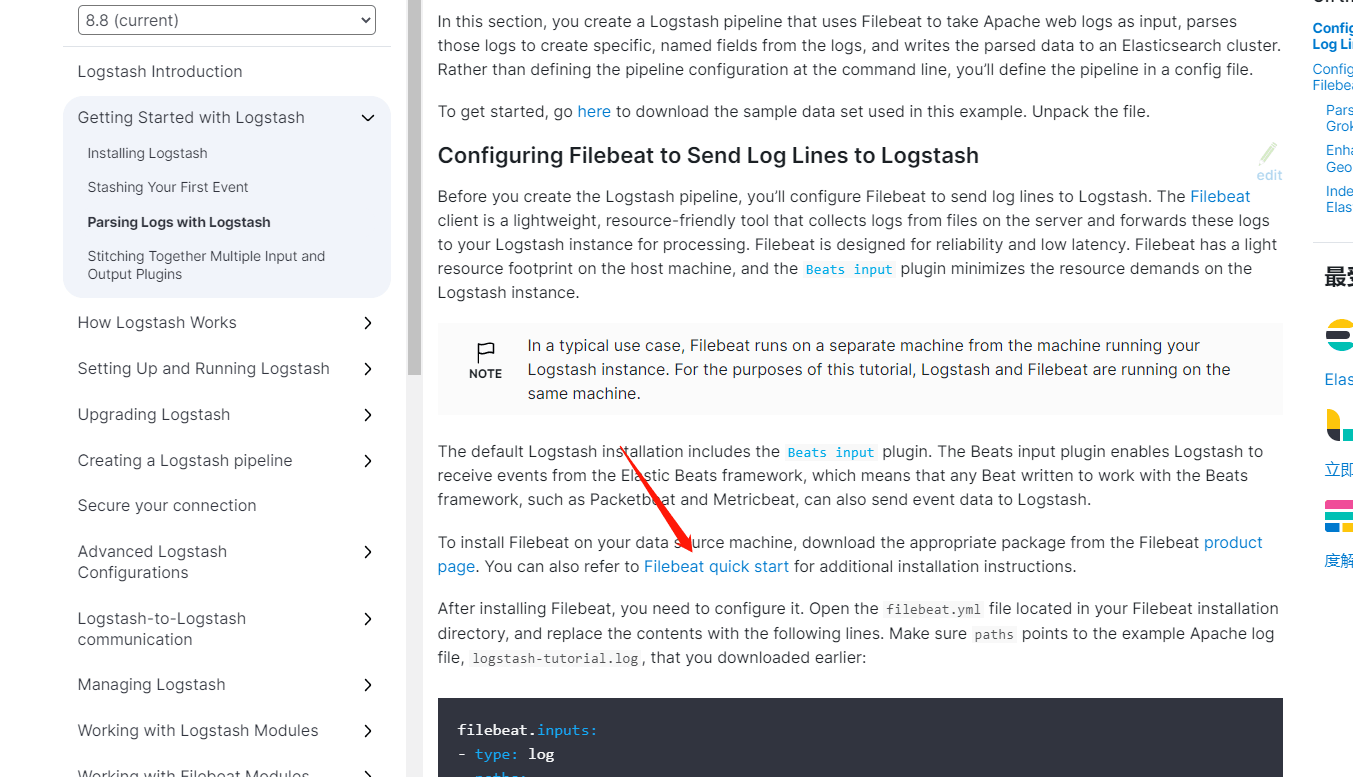
filebeat安装
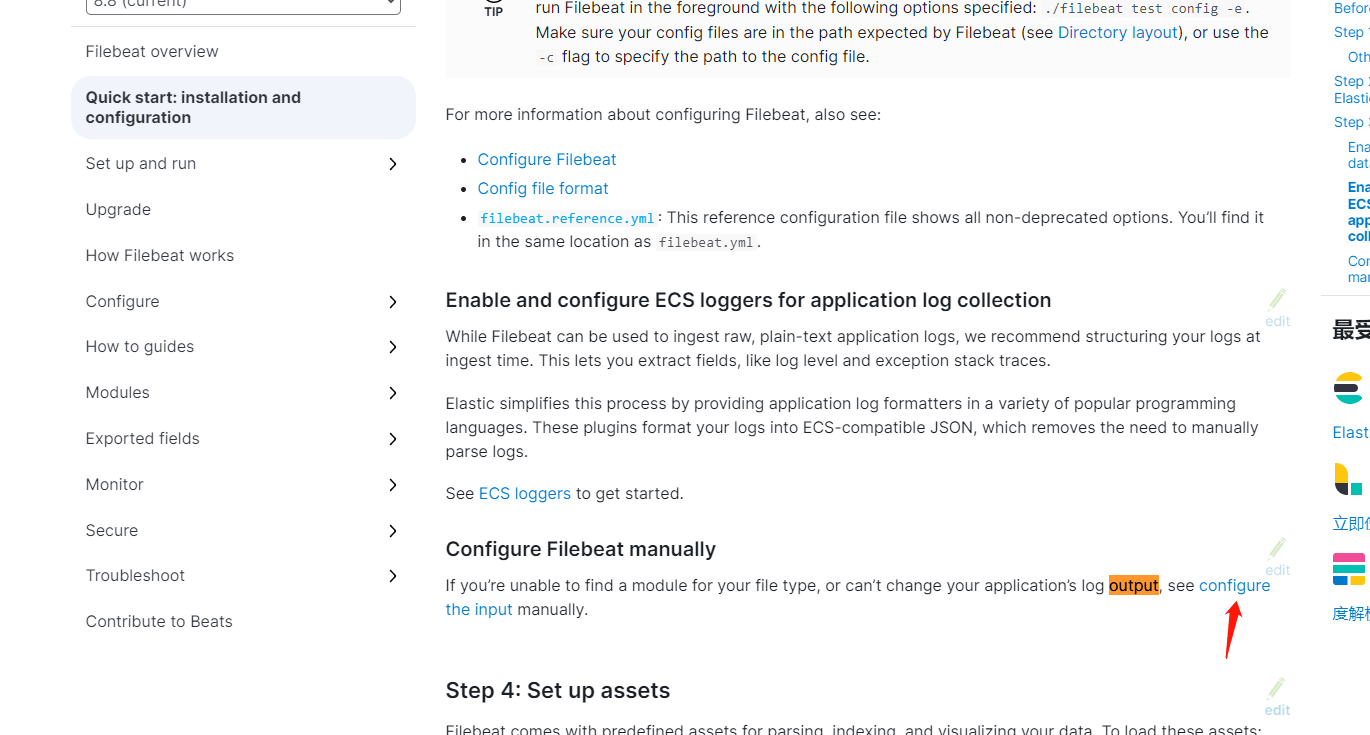
www.elastic.co/guide/en/beats/file...
curl -L -O https://artifacts.elastic.co/downloads/beats/filebeat/filebeat-8.8.0-linux-x86_64.tar.gz tar xzvf filebeat-8.8.0-linux-x86_64.tar.gz cd filebeat-8.8.0-linux-x86_64配置filebeat
vim filebeat.yml输入
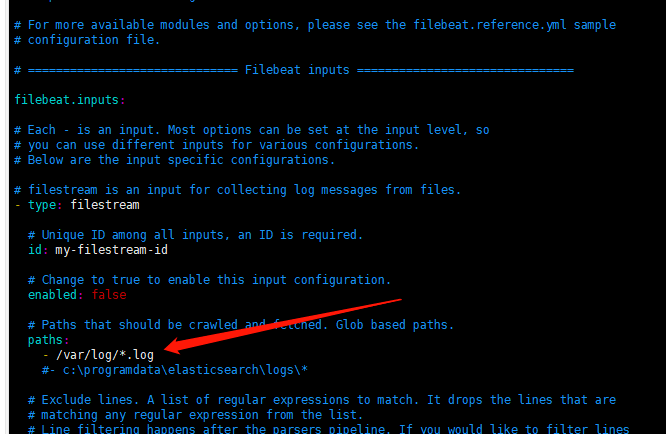
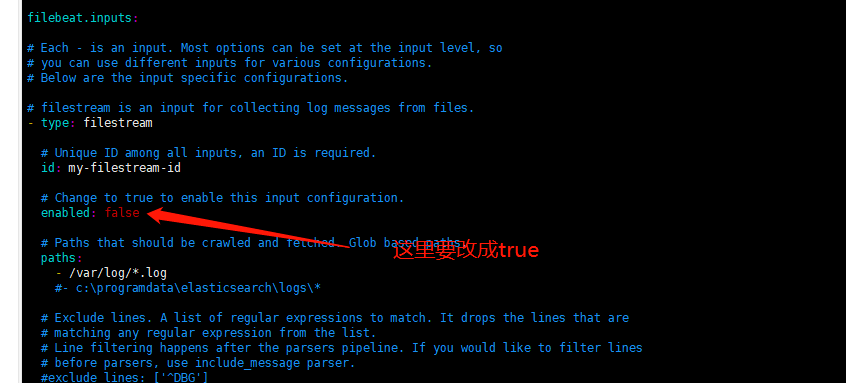
[root@MiWiFi-RA81-srv log]# pwd /var/log [root@MiWiFi-RA81-srv log]# echo "aaa" > test.log不输出到es(vim filebeat.yml)
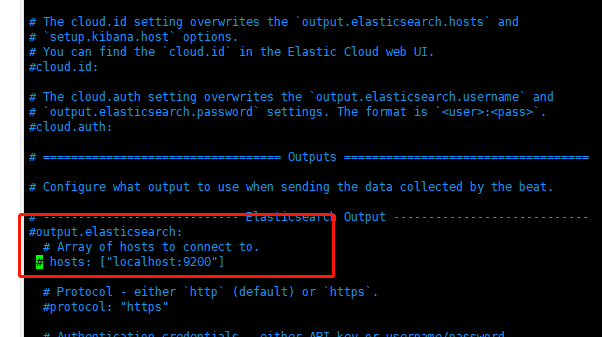
www.elastic.co/guide/en/beats/file...
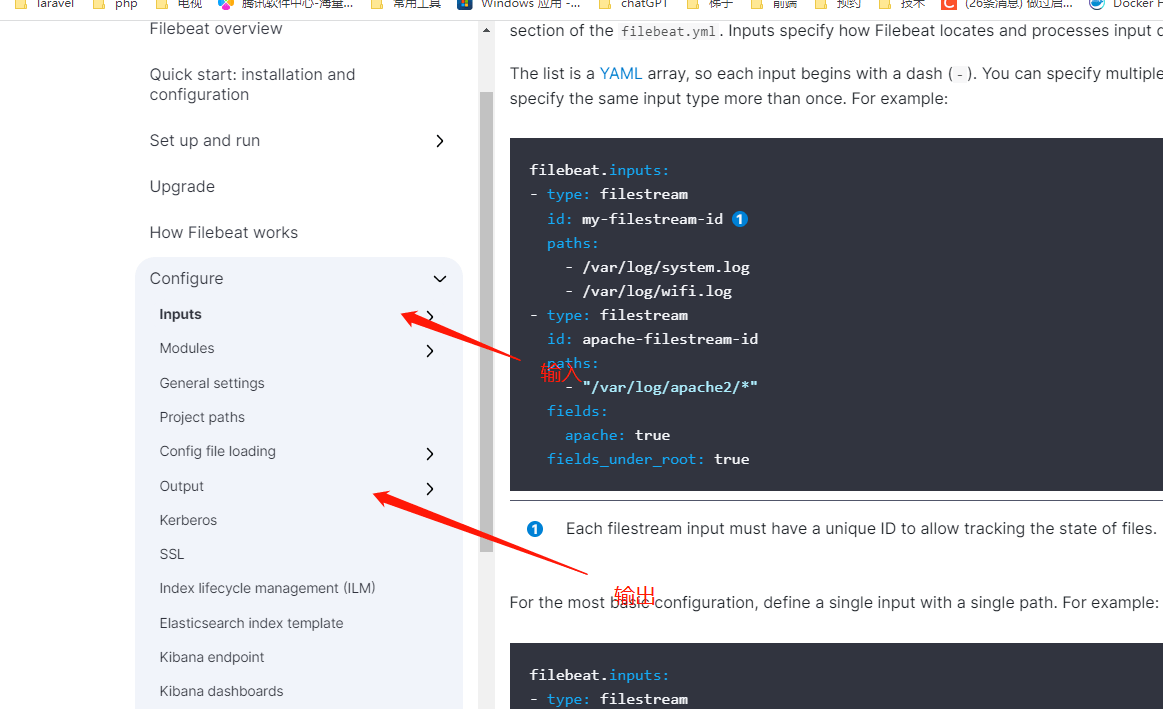
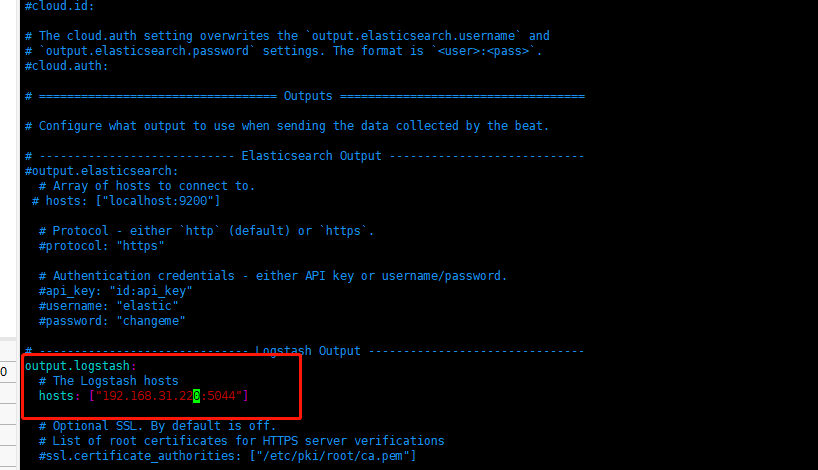
输出到logstash(不用这个)
www.elastic.co/guide/en/beats/file...
回到logstash文档输出
www.elastic.co/guide/en/logstash/c...
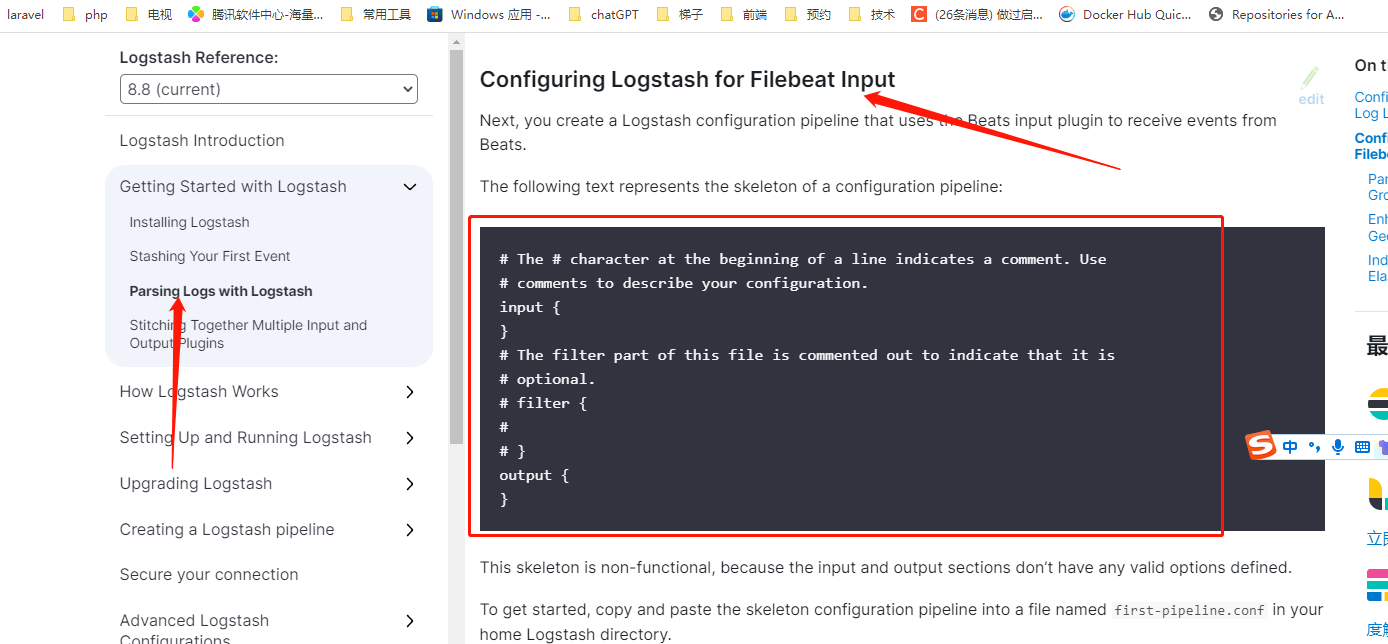

vim logstash-sample.conf这里输出到终端(下面会改成输出到es) stdout { codec => rubydebug }
input { beats { port => 5044 } } output { stdout { codec => rubydebug } } 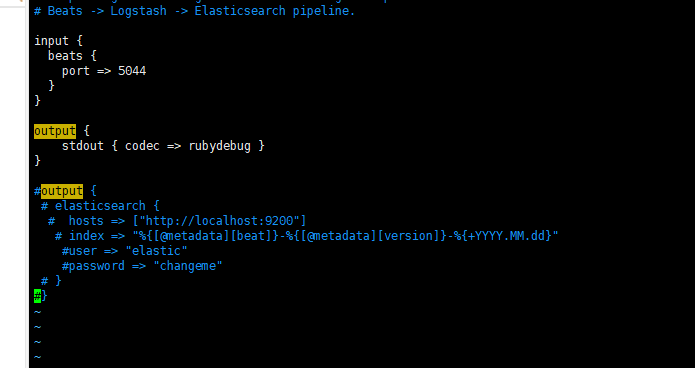
启动logstash(前面没关闭的要关闭,不然报错)
bin/logstash -f ./config/logstash-sample.conf --config.reload.automatic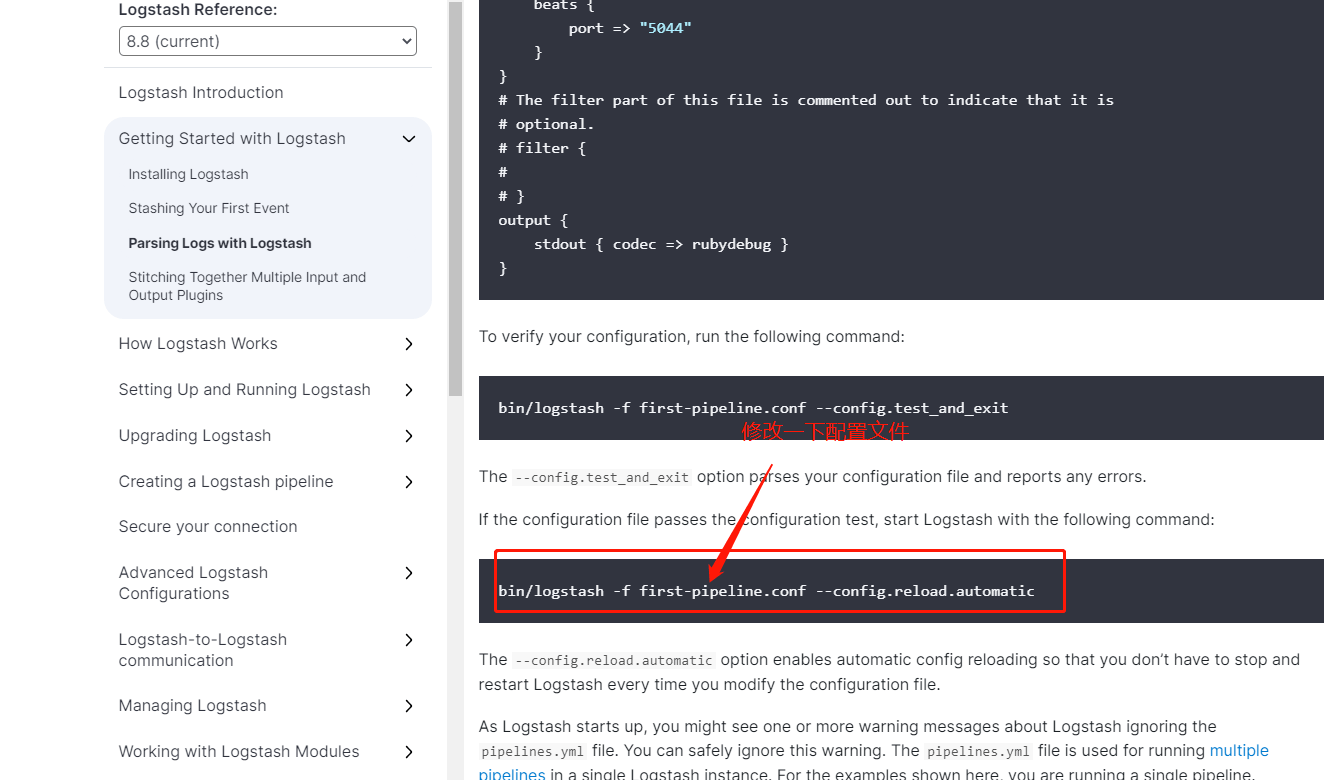
启动filebeat
www.elastic.co/guide/en/logstash/c...
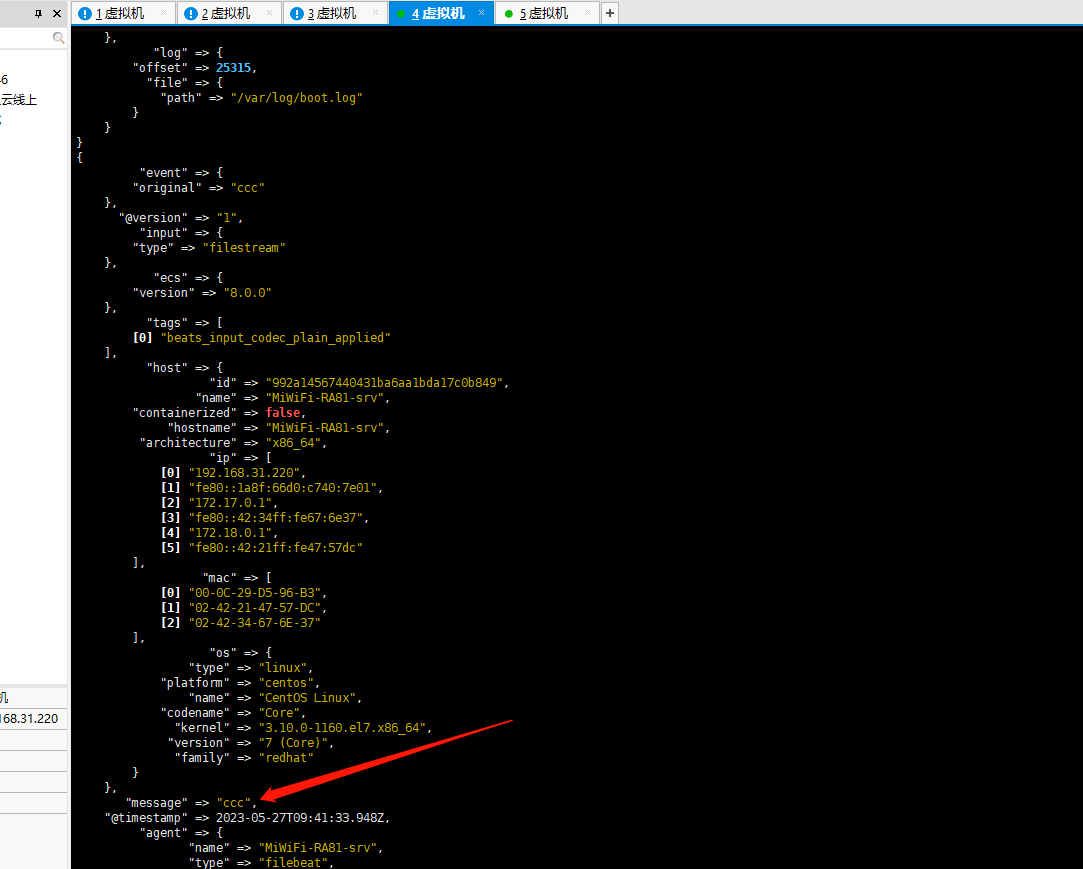
./filebeat -e -c filebeat.yml -d "publish"
测试

回到logstash窗口,发现输出终端成功
输出到es
[root@MiWiFi-RA81-srv config]# pwd /www/wwwroot/elk/logstash-8.8.0/config [root@MiWiFi-RA81-srv config]# vim logstash-sample.conf 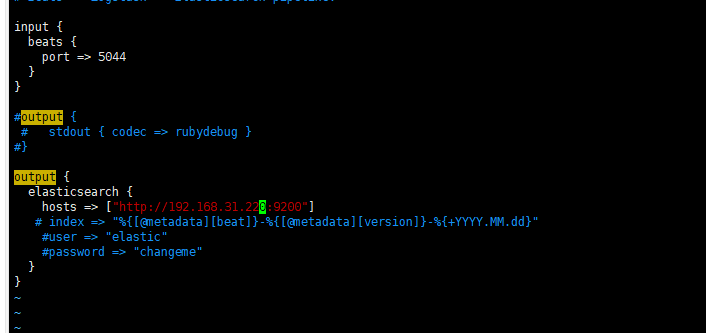
启动
bin/logstash -f ./config/logstash-sample.conf --config.reload.automatic测试输出
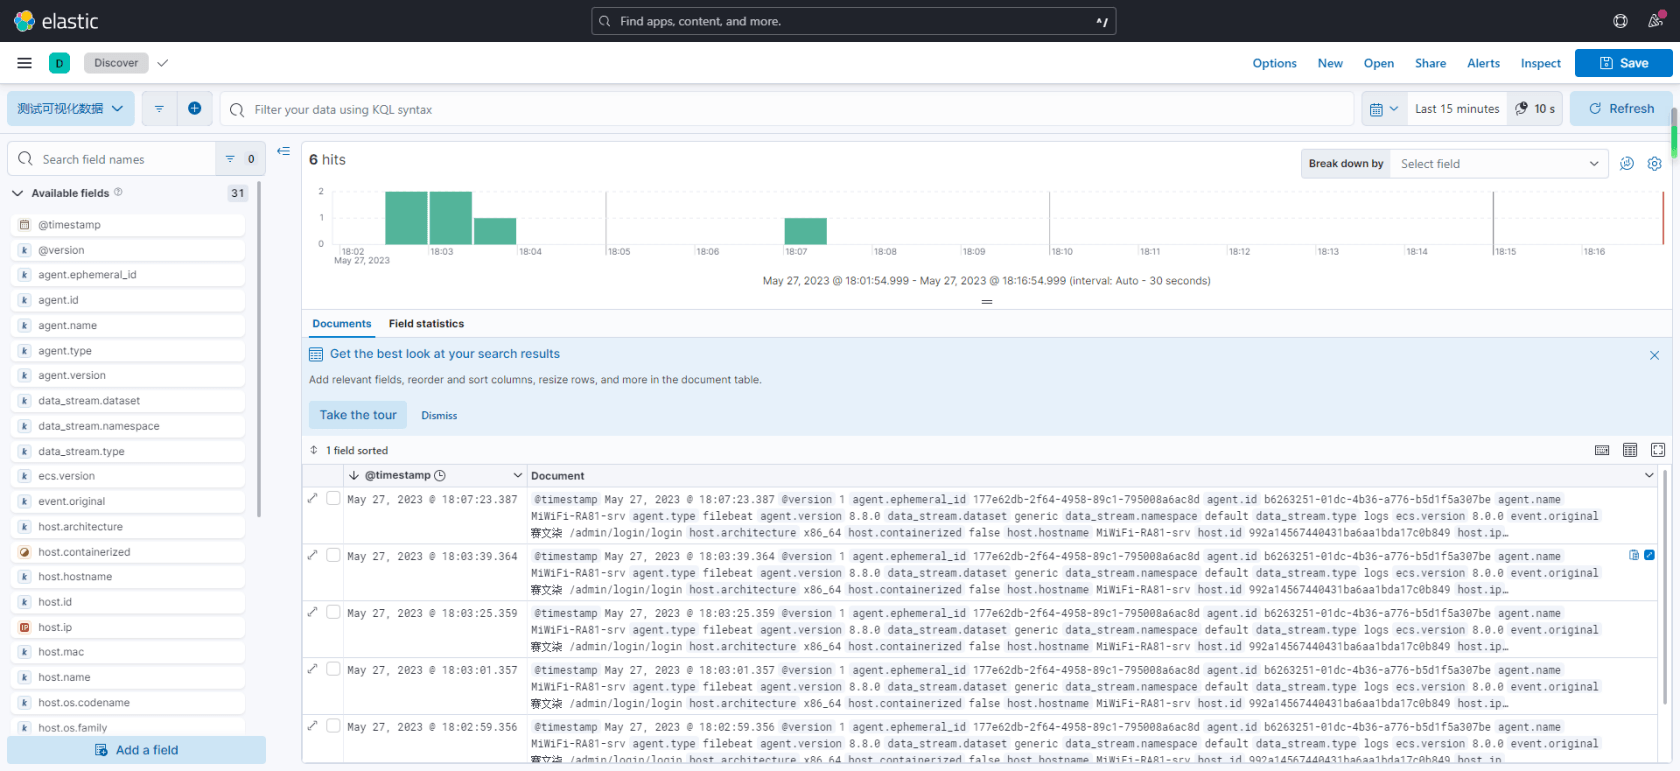
[root@MiWiFi-RA81-srv log]# pwd /var/log [root@MiWiFi-RA81-srv log]# echo "赛文柒 /admin/login/login" >> test.log 进入Kibana界面
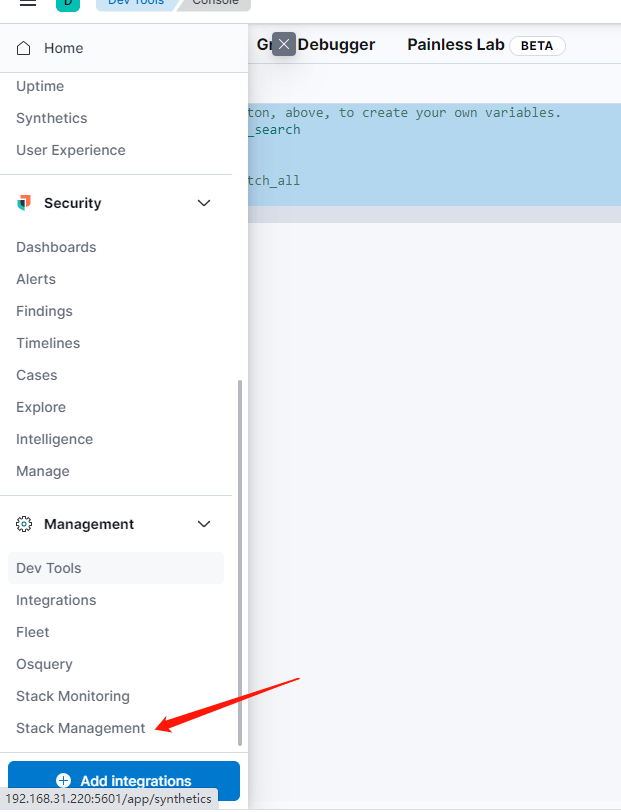
查询数据
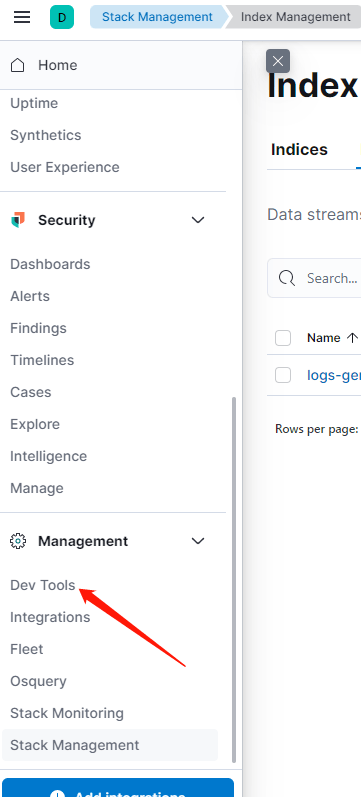
# Click the Variables button, above, to create your own variables. GET logs-generic-default/_search { "query": { "match_all": {} // match_all } }
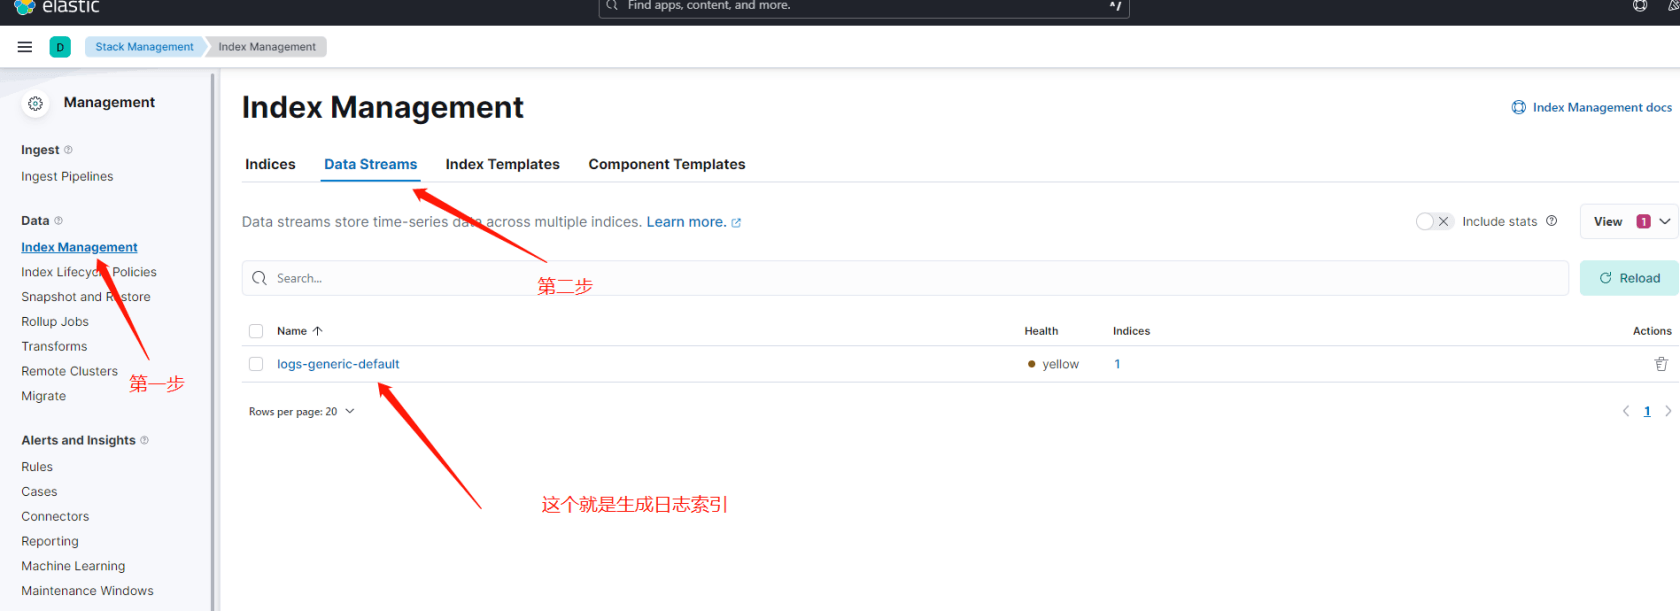
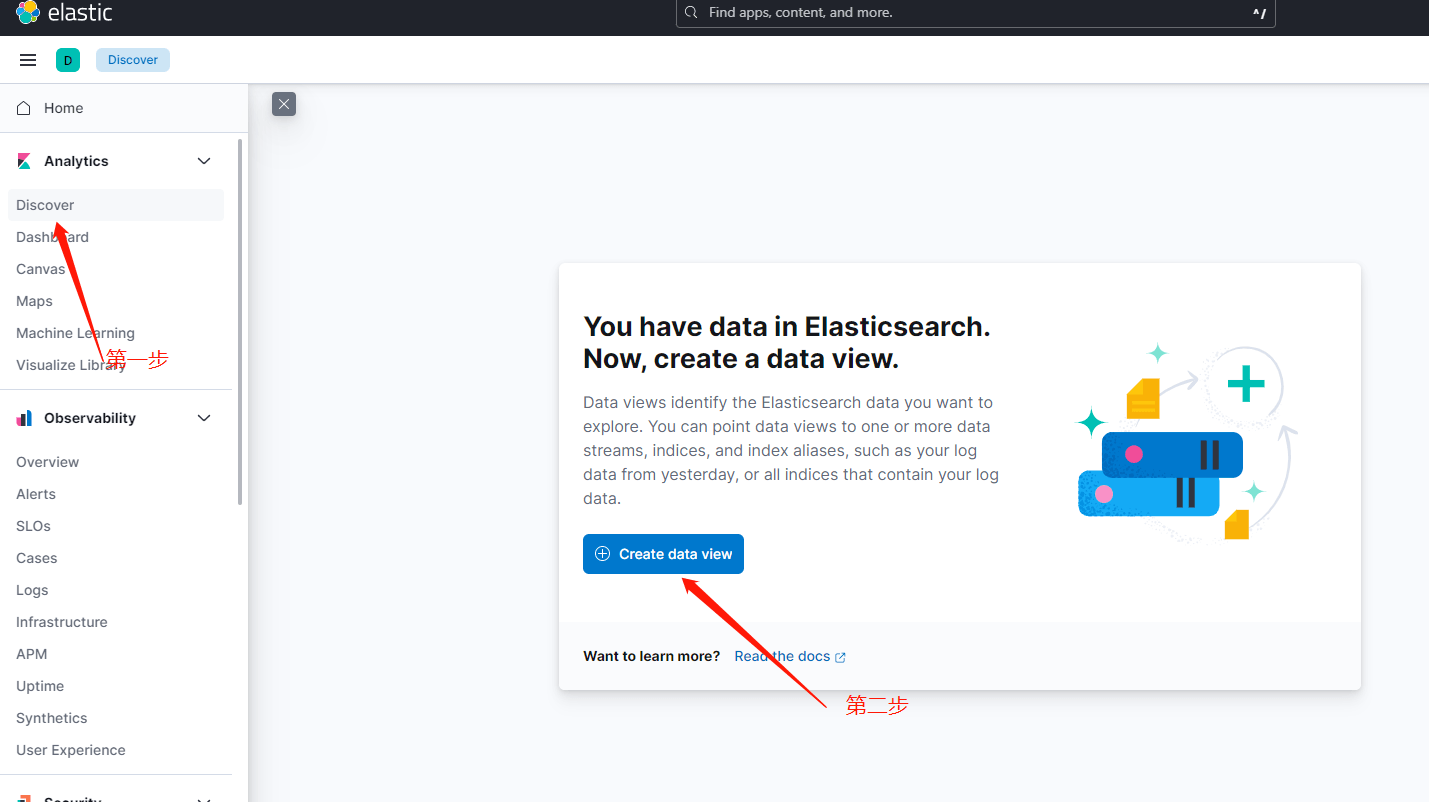
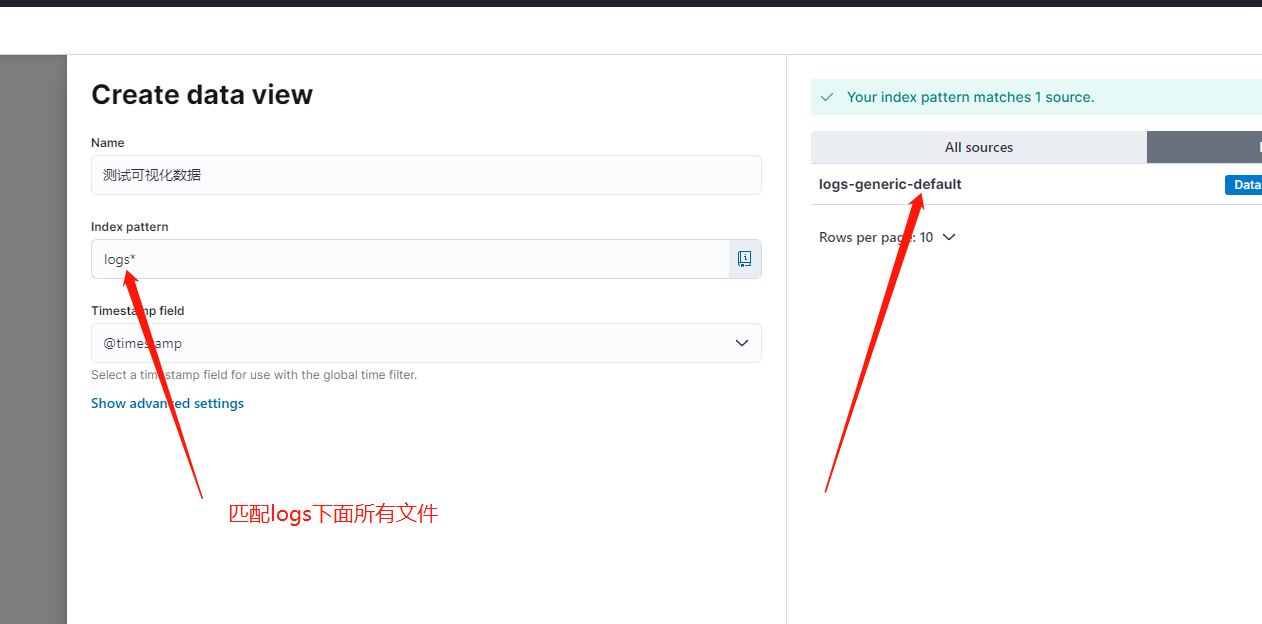
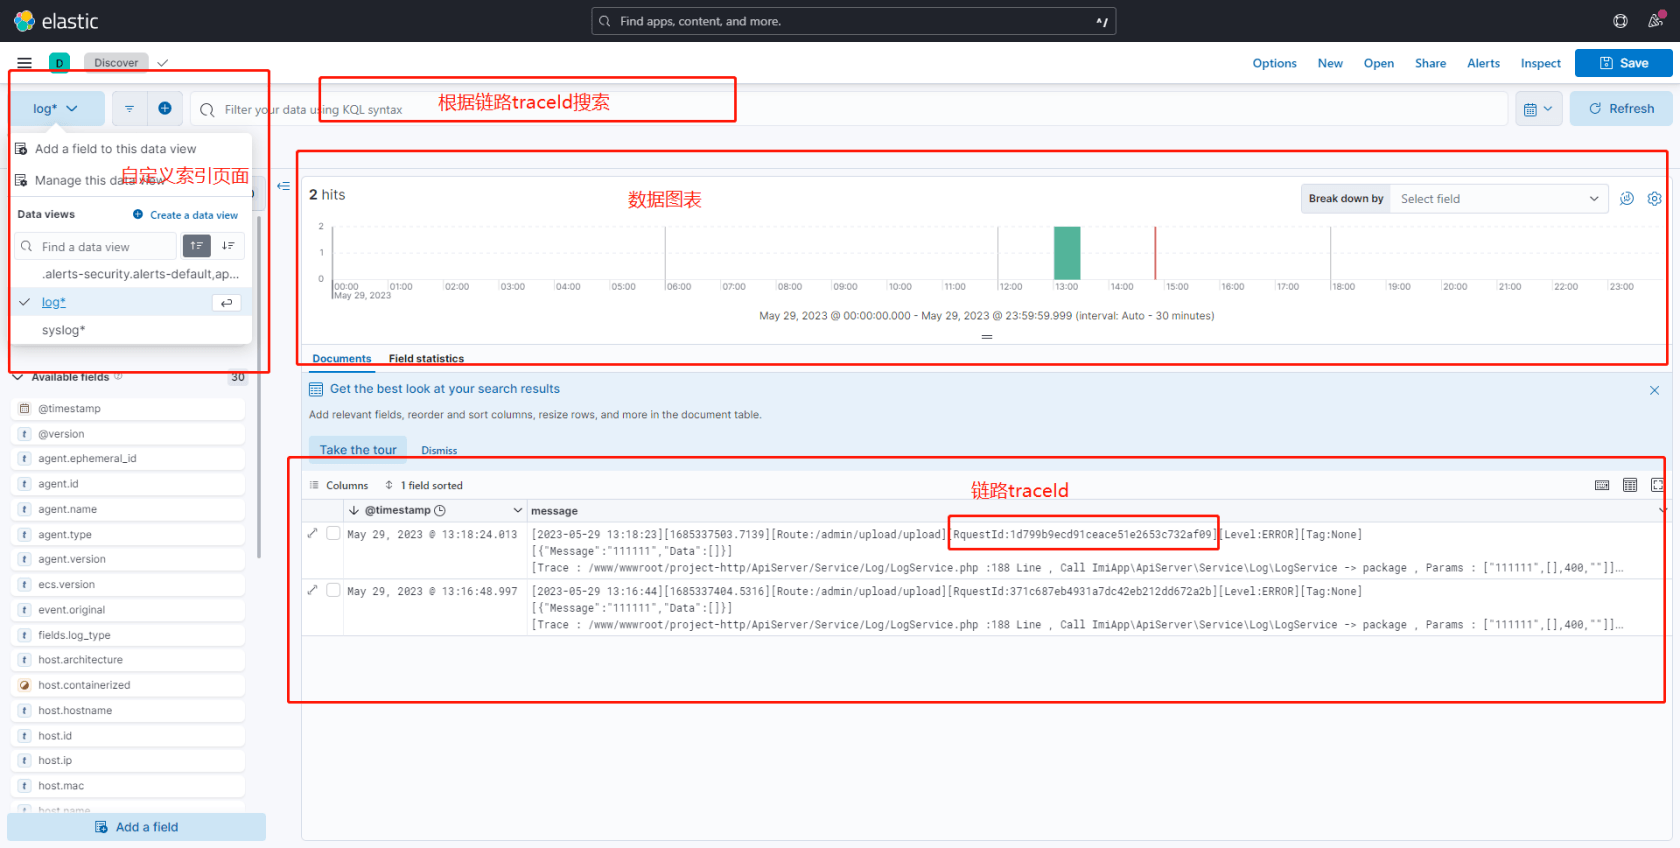
创建可视化界面(重点)
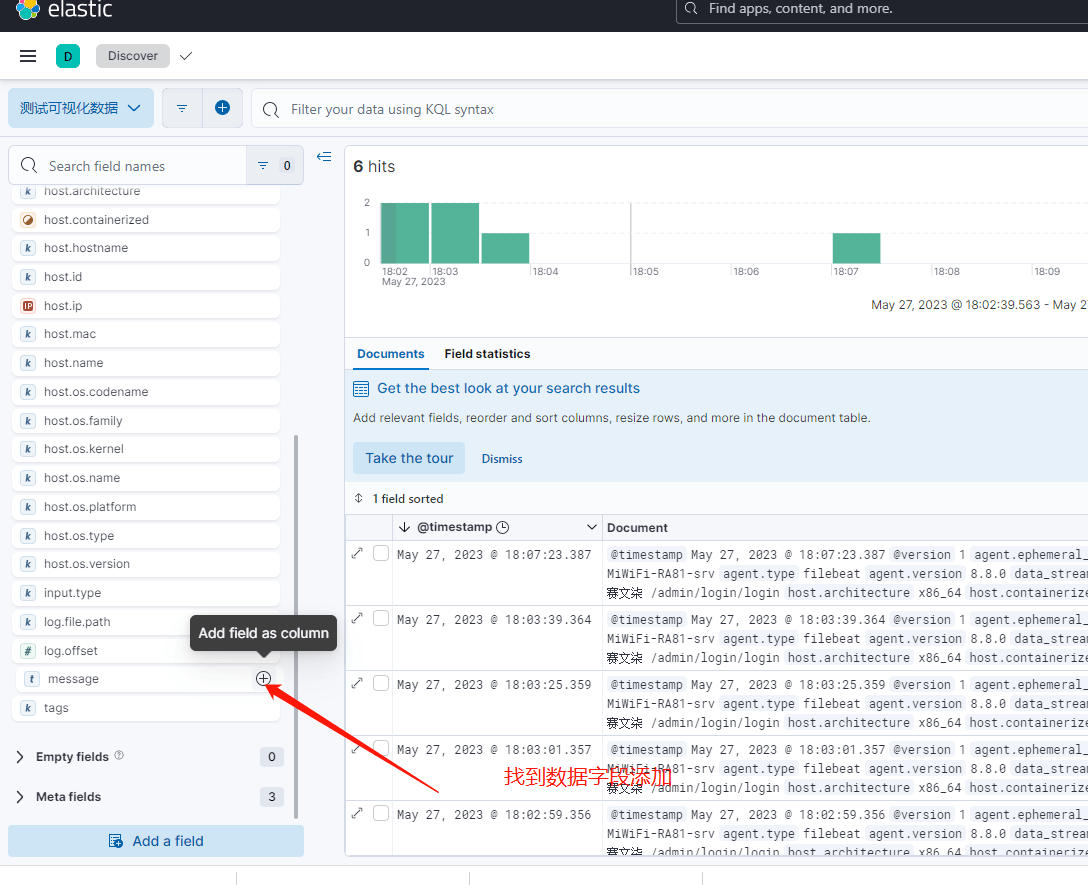
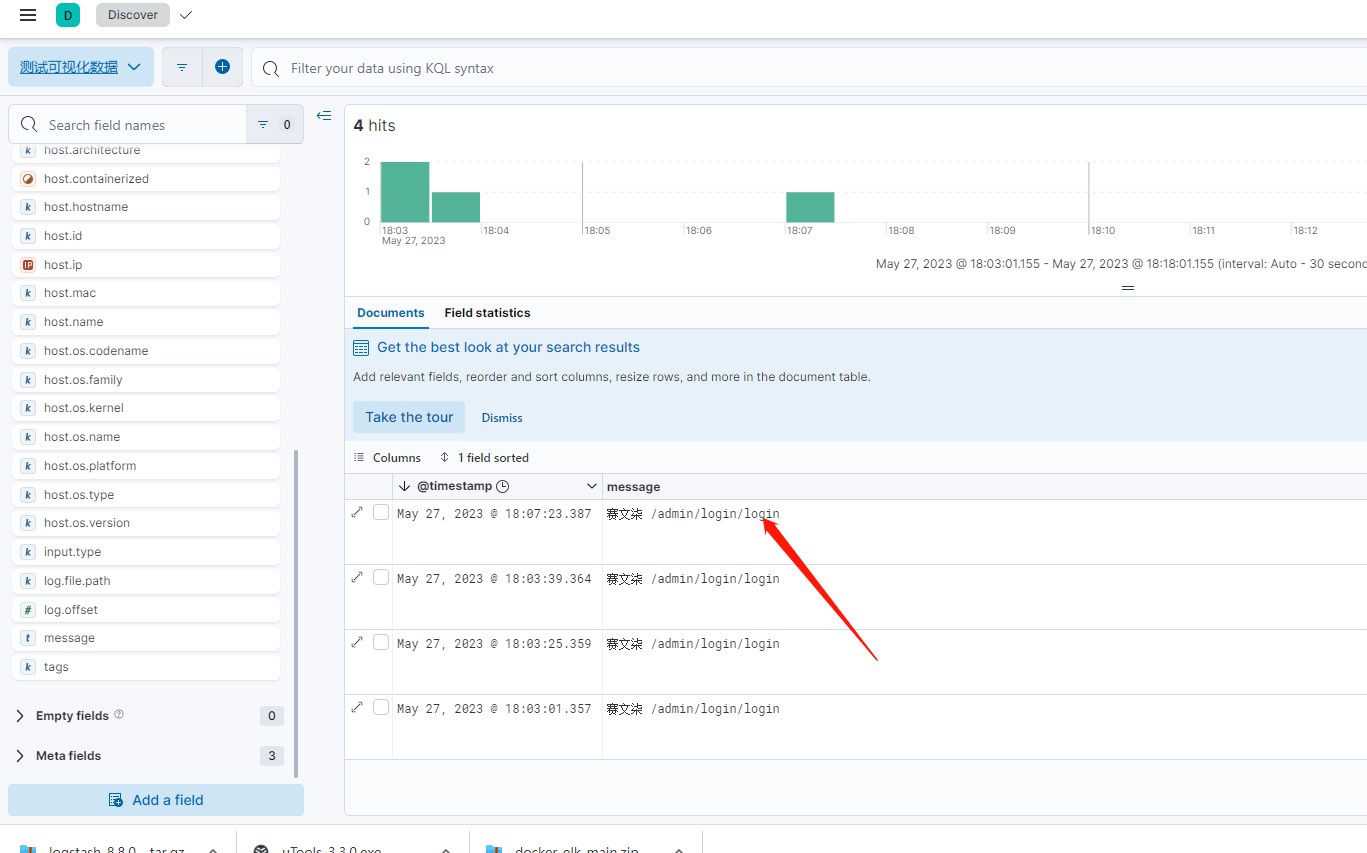
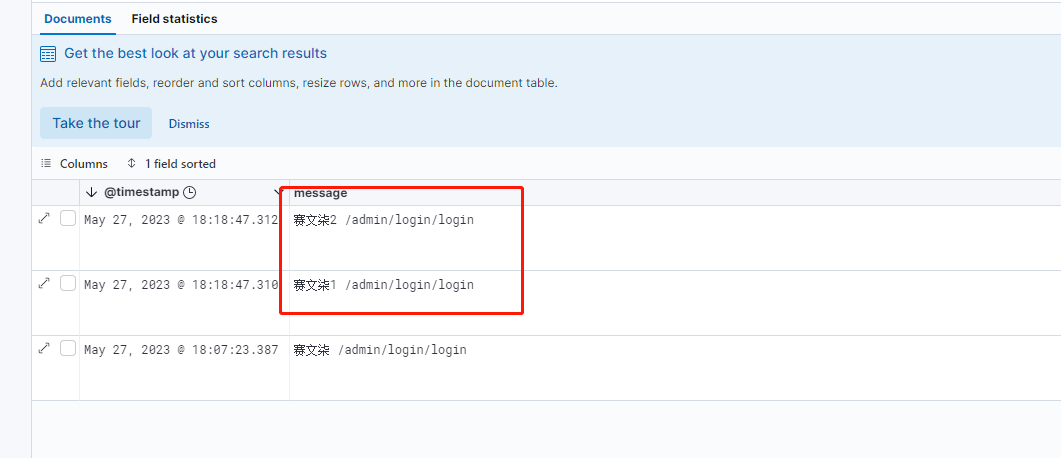
继续输出日志

根据目录配置es索引
vim filebeat.yml
filebeat.inputs: # Each - is an input. Most options can be set at the input level, so # you can use different inputs for various configurations. # Below are the input specific configurations. # filestream is an input for collecting log messages from files. - type: log # Unique ID among all inputs, an ID is required. #id: my-filestream-id # Change to true to enable this input configuration. enabled: true # Paths that should be crawled and fetched. Glob based paths. paths: - /var/server01/*.log fields: log_type: "server01" - type: log enabled: true paths: - /var/server02/*.log fields: log_type: "server02"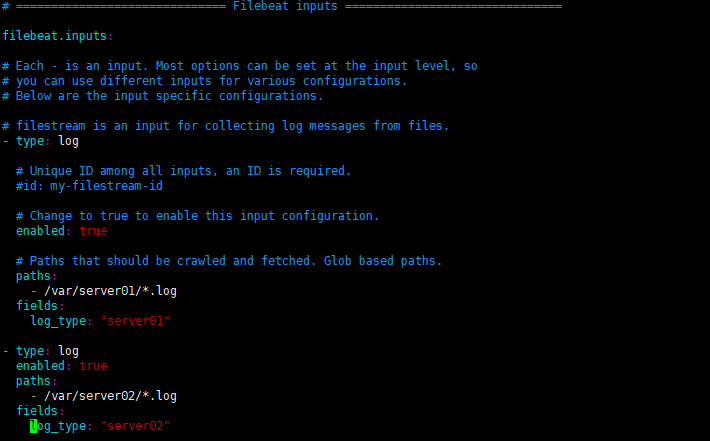
vim ./config/logstash-sample.conf
input { beats { port => 5044 } } #output { # stdout { codec => rubydebug } #} output { #elasticsearch { # hosts => ["http://192.168.31.220:9200"] # index => "logstash-test-%{index_name}" #user => "elastic" #password => "changeme" # } if [fields][log_type] == "server01" { elasticsearch { hosts => ["http://192.168.31.220:9200"] index => "server01-%{+YYYY.MM.dd}" } } if [fields][log_type] == "server02" { elasticsearch { hosts => ["http://192.168.31.220:9200"] index => "server02-%{+YYYY.MM.dd}" } } }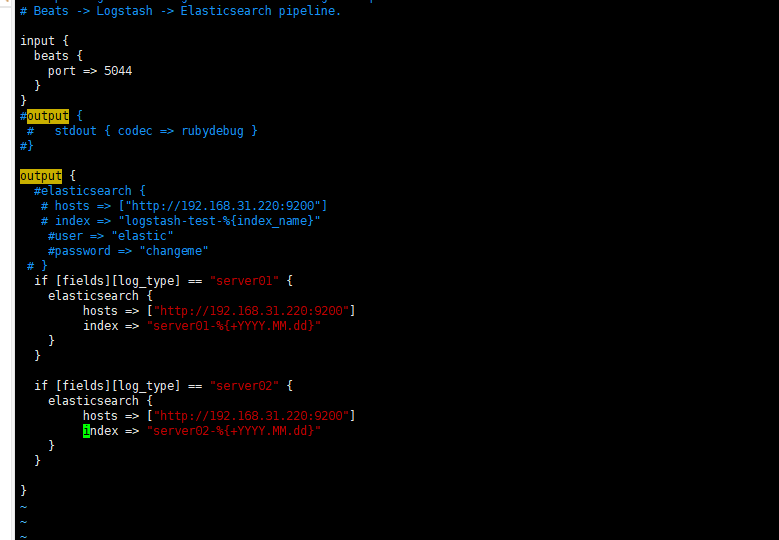
参考Filebeat+Logstash采集多个日志文件写入不同的ES索引
filebeat 配置多行解析
filebeat.inputs: # Each - is an input. Most options can be set at the input level, so # you can use different inputs for various configurations. # Below are the input specific configurations. # filestream is an input for collecting log messages from files. - type: log # Unique ID among all inputs, an ID is required. #id: my-filestream-id # Change to true to enable this input configuration. enabled: true # Paths that should be crawled and fetched. Glob based paths. paths: - /var/server01/*.log multiline.pattern: '^\d{4}-\d{2}-\d{2}' multiline.negate: true multiline.match: after fields: log_type: "server01" - type: log enabled: true paths: - /var/server02/*.log multiline.pattern: '^\d{4}-\d{2}-\d{2}' multiline.negate: true multiline.match: after fields: log_type: "server02" 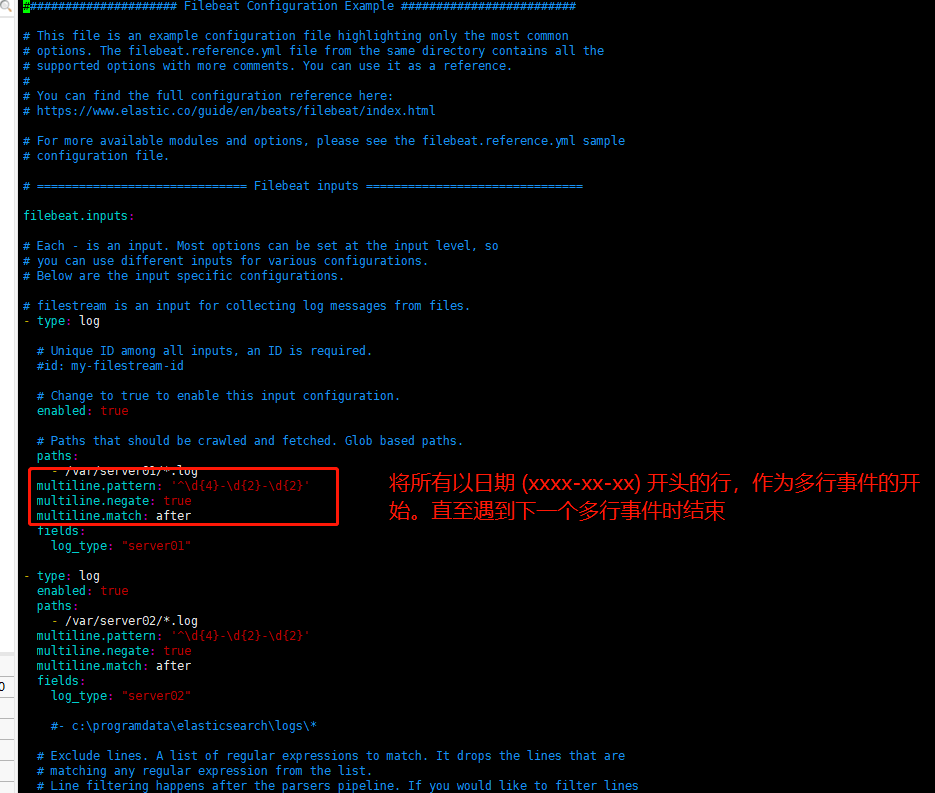
脚本运行
vim elk.sh
#!/bin/bash export ES_HOME=/www/wwwroot/elk/elasticsearch-8.8.0/ export KIBANA_HOME=/www/wwwroot/elk/kibana-8.8.0/ export LOGSTASH_HOME=/www/wwwroot/elk/logstash-8.8.0/ export FILEBEAT_HOME=/www/wwwroot/elk/filebeat-8.8.0-linux-x86_64/ su es <<EOF cd $ES_HOME pwd nohup ./bin/elasticsearch & echo "es start" EOF cd $KIBANA_HOME pwd nohup ./bin/kibana --allow-root & echo "kibana start" cd $LOGSTASH_HOME pwd nohup bin/logstash -f ./config/logstash-sample.conf --config.reload.automatic & echo "logstash start" cd $FILEBEAT_HOME pwd nohup ./filebeat -e -c filebeat.yml -d "publish" & echo "filebeat start" 启动
./elk.sh
vim elkstop.sh
#!/bin/bash pid=$(netstat -nlp | grep 9200 | awk '{print $7}' | awk -F"/" '{ print $1 }'); if [ -n "$pid" ]; then kill -9 $pid; fi echo "es is stopped" pid=$(netstat -nlp | grep 5601 | awk '{print $7}' | awk -F"/" '{ print $1 }'); if [ -n "$pid" ]; then kill -9 $pid; fi echo "kibana is stopped"关闭
./elkstop.sh
补充
nohup后台运行可以输入fg退出到终端
注意防火墙端口
效果图
本作品采用《CC 协议》,转载必须注明作者和本文链接


 关于 LearnKu


赞一个
优秀
7哥转运维了????????
:+1: 我嫌弃elk太大了,直接用的迷你版组合filebeat+zinc。