Development Docker Image
Start building your website or application today. It's free.
The October CMS Development Docker Image includes everything you need to explore the platform and start building a website instantly, without configuring your development machine. You can have a running October CMS container on your computer in a few minutes after reading this page or watching the video tutorial.
What's in the October CMS Development Docker Image?
The Image is based on the official PHP Docker Image and includes PHP 8.4, MariaDB and Apache. Use the Quick Demo to try out the platform instantly, or set up a Development Environment for building real projects. You can create multiple containers to work on different projects.
macOS, Windows, and Linux
The Image is compatible with ARM64 and AMD64 CPU architectures and can work on Windows, Linux and macOS systems with Intel and Apple M1 processors.
To protect your database and files, both setup methods allow you to store the source code and database on the host machine. You won't lose your work if you accidentally delete the container. Just recreate the container and continue from where you left off!
Installing and Using October CMS Development Docker Image
Please select your platform:
-
I'm using Windows
-
I'm using macOS or Linux
Select your preferred installation method:
-
Quick Demo — the fastest way to try October CMS
Pull and run a pre-built Docker image. Great for evaluation, not recommended for real development.
-
Development Setup — for building real projects
Clone the CLI toolkit and set up a persistent, fully-featured development environment with Xdebug, Redis and more.
Quick Demo on Windows using Docker Desktop
This method is intended for trying out October CMS. For building real projects, use the Development Setup method.
- Install and launch Docker Desktop for Windows.
- Launch Command Prompt and run
docker pull octobercms/october:latest - In Docker Desktop, go to Images, find the pulled image, and click Run.
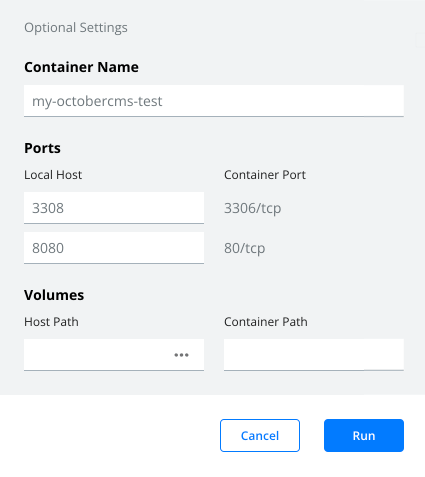
- In the container configuration popup, click Optional Settings.
- Enter the container name, e.g. my-octobercms-test. If you skip that step, a container name will be generated automatically.
- Click the Plus icon in the Ports section to reveal settings for the port 80.
- Enter a forwarding port number for the container's port 80. You will use this port to access the installation in a browser. You can use 8080 or a similar value. Remember that you can't have two running containers that use the same port number. We recommend using a unique port number for every container.
- Optionally, enter a forwarding port number for the database port 3306. You can use that port to connect to the MariaDB server running in the container.
- Click Run to start the container.
After the container starts, you should be able to access the installation in a browser, e.g. http://localhost:8080. It can take a few minutes for the container to configure itself after the first launch. If the page doesn't open, try refreshing it until it loads.
Using the Image
After creating the container, you can control it on the Containers / Apps tab in Docker Desktop. Please note that deleting the container will also delete any data and files that you created in the container. You can map Docker volumes to preserve your data — see the example below.
Running with Data Persistence
You can run the container from the command line with volume mounts to protect your files and database:
docker run -d \ --name my-october \ -p 8080:80 \ -p 3306:3306 \ -v my_october_files:/var/www/html \ -v my_october_db:/var/lib/october-mysql \ octobercms/october:latest
With this configuration, you can delete and recreate the container without losing your data.
Editing files in the container
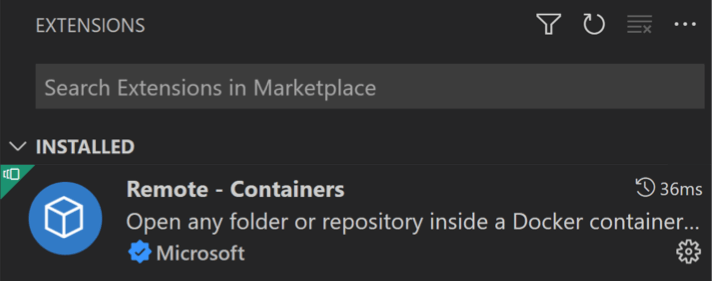
You can access files in the container using the Remote-Containers extension for Microsoft Visual Studio Code.
- Install the extension.
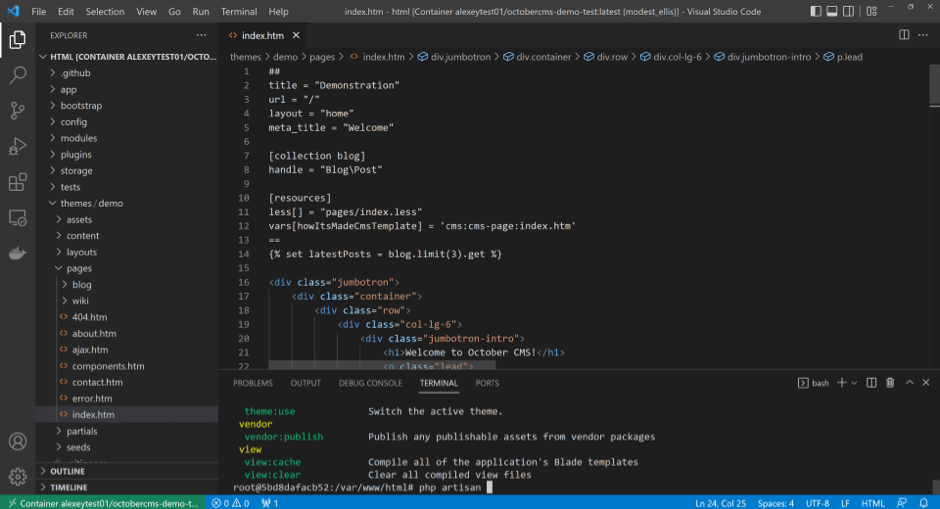
- Open the Command Palette (
ctrl+shift+p) and select Remote-Containers: Attach to Running Container. - Select your container.
- That will open a new Code window. Click the Open Folder button in the sidebar and select the
/var/www/htmldirectory.

You can now edit theme files and experiment with creating plugins.
Running CLI commands in the container
The Remote-Containers: Attach to Running Container command described above connects the Visual Studio Code Terminal to the container shell. To open the Terminal, use the ctrl+` hotkey or select View / Terminal from the main menu. The Terminal opens in the October CMS installation directory, which is /var/www/html.
In the Terminal you can run any CLI commands, including Artisan and Composer commands. Run php artisan to see the list of available commands.
Accessing the database
The MariaDB database is called octobercms. You can access it using the mysql CLI tool from the Visual Studio Code Terminal or your host machine.
- In the Visual Studio Code Terminal run
mysql -uroot -proot octobercms. - Alternatively, if you forwarded the database port during the container creation and you have the MySQL client tools installed on your host computer, you can connect from your host machine in Windows Command Prompt:
mysql --host=127.0.0.1 -uroot -proot --port=3307 octobercms. Theportargument is the port number you entered in the container configuration. - Alternatively, if you configured the database port forwarding, you can use any database GUI tool, for example, MySQL Workbench.
Quick Demo on macOS or Linux using Docker Desktop
This method is intended for trying out October CMS. For building real projects, use the Development Setup method.
- Install and launch Docker Desktop for macOS or Linux.
- Launch Terminal and run
docker pull octobercms/october:latest - In Docker Desktop, go to Images, find the pulled image, and click Run.
- In the container configuration popup, click Optional Settings.
- Enter the container name, e.g. my-octobercms-test. If you skip that step, a container name will be generated automatically.
- Click the Plus icon in the Ports section to reveal settings for the port 80.
- Enter a forwarding port number for the container's port 80. You will use this port to access the installation in a browser. You can use 8080 or a similar value. Remember that you can't have two running containers that use the same port number. We recommend using a unique port number for every container.
- Optionally, enter a forwarding port number for the database port 3306. You can use that port to connect to the MariaDB server running in the container.
- Click Run to start the container.
After the container starts, you should be able to access the installation in a browser, e.g. http://localhost:8080. It can take a few minutes for the container to configure itself after the first launch. If the page doesn't open, try refreshing it until it loads.
Using the Image
After creating the container, you can control it on the Containers / Apps tab in Docker Desktop. Please note that deleting the container will also delete any data and files that you created in the container. You can map Docker volumes to preserve your data — see the example below.
Running with Data Persistence
You can run the container from the command line with volume mounts to protect your files and database:
docker run -d \ --name my-october \ -p 8080:80 \ -p 3306:3306 \ -v my_october_files:/var/www/html \ -v my_october_db:/var/lib/october-mysql \ octobercms/october:latest
With this configuration, you can delete and recreate the container without losing your data.
Editing files in the container
You can access files in the container using the Remote-Containers extension for Microsoft Visual Studio Code.
- Install the extension.
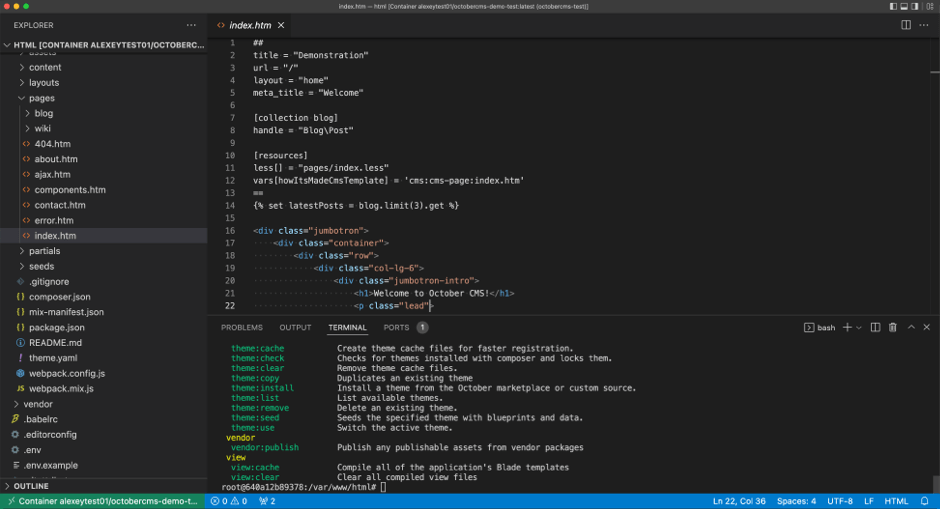
- Open the Command Palette (
cmd+shift+p) and select Remote-Containers: Attach to Running Container. - Select your container.
- That will open a new Code window. Click the Open Folder button in the sidebar and select the
/var/www/htmldirectory.
You can now edit theme files and experiment with creating plugins.
Running CLI commands in the container
The Remote-Containers: Attach to Running Container command described above connects the Visual Studio Code Terminal to the container shell. To open the Terminal, use the ctrl+` hotkey or select View / Terminal from the main menu. The Terminal opens in the October CMS installation directory, which is /var/www/html.
In the Terminal you can run any CLI commands, including Artisan and Composer commands. Run php artisan to see the list of available commands.
Accessing the database
The MariaDB database is called octobercms. You can access it using the mysql CLI tool from the Visual Studio Code Terminal or your host machine.
- In the Visual Studio Code Terminal run
mysql -uroot -proot octobercms. - Alternatively, if you forwarded the database port during the container creation and you have the MySQL client tools installed on your host computer, you can connect from your host machine in Terminal:
mysql --host=127.0.0.1 -uroot -proot --port=3307 octobercms. Theportargument is the port number you entered in the container configuration. - Alternatively, if you configured the database port forwarding, you can use any database GUI tool, for example, MySQL Workbench.
Setting Up a Development Environment on Windows
A persistent, fully-featured environment for building real projects with October CMS.
Prerequisites
- Install Docker Desktop for Windows.
- Install WSL 2 (Windows Subsystem for Linux). Open Windows Command Prompt or PowerShell and run
wsl --install. If WSL is already installed, install a Linux distribution from the Microsoft Store — we recommend Ubuntu 24.04. Git is included. - Enable Docker's WSL integration for your distribution. In Docker Desktop, go to Settings → Resources → WSL Integration and enable integration for your distribution (e.g. Ubuntu-24.04). This allows the
dockercommand to work inside the WSL terminal.
Setup
- Start Ubuntu from the Windows Start menu.
- Clone the October CMS Docker toolkit and enter the directory:
git clone https://github.com/octobercms/docker.git cd docker
- Run the setup wizard:
./october-setup myappThe wizard will ask you to configure the environment (development or production), port numbers, and optional services. For your first site, the defaults work well.
- Start the site:
./launcher start myapp - Access the site at http://localhost (or the port you chose during setup). The first start may take a few minutes while the container installs October CMS.
Using the Development Environment
Common commands
The launcher script provides a set of commands for managing your site:
./launcher start myapp— Start the site containers../launcher stop myapp— Stop the site containers../launcher restart myapp— Restart the site containers../launcher enter myapp— Open a shell inside the web container../launcher logs myapp— View container logs../launcher status— Show all sites and their status.
Editing files
Open VS Code attached directly to the running container:
./launcher code myapp
This opens Visual Studio Code with the Dev Containers extension connected to the web container, giving you full IDE support with IntelliSense, integrated debugging with Xdebug, and terminal access inside the container.
Accessing files from Windows
Site files live inside WSL 2 for optimal Docker performance. To access them with Windows tools like Tortoise Git or Windows Explorer, the launcher can mount the sites directory as a Windows drive via Samba:
./launcher mount
Your sites will be available at a drive letter (e.g. Z:\myapp). To disconnect, run ./launcher unmount. The WSL IP changes on reboot, so you'll need to run ./launcher mount each time you restart your machine.
Running CLI commands
Open a shell inside the container to run Artisan and Composer commands:
./launcher enter myapp php artisan
Multiple sites
You can run multiple October CMS sites from one installation. Each site has isolated containers and data:
./october-setup blog ./october-setup shop --port 8080 ./launcher start blog ./launcher start shop
Rebuilding a site
If something goes wrong, you can destroy and recreate the containers without losing your application files and database:
./launcher destroy myapp ./launcher start myapp
Setting Up a Development Environment on macOS or Linux
A persistent, fully-featured environment for building real projects with October CMS.
Prerequisites
- Install Docker Desktop for macOS or Linux.
Setup
- Open Terminal.
- Clone the October CMS Docker toolkit and enter the directory:
git clone https://github.com/octobercms/docker.git cd docker
- Run the setup wizard:
./october-setup myappThe wizard will ask you to configure the environment (development or production), port numbers, and optional services. For your first site, the defaults work well.
- Start the site:
./launcher start myapp - Access the site at http://localhost (or the port you chose during setup). The first start may take a few minutes while the container installs October CMS.
Using the Development Environment
Common commands
The launcher script provides a set of commands for managing your site:
./launcher start myapp— Start the site containers../launcher stop myapp— Stop the site containers../launcher restart myapp— Restart the site containers../launcher enter myapp— Open a shell inside the web container../launcher logs myapp— View container logs../launcher status— Show all sites and their status.
Editing files
Open VS Code attached directly to the running container:
./launcher code myapp
This opens Visual Studio Code with the Dev Containers extension connected to the web container, giving you full IDE support with IntelliSense, integrated debugging with Xdebug, and terminal access inside the container.
Running CLI commands
Open a shell inside the container to run Artisan and Composer commands:
./launcher enter myapp php artisan
Multiple sites
You can run multiple October CMS sites from one installation. Each site has isolated containers and data:
./october-setup blog ./october-setup shop --port 8080 ./launcher start blog ./launcher start shop
Rebuilding a site
If something goes wrong, you can destroy and recreate the containers without losing your application files and database:
./launcher destroy myapp ./launcher start myapp