Showing posts with label tutorial. Show all posts

Sunday, June 15, 2025

Attaching a Hooked Piece to a Cigar Box ~

A day late ~

I'm sure using glue on a hooked piece is a no-no, but rules are meant to be broken!

First I run a bead of glue around the edge of the hooking.  This time I used Aileen's tacky glue.  I have also used Elmer's.

Then smoosh it around to get a few threads of the linen and on to the last row of loops.


It may take a few hours to dry, depending on the temperature and how thick the glue was applied.  It will dry clear.

Then carefully trim away the linen as close as possible to hooked row., being careful to not cut the wool.


After trimming, I use a Sharpie to disguise the cut edge on the front.


Now run a bead of glue on the edge.

Carefully place on the cigar box top and weight it down to dry.  A heavy crock does the trick.
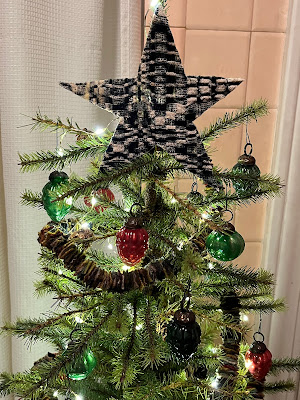
All finished!

And the inside.


Think good thoughts for me tomorrow.  I have had a slowly developing cataract for many years.  About six months ago it developed into a cataract on steroids.  I am so tired of blurry vision!!!  I just want to see well again.  Prayers appreciated, too.

Thanks so much for stopping by.
Pug hugs 😊
Lauren

Sunday, December 4, 2022

Easy Peasy Wool Garland ~

I first saw a wool garland made like this about 10 years ago at hooker Deb's house but was not inspired to make one until hooker Melissa had made some.  A bit time consuming to make, but so darn easy and no need to be exact!  Use leftover snippets, worms or cut new strips.  Wool that is too thick or thin works just fine.  No need to color plan.  It is all random.  These are mostly a 9 cut strip.  You can use larger or smaller strips or a combination.


I cut my pieces about 3/4".  Like I said, no need to be exact.  You can cut them with scissors, or for faster cutting, lay them on a cutting mat and use a rotary cutter.


I would suggest using a strong thread such as a button or silamide thread.  You would hate for the thread to break after stringing.  This is the thread I use.


Tie a knot, button or bell at the end and start stringing.


I love how it looks on my tree.


My star tree topper is another super easy thing to make.  I drew a simple star and then got a leftover piece of coverlet.  I painted the backside with Mod Podge to stiffen it a little, let it dry and then cut out the star shape.  Done in a jiffy.


The garland actually takes longer than I anticipated and surprisingly uses quite a bit of wool, but it is such a no brainer and a great way to use leftover worms.  The hardest part is cutting all those darn little pieces.  Tomorrow we are off to visit friends, so the 4 hours spent in the car will be used to string more garland.  Thanks for the inspiration, Melissa.

Thanks so much for stopping by.
Pug hugs 😊
Lauren

Tuesday, October 20, 2015

Sunflower Tutorial ~

 
Here's how I make my sunflowers with proddy petals.  Maybe not the right way, but it's the way I do it.

 
Draw a circle on the backing of your choice.  A 4" diameter is a good size for the sunflower on a bedspring.  Larger if you want a table/candle mat.
 
These are the wools I used for the center.  (I did not mix the wools.  The plaids give you a varied look.)  The colors are washed out but you get the idea of what type of wool I used, right?
 
 
After hooking the center, do a row of proddy as close to your last row of hooking as you can.  Go here to learn my method of proddy using your rug hook.  (Note ~ proddy tool is STILL missing . . . sigh.)  I used maybe 5 different wools for the petals.
 
 
Do two rows of proddy for fullness.

On this sunflower, I used the same wool for the first row and varied the wools for the second row.


On this one, I varied the wools for both rows.


Here is an idea of the spacing between the proddy.
 
 
Cut your backing about 1" from your second row.  I zigzag the edges to prevent fraying.


I fold over and pin.  Baste if desired.  Do not steam ~ it will really smash your petals.  (Yes, I did that ~ ugh.) 

 
Cut a wool circle to size.  Whipstitch in place being sure you don't forget to remove all your pins :)  Padding can be added if desired but it may make it difficult to insert the spring.


This is the type bedspring I used.  On the left is as I bought it (from a friend but you can find them at antique shops or I'm sure online) and on the right after DSO cut it.  I know others have not cut them, but this seemed so much easier to me.


Carefully "screw" the spring in to the back of the sunflower, poking through the wool. 

 
I hope this answers any questions you might have.  Please email me if you need additional information.
 
Thanks so much for stopping by.
Pug hugs :)
Lauren