Download as PDF, PPTX


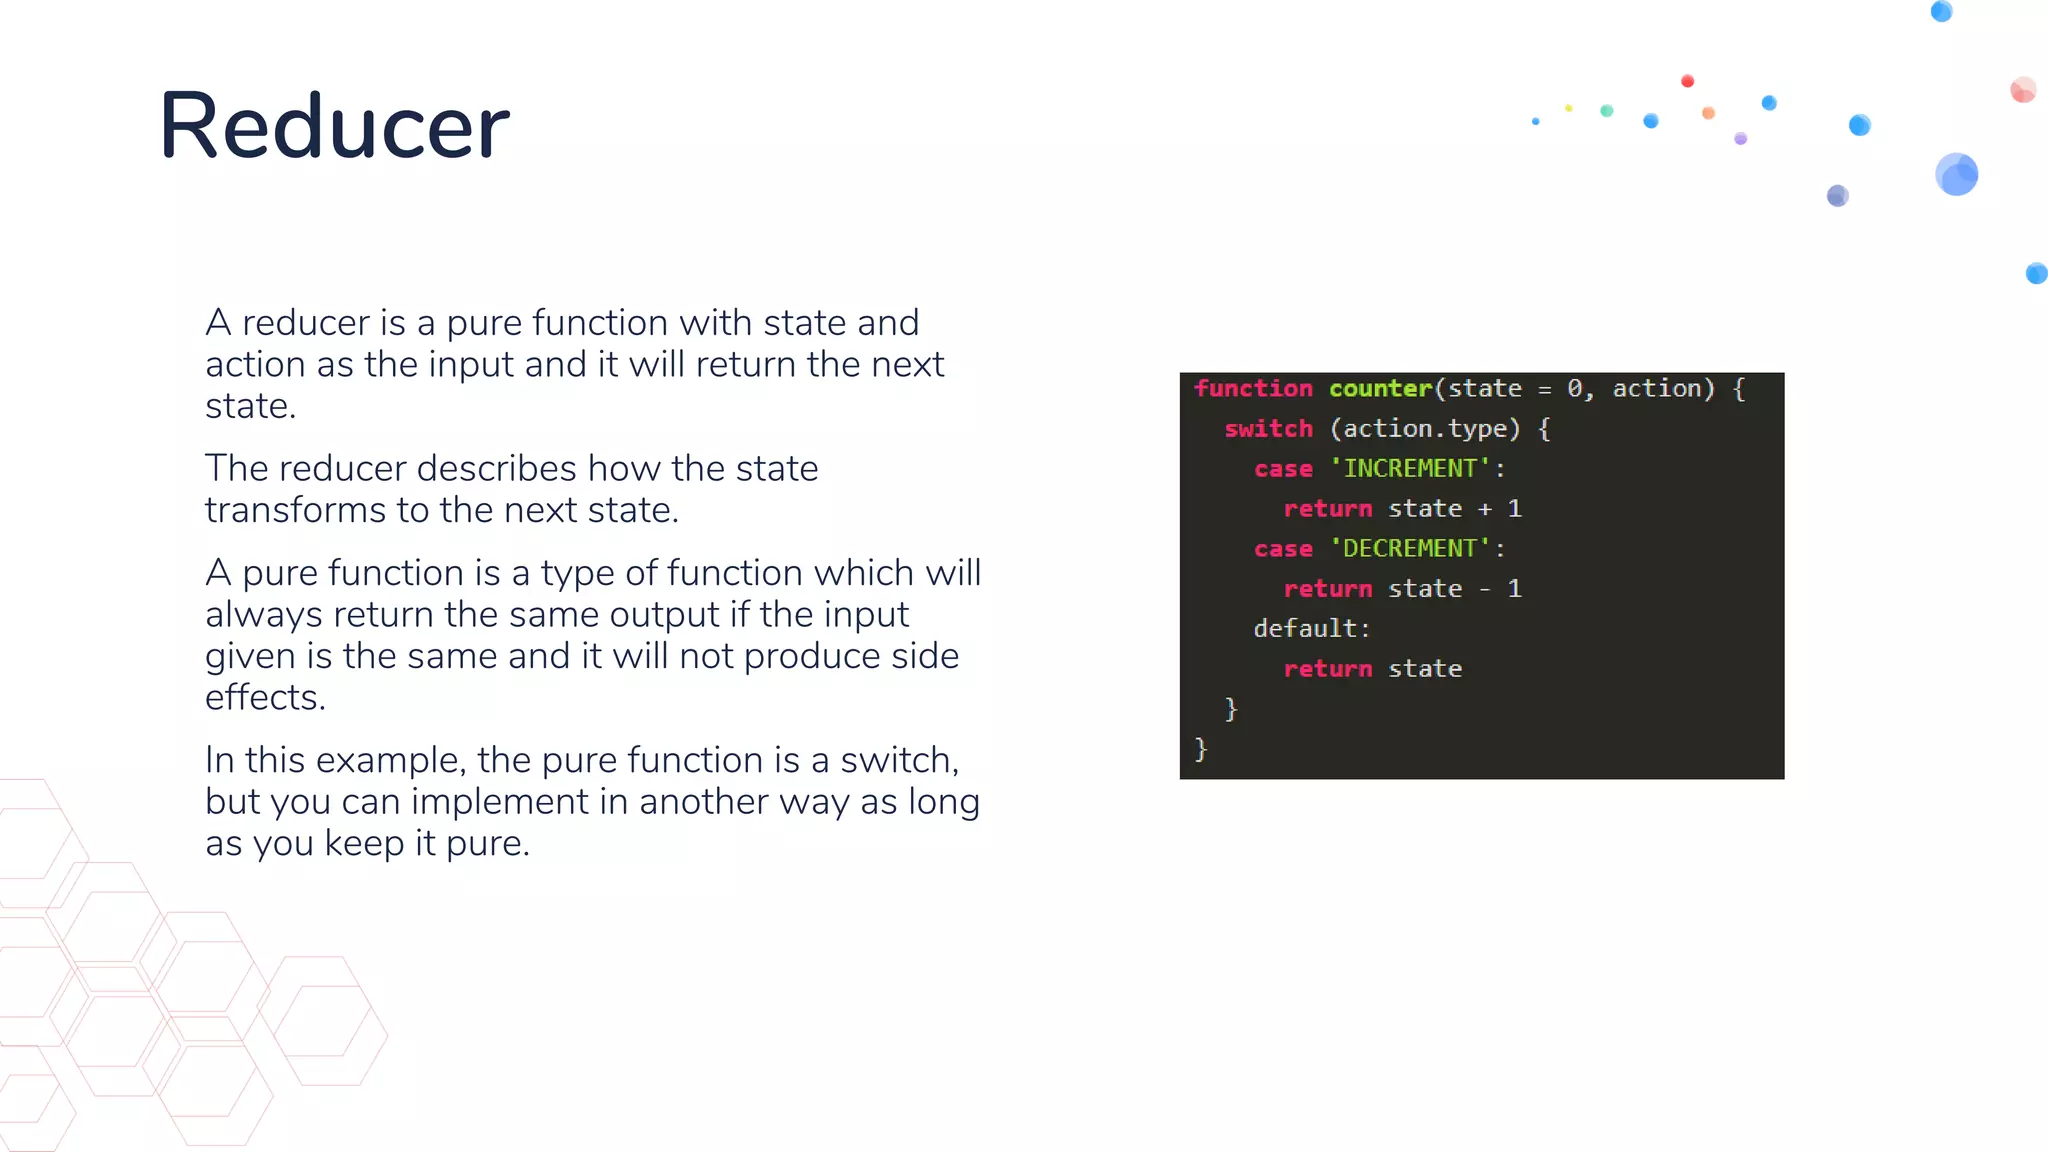
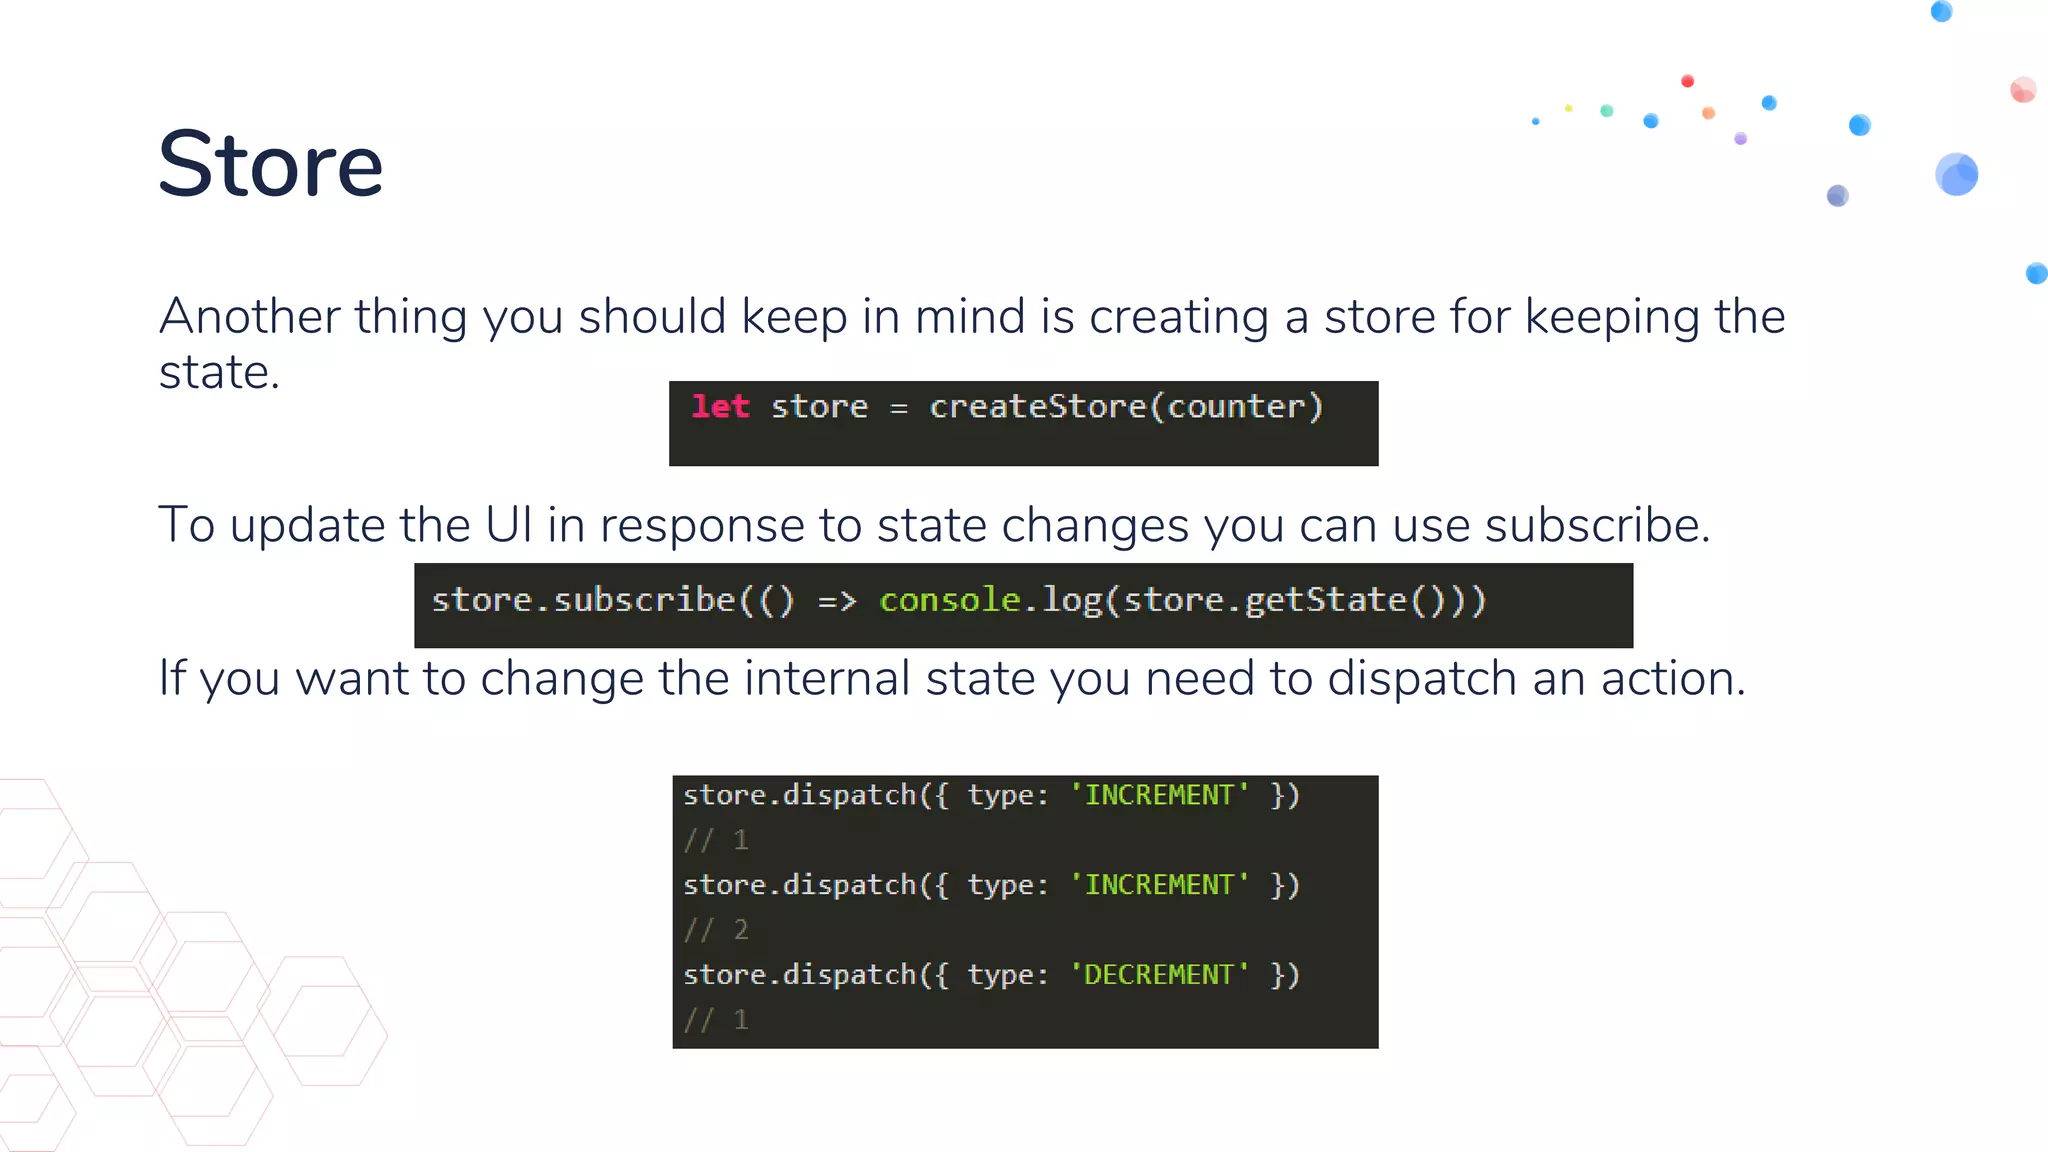
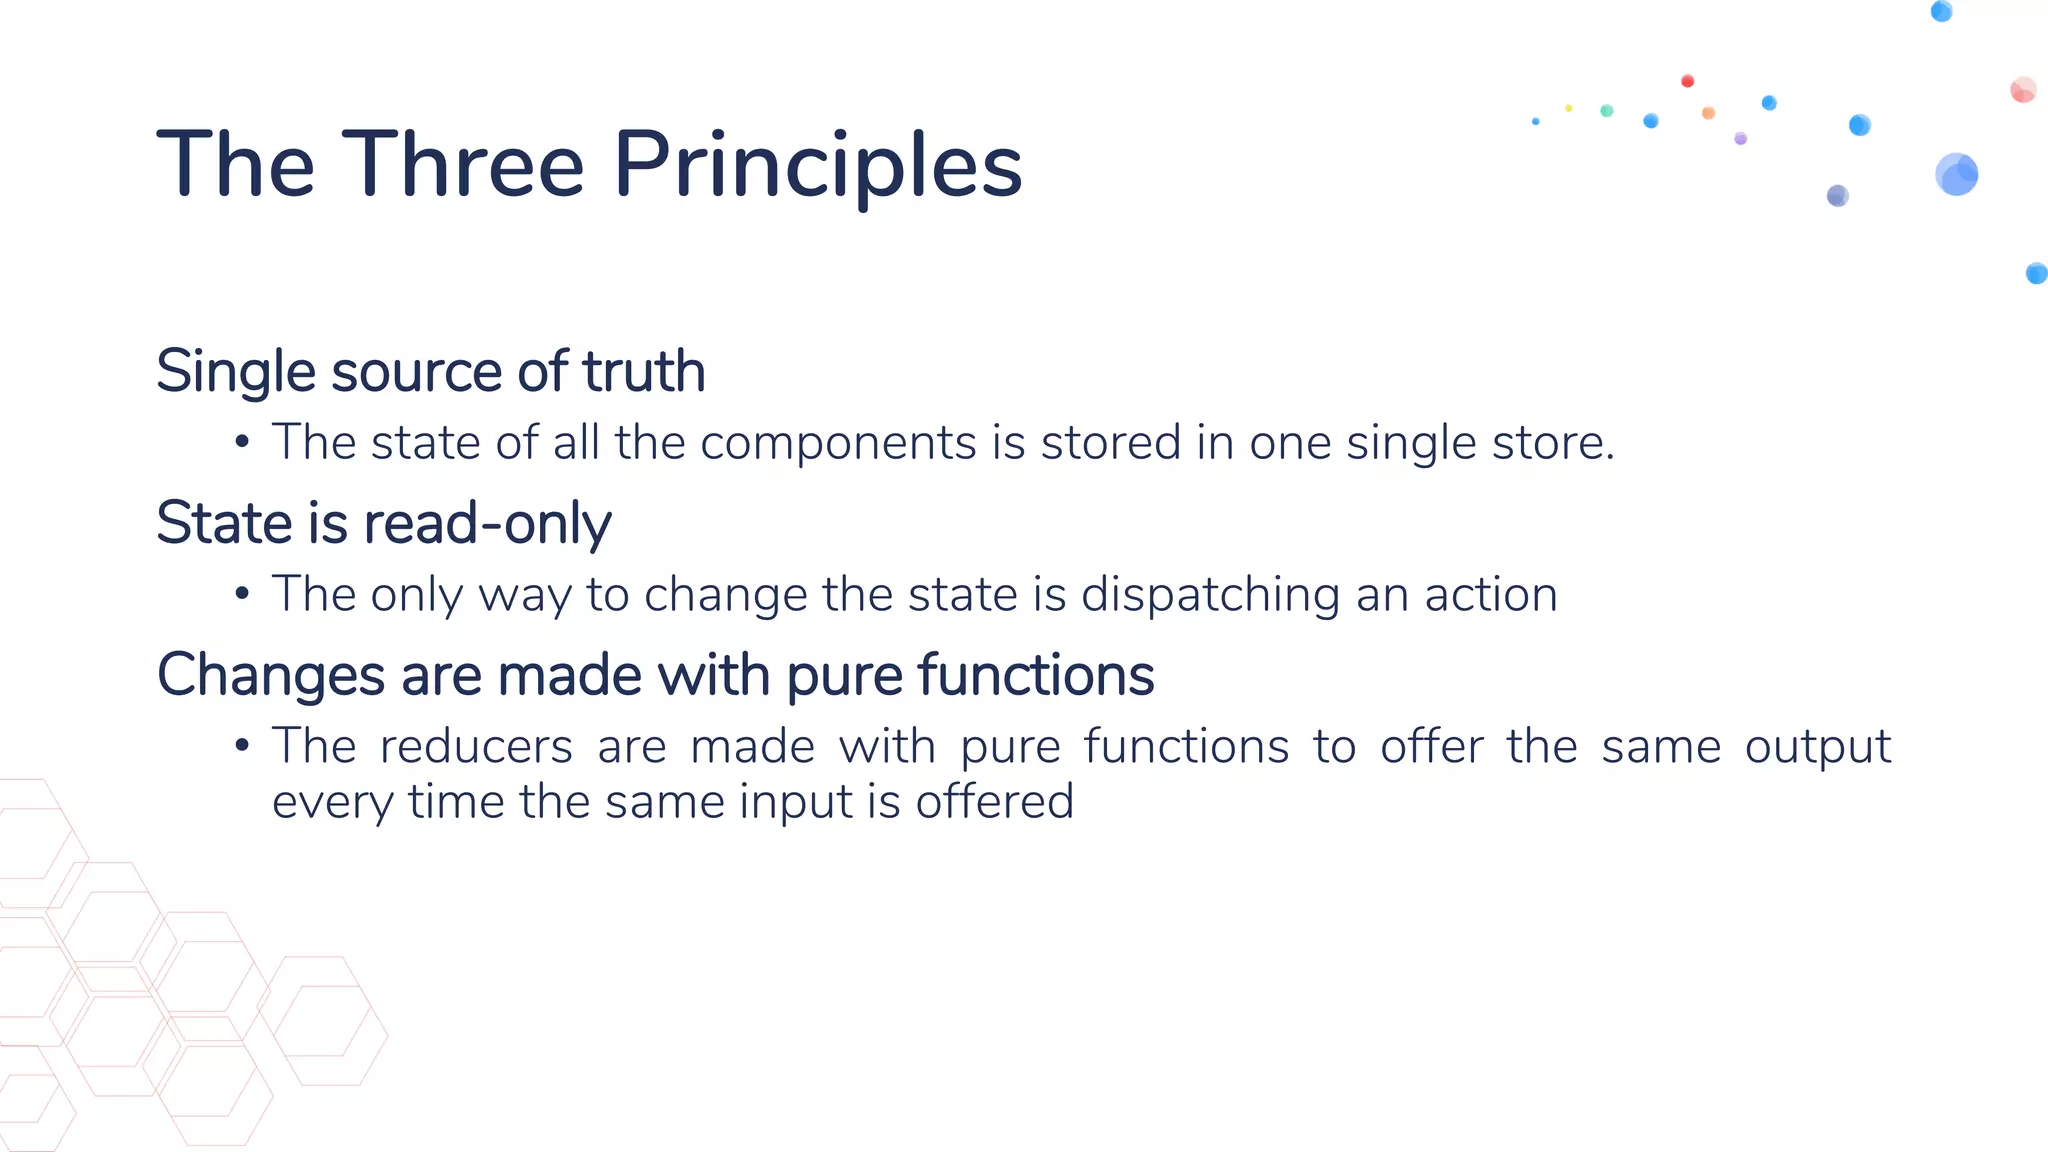
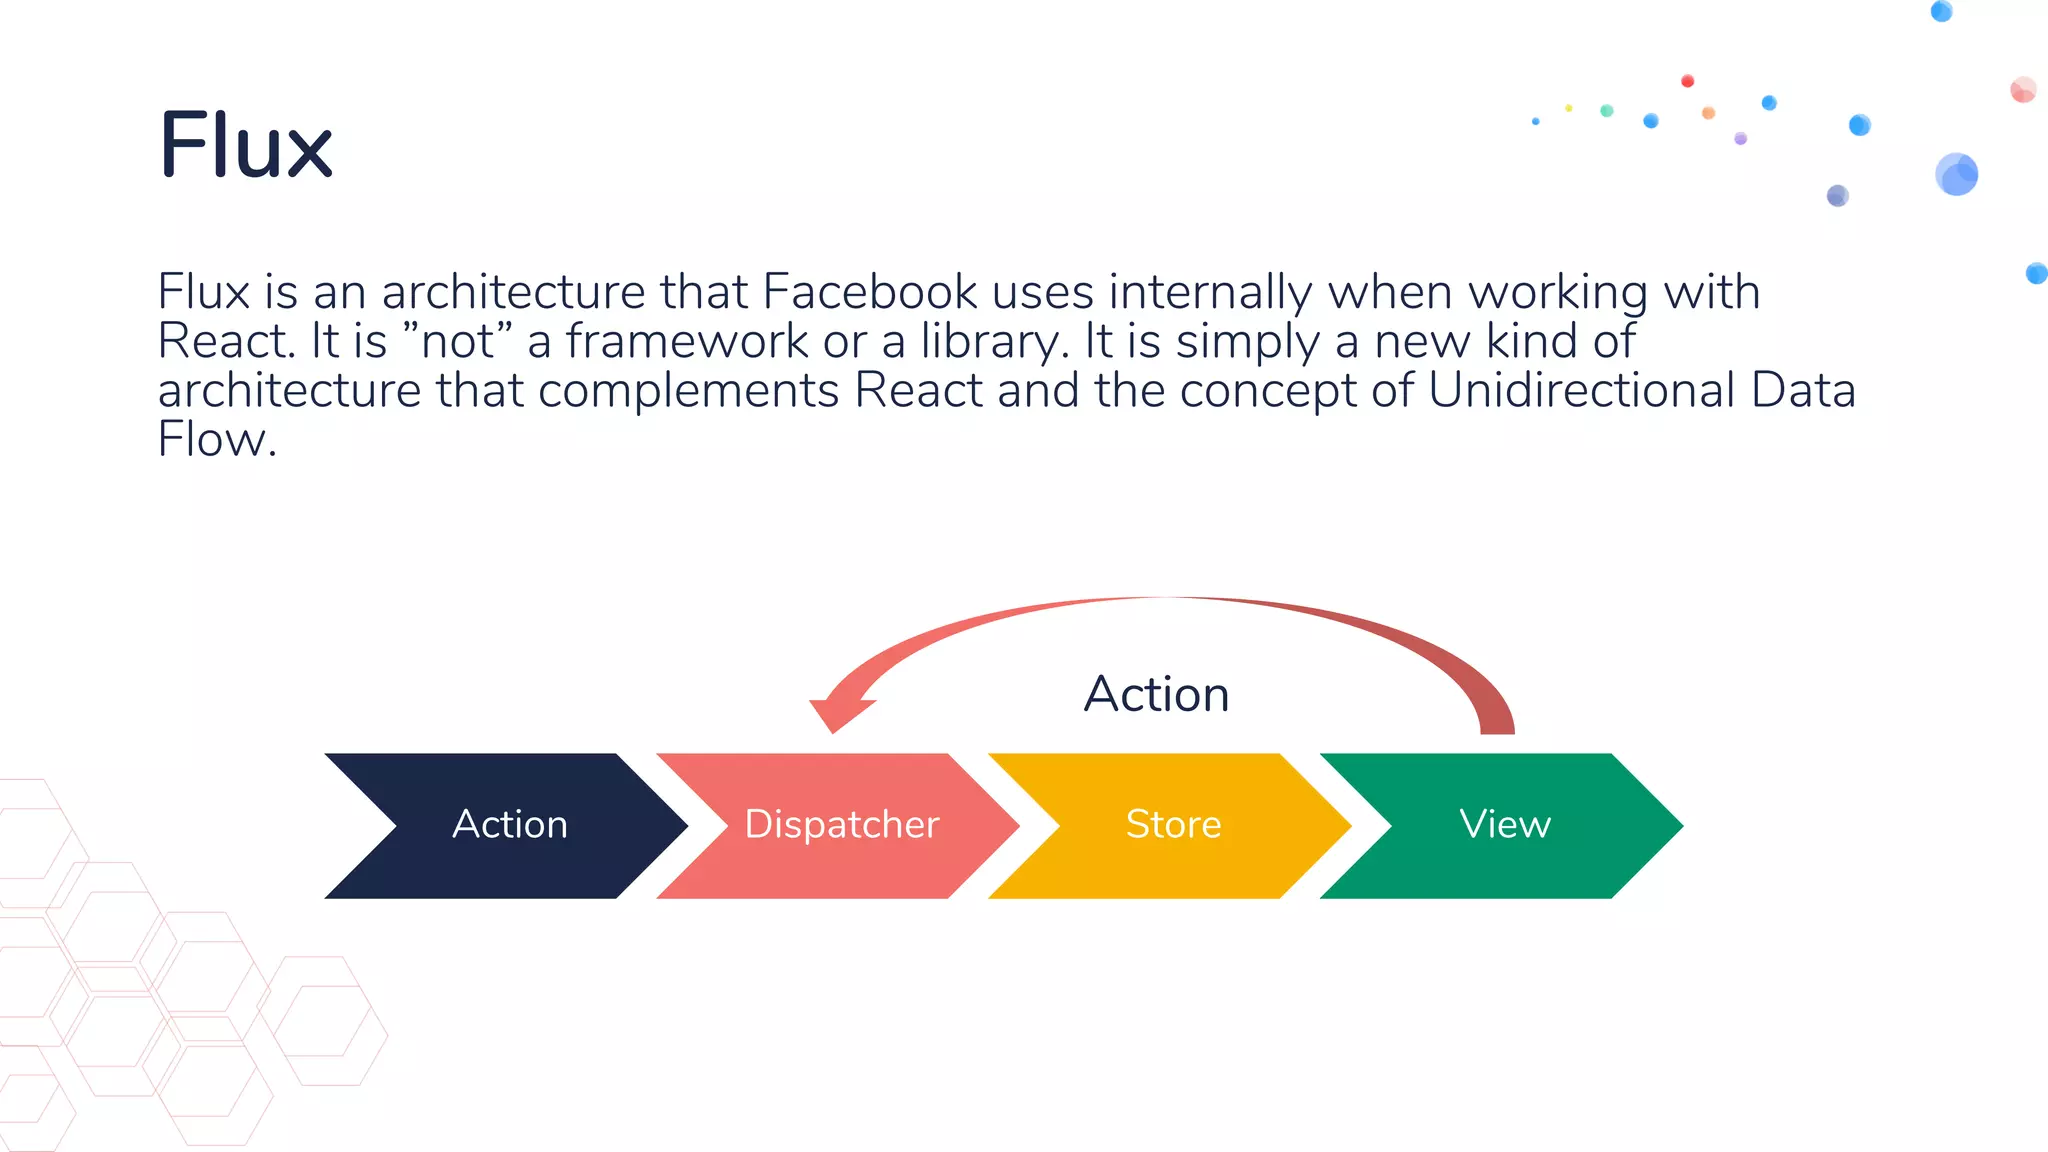


The document outlines the advantages of learning React.js over Angular and Vue, emphasizing its popularity, ease of learning, and speed. It covers essential topics like the virtual DOM, component-based architecture, and practical tips for installation, building applications, and using features like JSX, event handling, and state management. The document also discusses Redux and Flux architectures for state management within React applications.