Download as PDF, PPTX


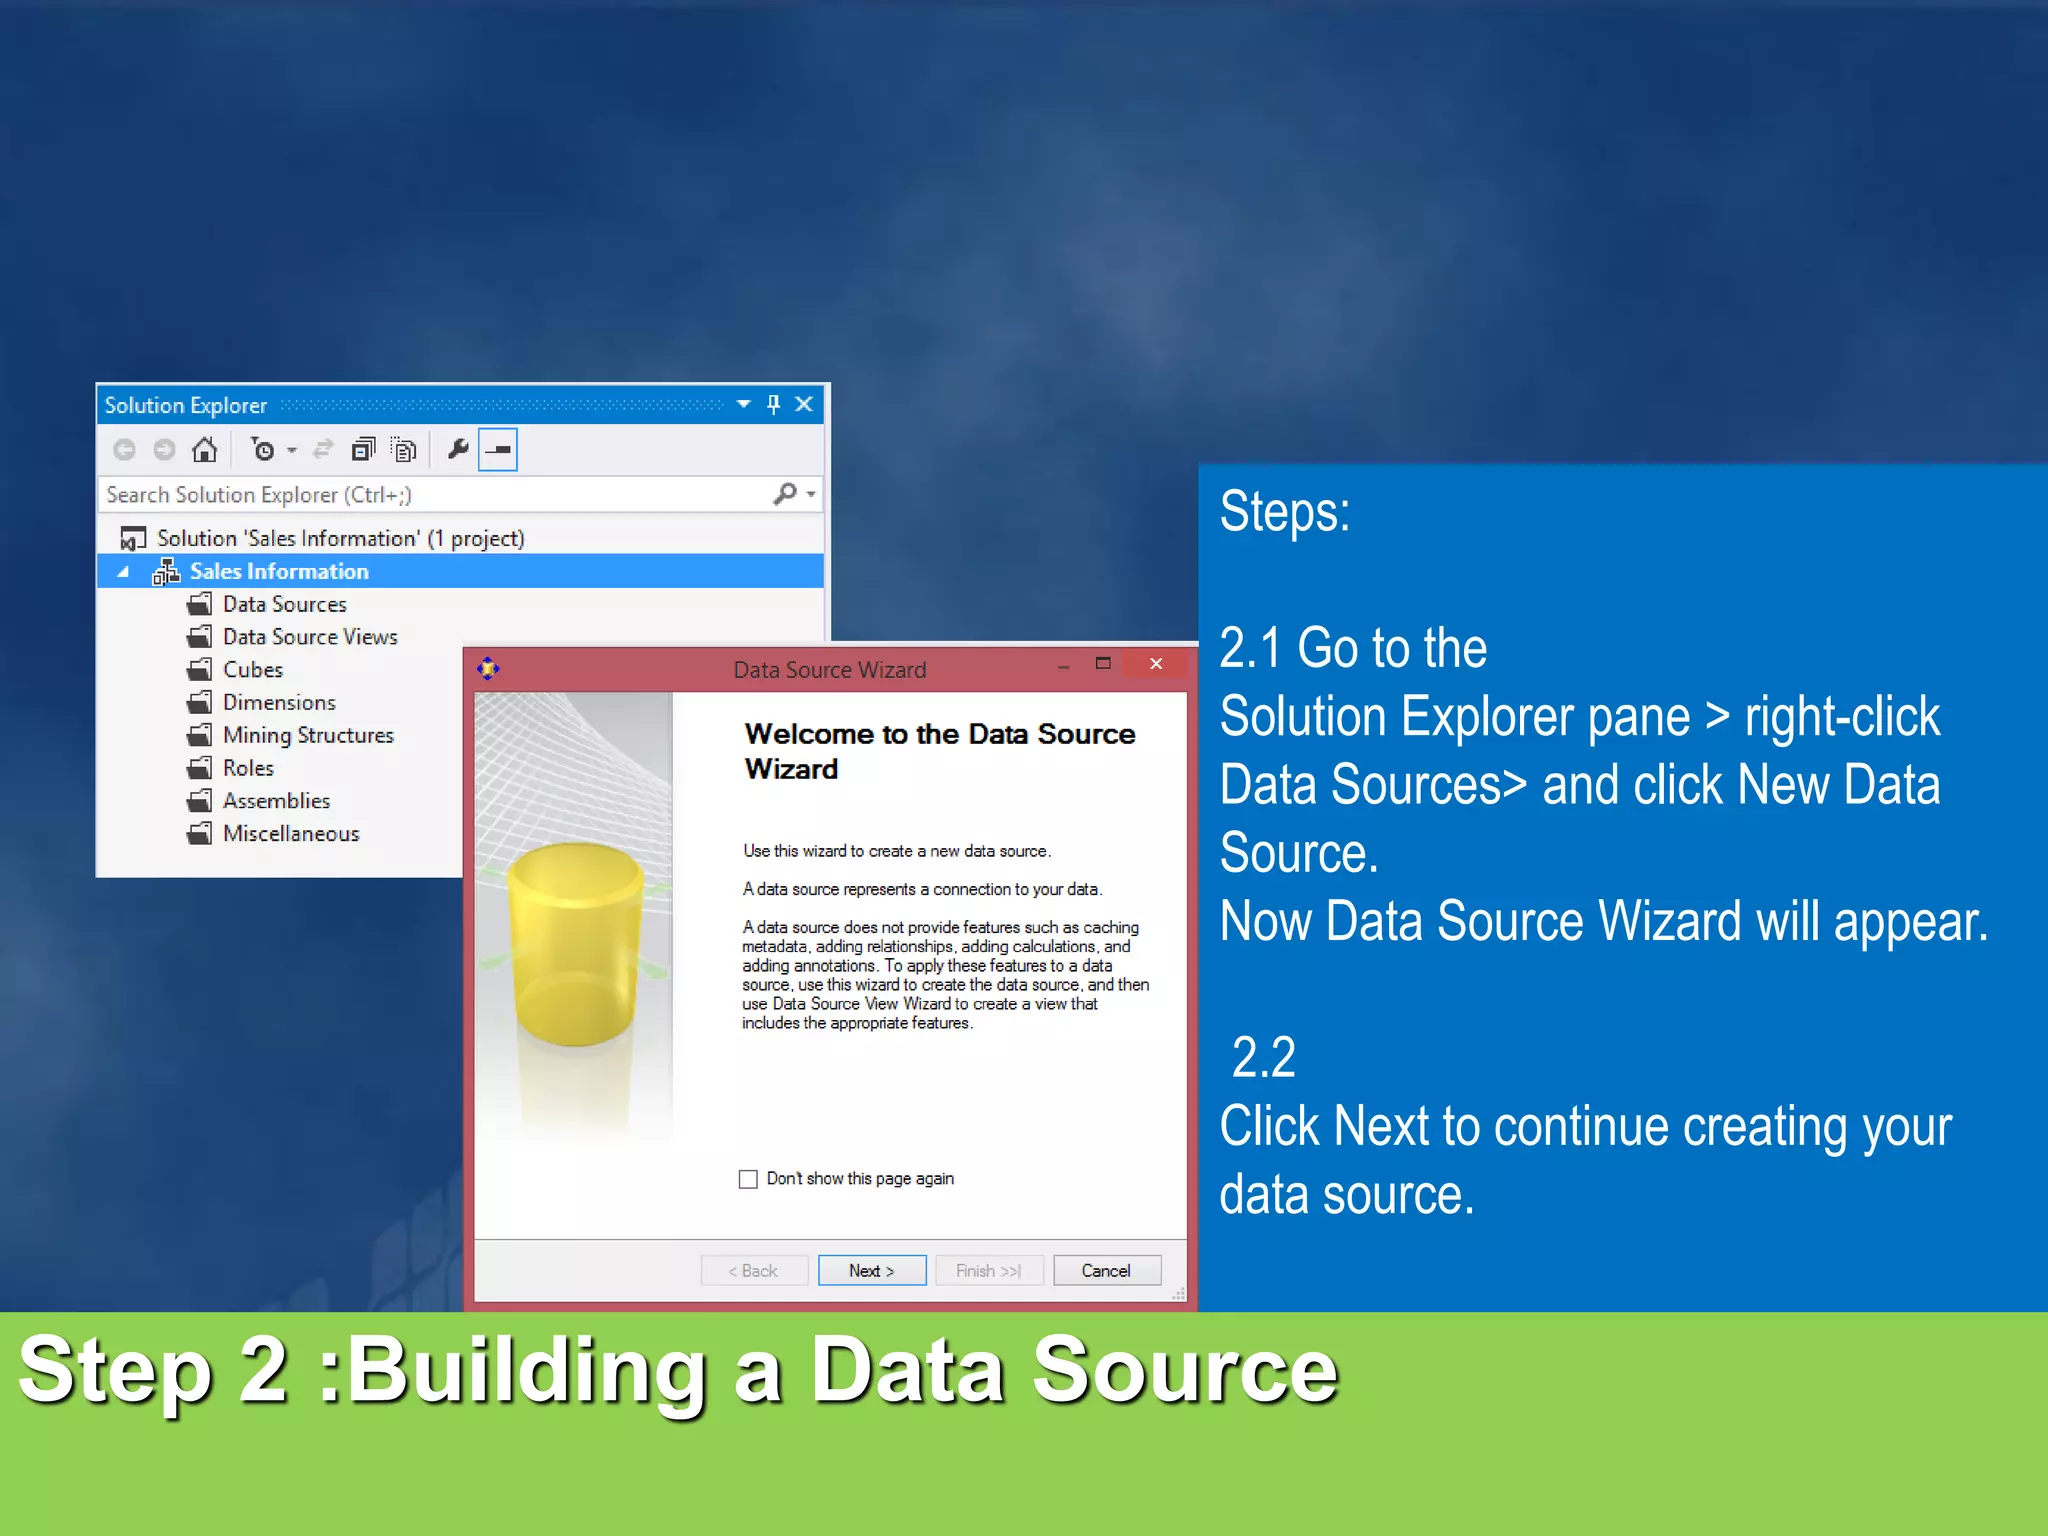
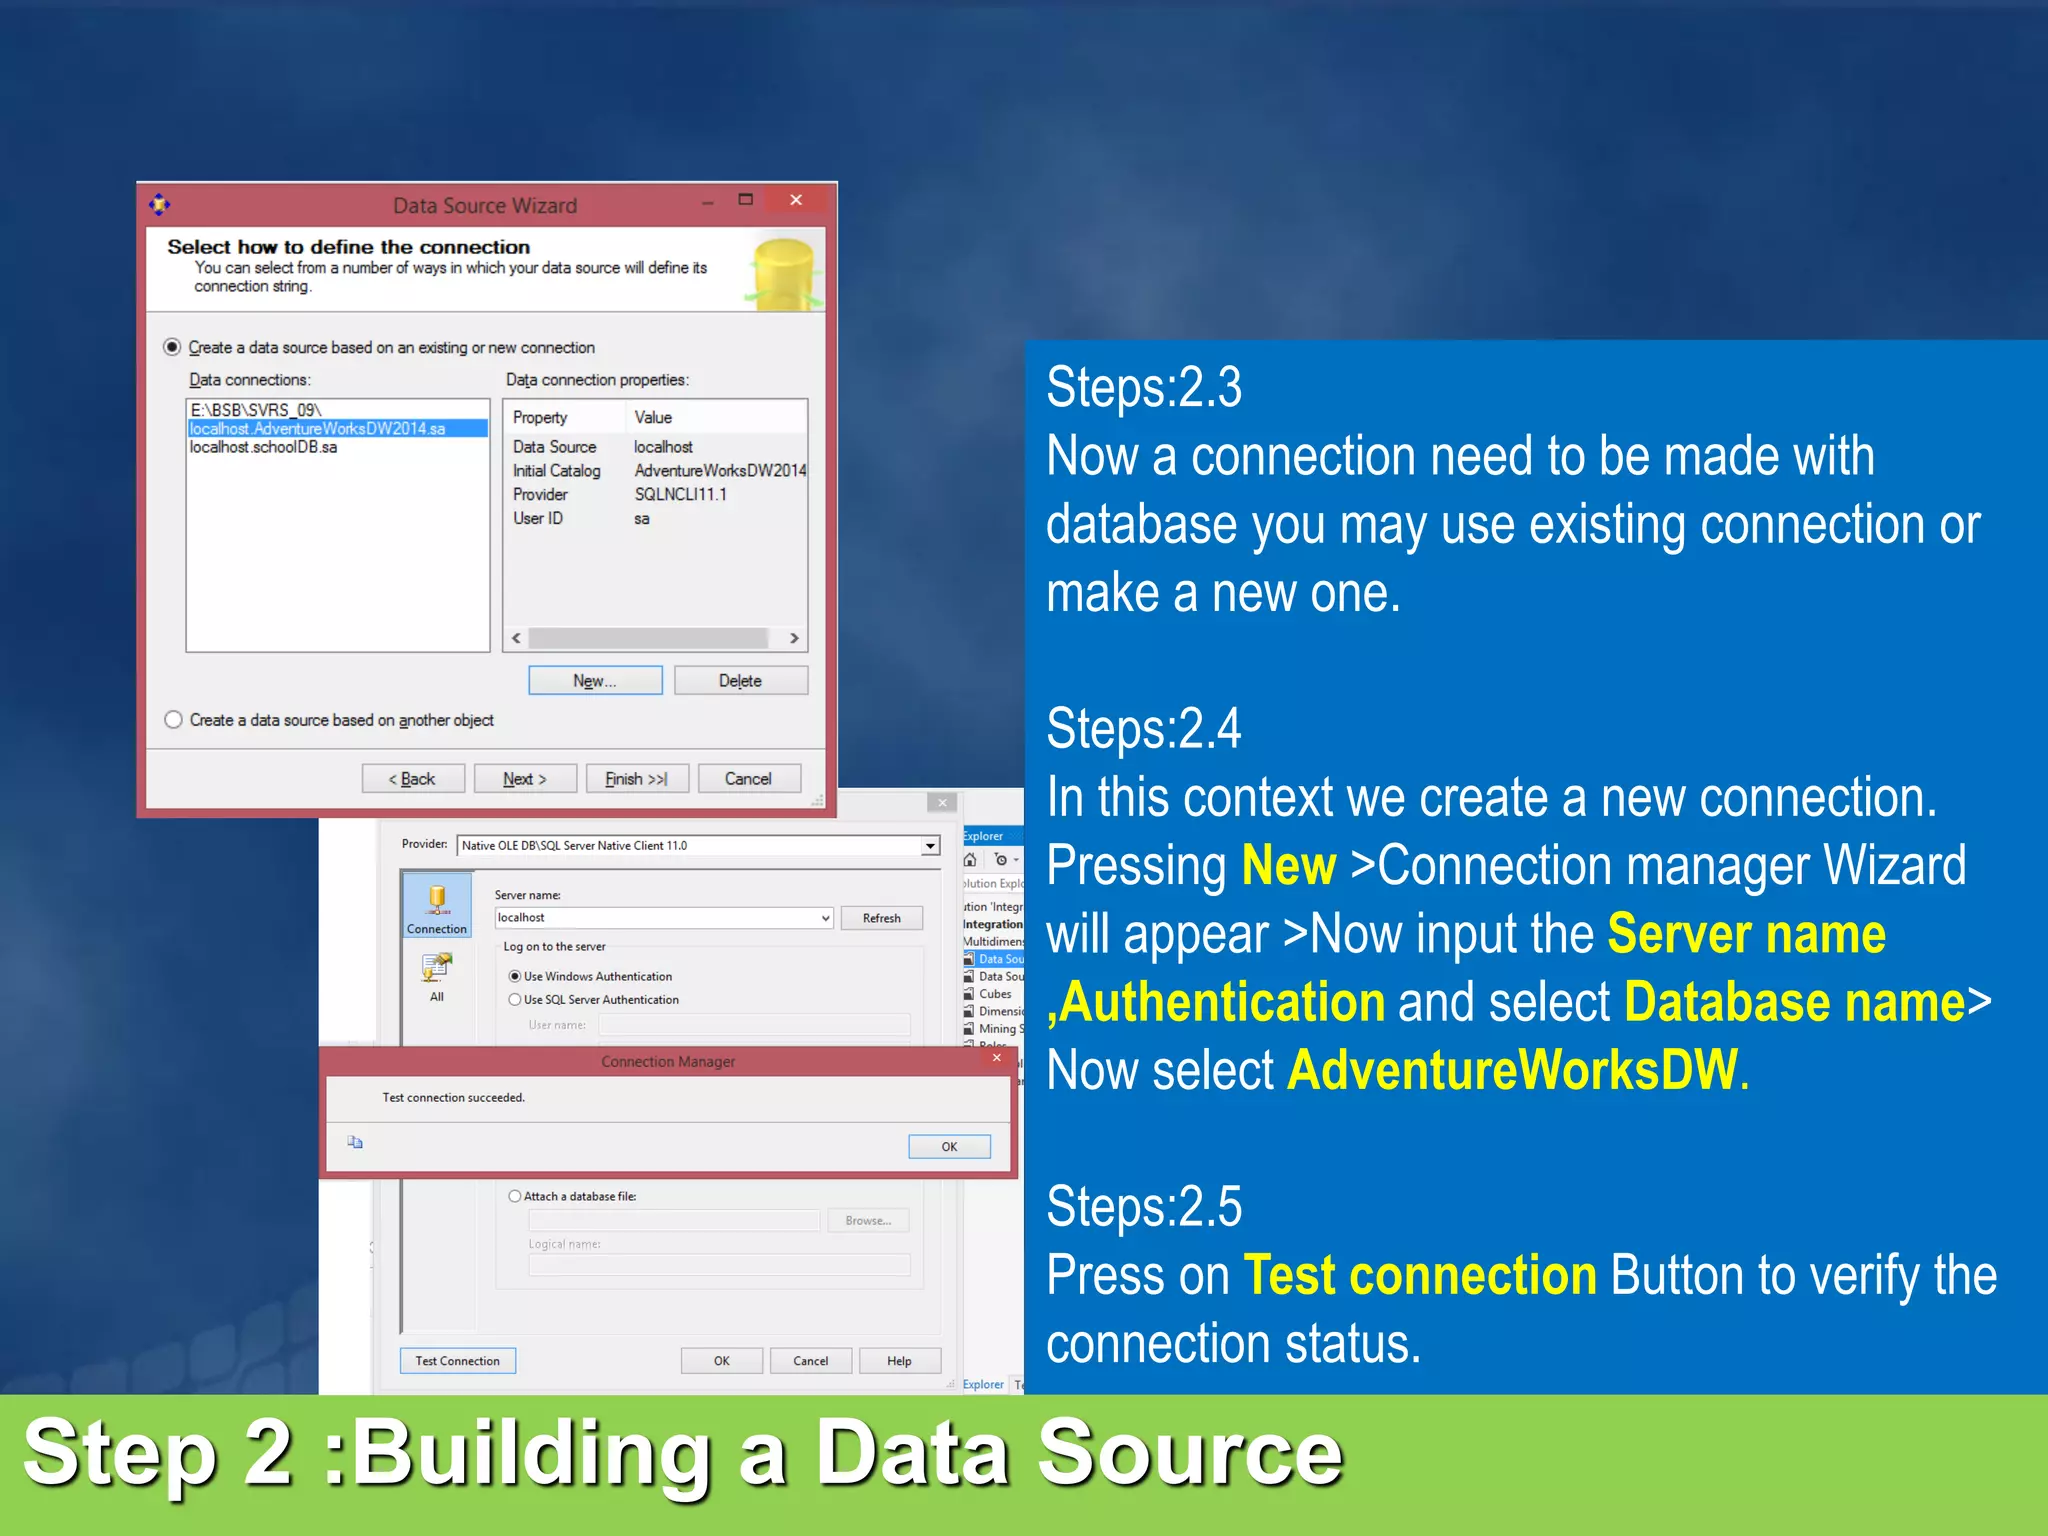
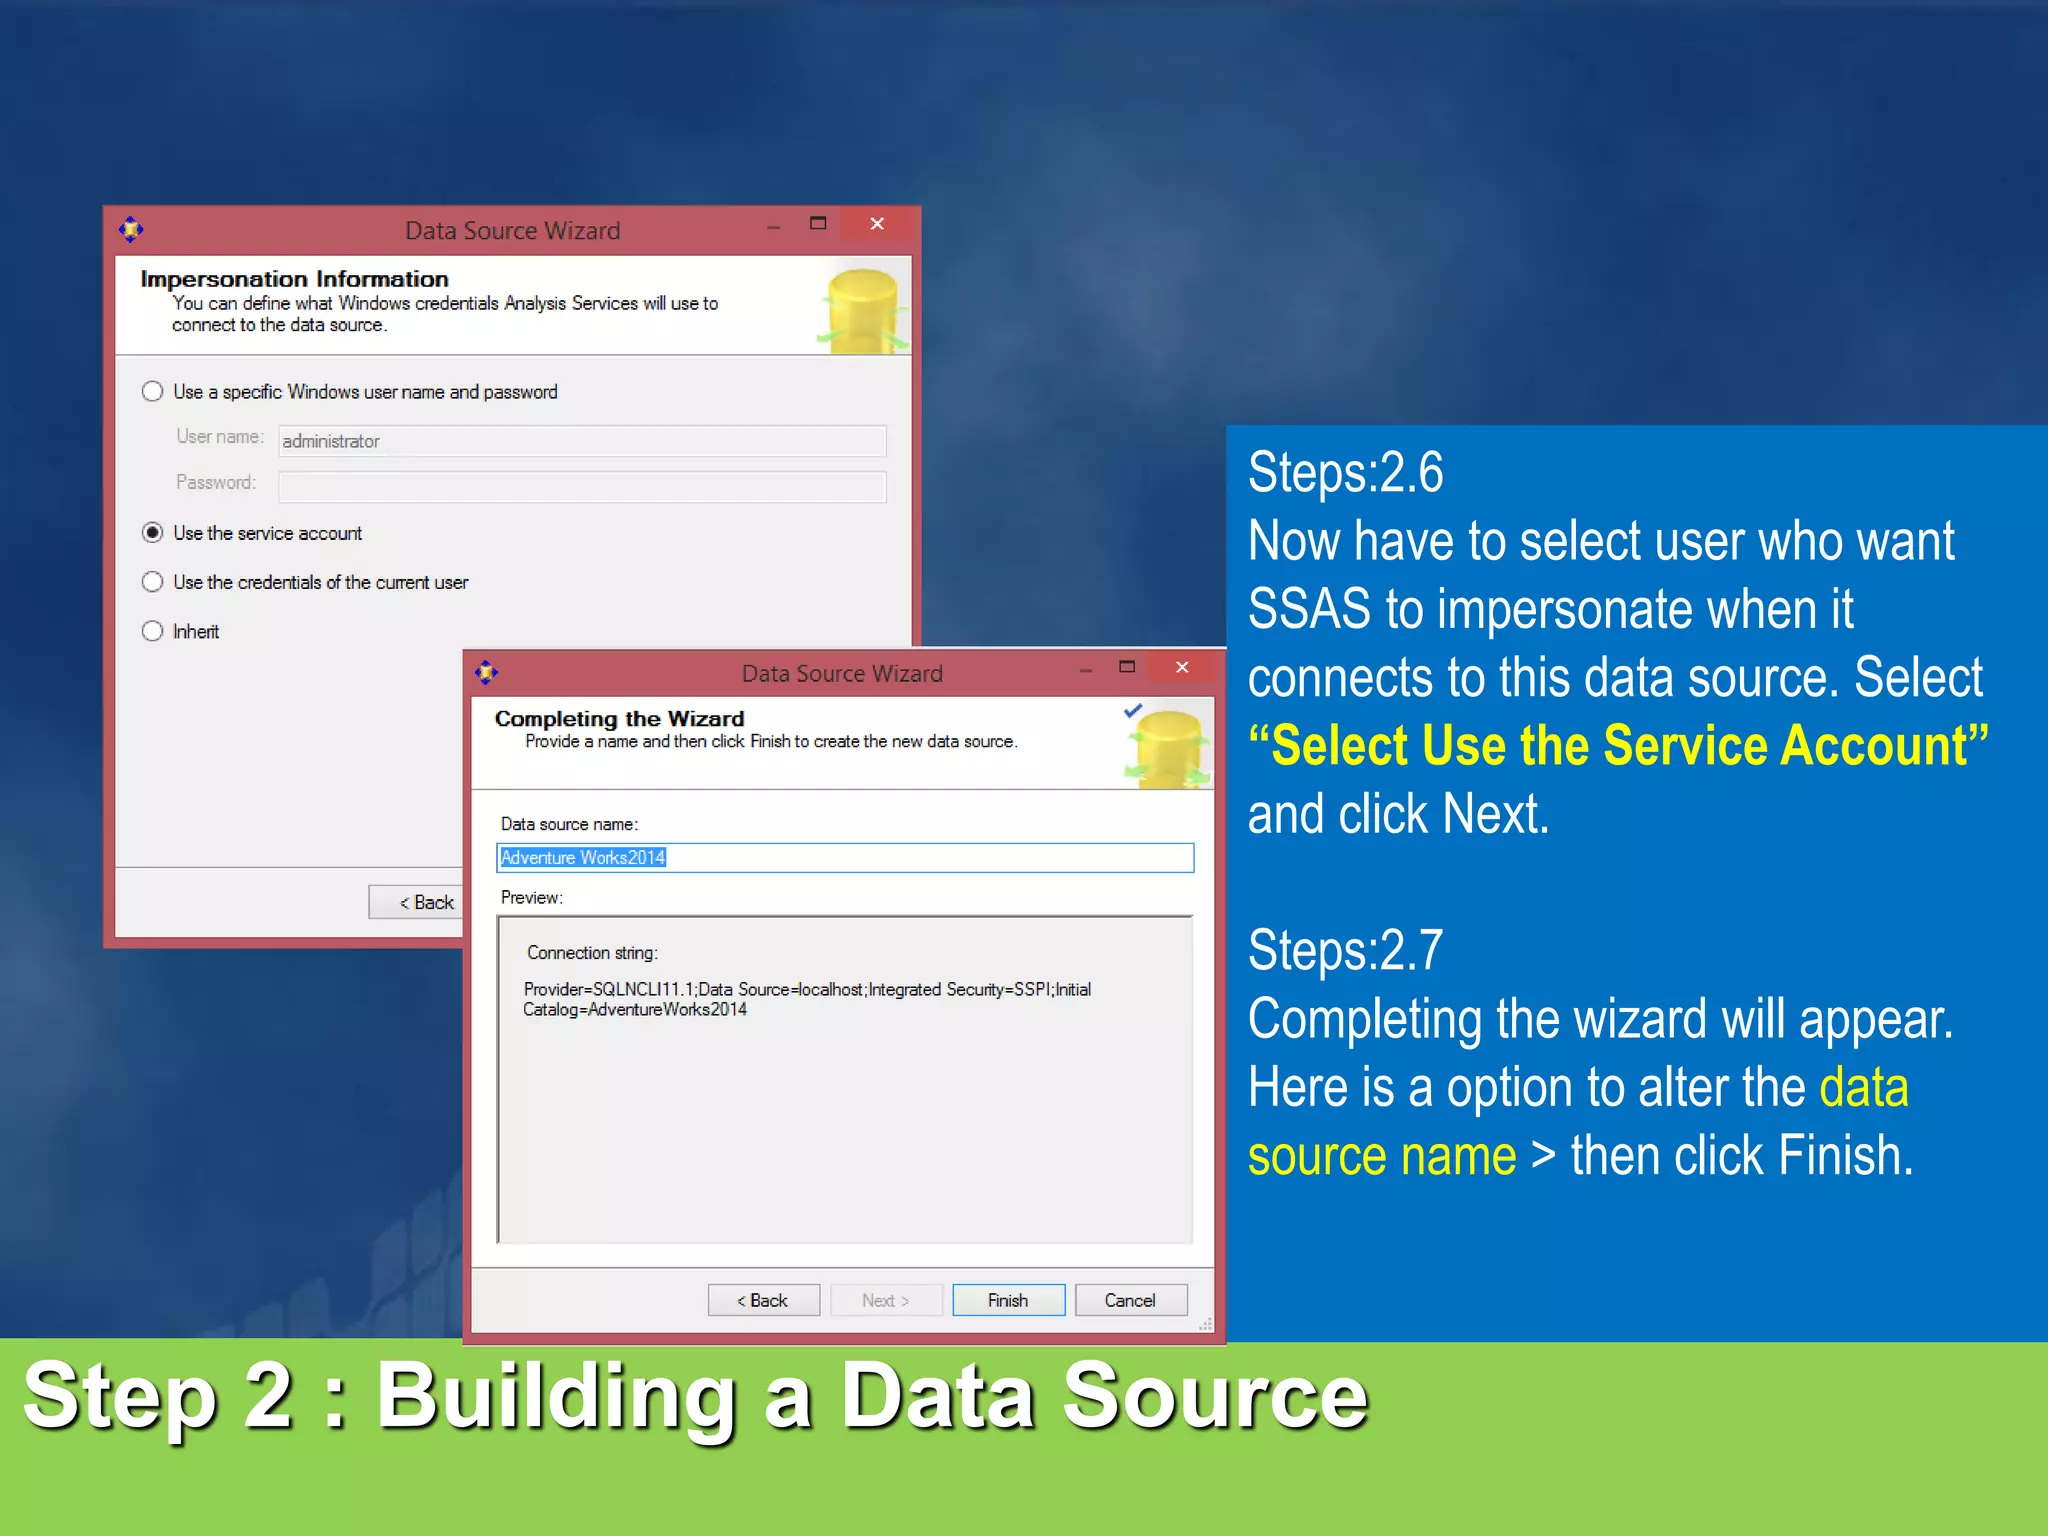

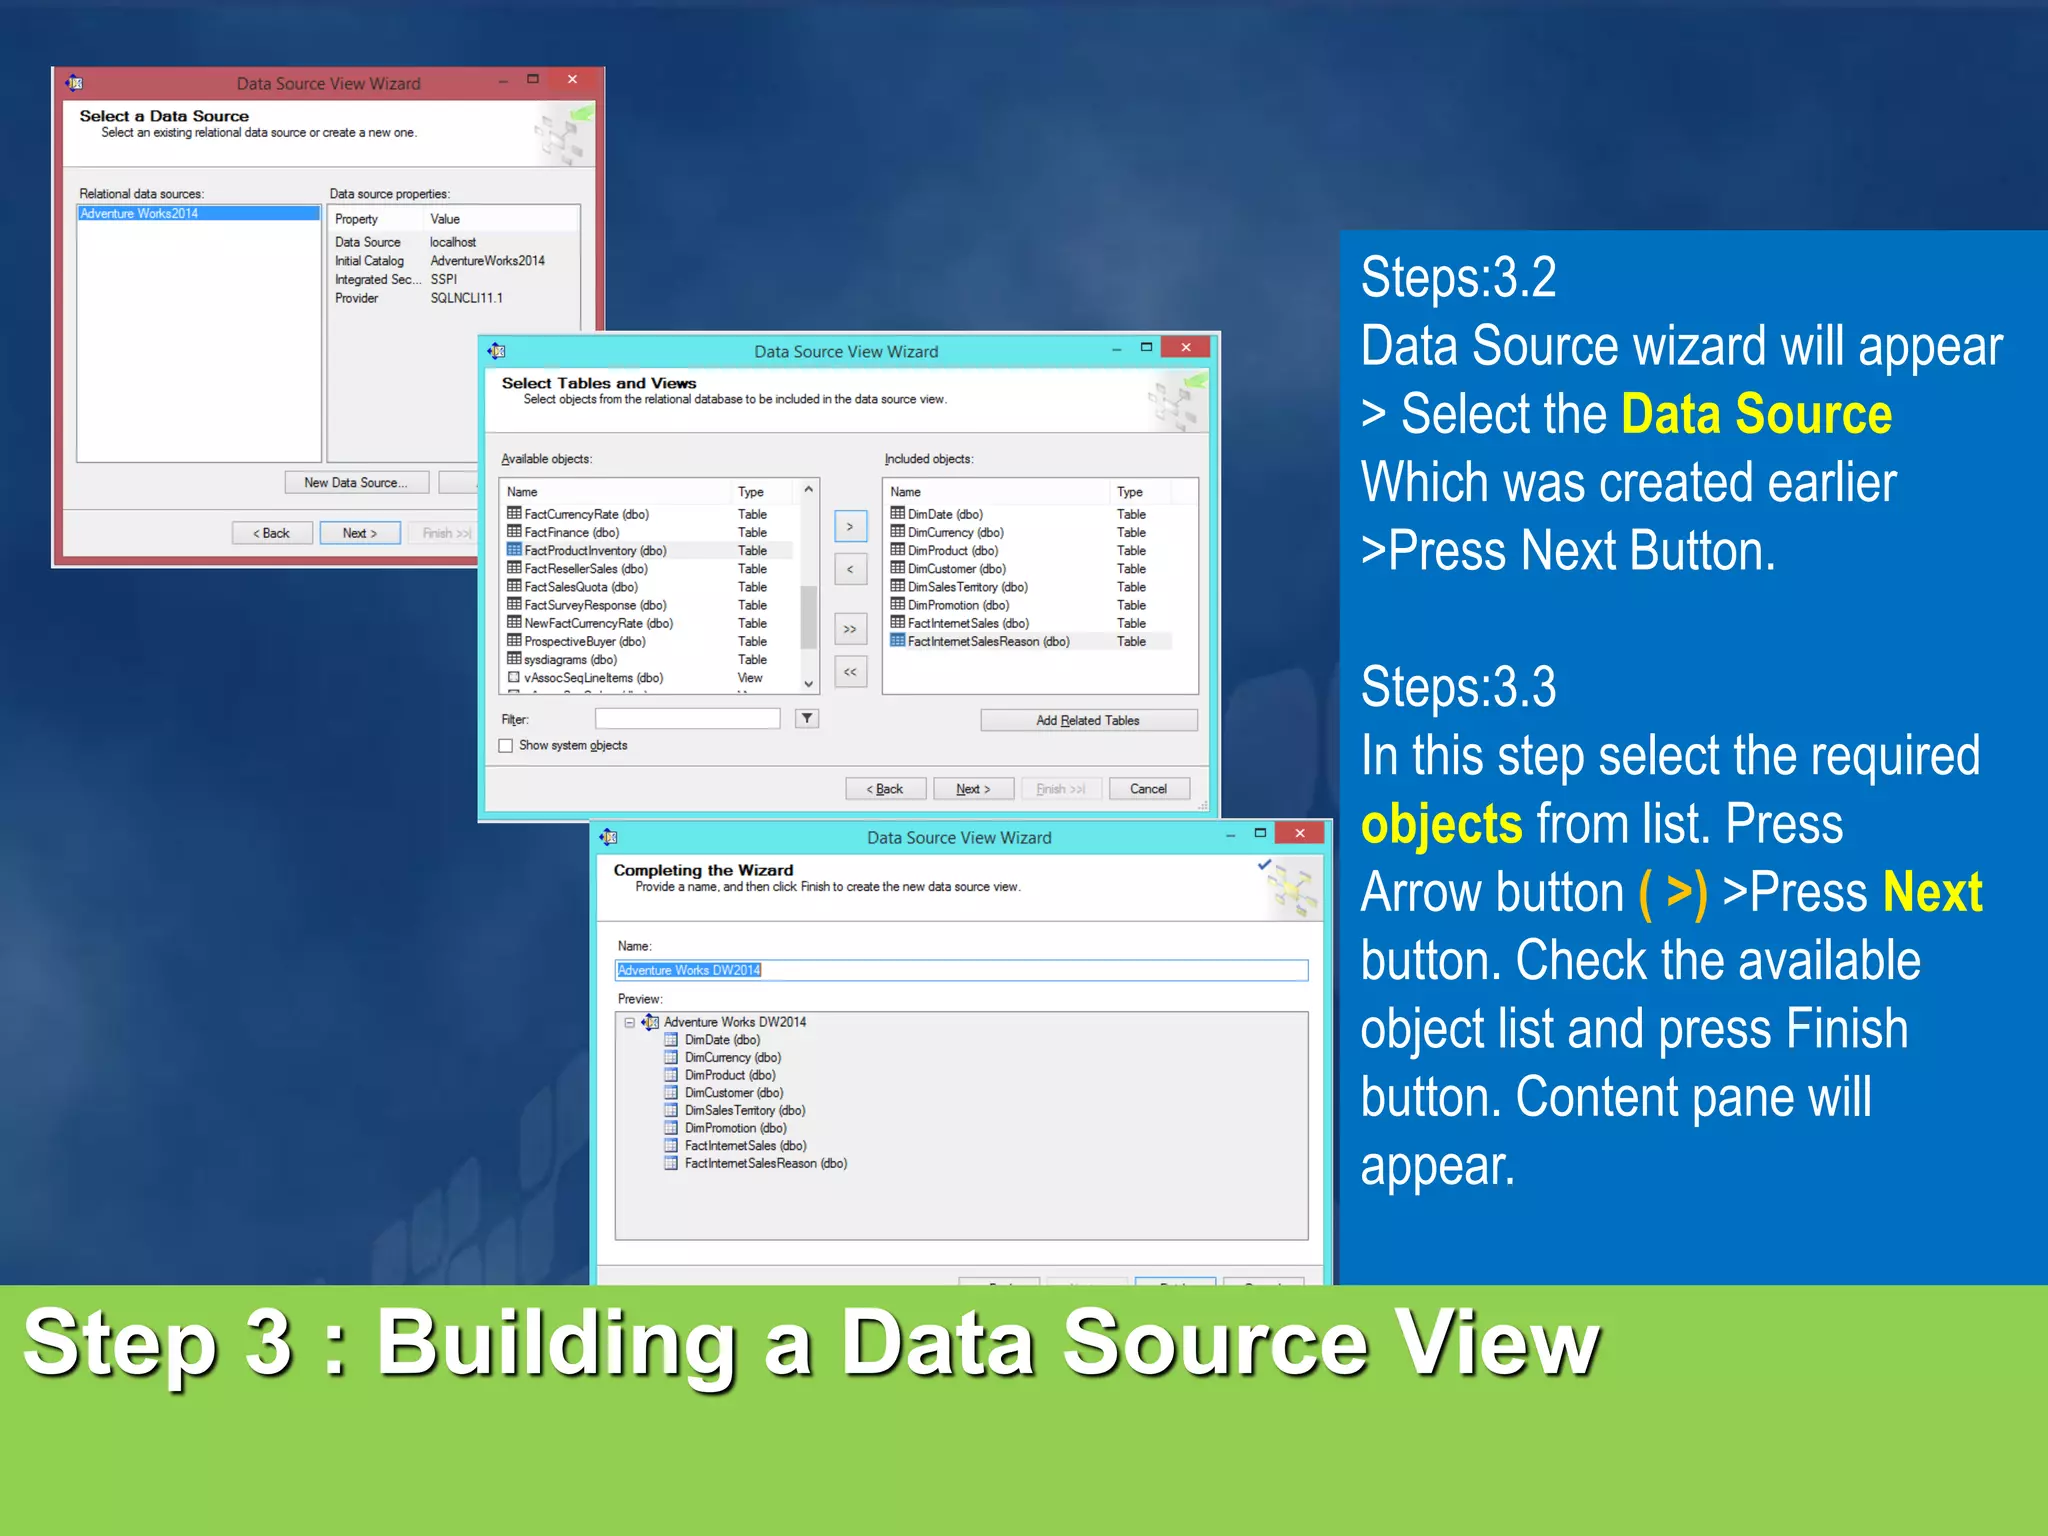
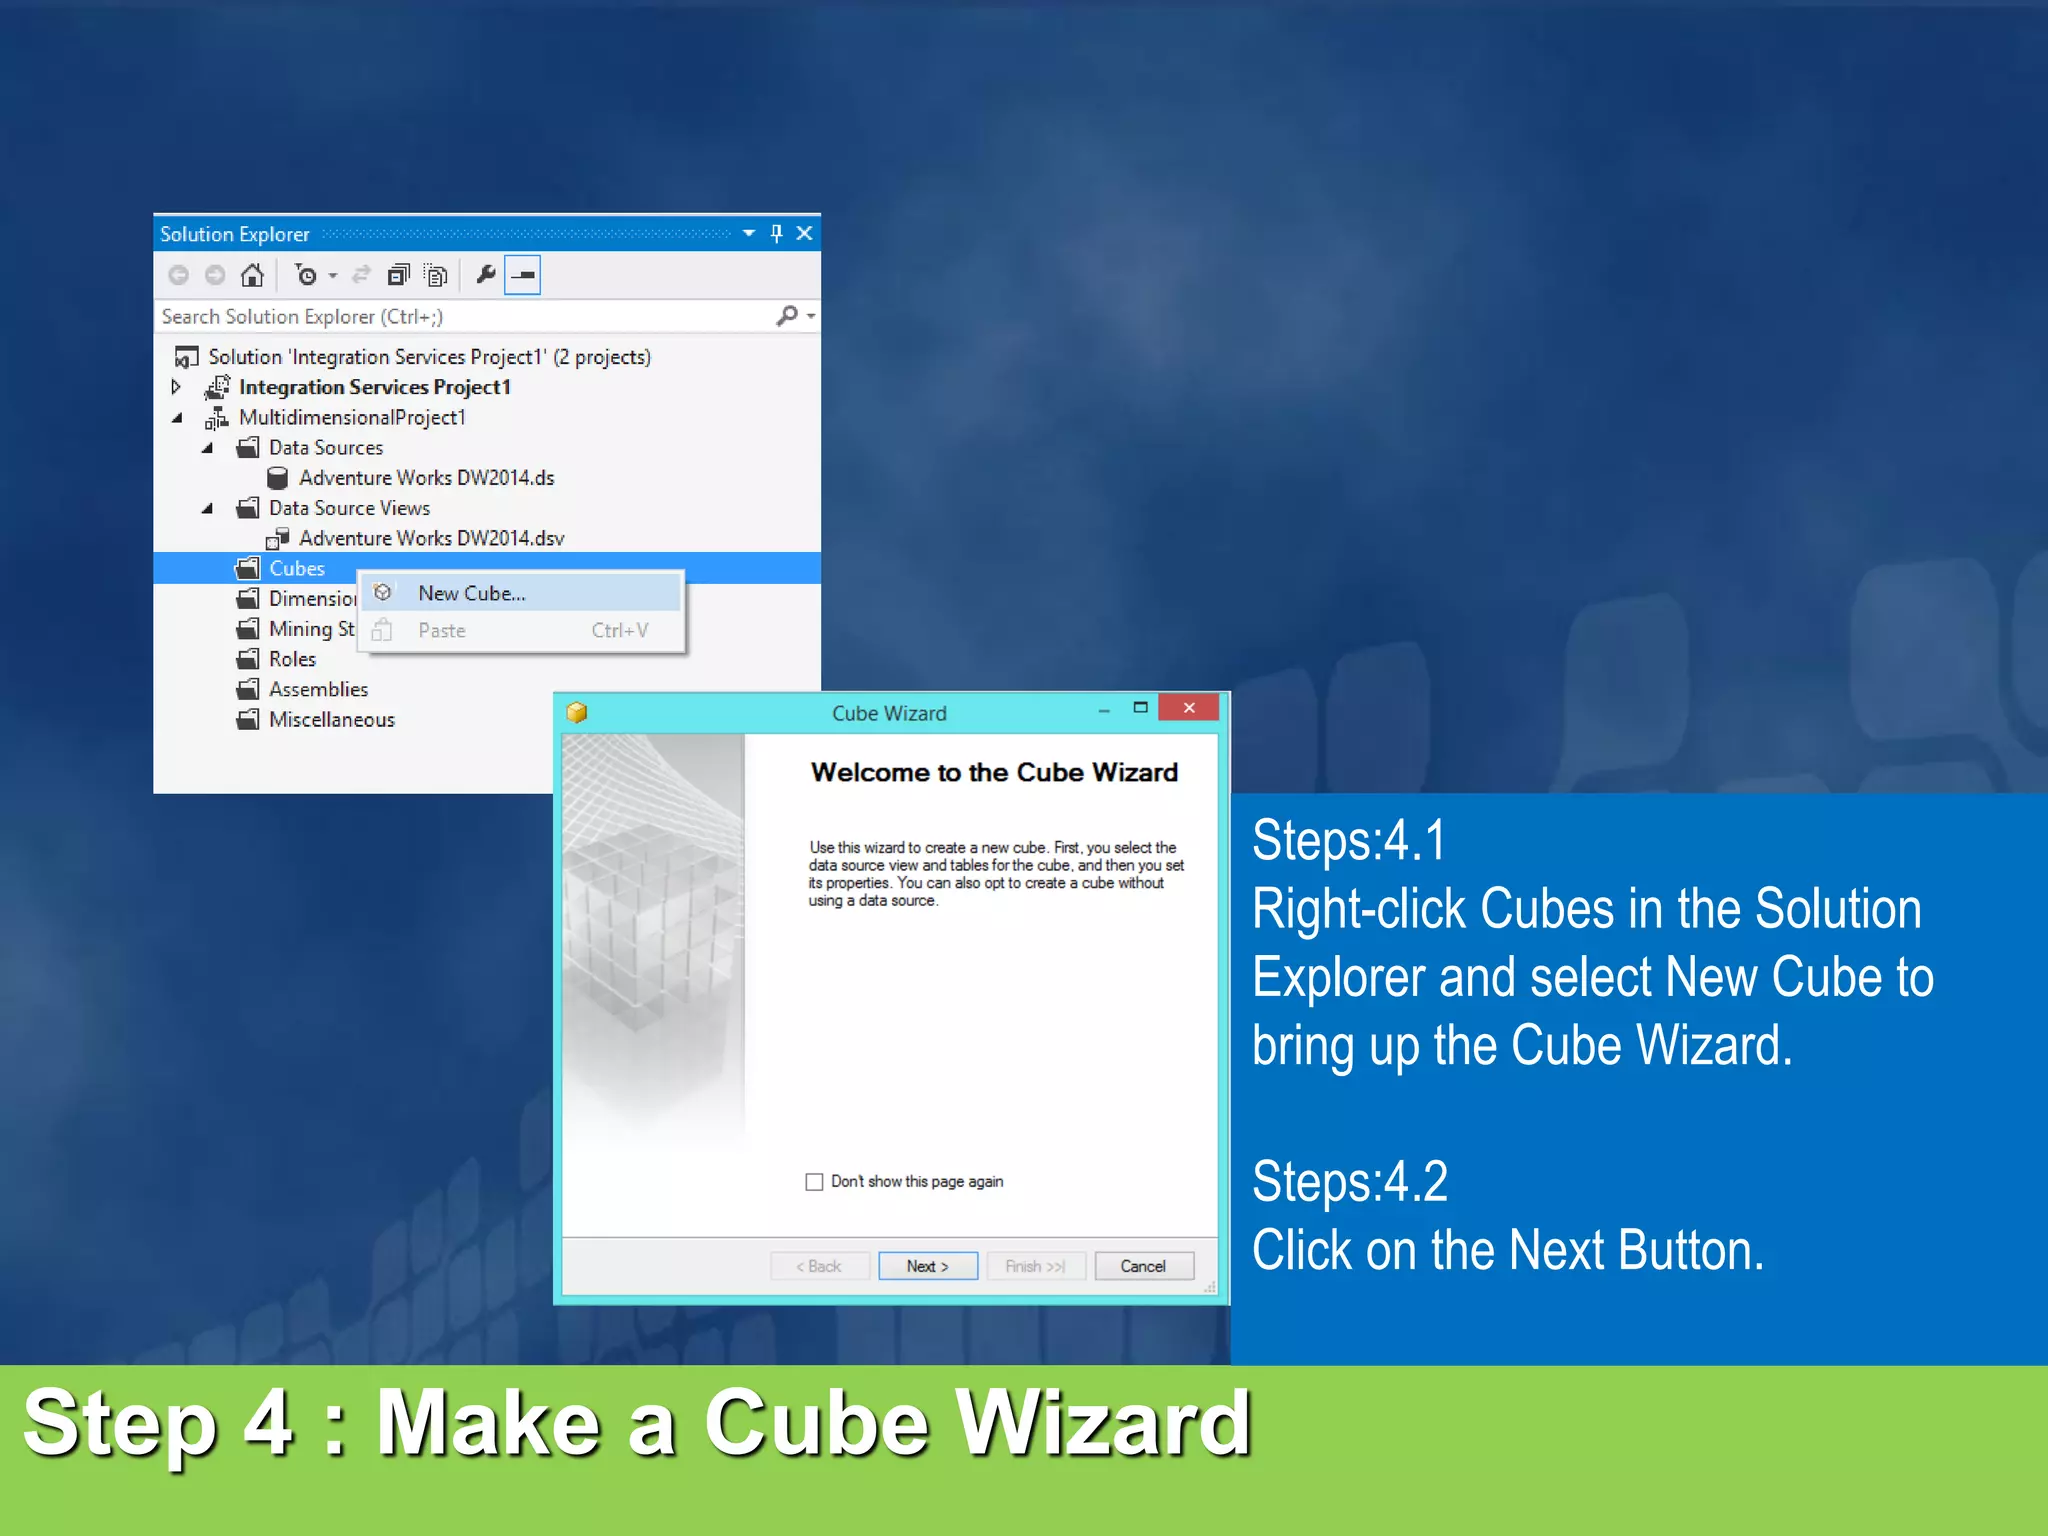
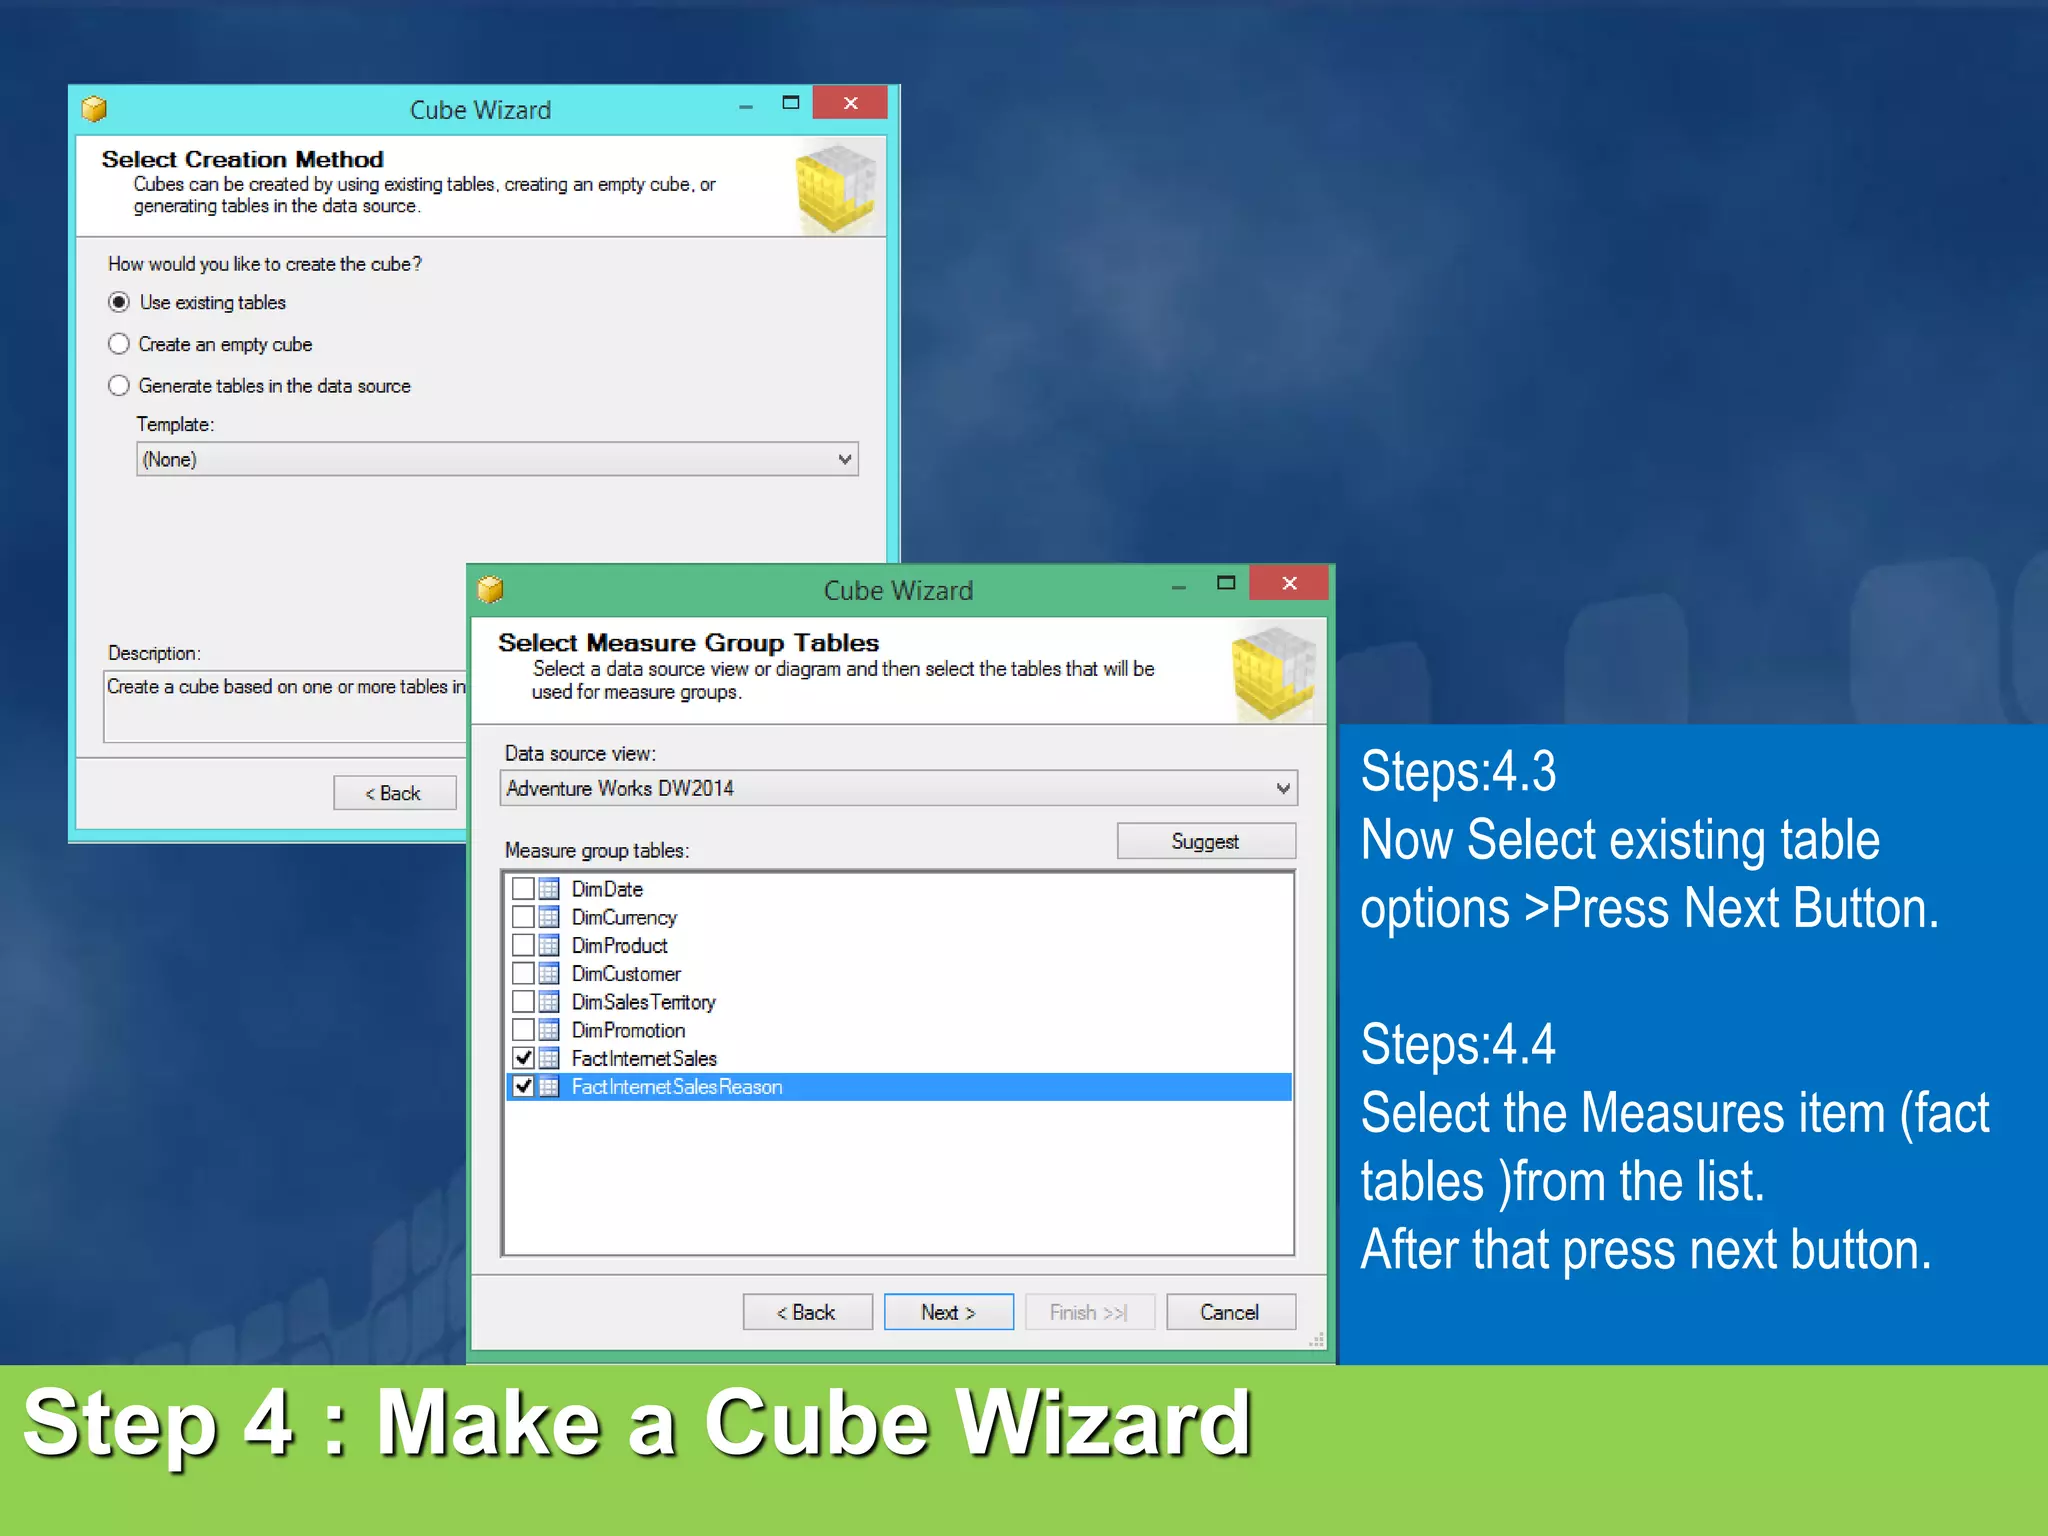
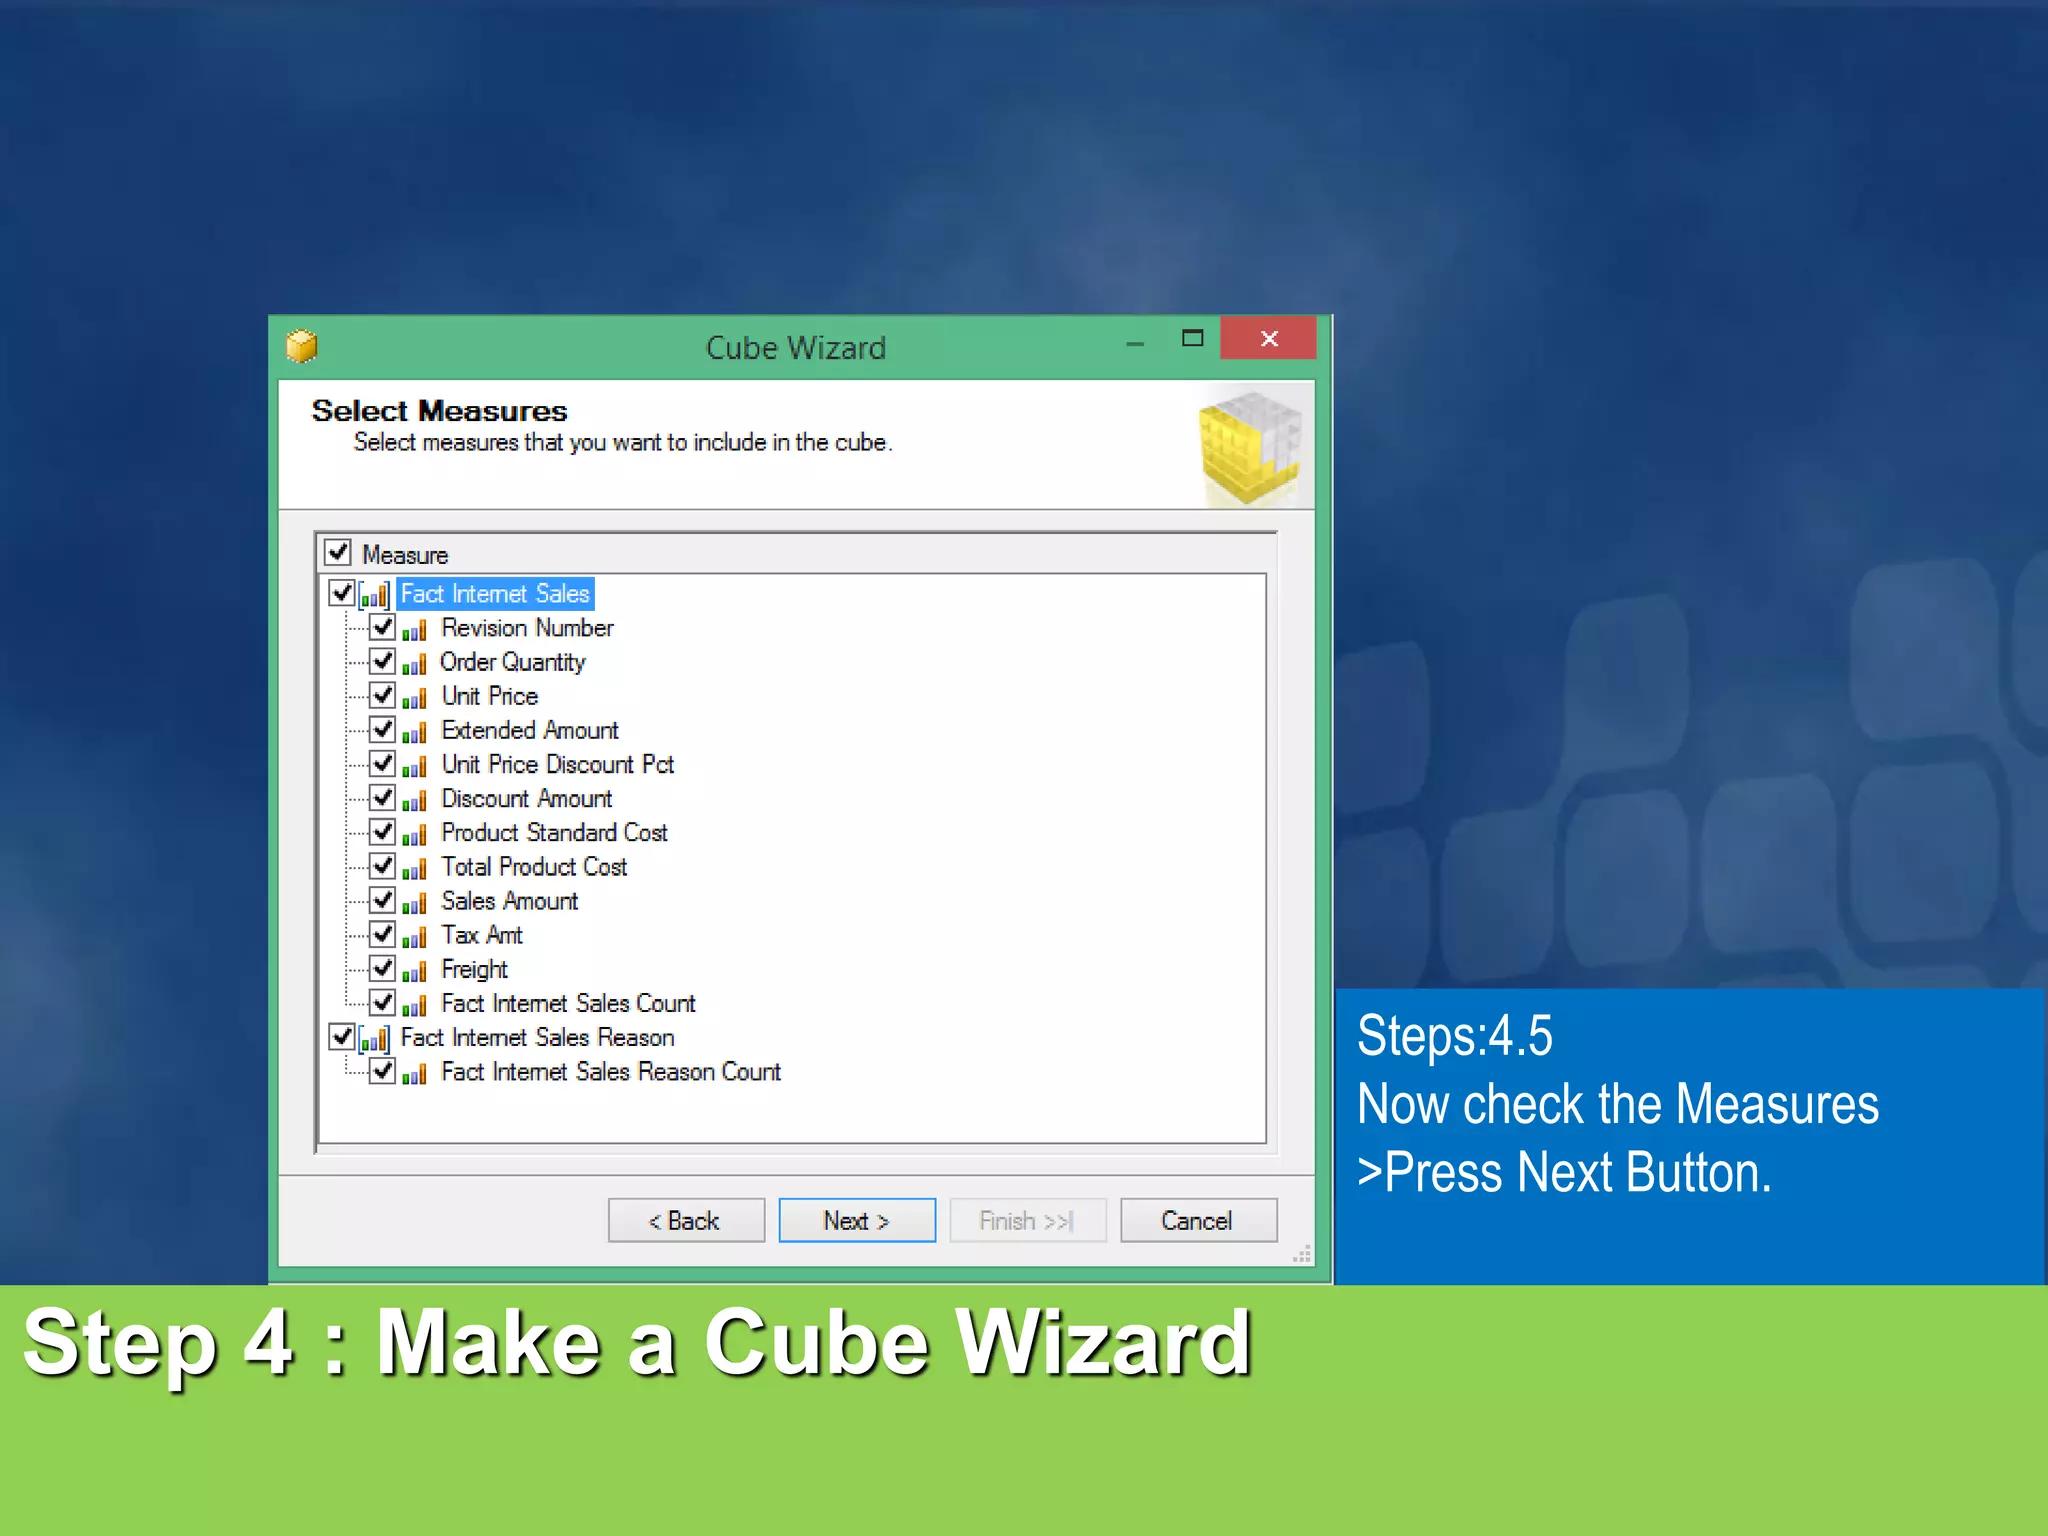
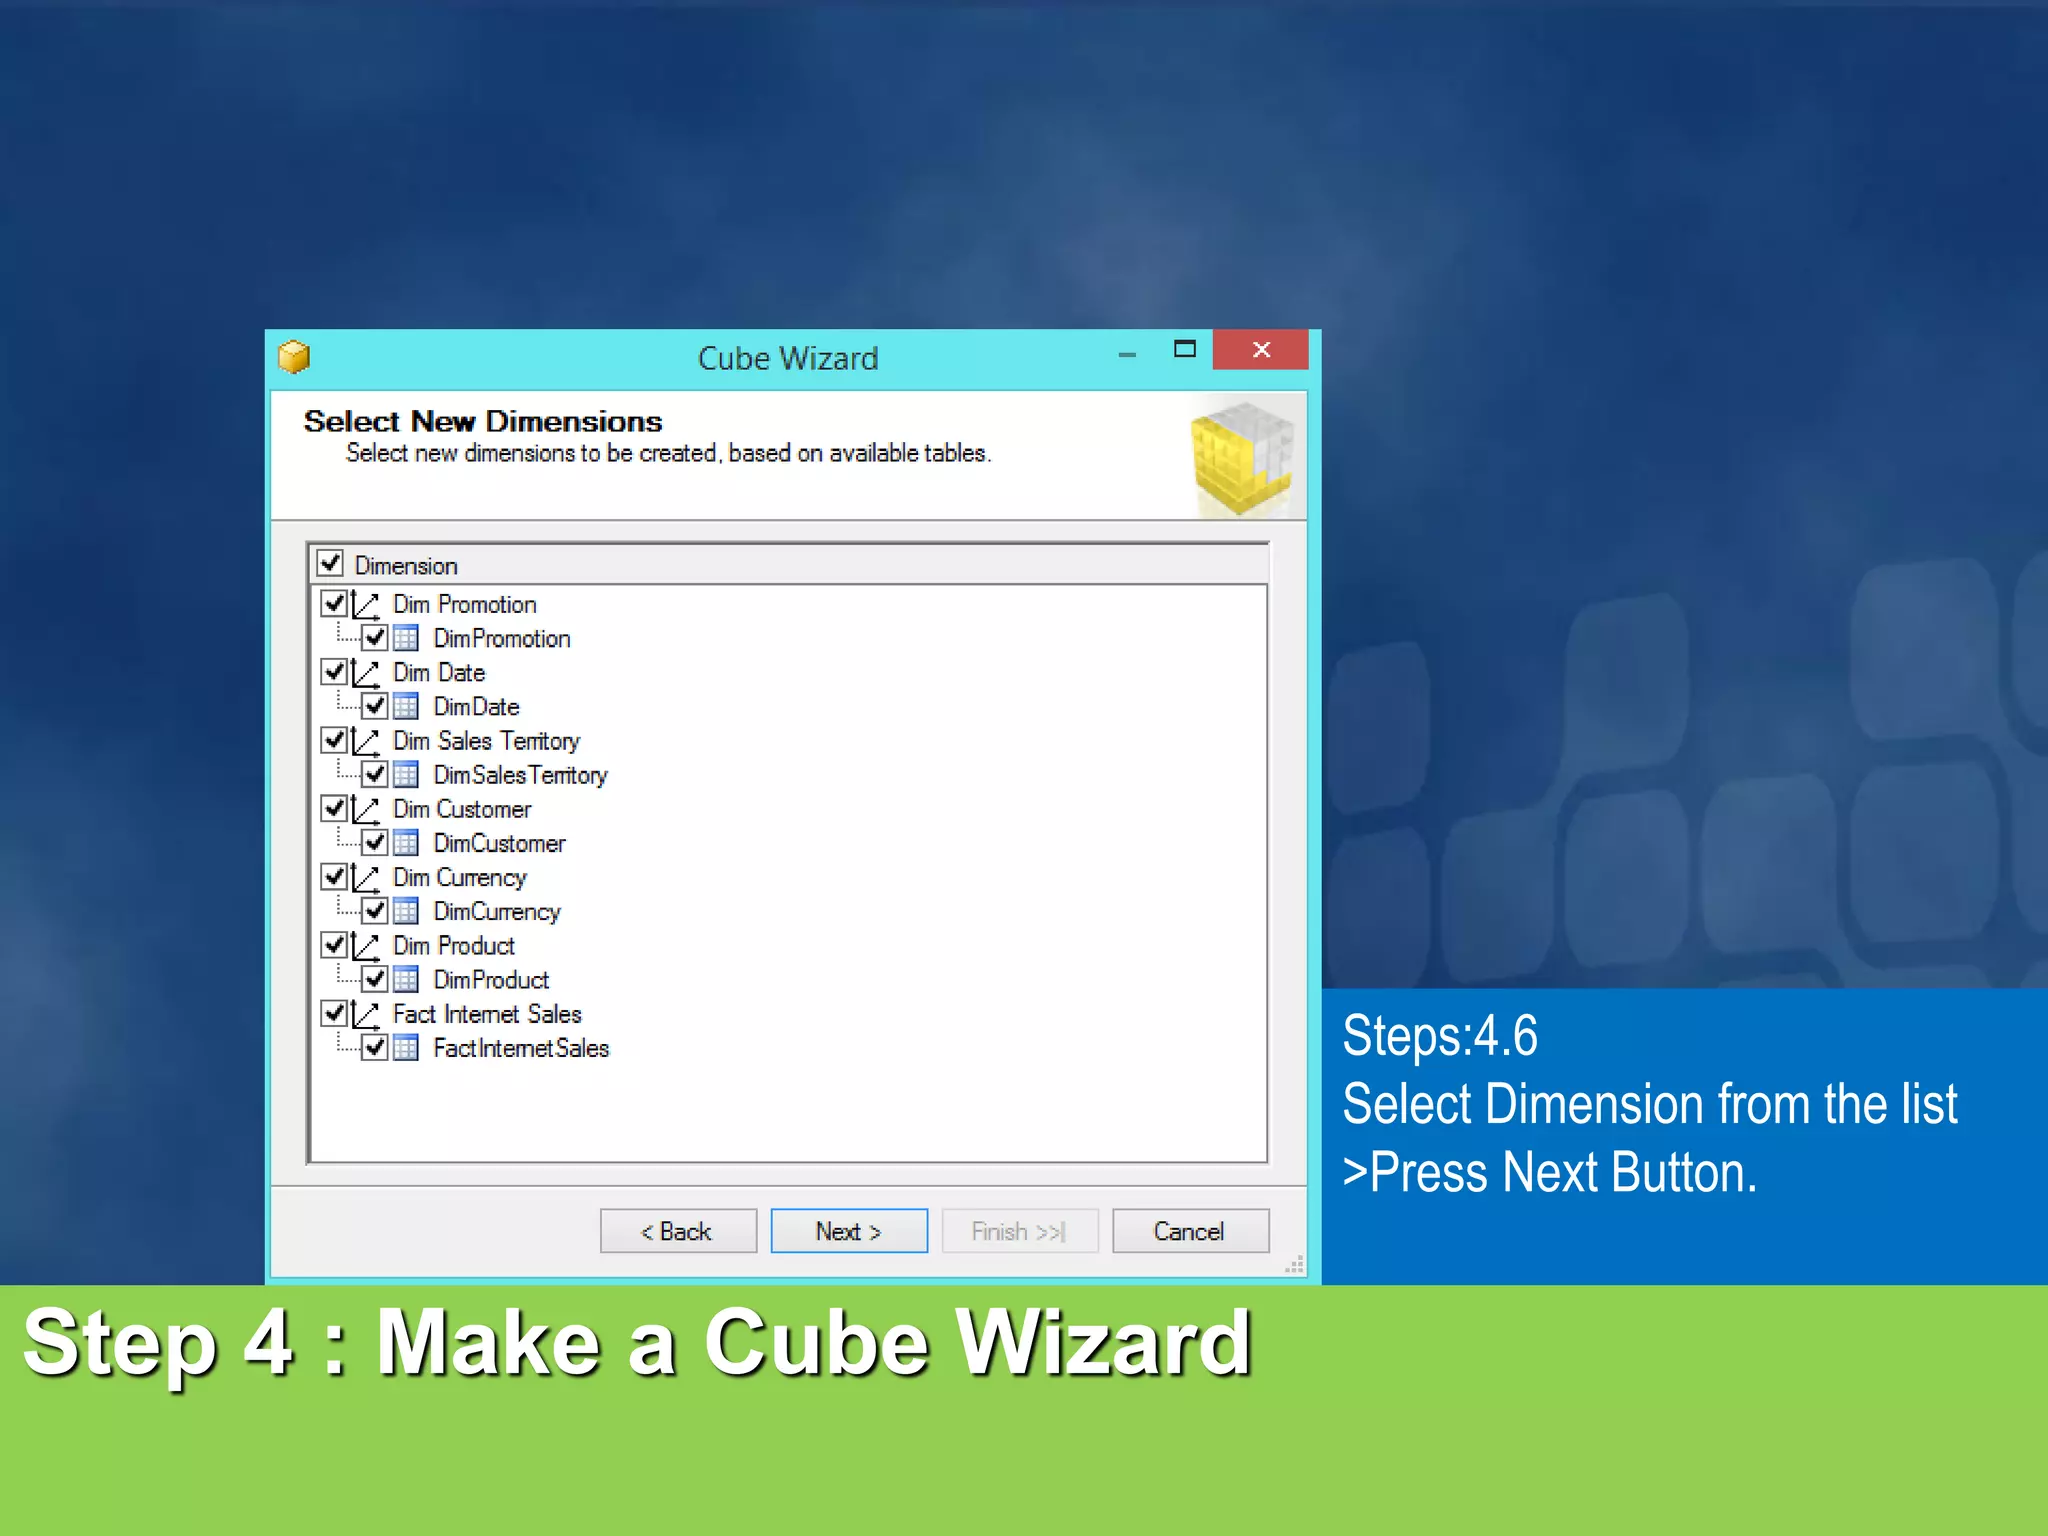
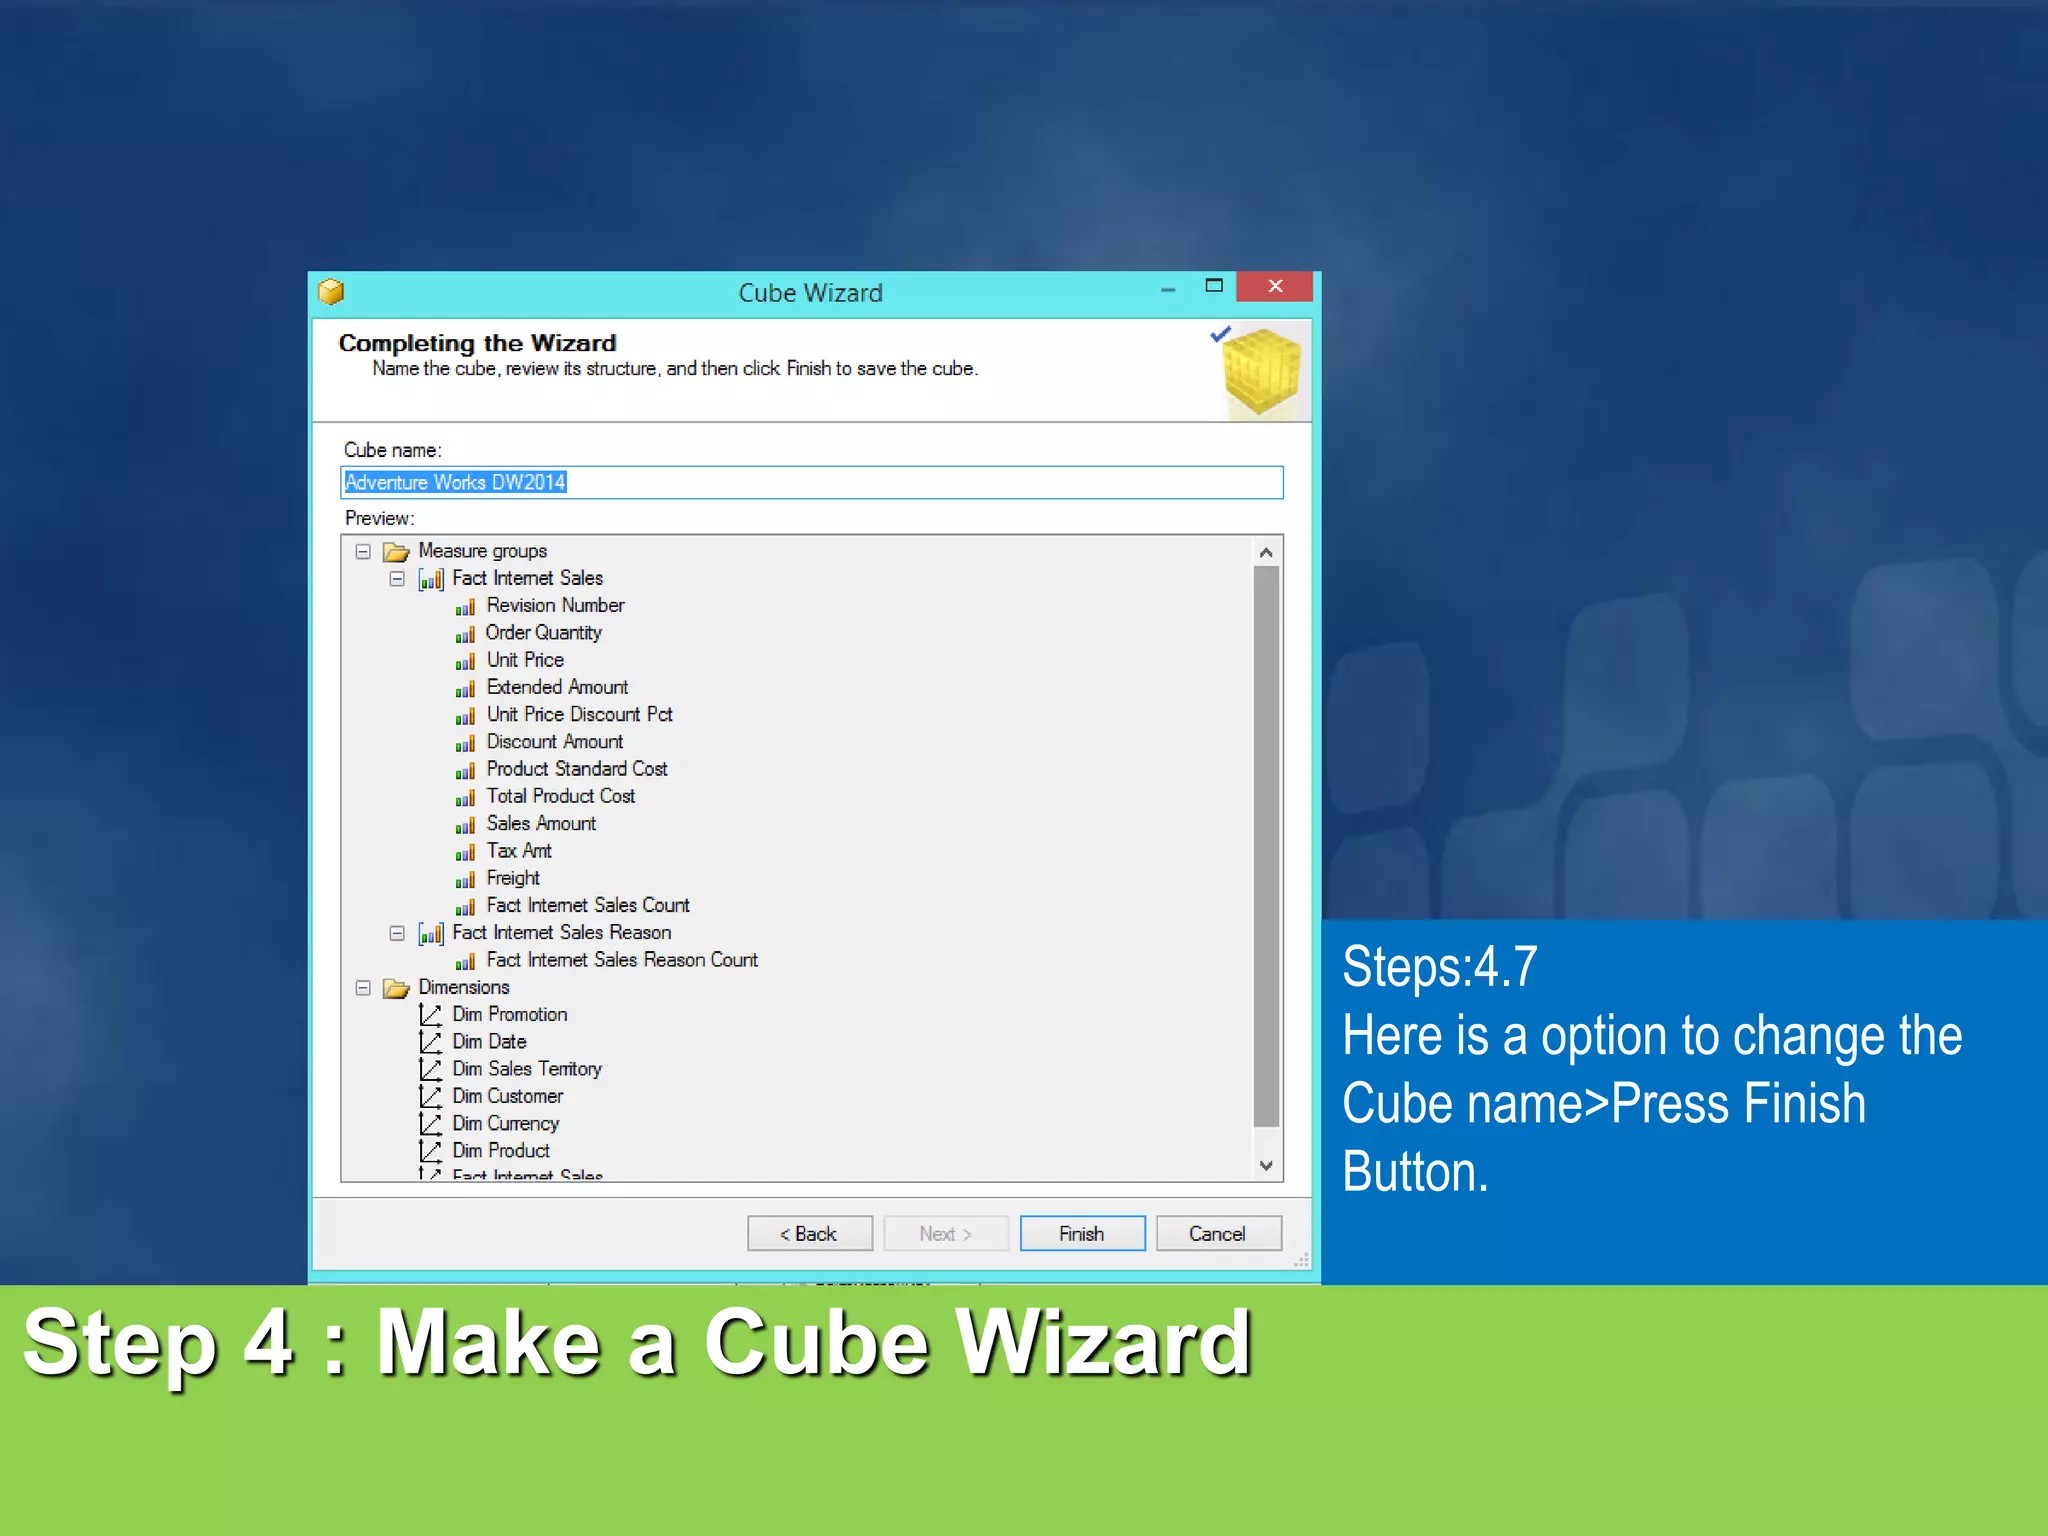
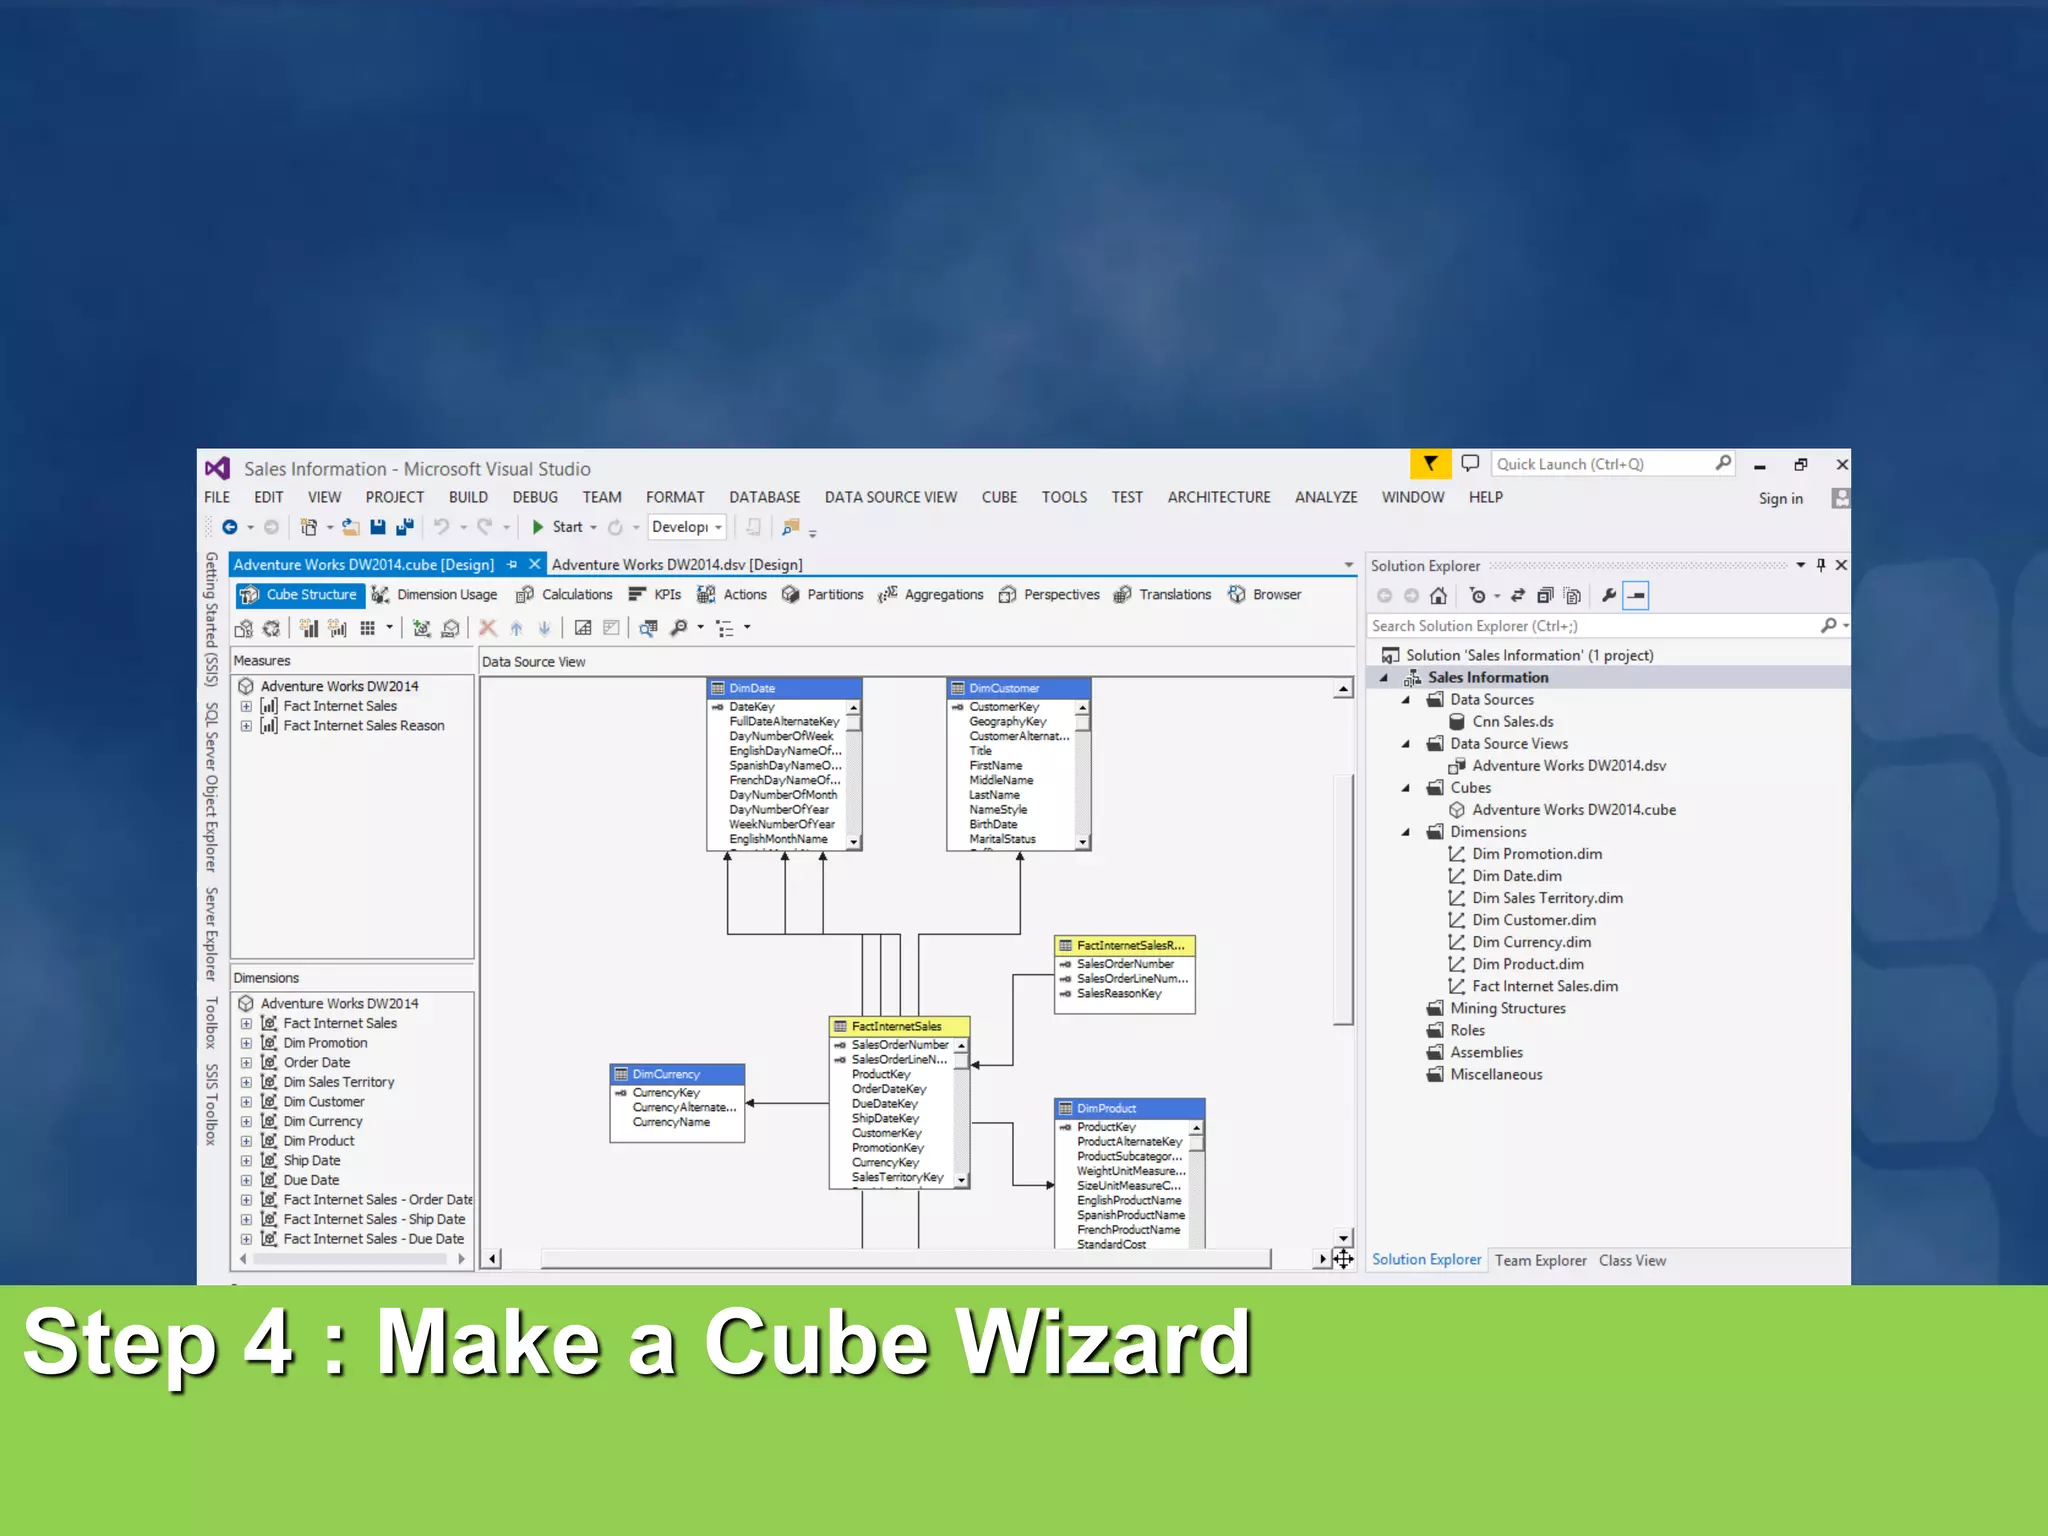
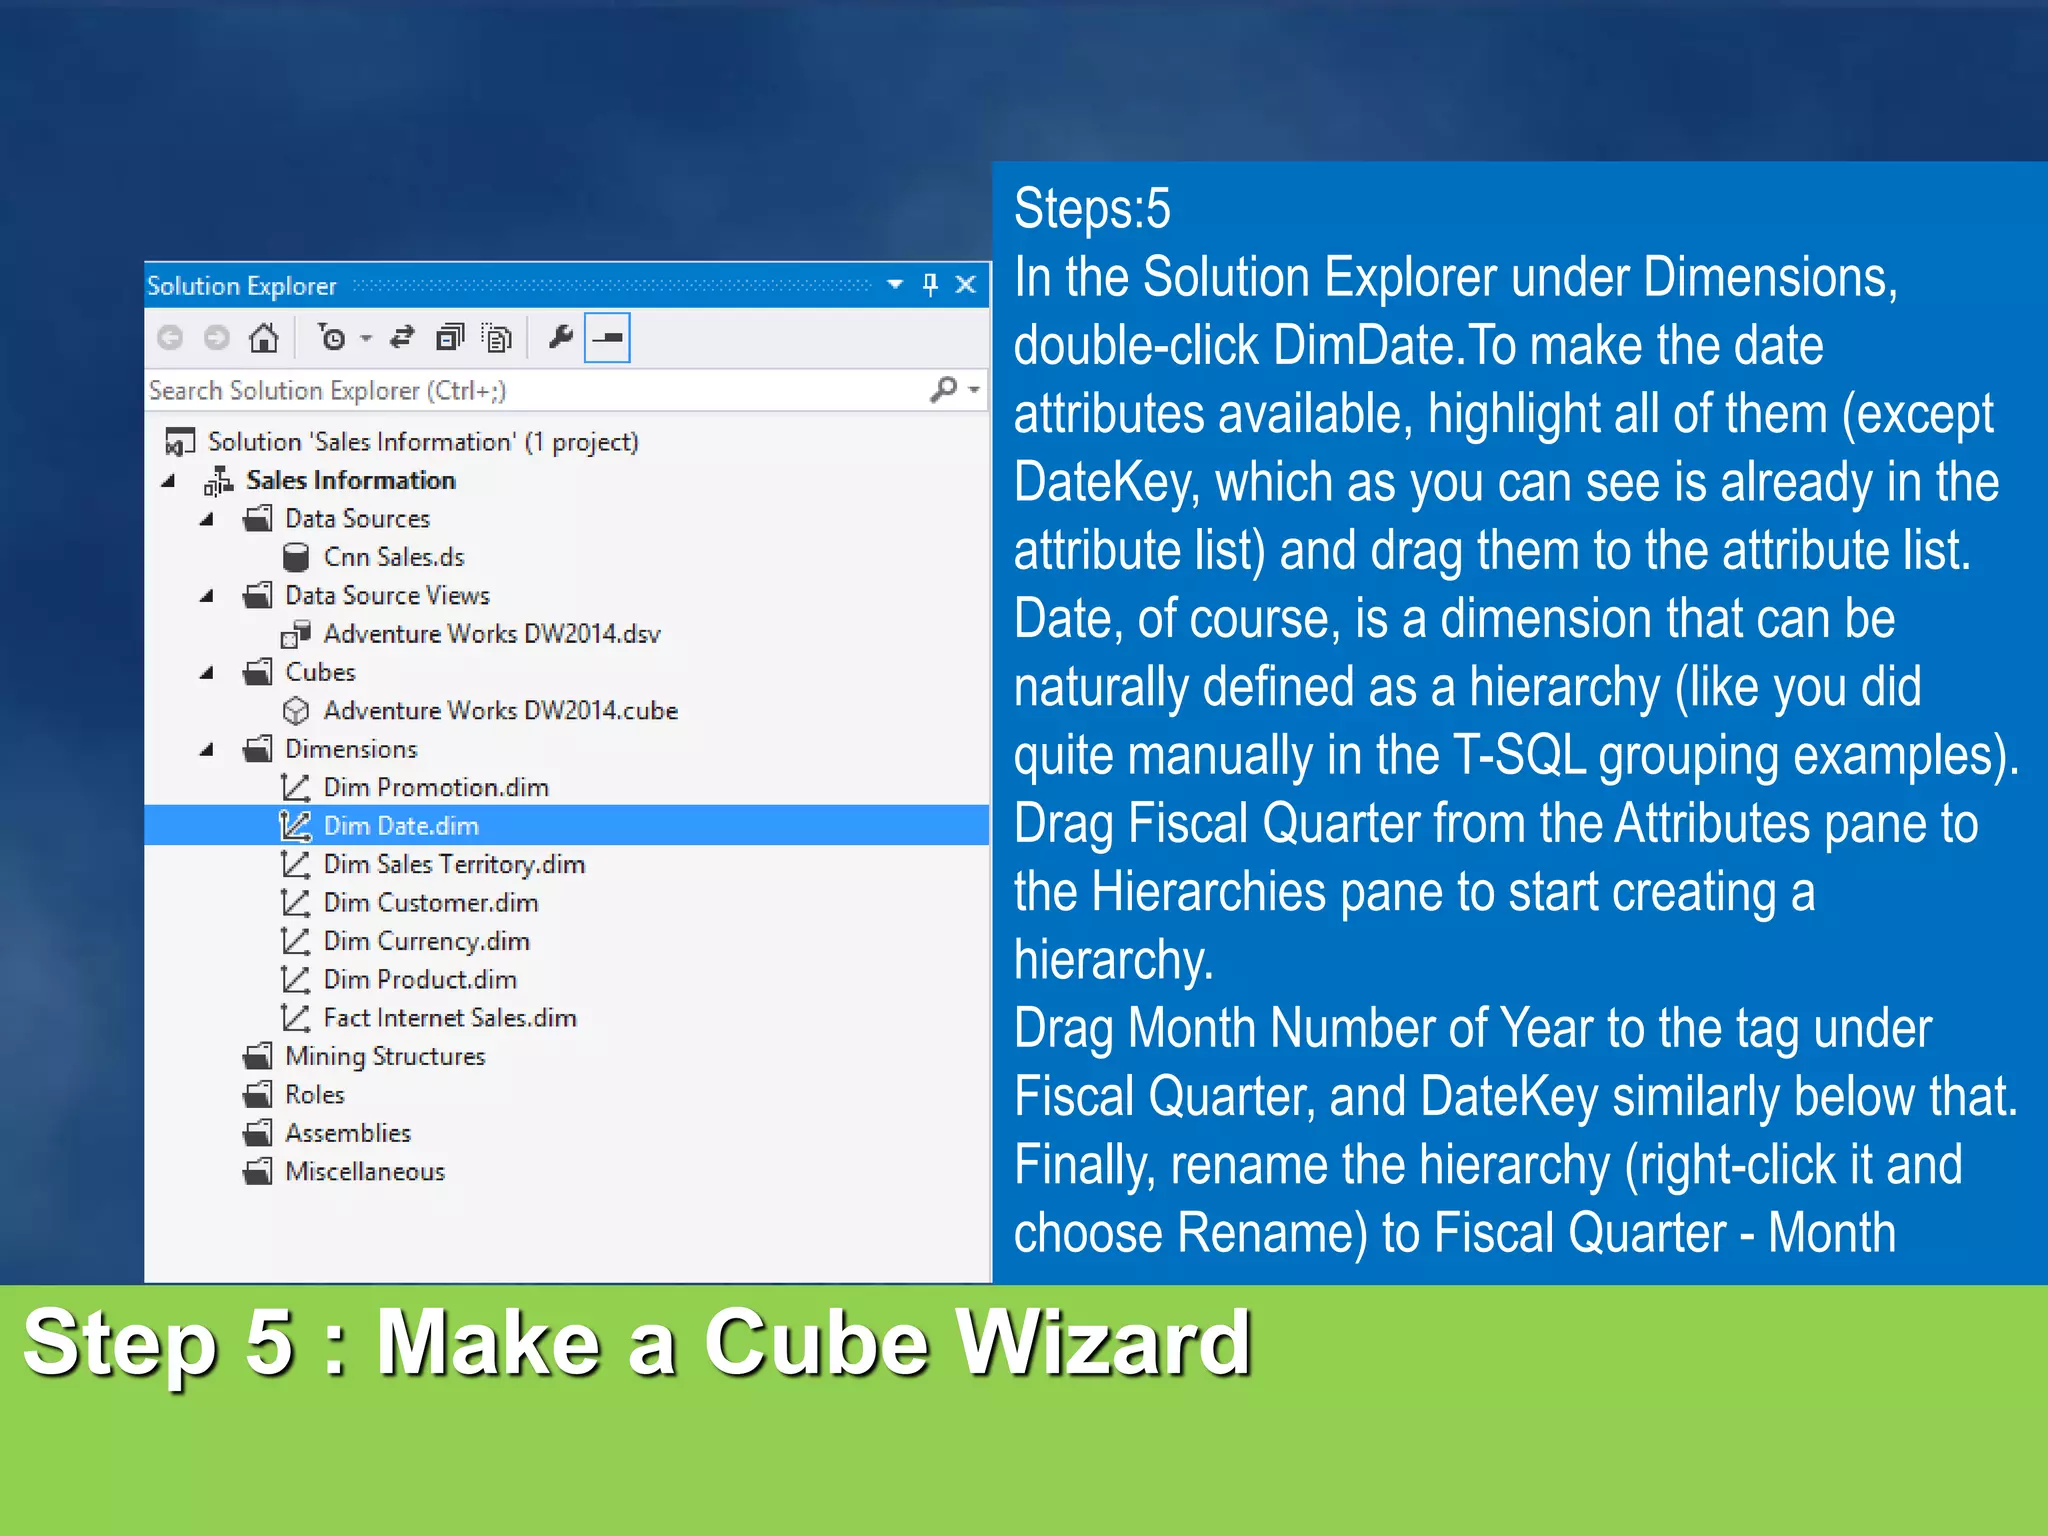
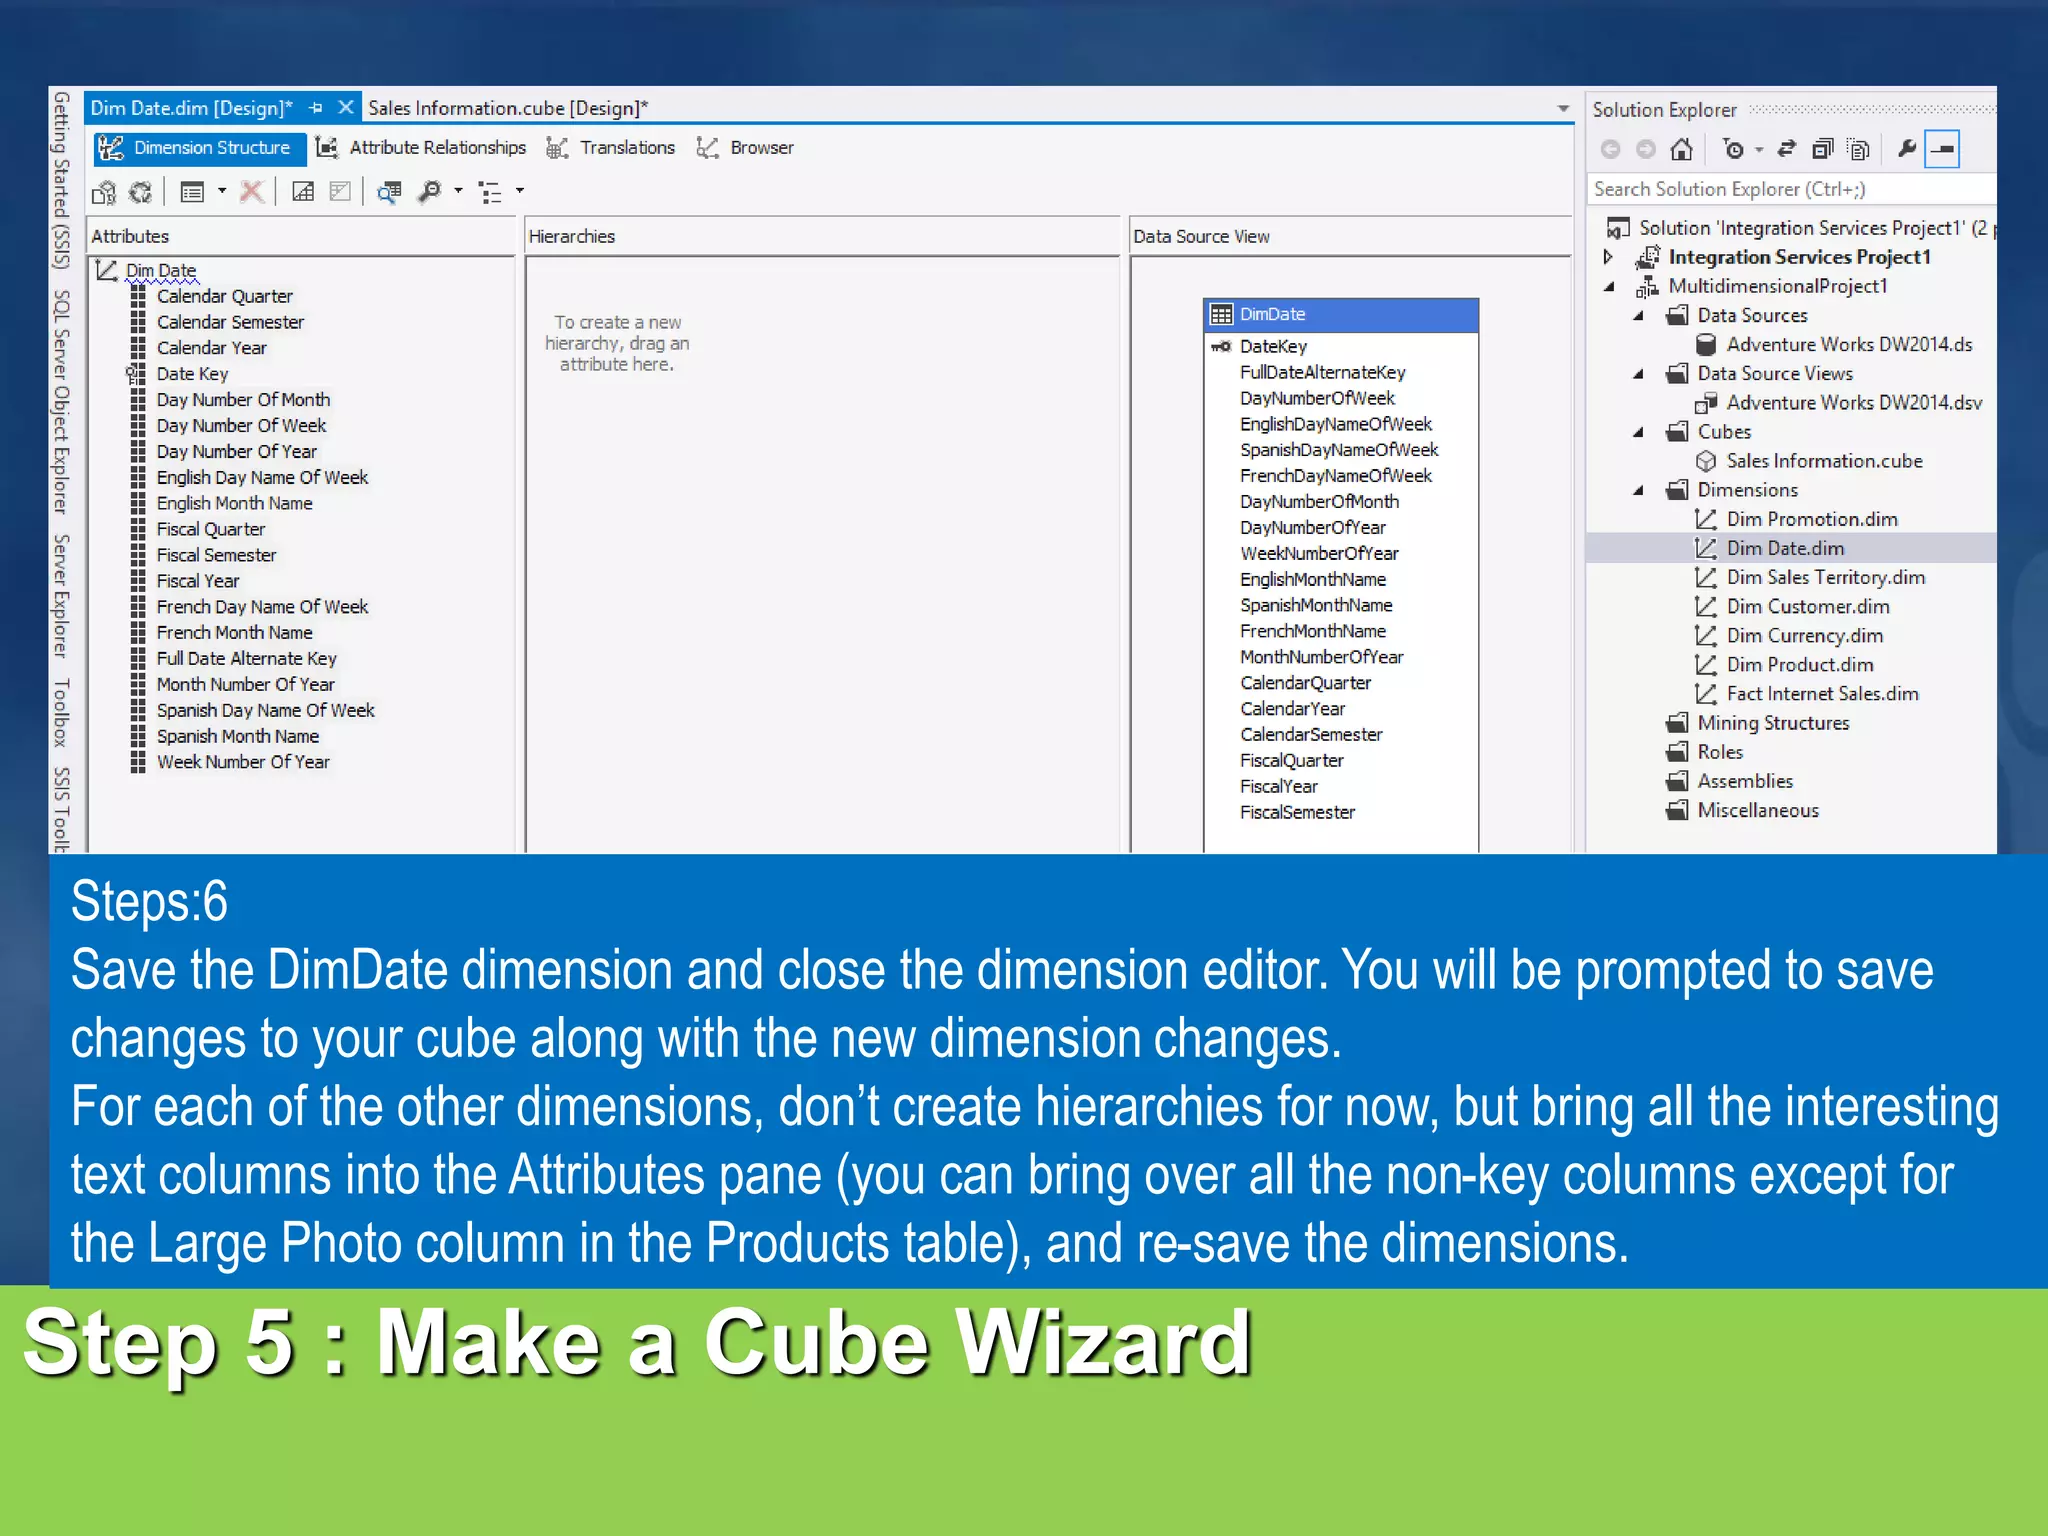
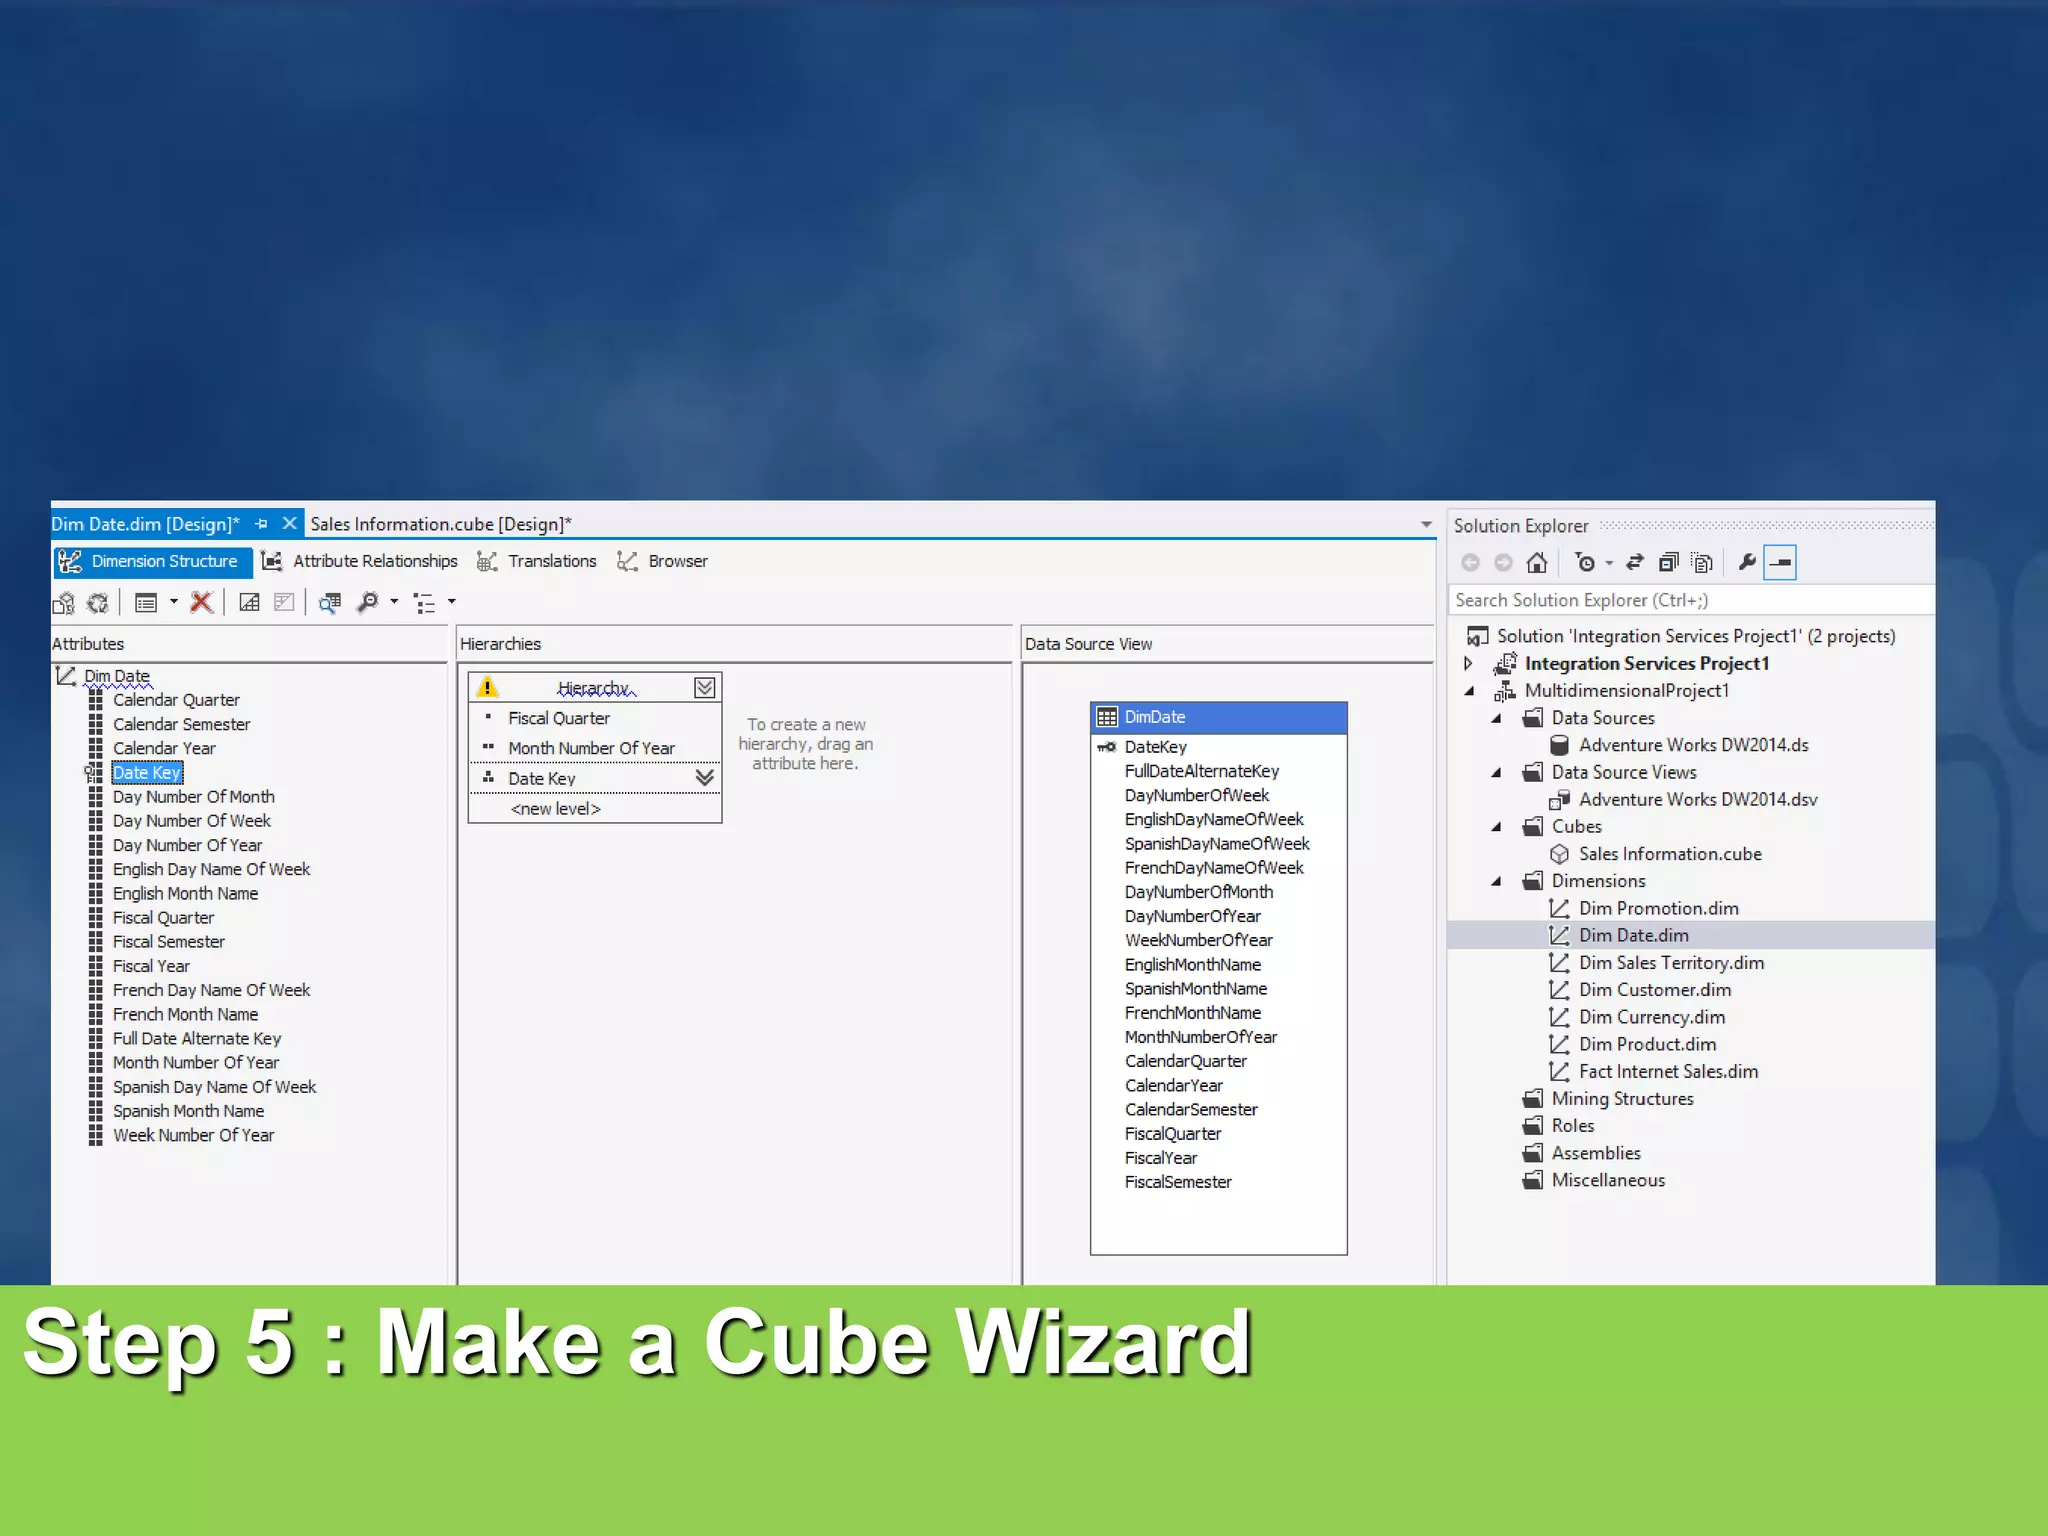
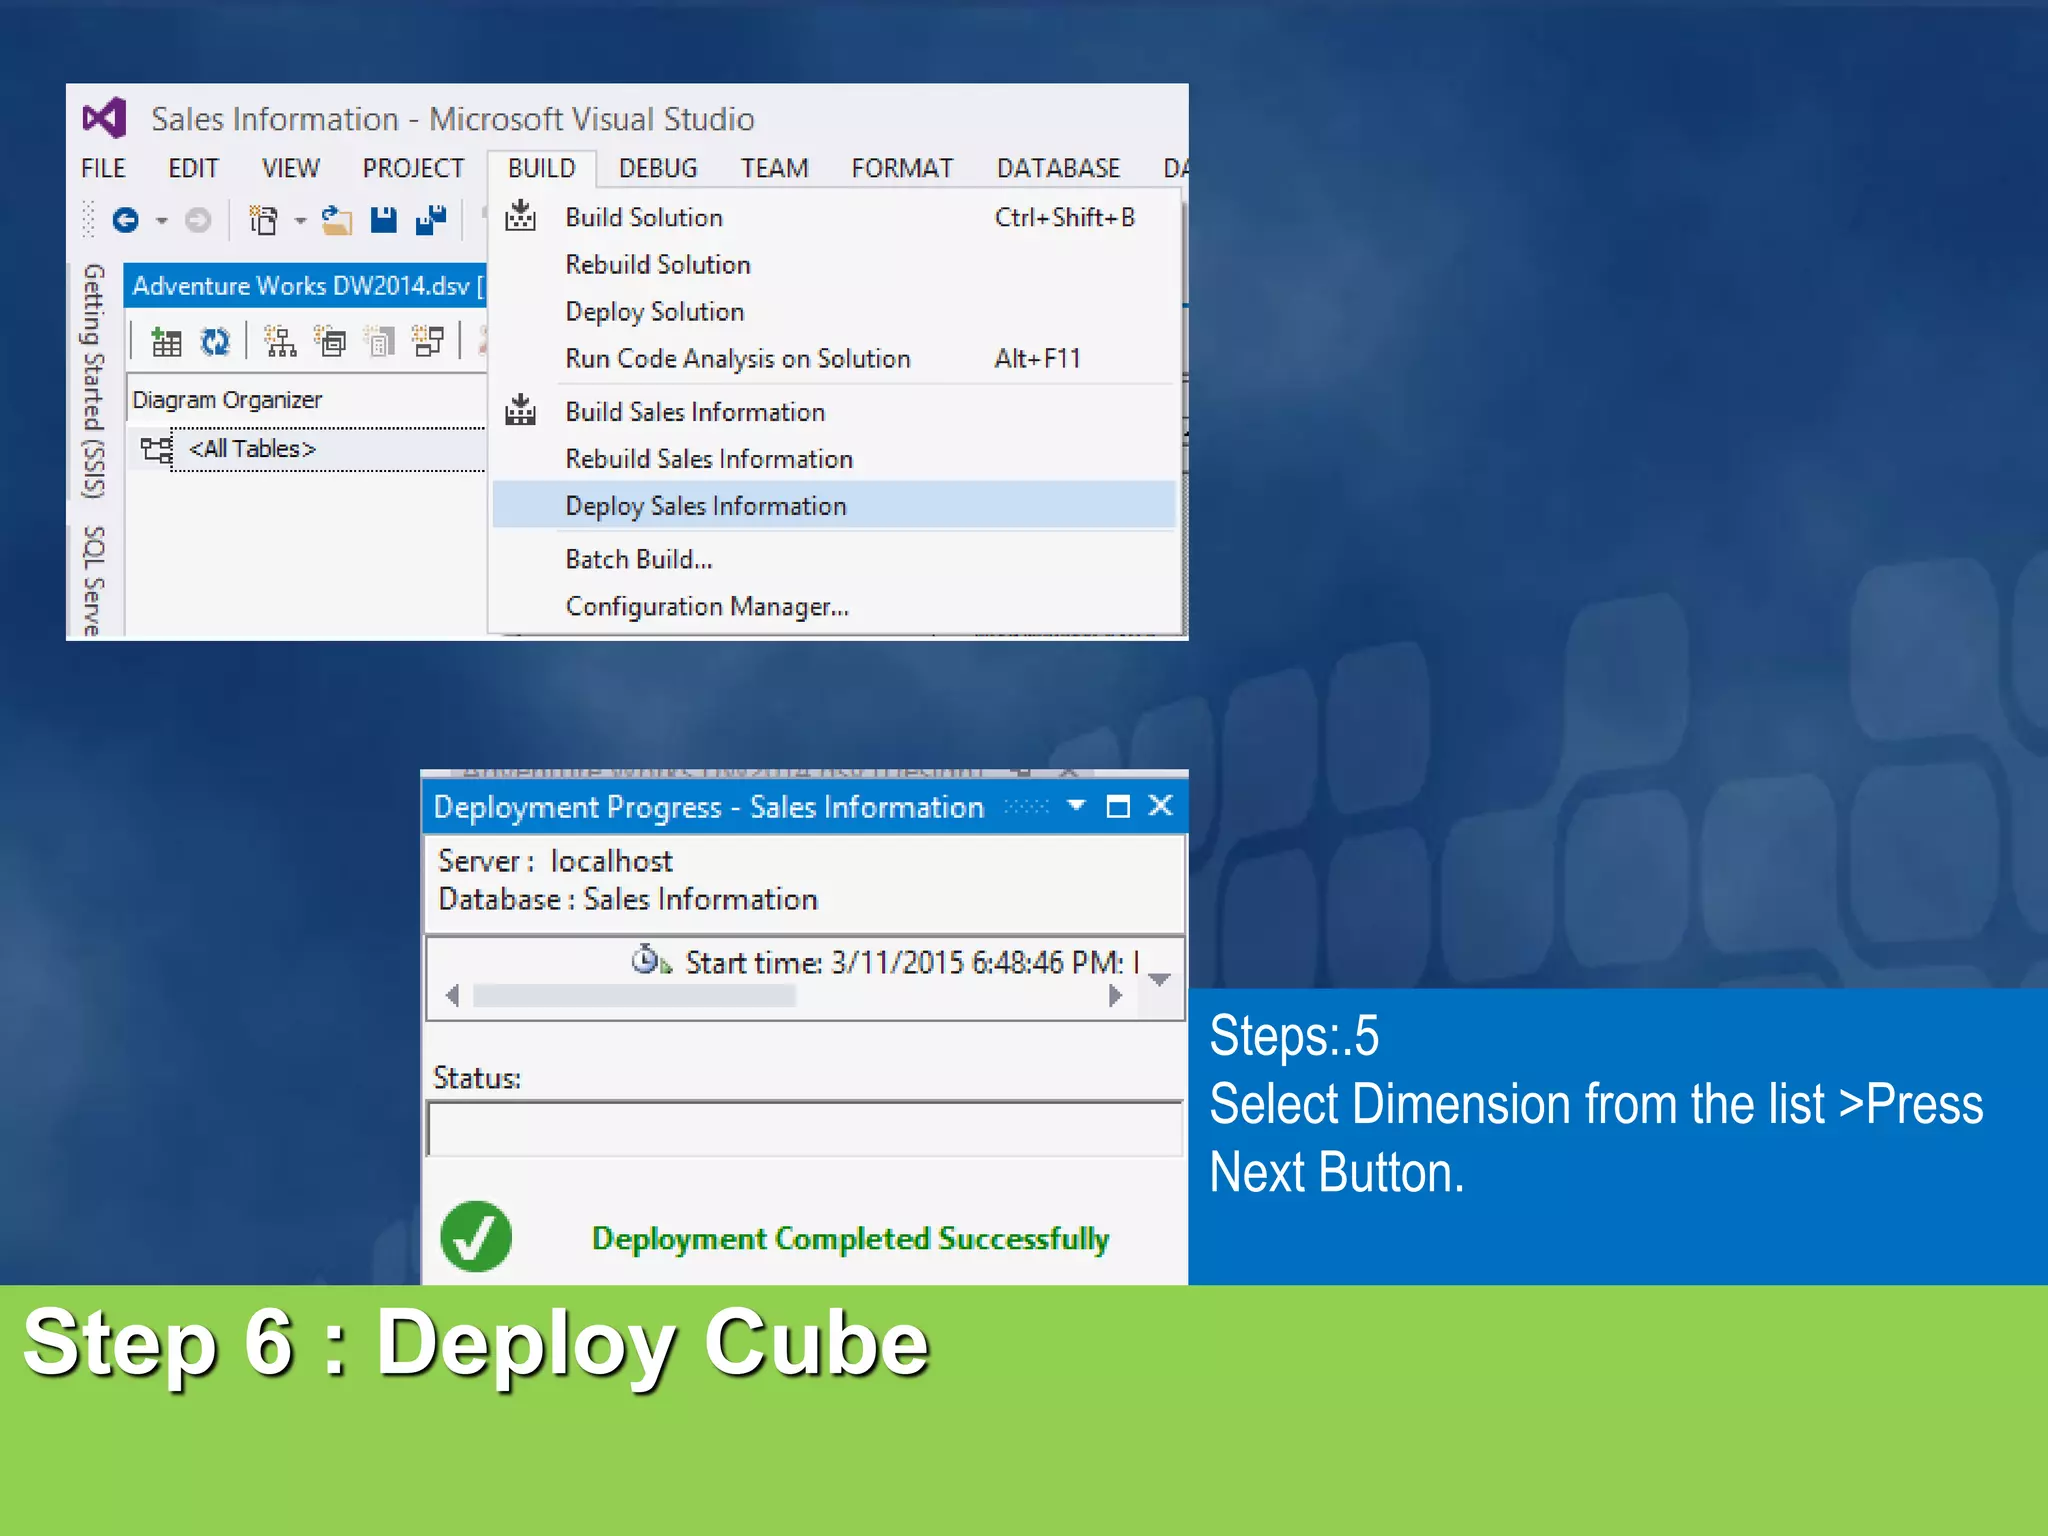
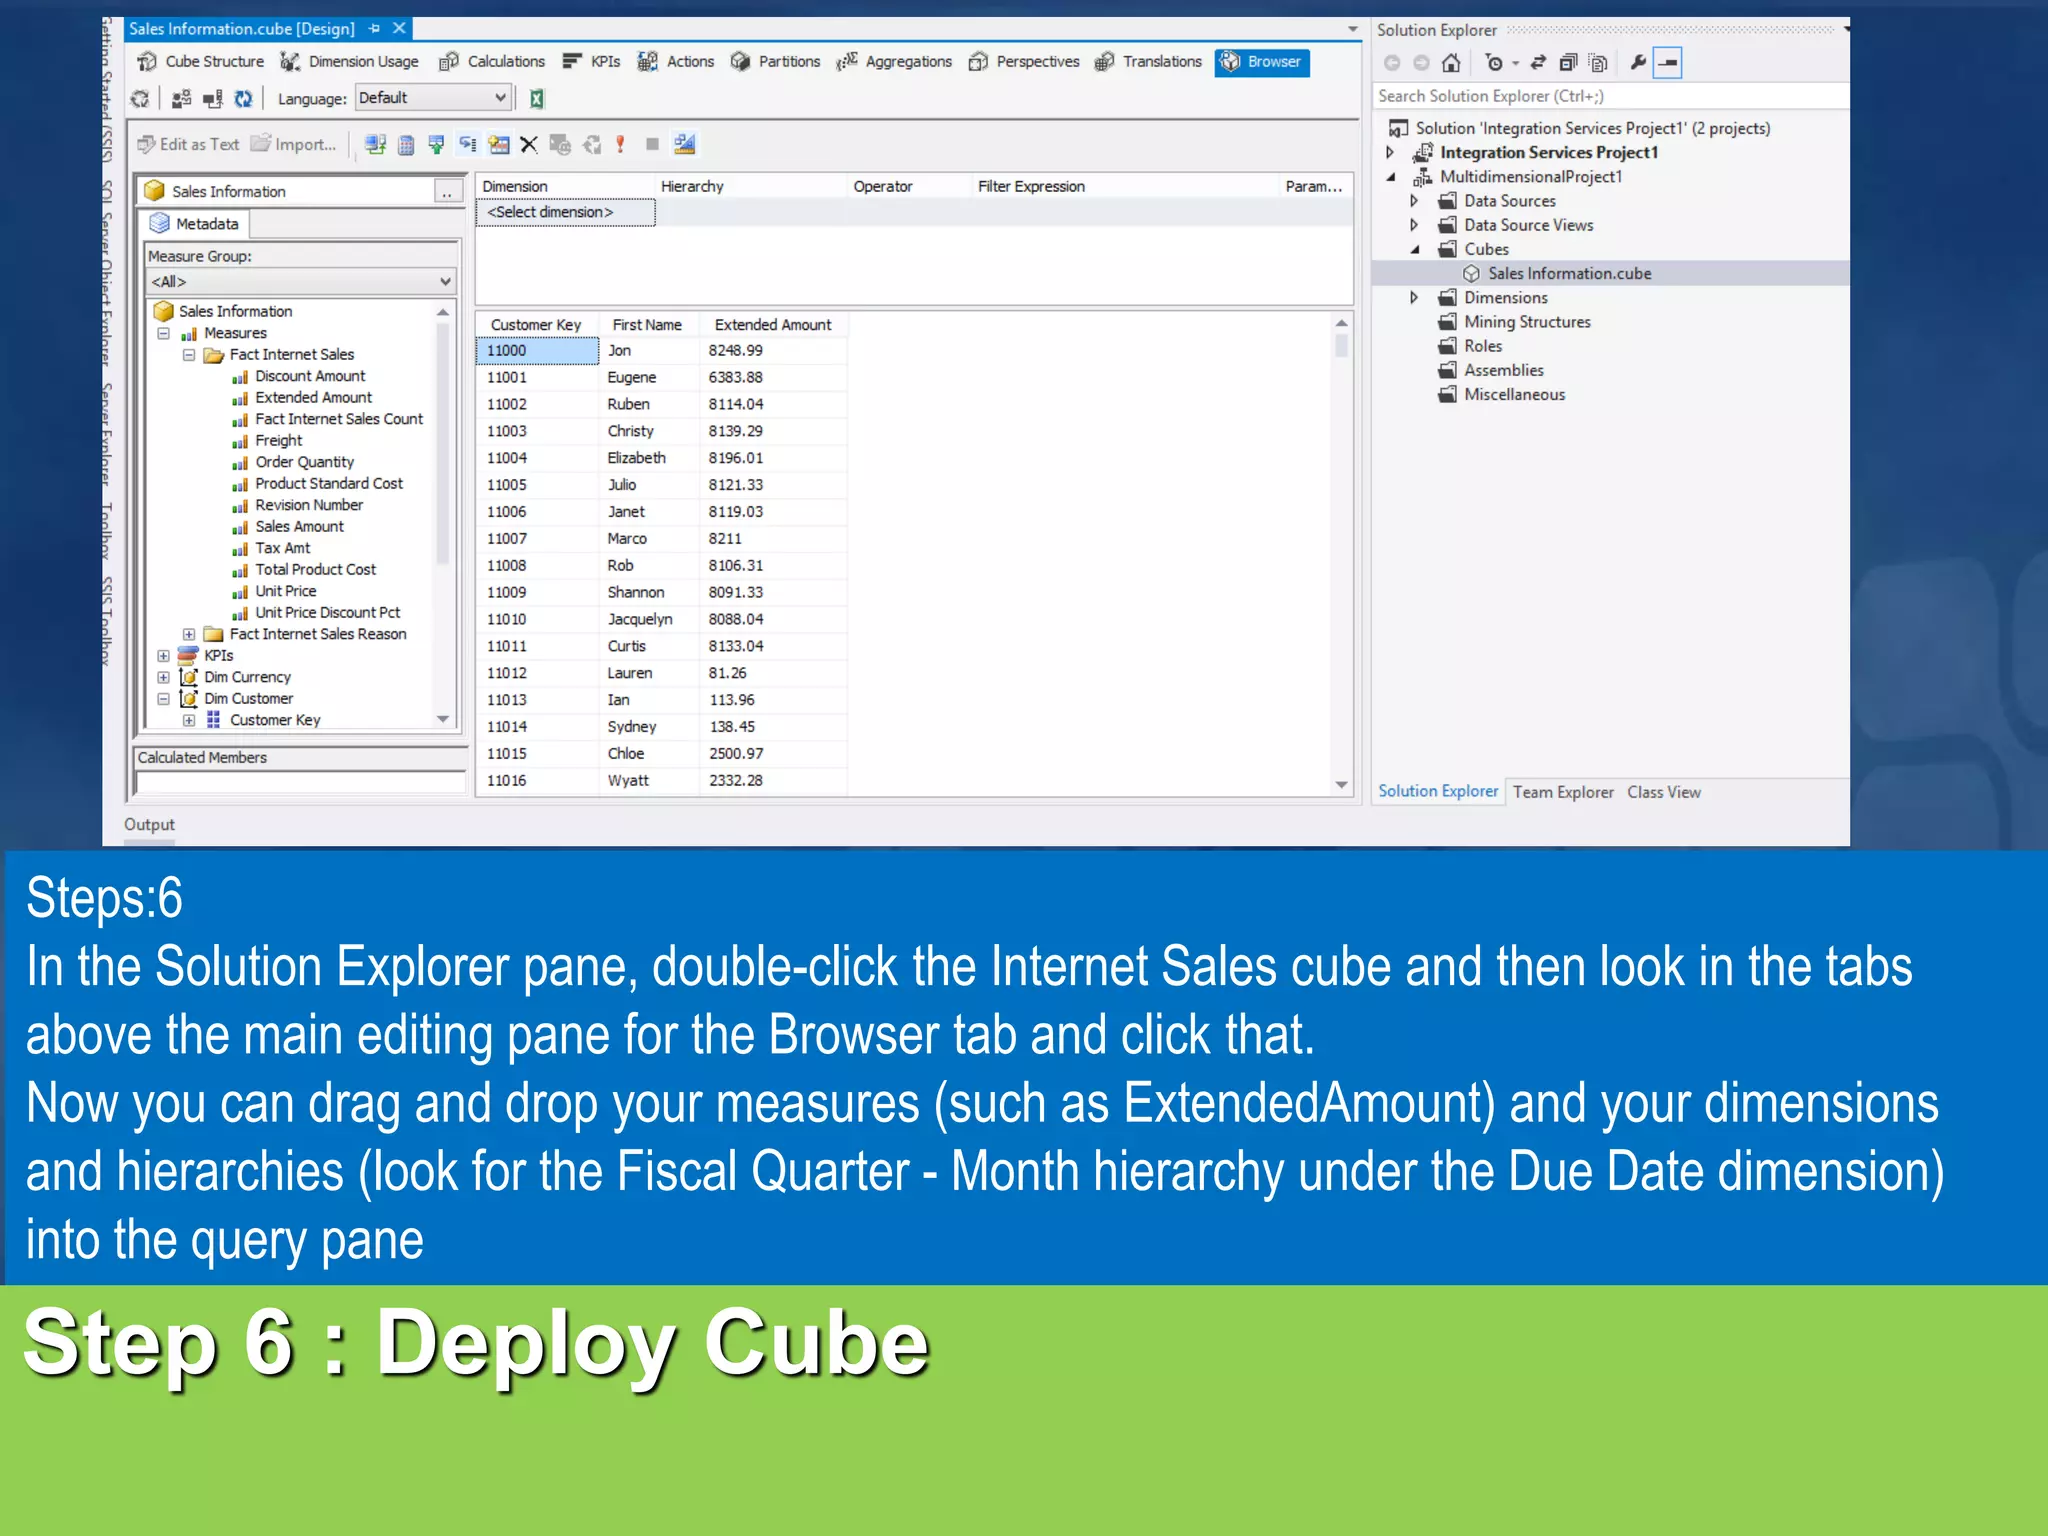


The document provides a step-by-step guide for designing a cube in SQL Server Analysis Services (SSAS) using SQL Server Data Tools (SSDT). It outlines the procedures for creating an SSAS project, building a data source, designing a data source view, and constructing a cube. Key steps include connecting to a database, selecting measures and dimensions, and deploying the cube for analysis.