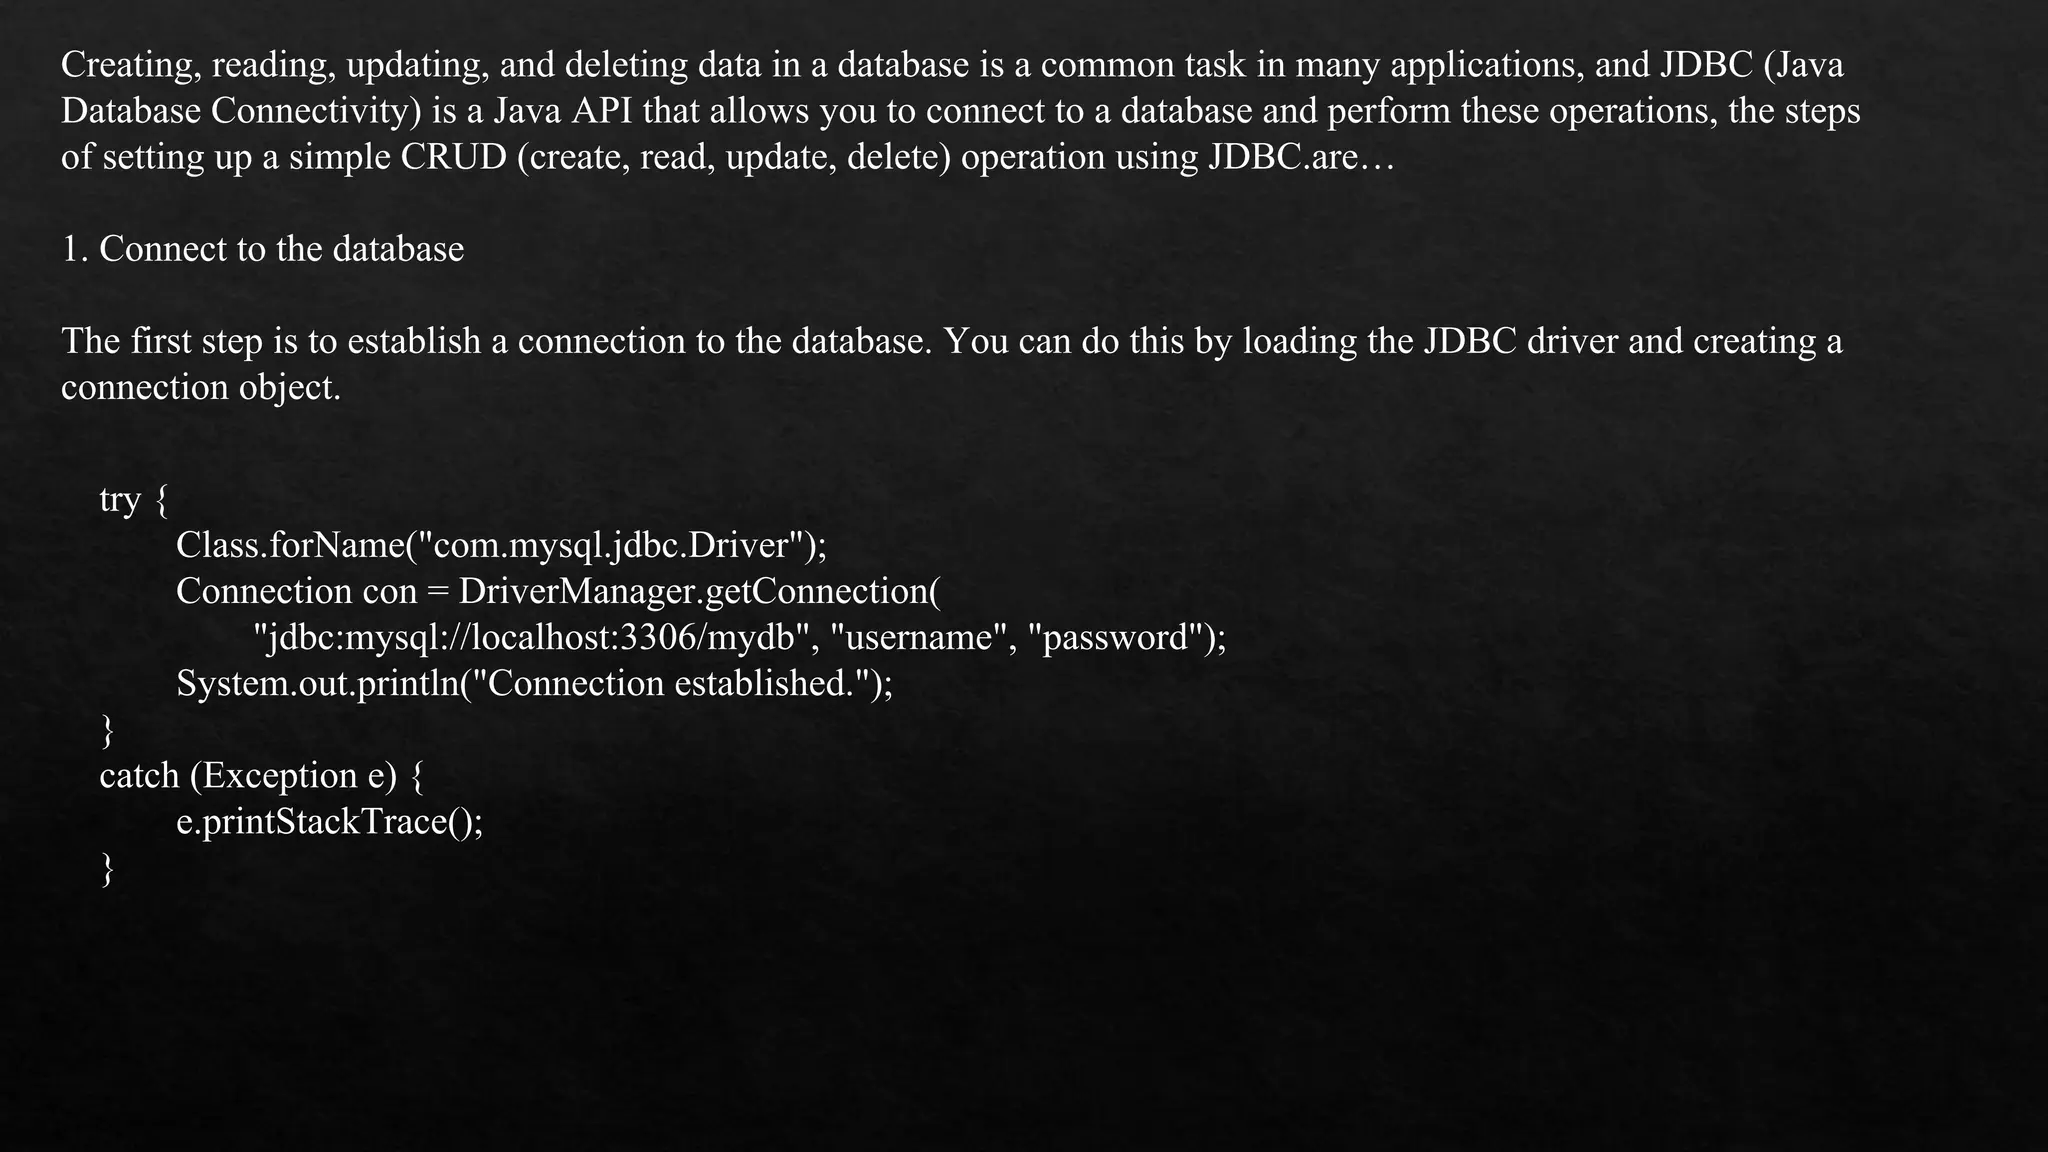
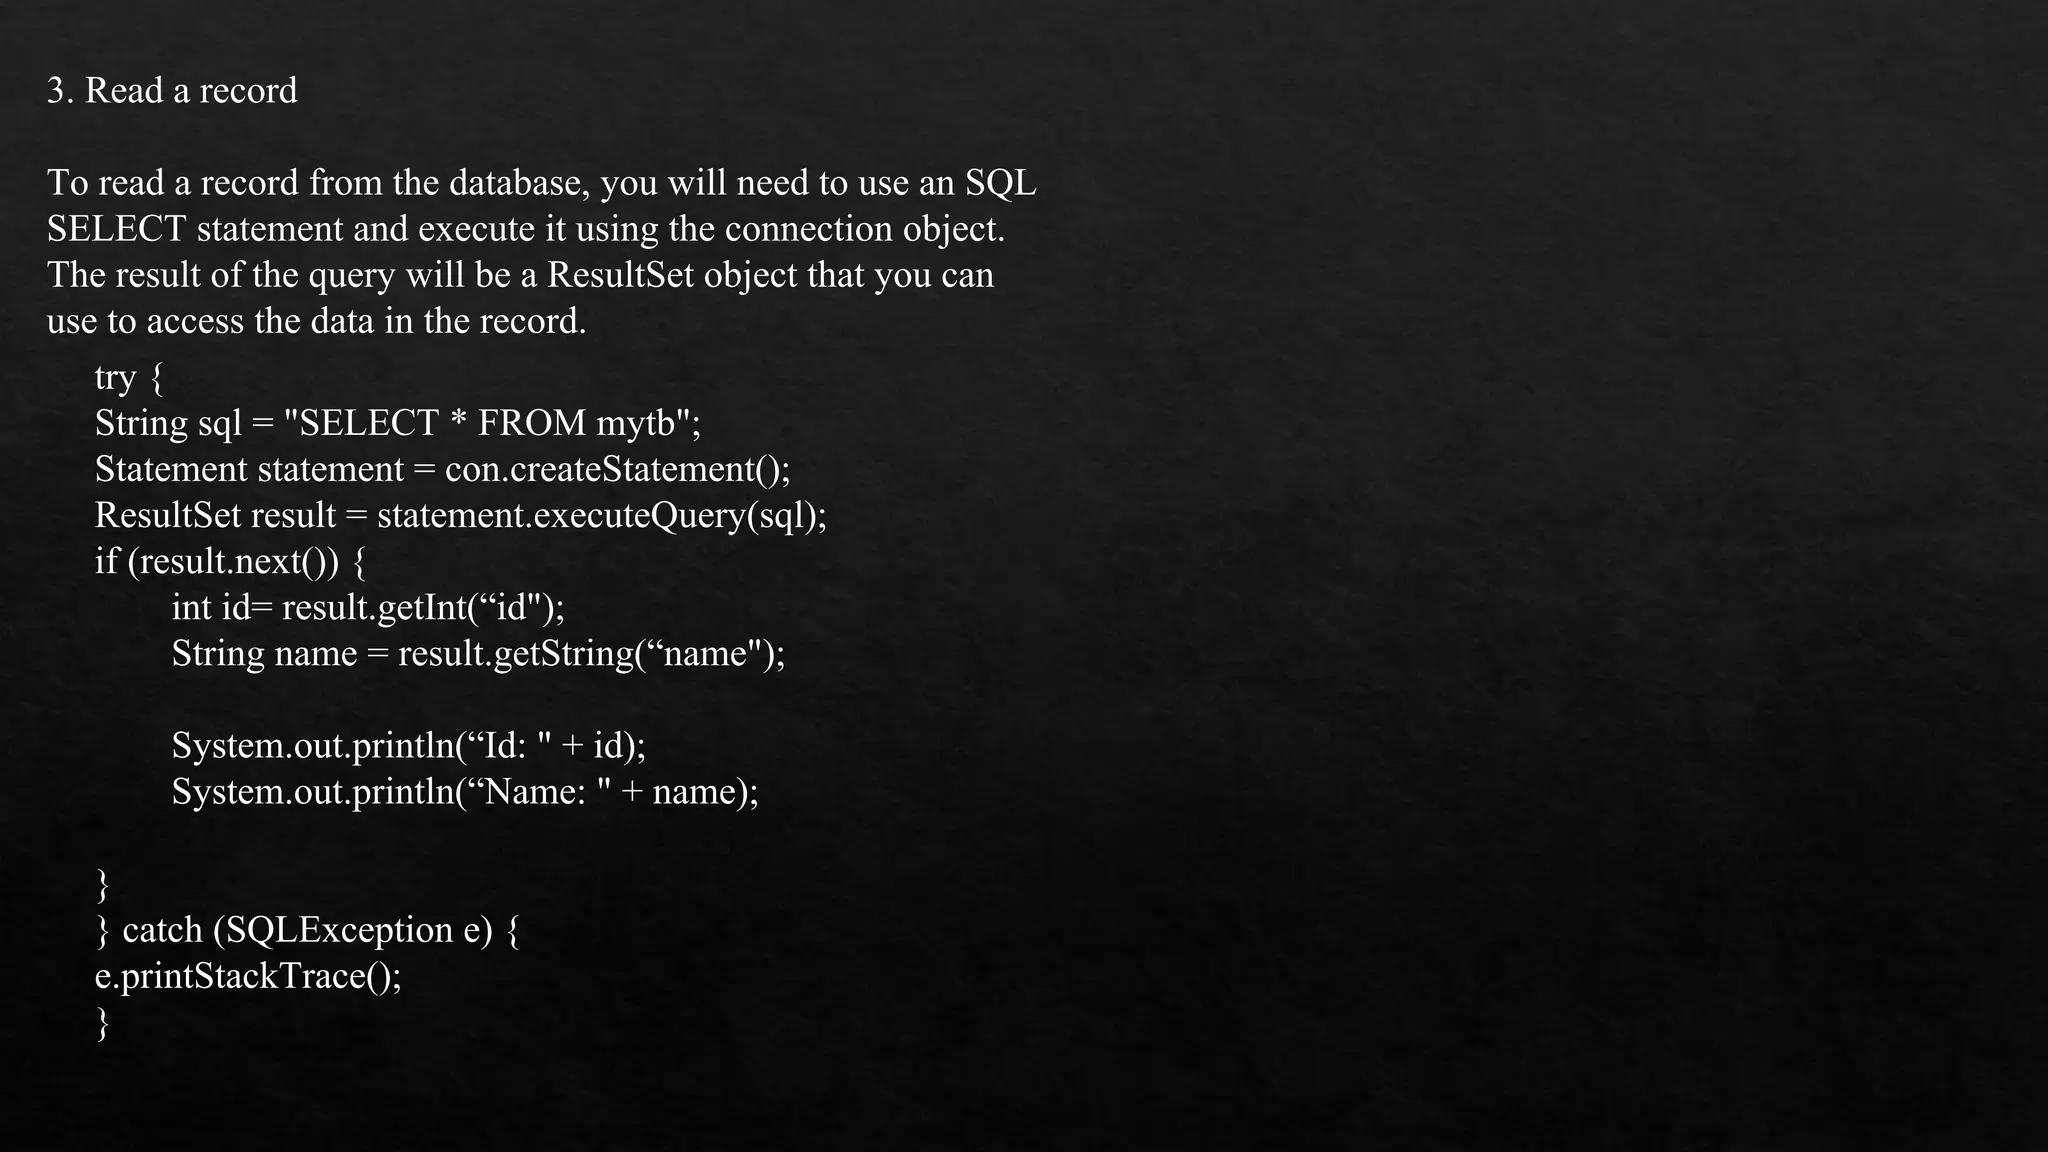
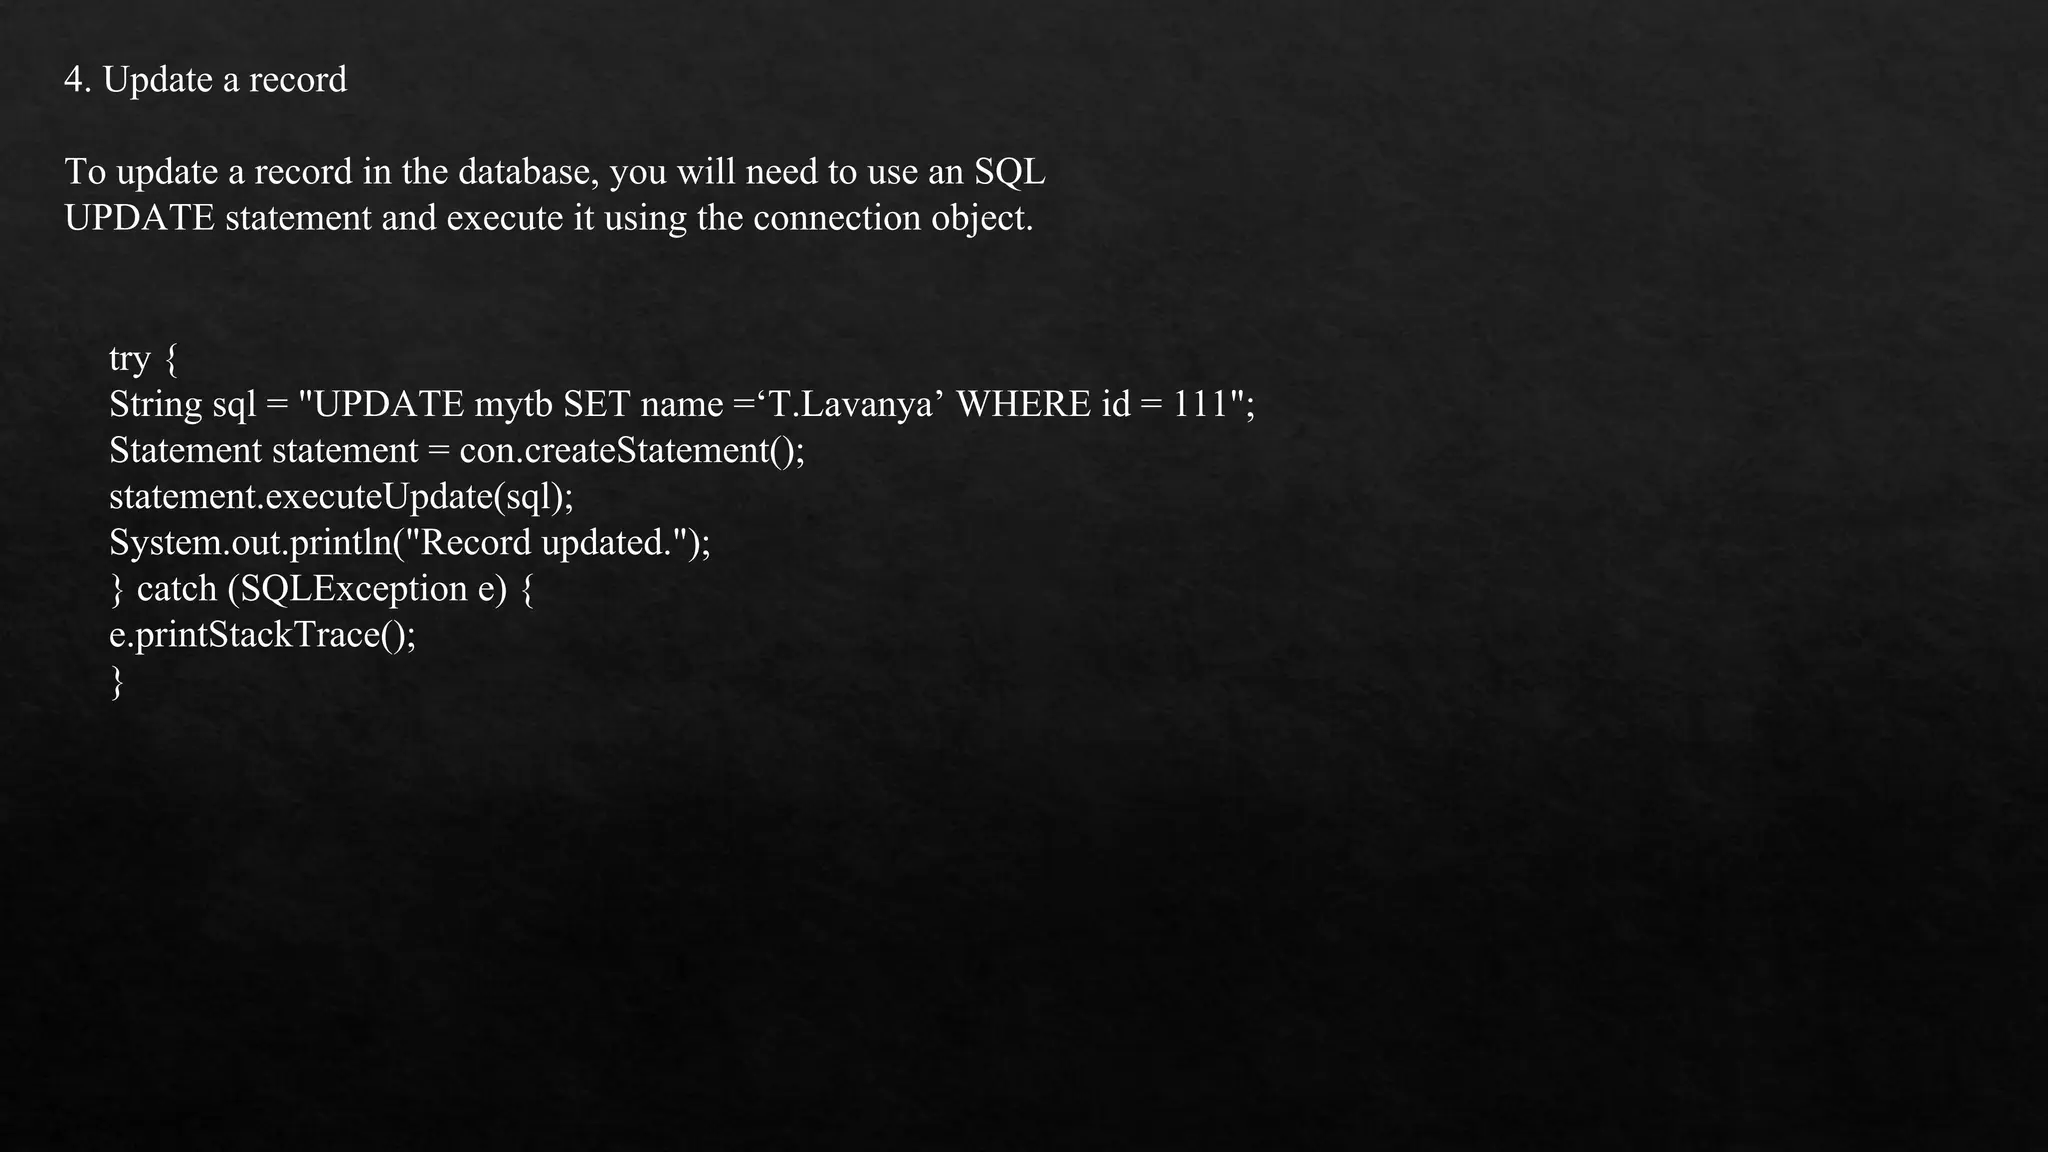
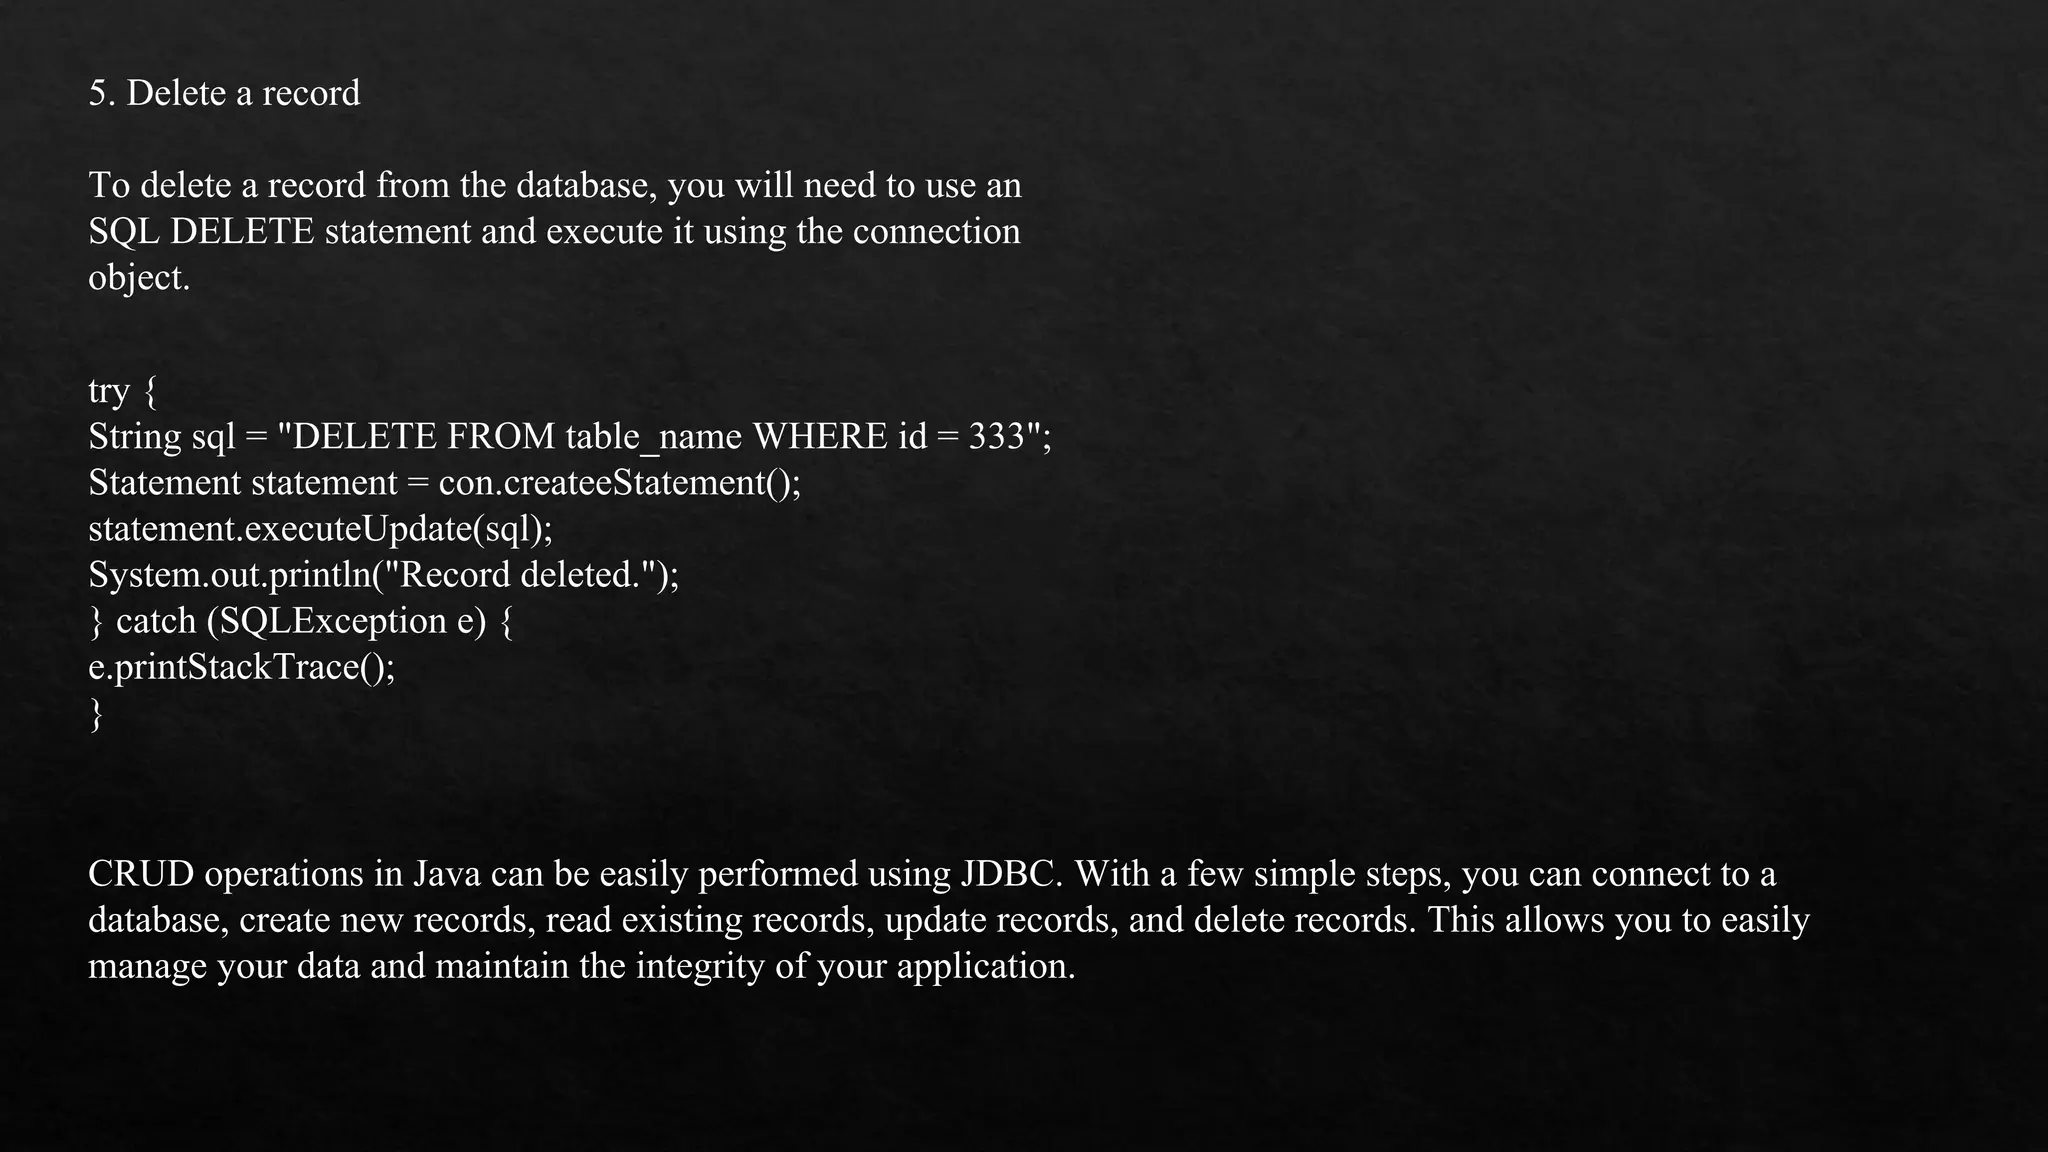
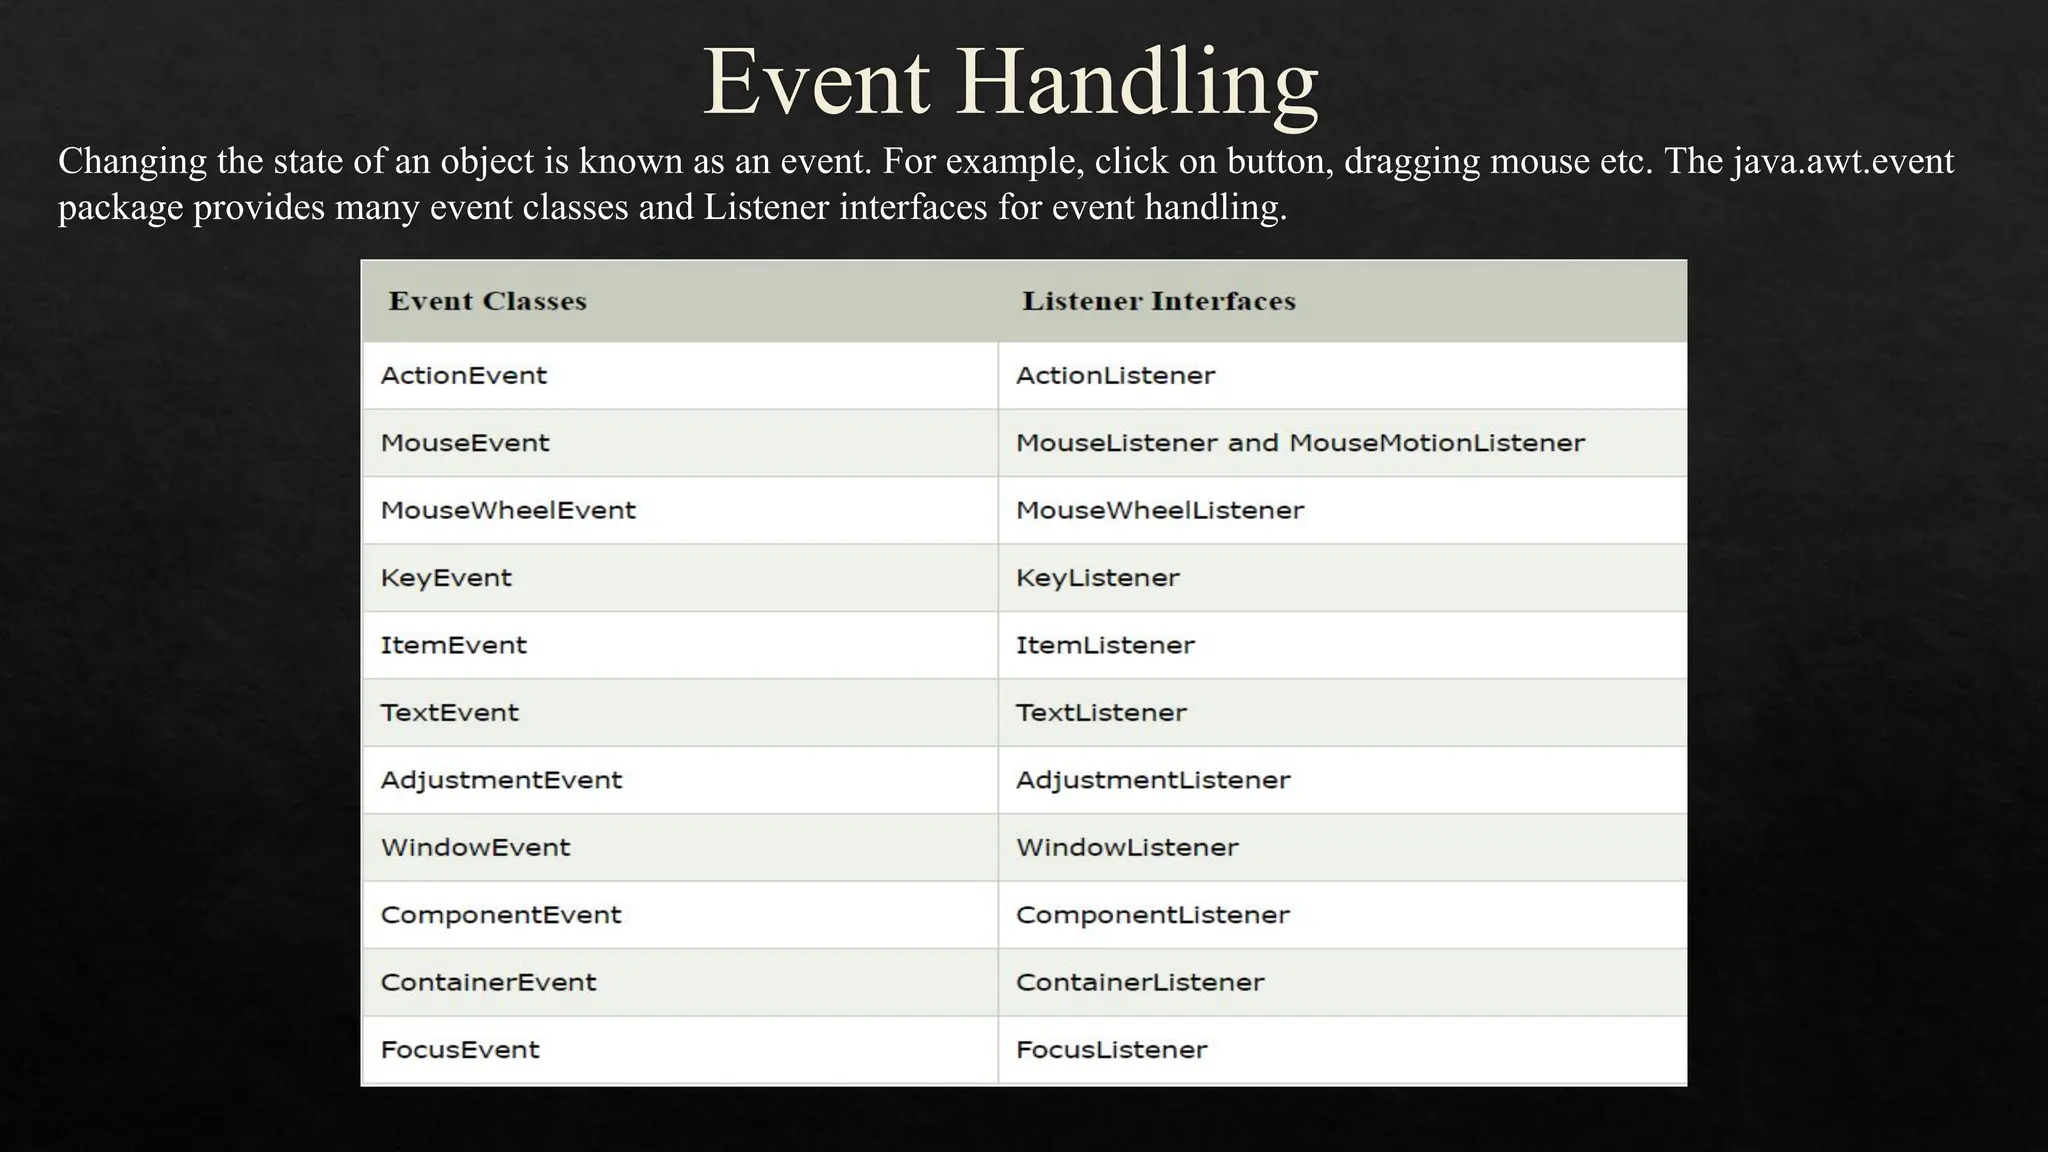
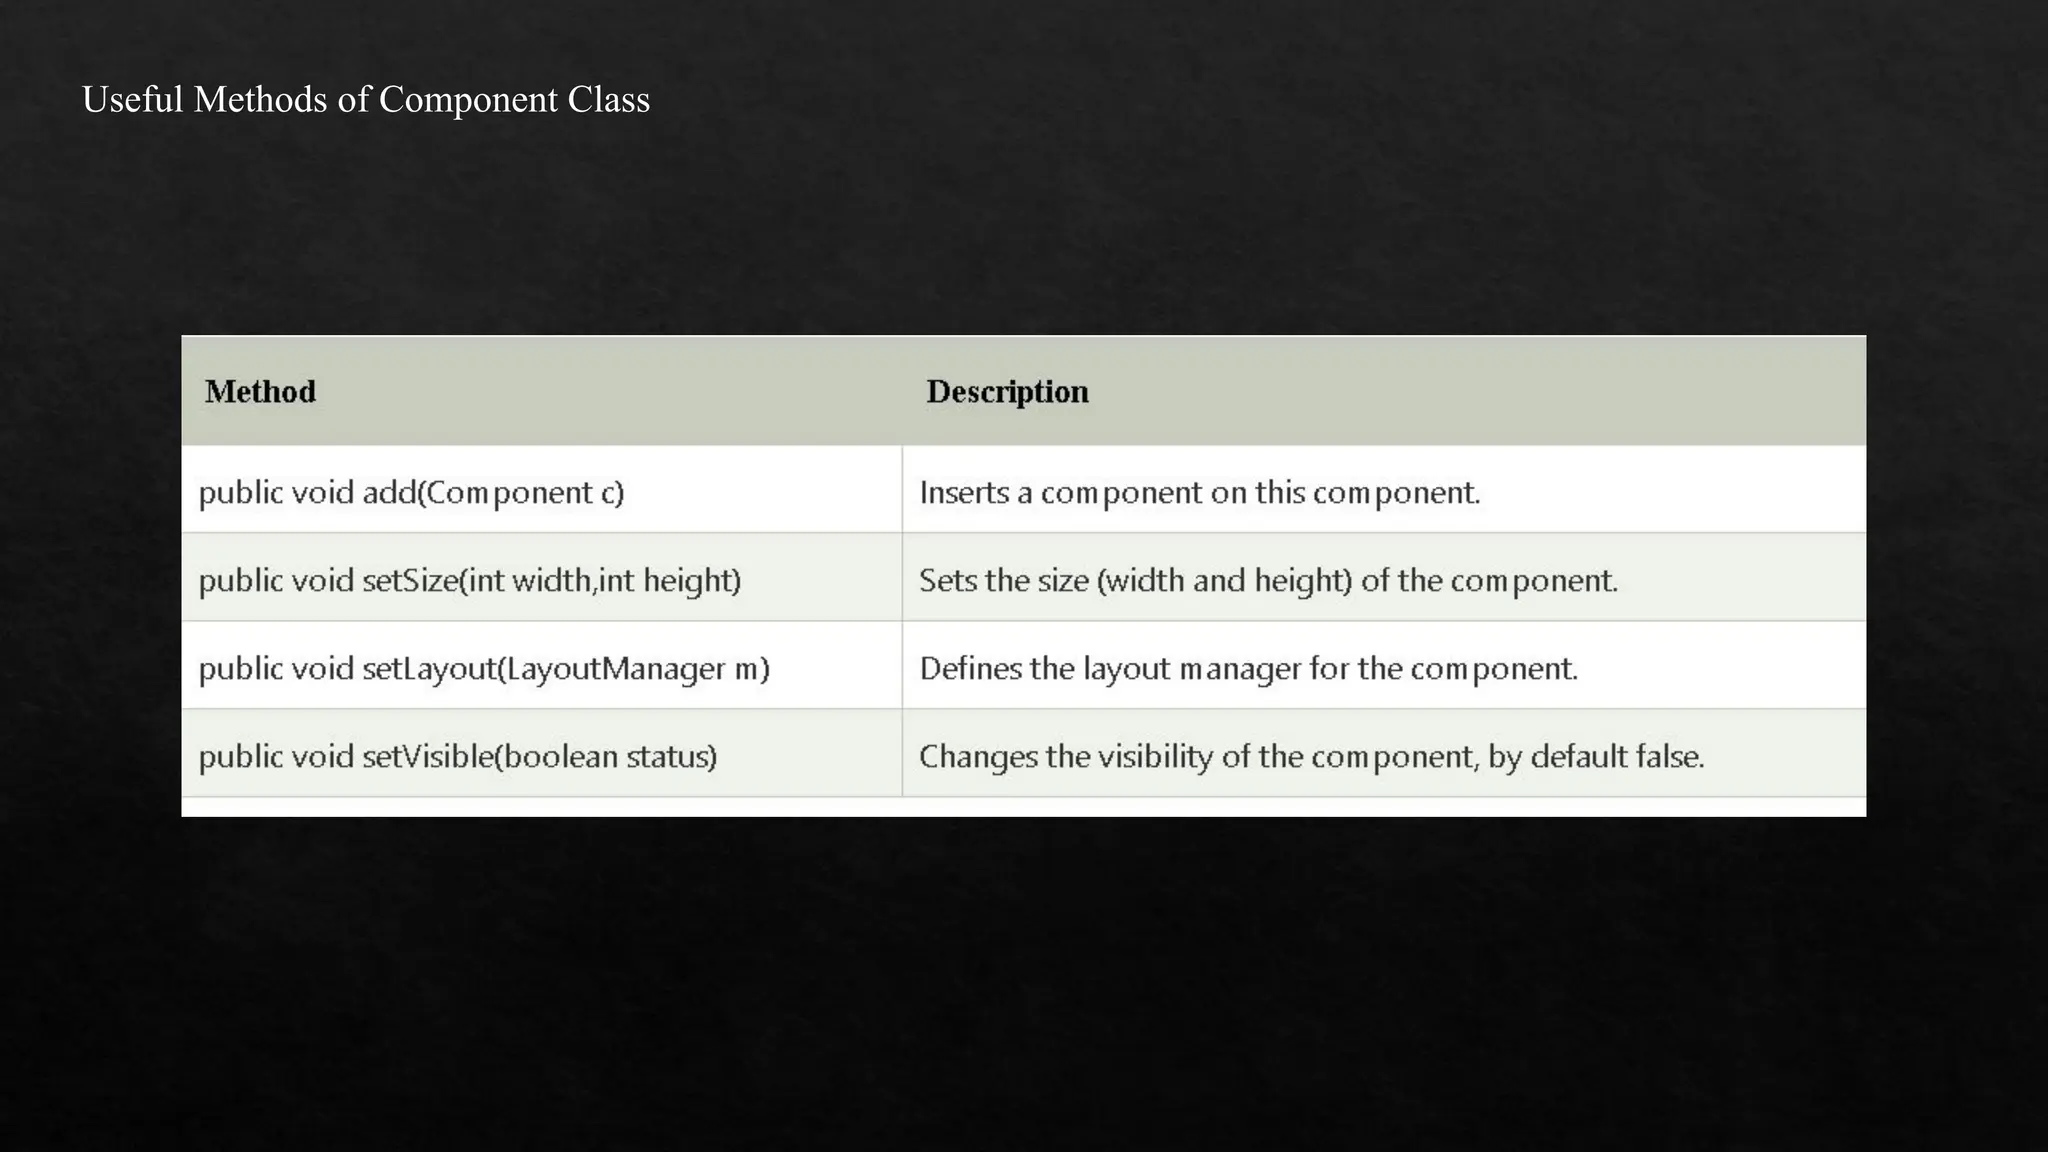
The document outlines how to perform CRUD (Create, Read, Update, Delete) operations in Java using JDBC (Java Database Connectivity), detailing the necessary steps for establishing a database connection and executing SQL commands. It also describes event handling in Java, explaining the delegation event model and illustrating how to implement event listeners, particularly with AWT (Abstract Window Toolkit) components for GUI applications. The document provides example code snippets for database operations and event handling, highlighting Java's capability to manage data and respond to user interactions.


![Create and Read Operation: import jdbc.sql.*; public class Main { public static void main(String[] args) { // Database URL, username, and password String url = "jdbc:mysql://localhost:3306/db"; String user = "root"; // Replace with your MySQL username String password = ""; // Replace with your MySQL password // SQL query to be executed String query = "Insert into mytb values(333,'Girish')"; String squery ="select * from mytb"; Connection connection = null; Statement statement = null; ResultSet resultSet = null; try { // Establishing the connection connection = DriverManager.getConnection(url, user, password); // Creating a Statement object statement = connection.createStatement(); // Executing the query statement.executeUpdate(query); resultSet = statement.executeQuery(squery // Processing the result while (resultSet.next()) { // Assuming your table has a column named 'id' and 'name' int id = resultSet.getInt("id"); String name = resultSet.getString("name"); System.out.println("ID: " + id + ", Name: " + name); } } catch (SQLException e) { e.printStackTrace(); } finally { // Closing the resources resultSet.close(); statement.close(); connection.close(); } } } OUTPUT: ID: 111, Name: Lavanya ID: 222, Name: Suja ID: 333, Name: Girish](https://image.slidesharecdn.com/unit-5-java-241122062438-e61228ee/75/Unit-5-Notes-For-Java-Programming-for-BCA-Madras-Univ-7-2048.jpg)

![Java event handling by implementing ActionListener import java.awt.*; import java.awt.event.*; class AEvent extends Frame implements ActionListener{ TextField tf; AEvent(){ //create components tf=new TextField(); tf.setBounds(60,50,170,20); Button b=new Button("click me"); b.setBounds(100,120,80,30); //register listener b.addActionListener(this);//passing current instance //add components and set size, layout and visibility add(b);add(tf); setSize(300,300); setLayout(null); setVisible(true); } public void actionPerformed(ActionEvent e){ tf.setText("Welcome"); } public static void main(String args[]){ new AEvent(); } }](https://image.slidesharecdn.com/unit-5-java-241122062438-e61228ee/75/Unit-5-Notes-For-Java-Programming-for-BCA-Madras-Univ-13-2048.jpg)


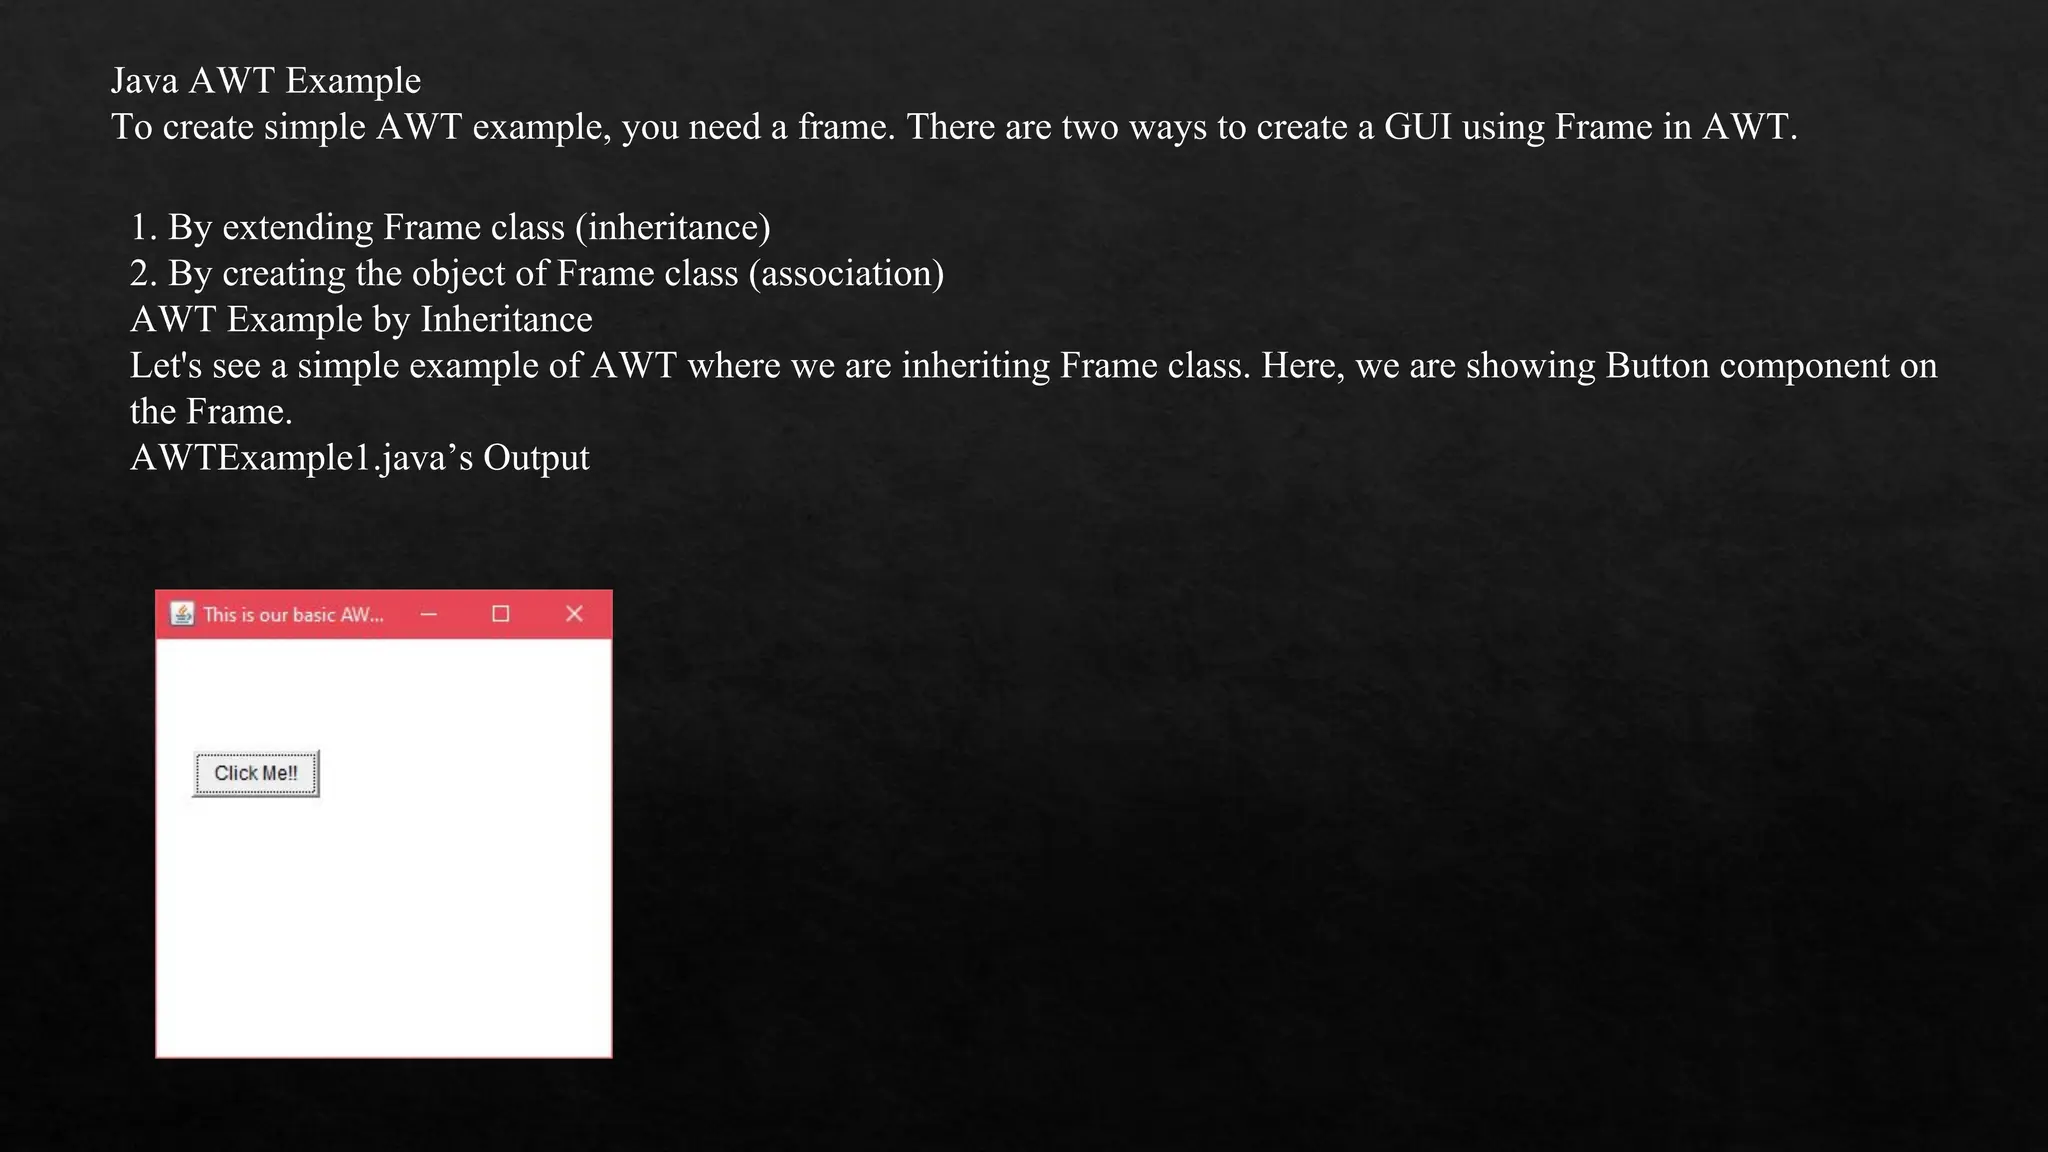
![AWTExample1.java’s Code / importing Java AWT class import java.awt.*; // extending Frame class to our class AWTExample1 public class AWTExample1 extends Frame { // initializing using constructor AWTExample1() { // creating a button Button b = new Button("Click Me!!"); // setting button position on screen b.setBounds(30,100,80,30); // adding button into frame add(b); // frame size 300 width and 300 height setSize(300,300); // setting the title of Frame setTitle("This is our basic AWT example"); // no layout manager setLayout(null); // now frame will be visible, by default it is not visible setVisible(true); } // main method public static void main(String args[]) { // creating instance of Frame class AWTExample1 f = new AWTExample1(); } }](https://image.slidesharecdn.com/unit-5-java-241122062438-e61228ee/75/Unit-5-Notes-For-Java-Programming-for-BCA-Madras-Univ-21-2048.jpg)
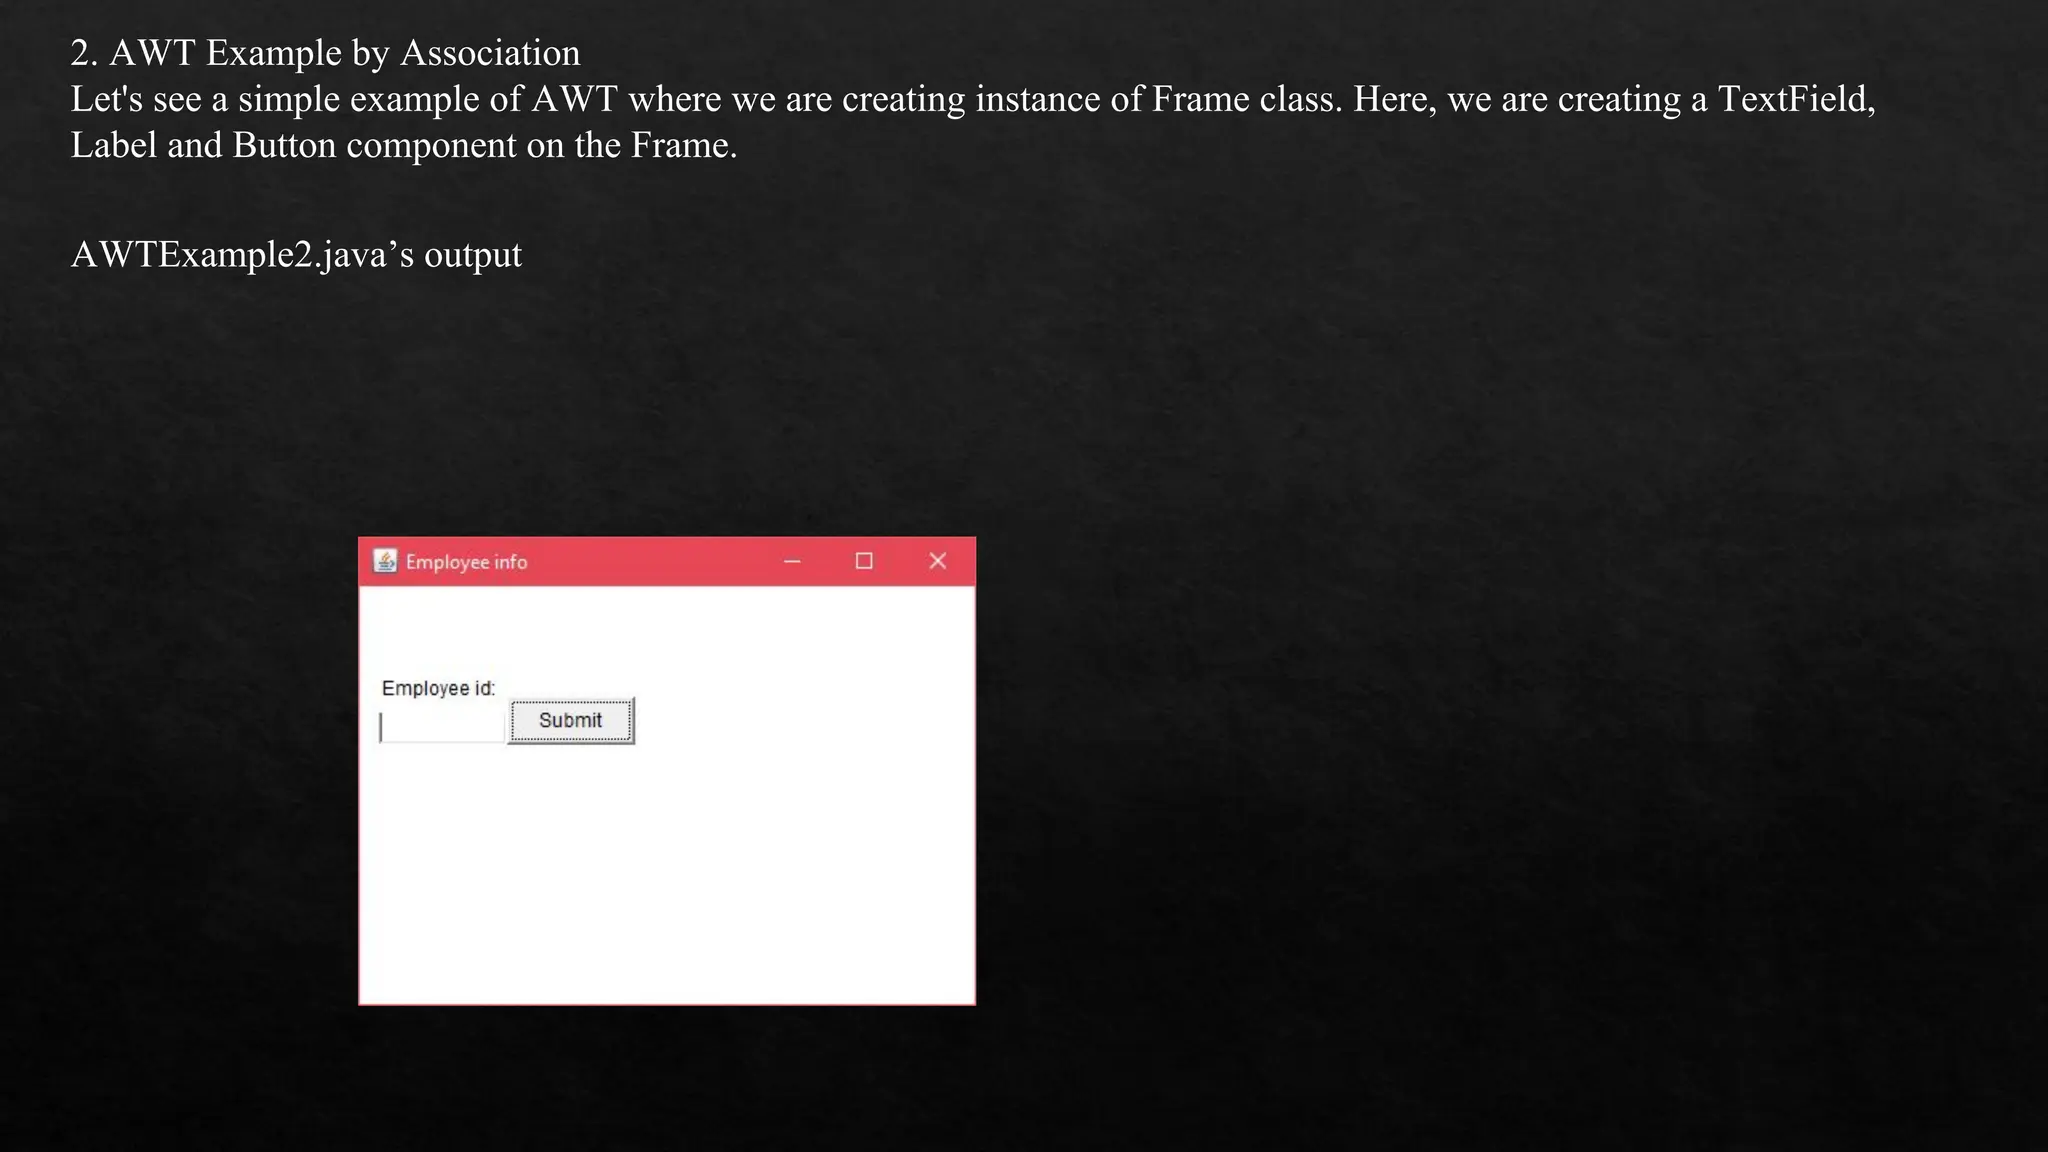
![AWTExample2.java’s code // importing Java AWT class import java.awt.*; // class AWTExample2 directly creates instance of Frame class class AWTExample2 { // initializing using constructor AWTExample2() { // creating a Frame Frame f = new Frame(); // creating a Label Label l = new Label("Employee id:"); // creating a Button Button b = new Button("Submit"); // creating a TextField TextField t = new TextField(); // setting position of above components in the frame l.setBounds(20, 80, 80, 30); t.setBounds(20, 100, 80, 30); b.setBounds(100, 100, 80, 30); // adding components into frame f.add(b); f.add(l); f.add(t); // frame size 300 width and 300 height f.setSize(400,300); // setting the title of frame f.setTitle("Employee info"); // no layout f.setLayout(null); // setting visibility of frame f.setVisible(true); } // main method public static void main(String args[]) { // creating instance of Frame class AWTExample2 awt_obj = new AWTExample2(); } }](https://image.slidesharecdn.com/unit-5-java-241122062438-e61228ee/75/Unit-5-Notes-For-Java-Programming-for-BCA-Madras-Univ-23-2048.jpg)