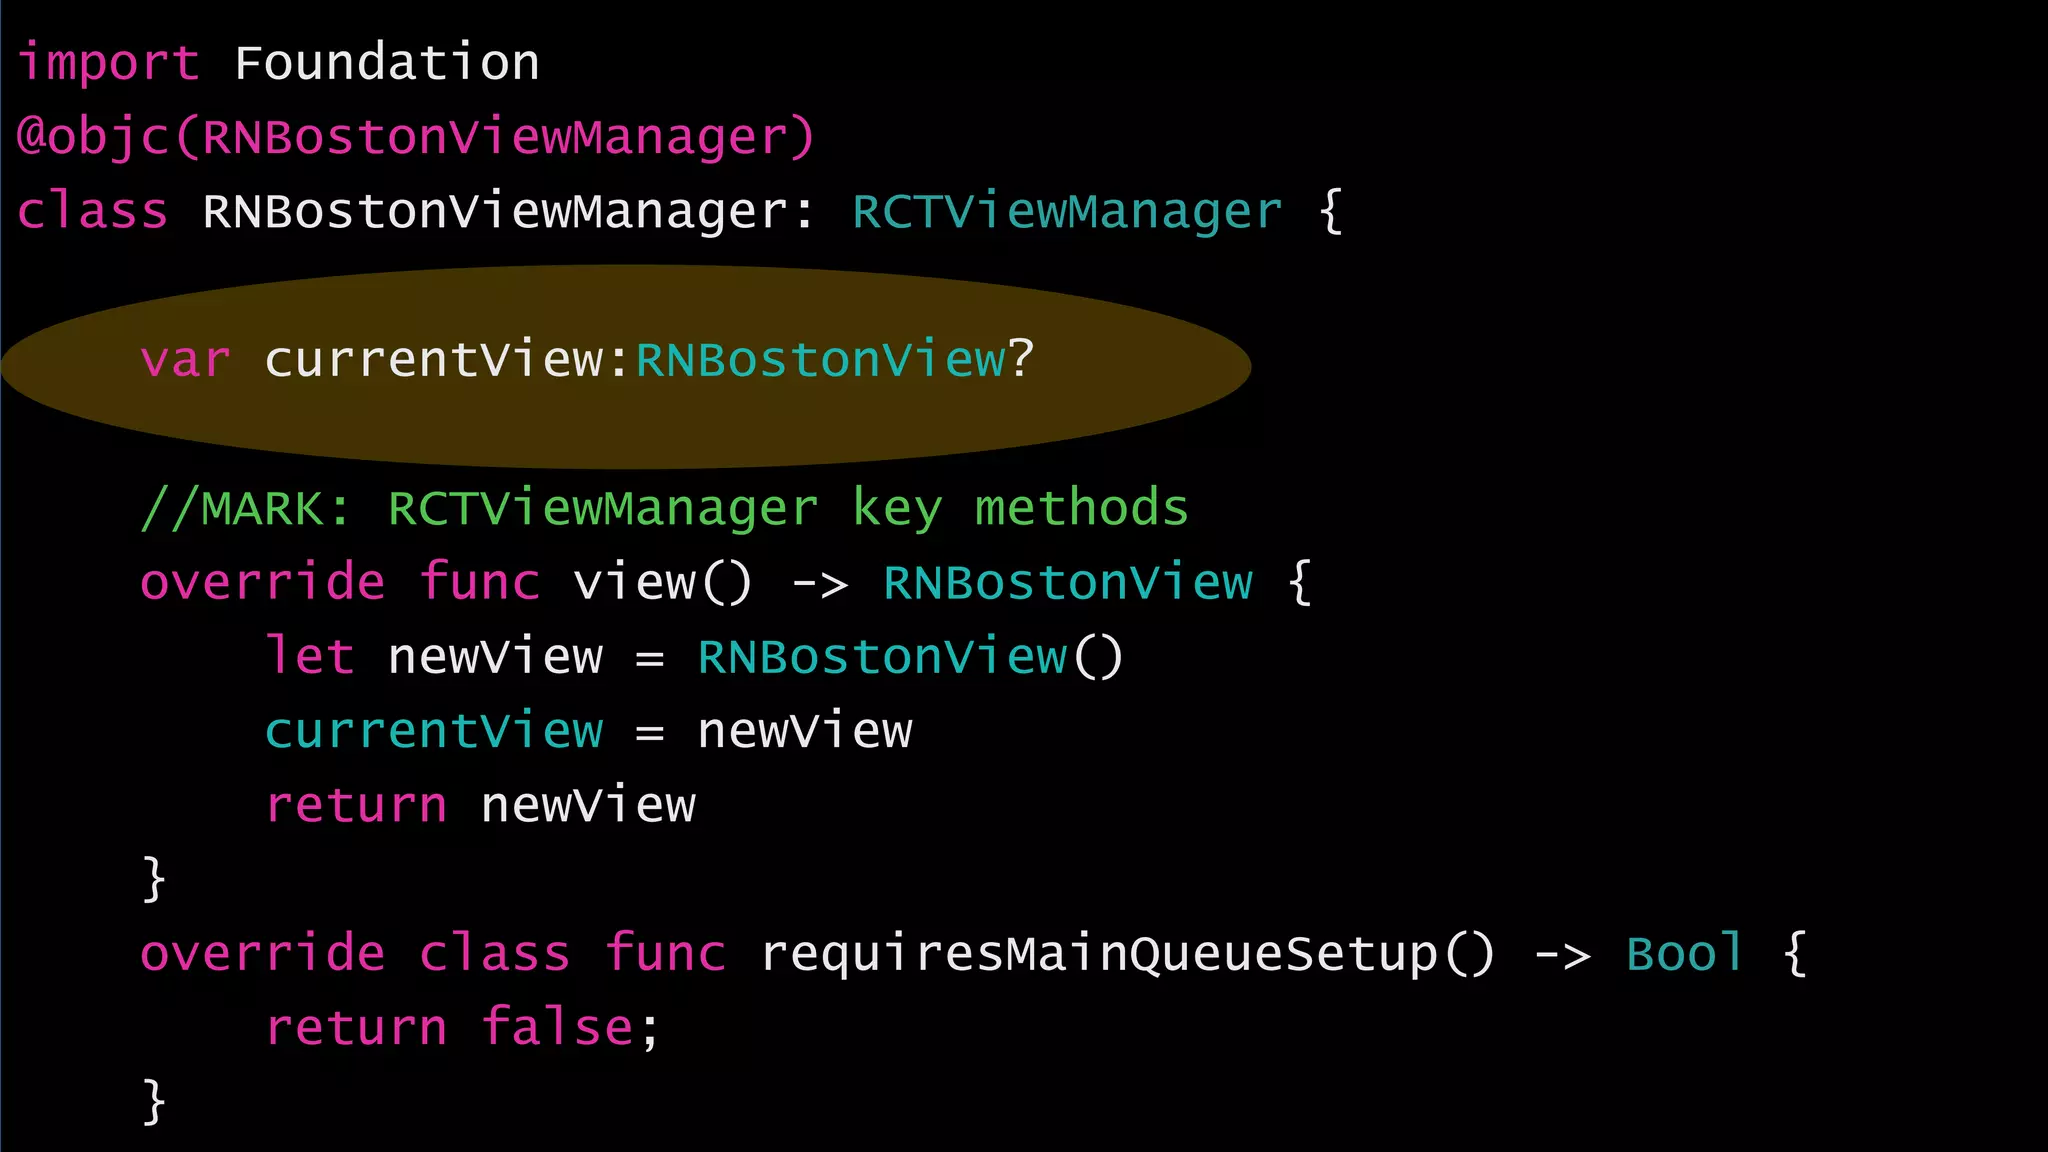
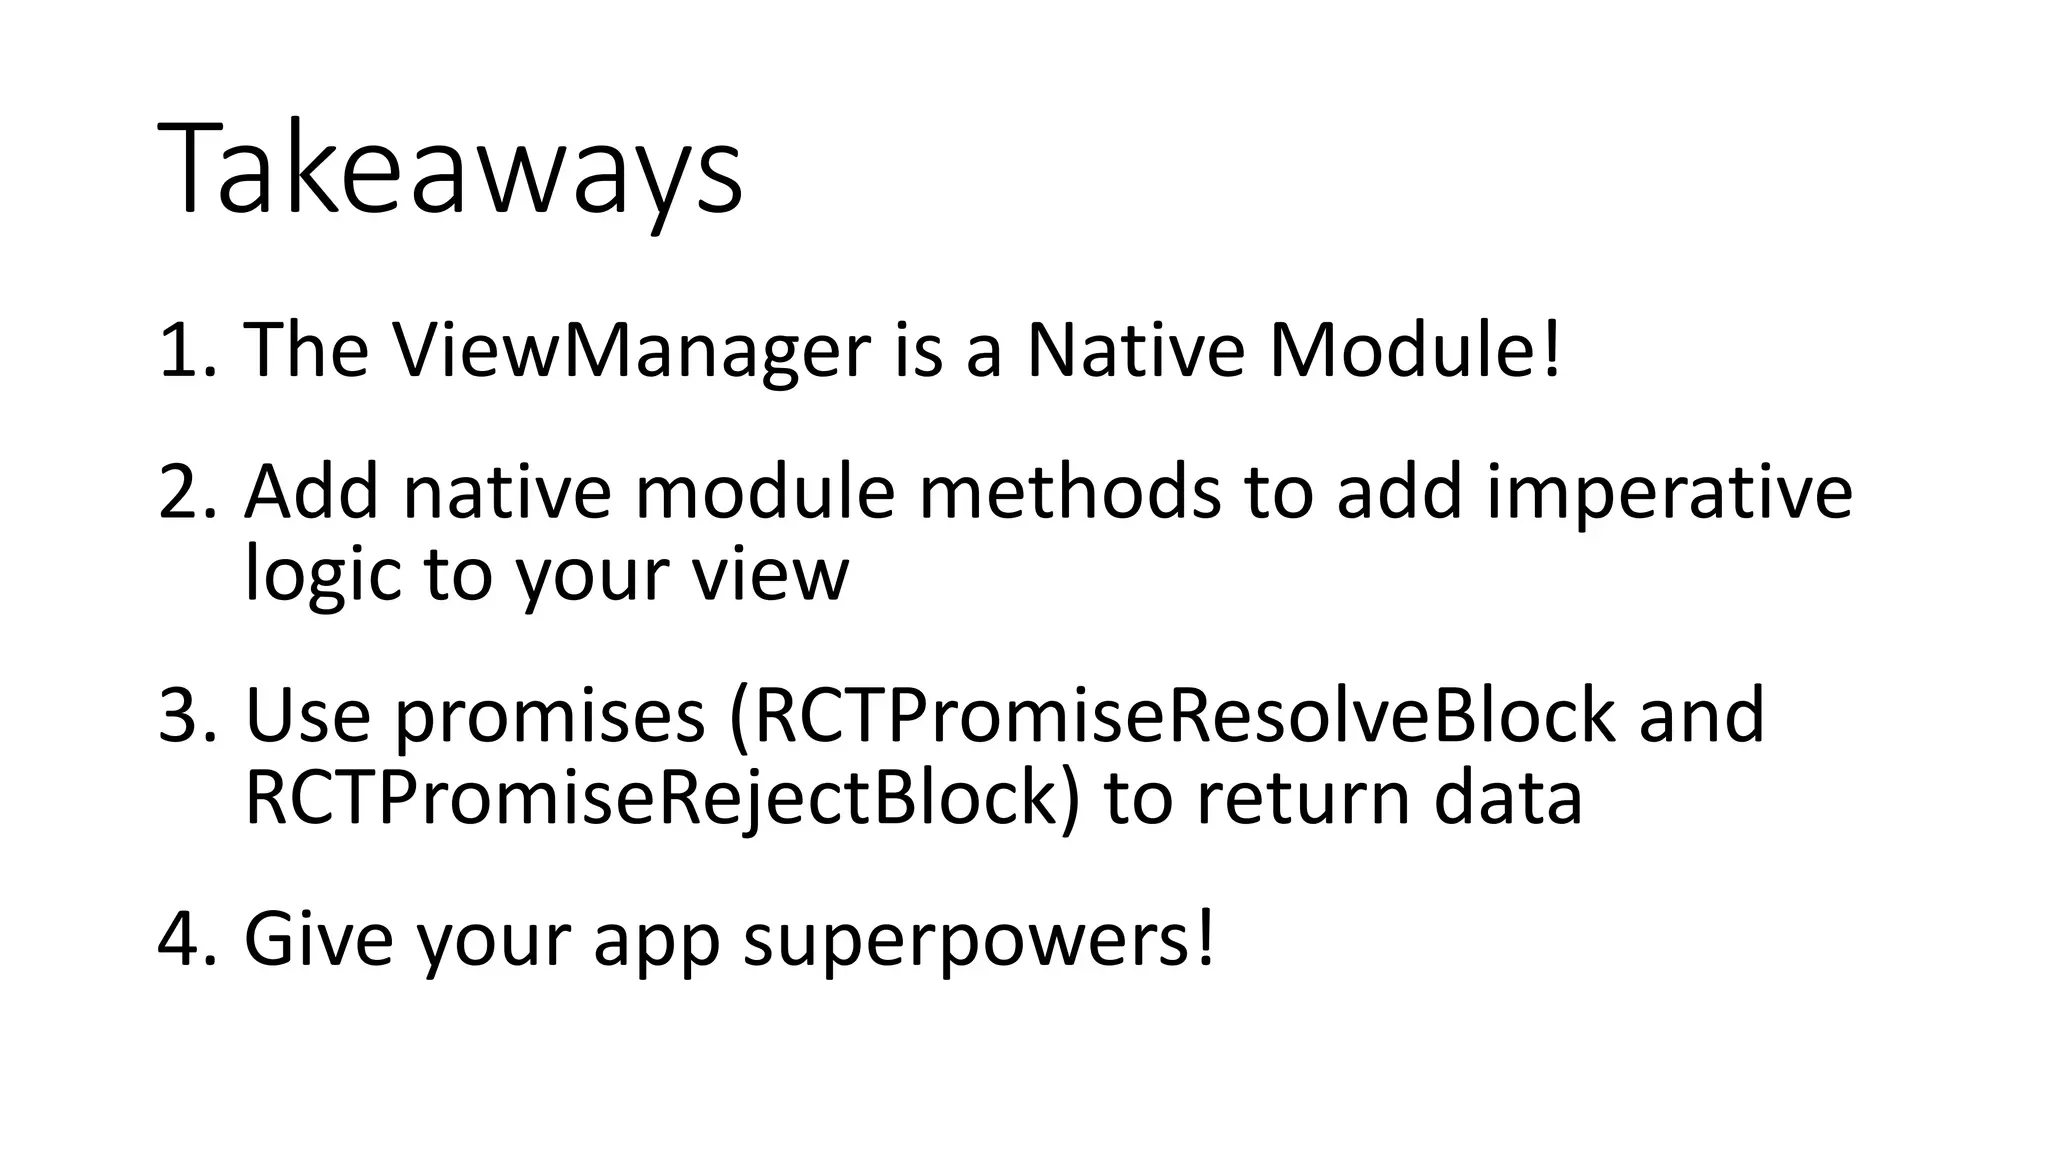
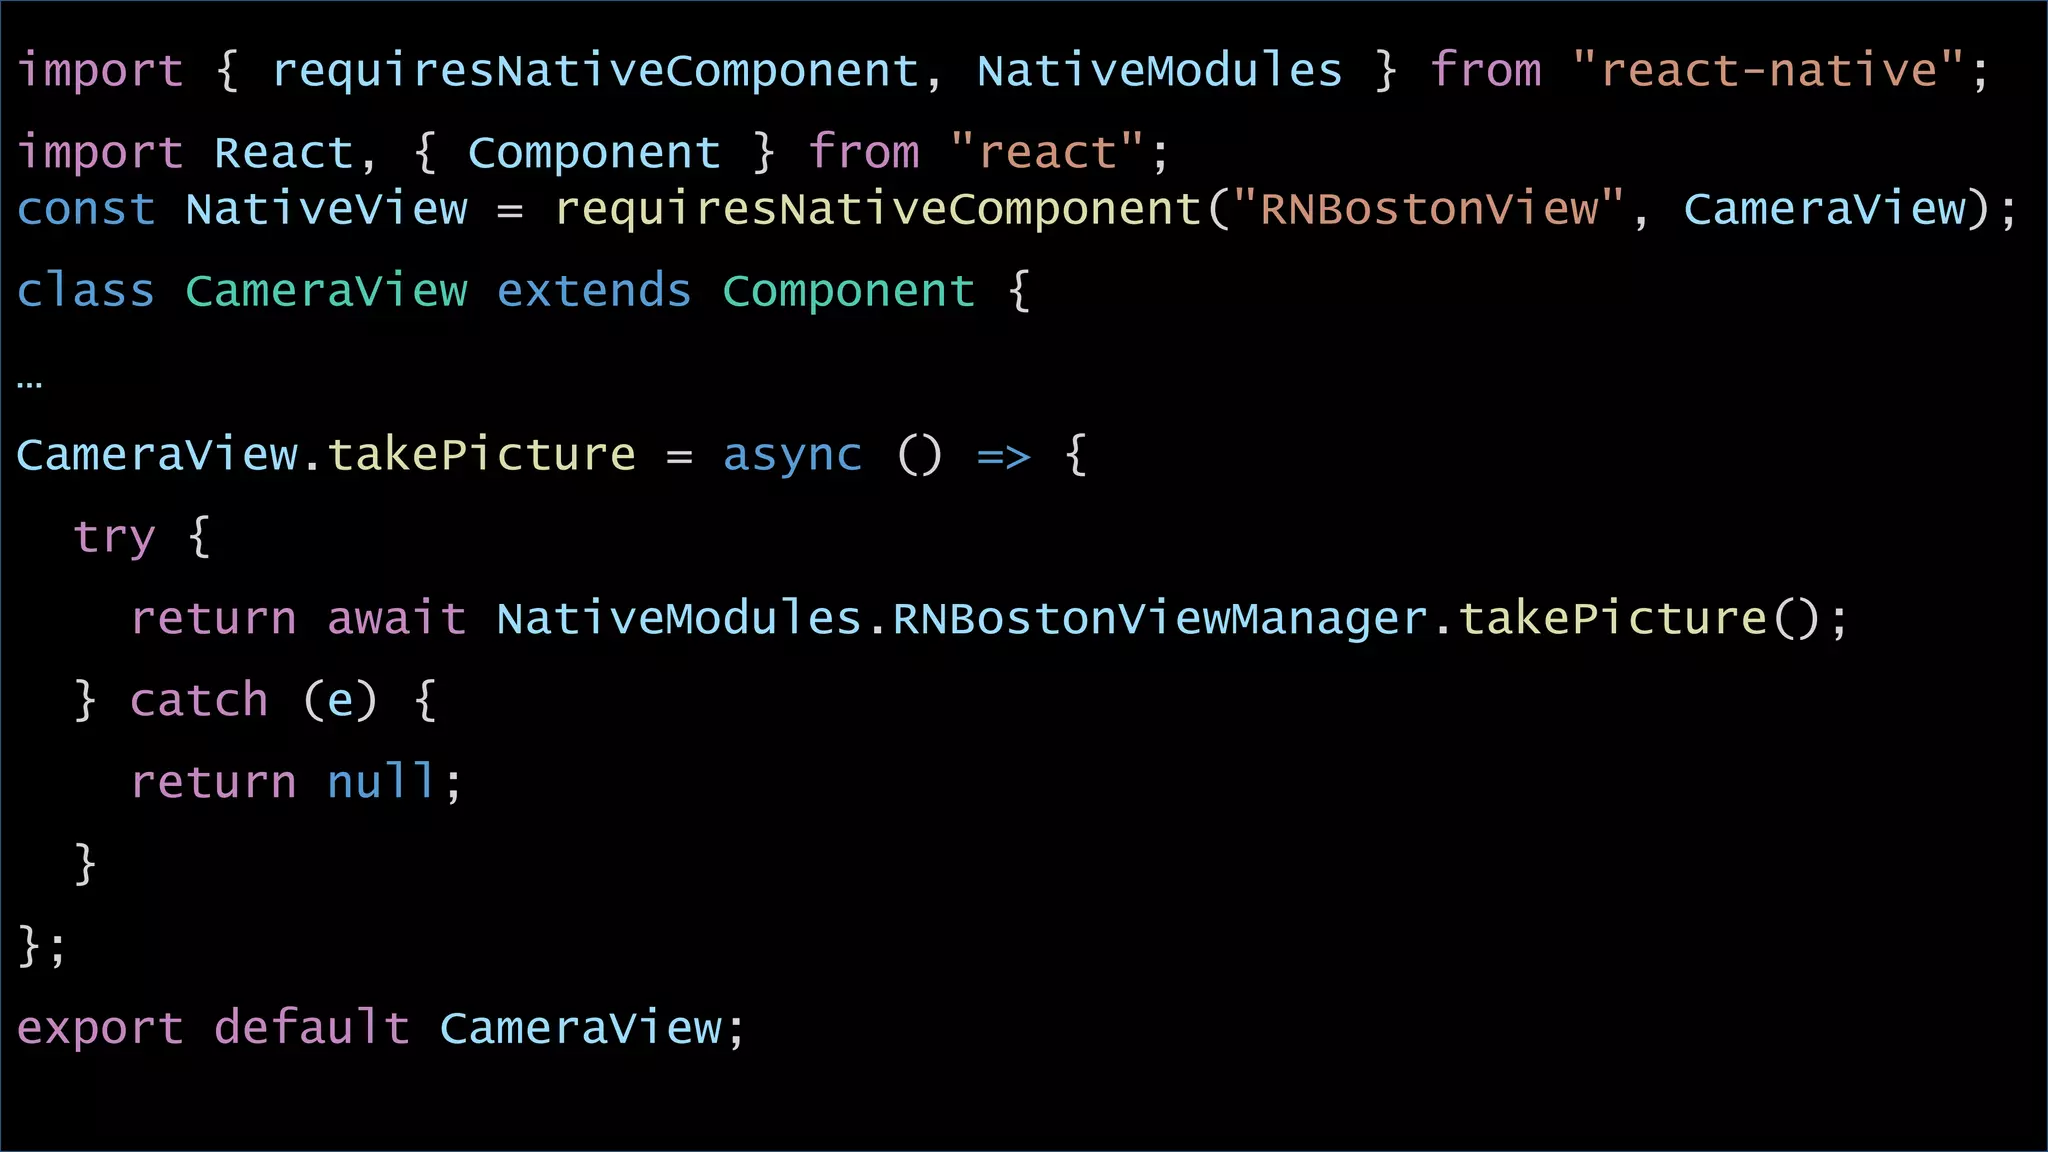
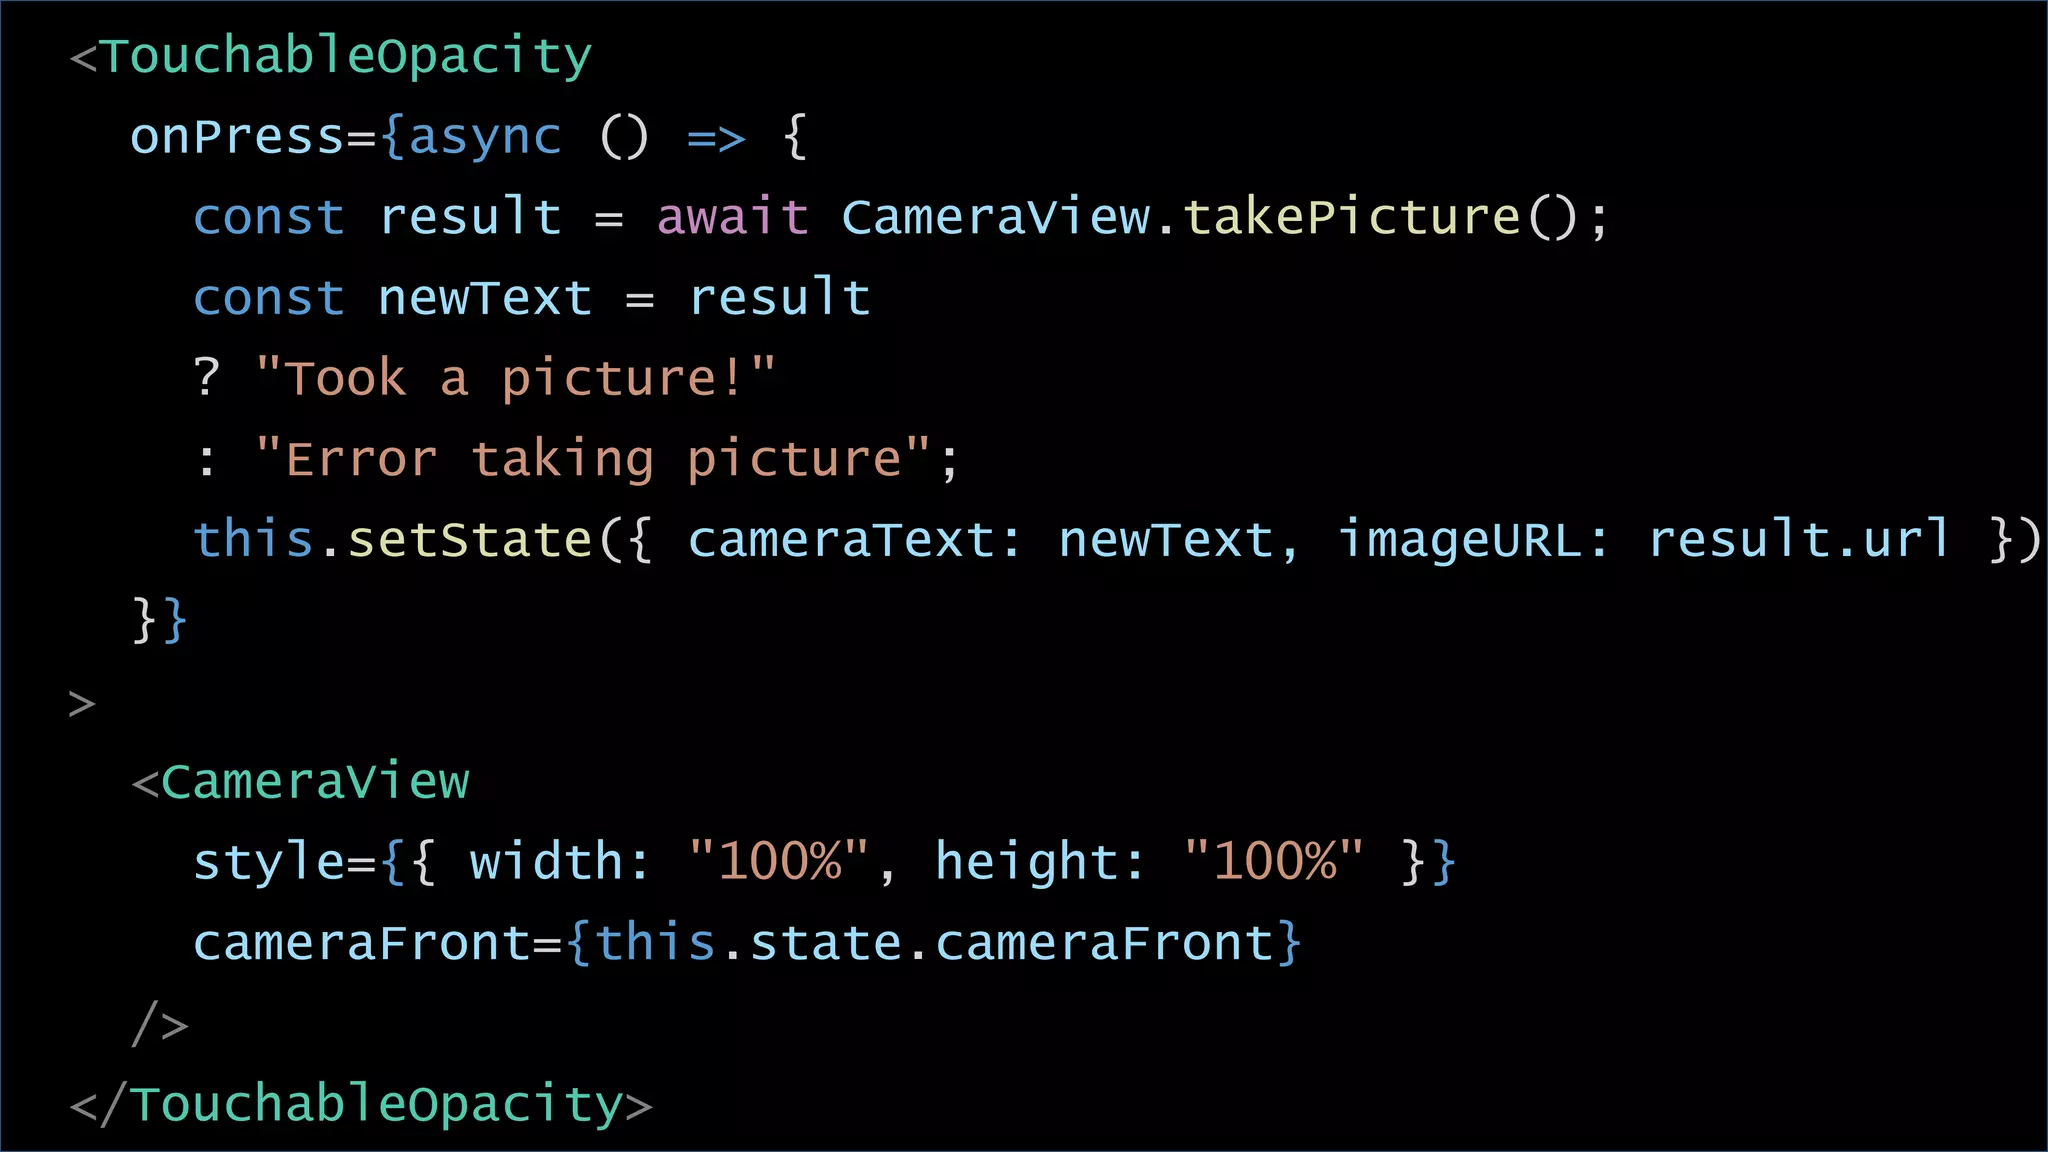
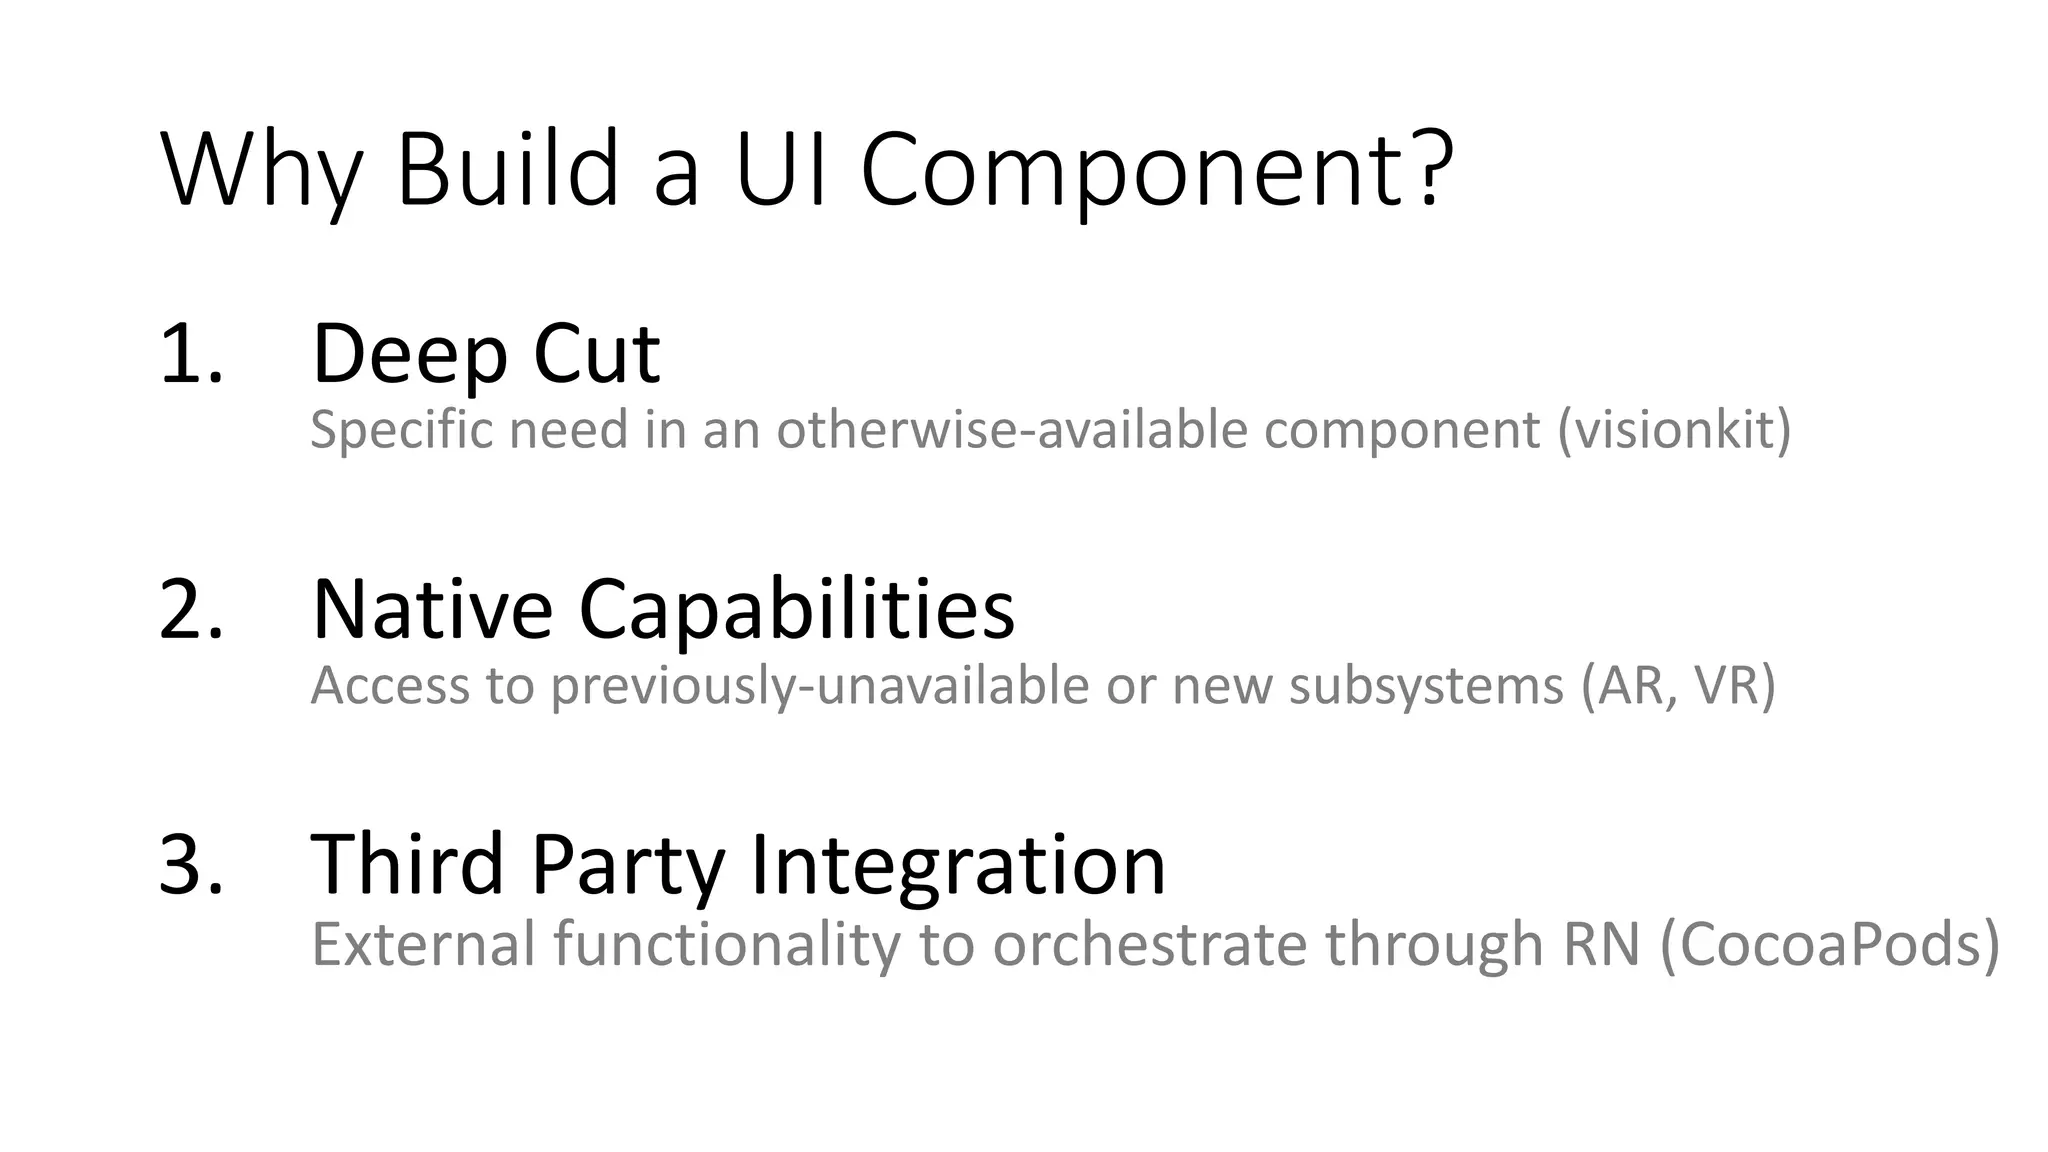
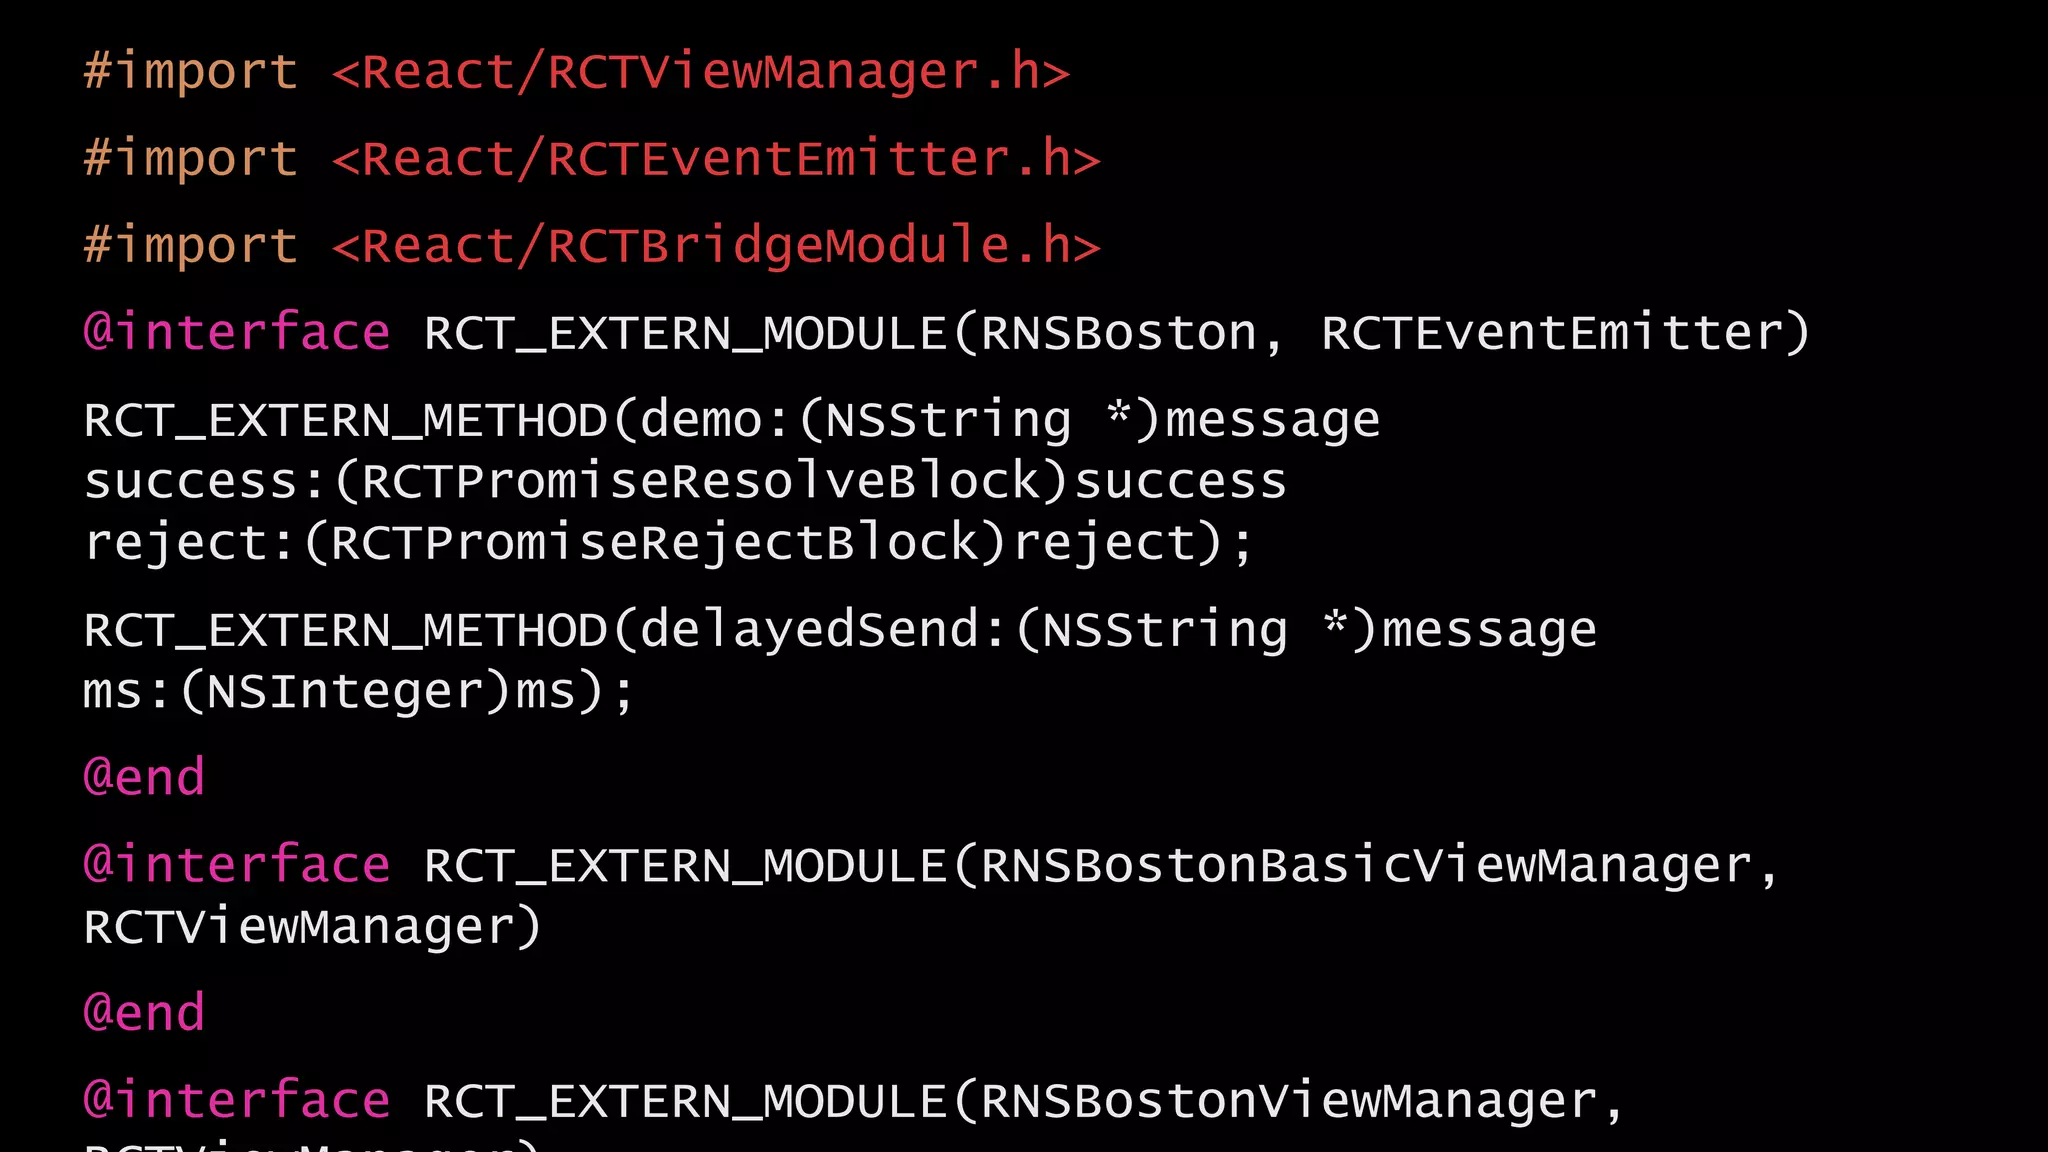
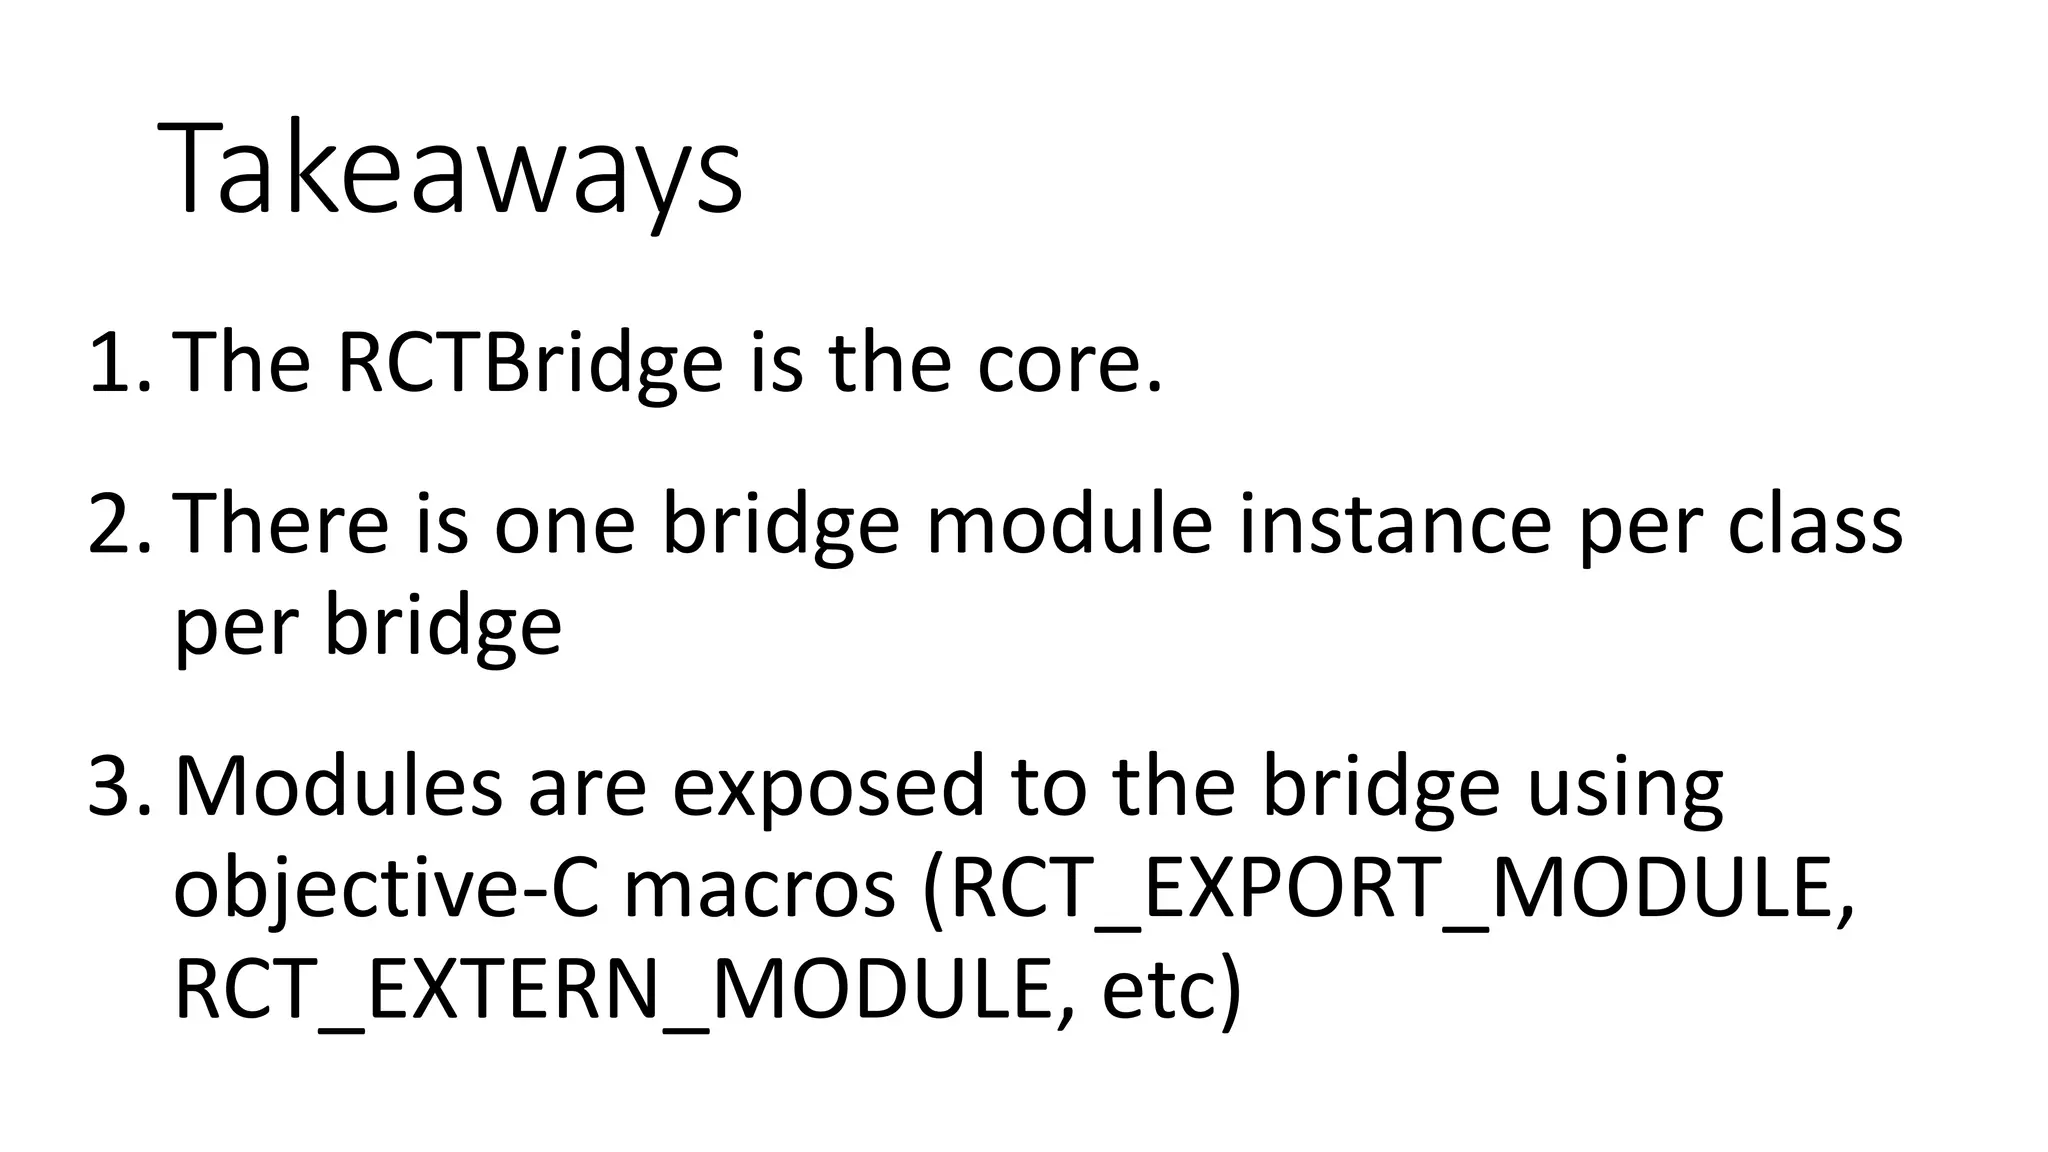
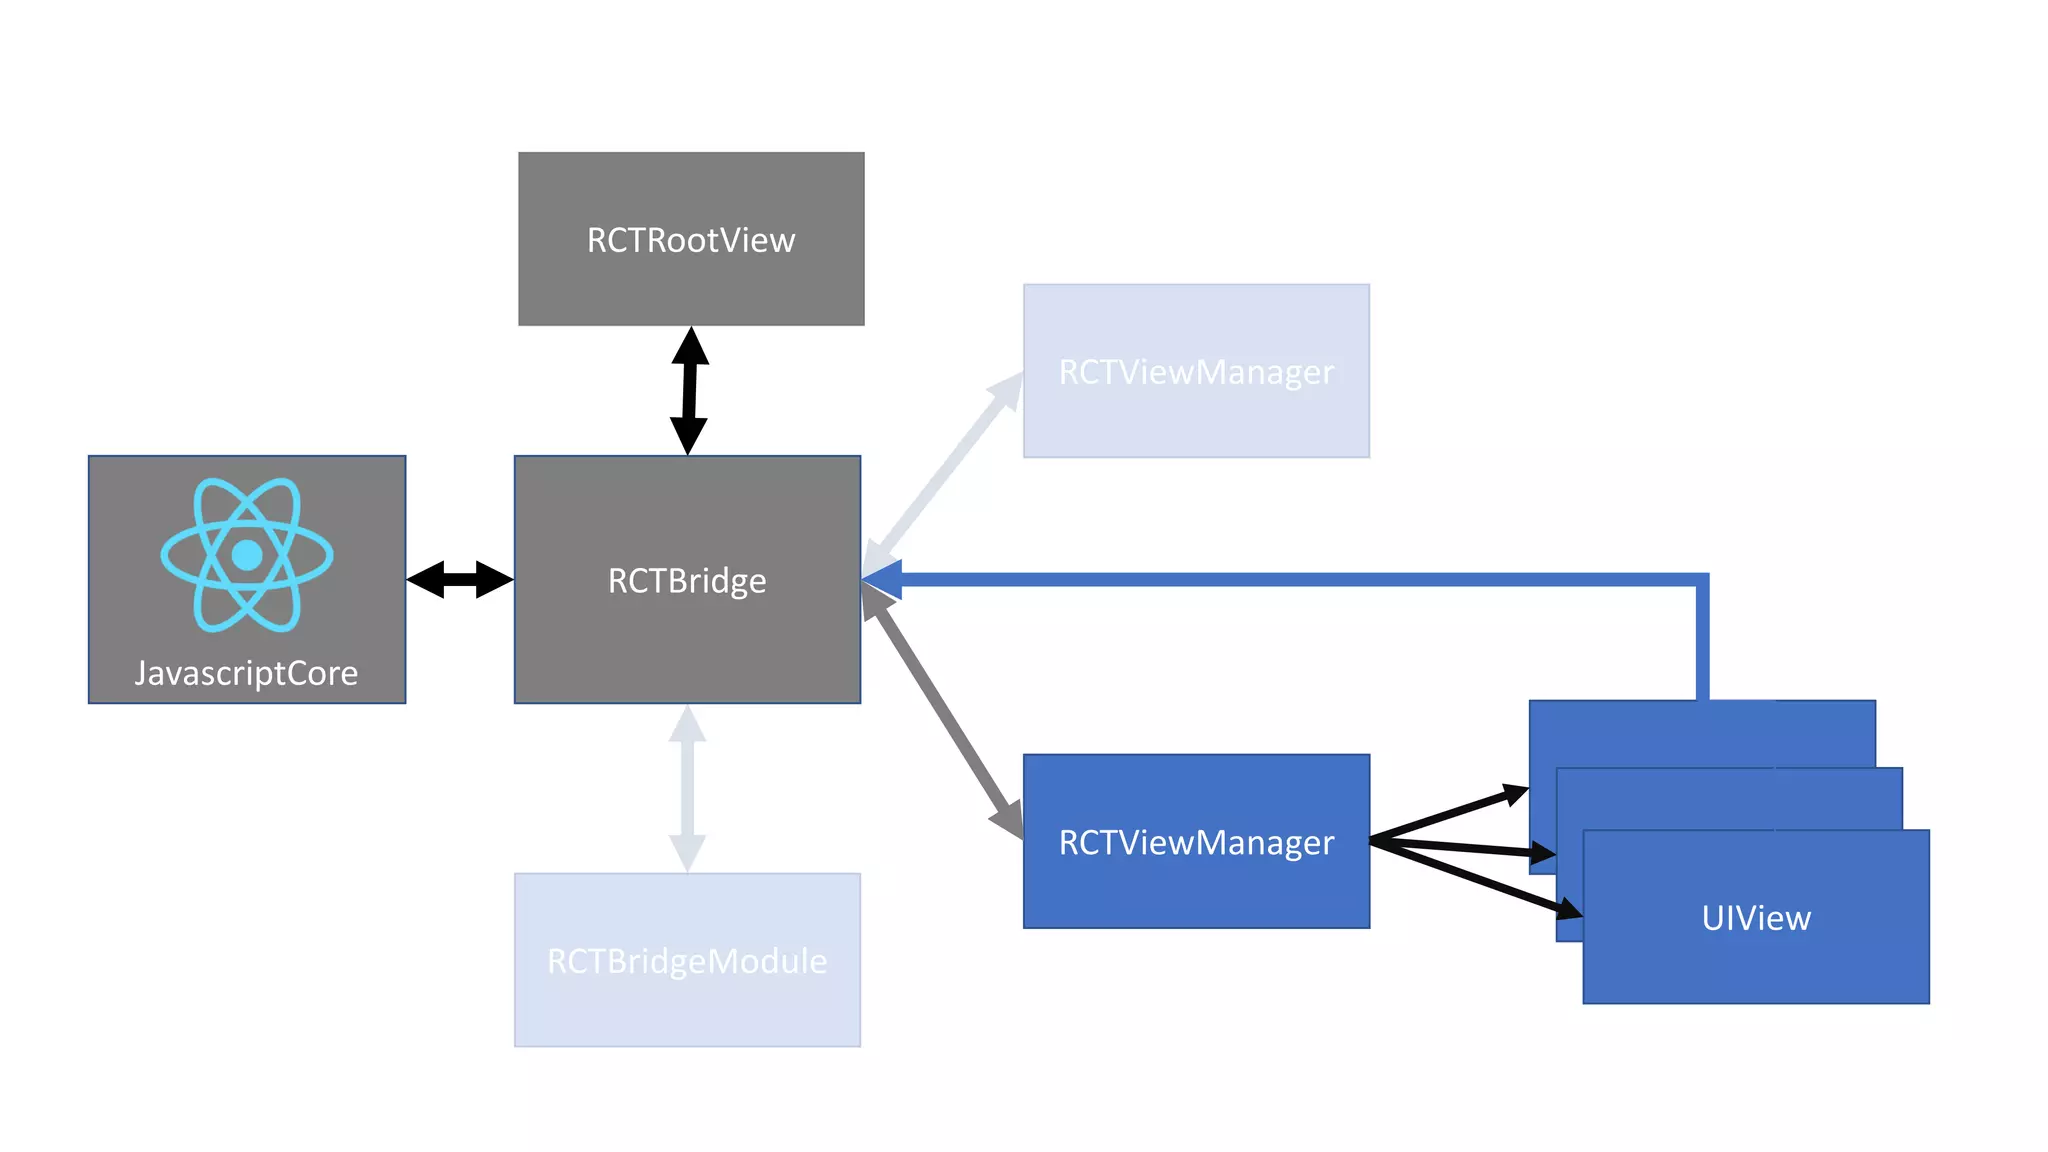
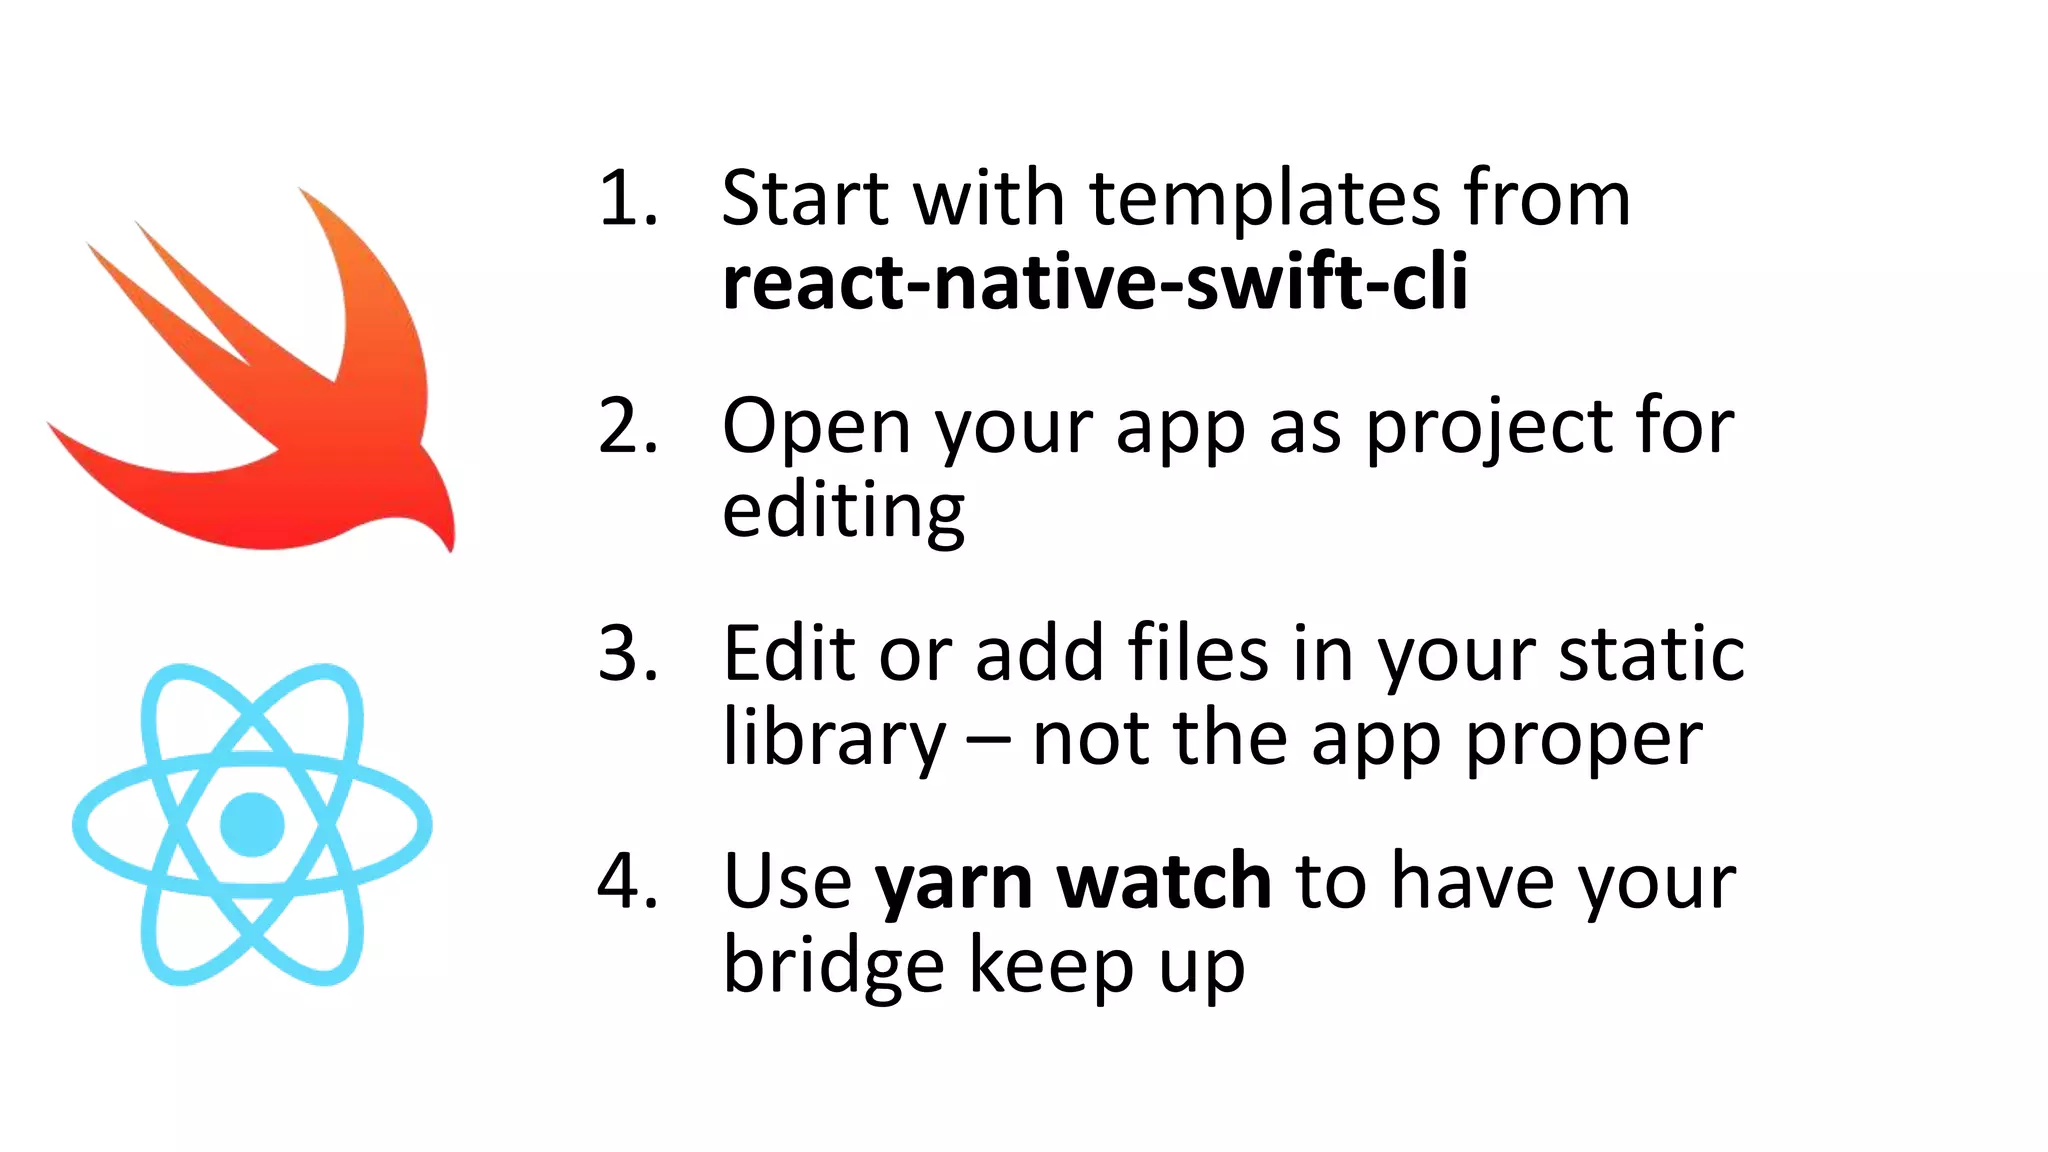
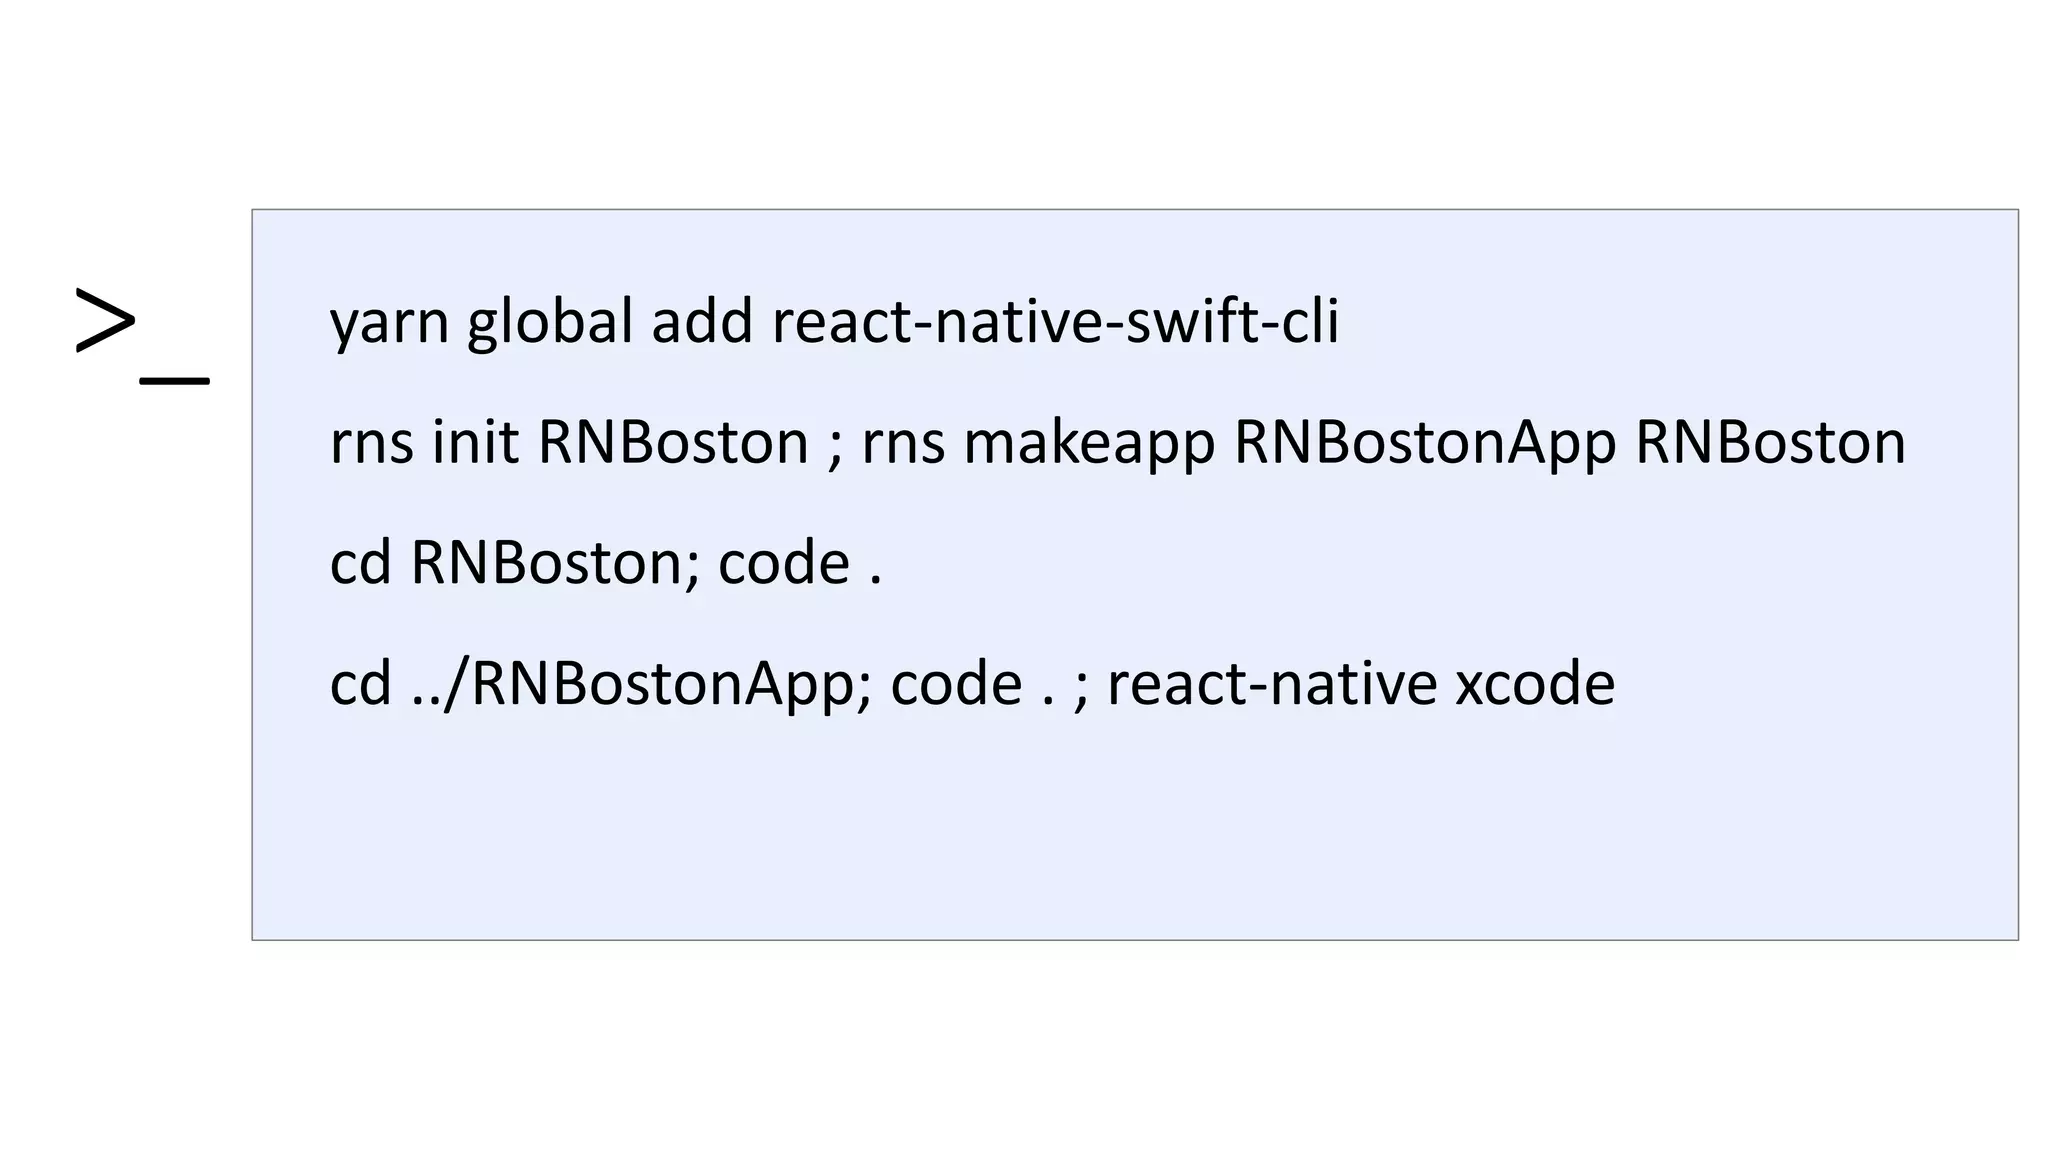
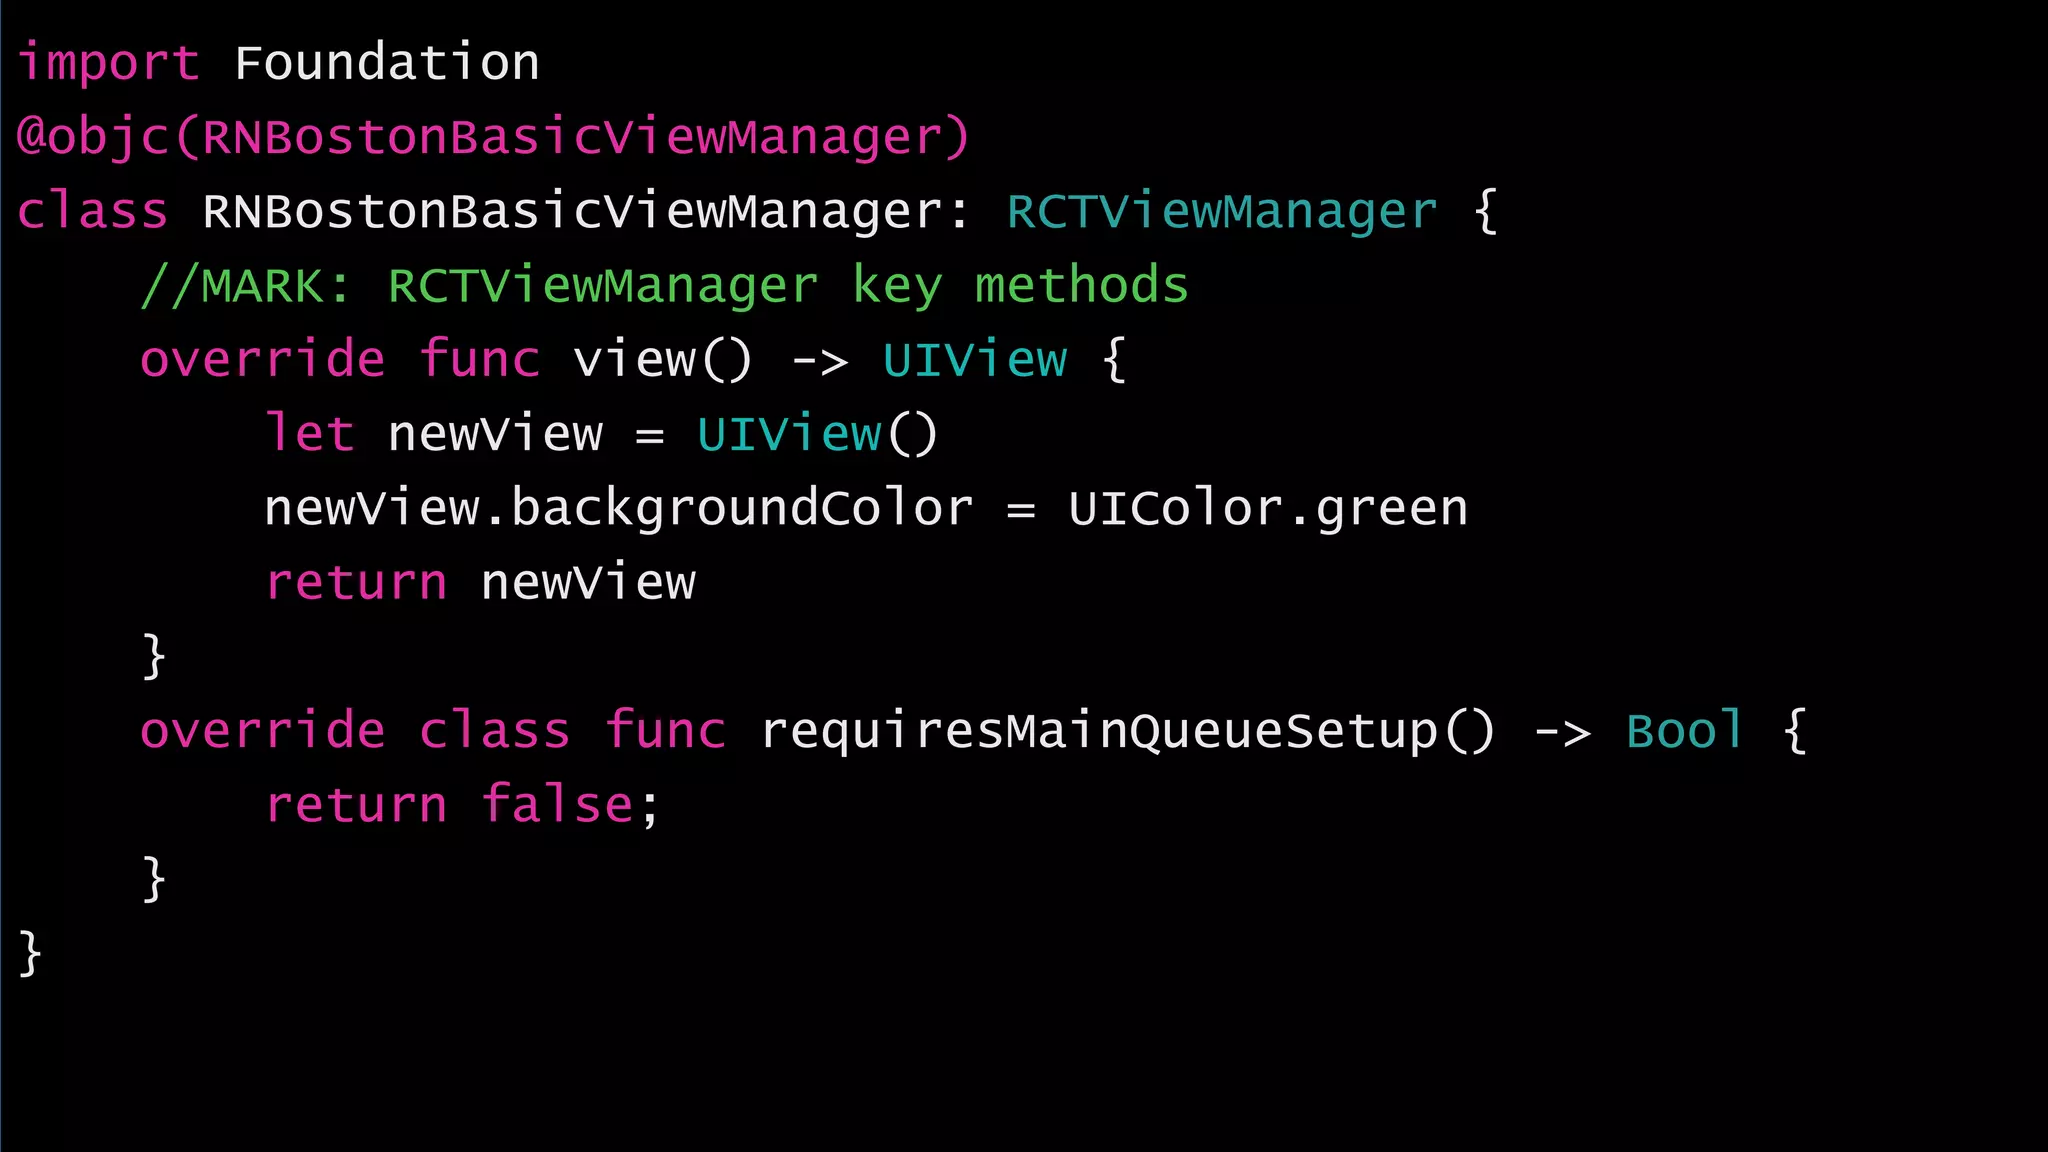
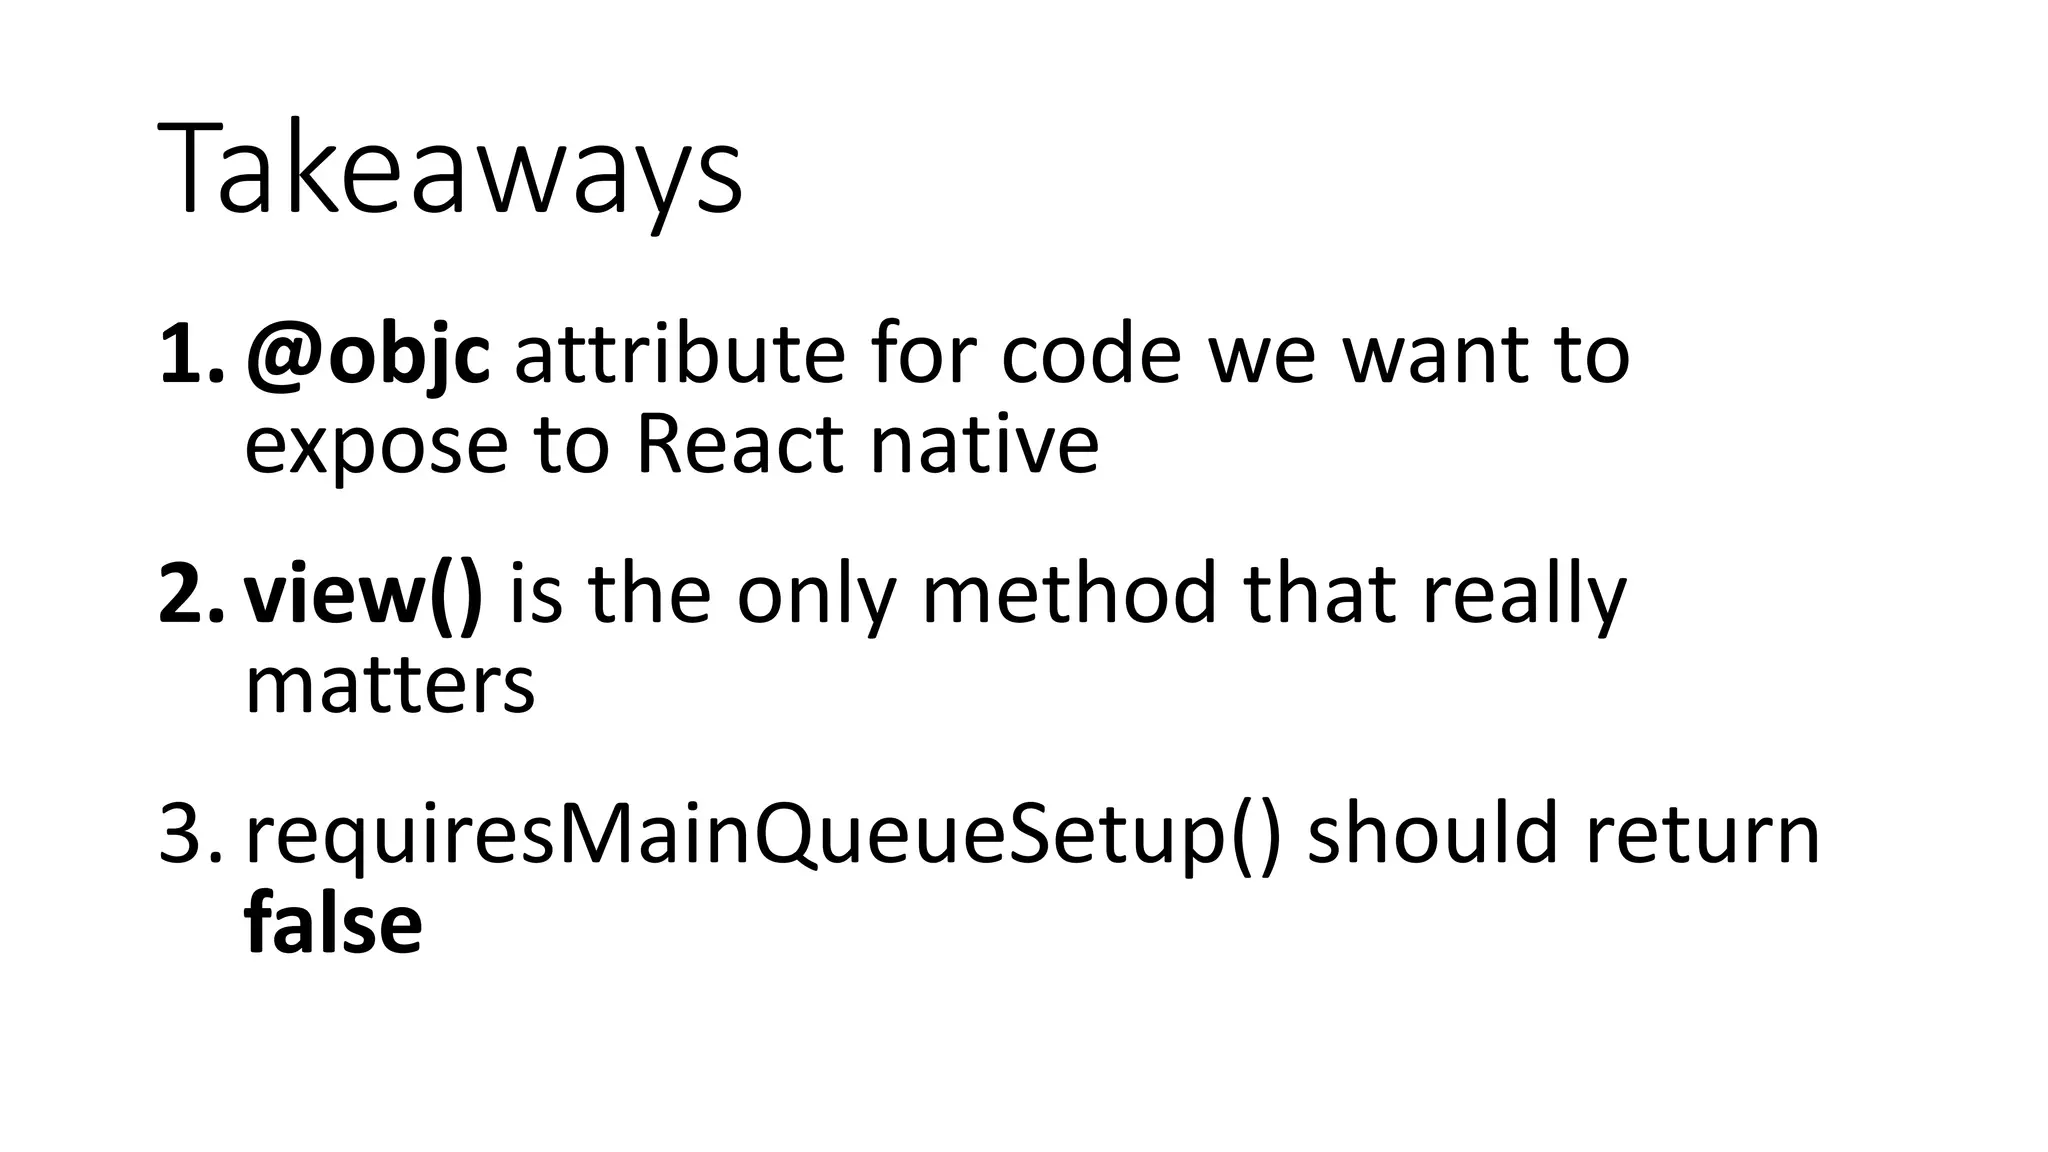
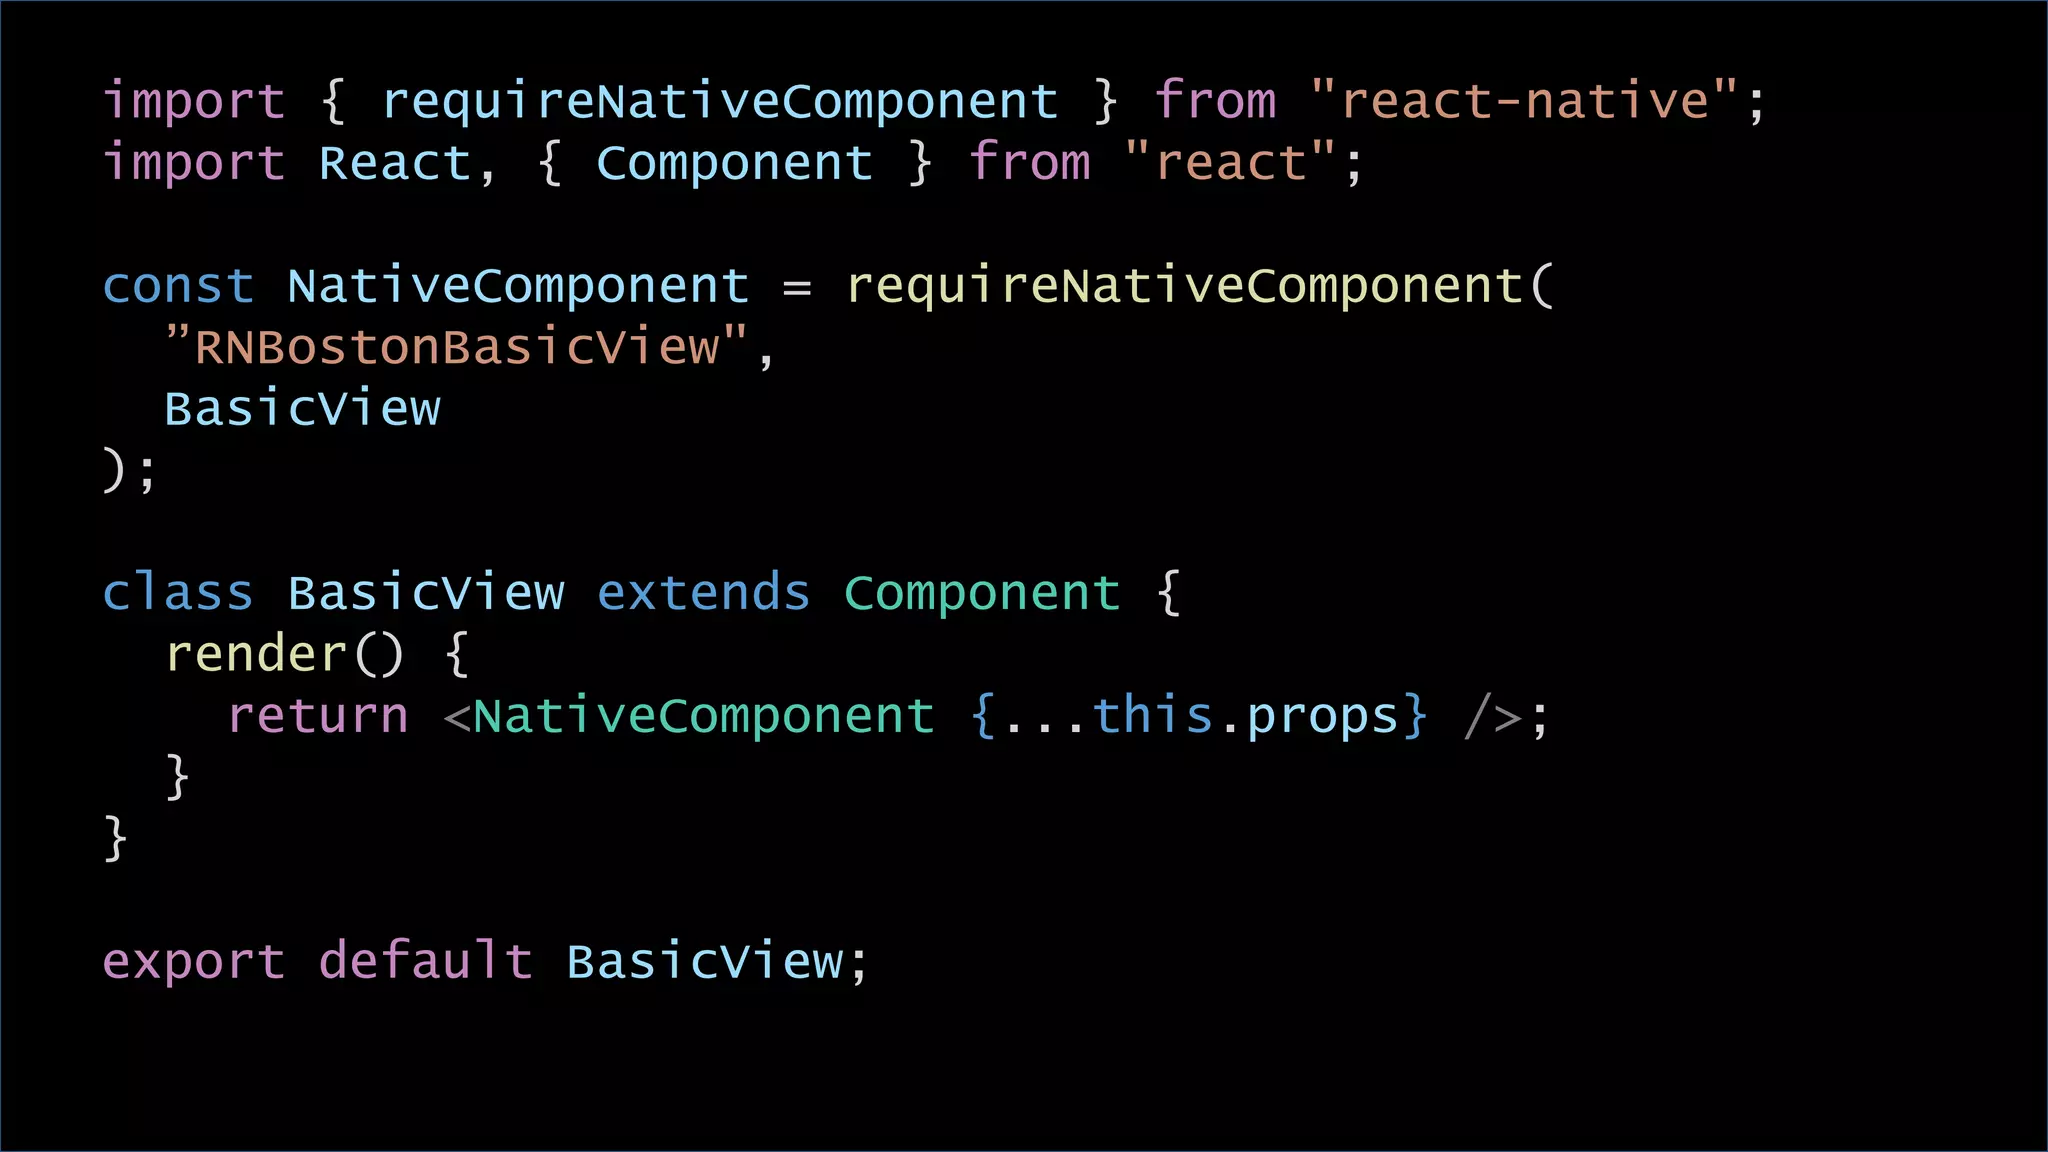
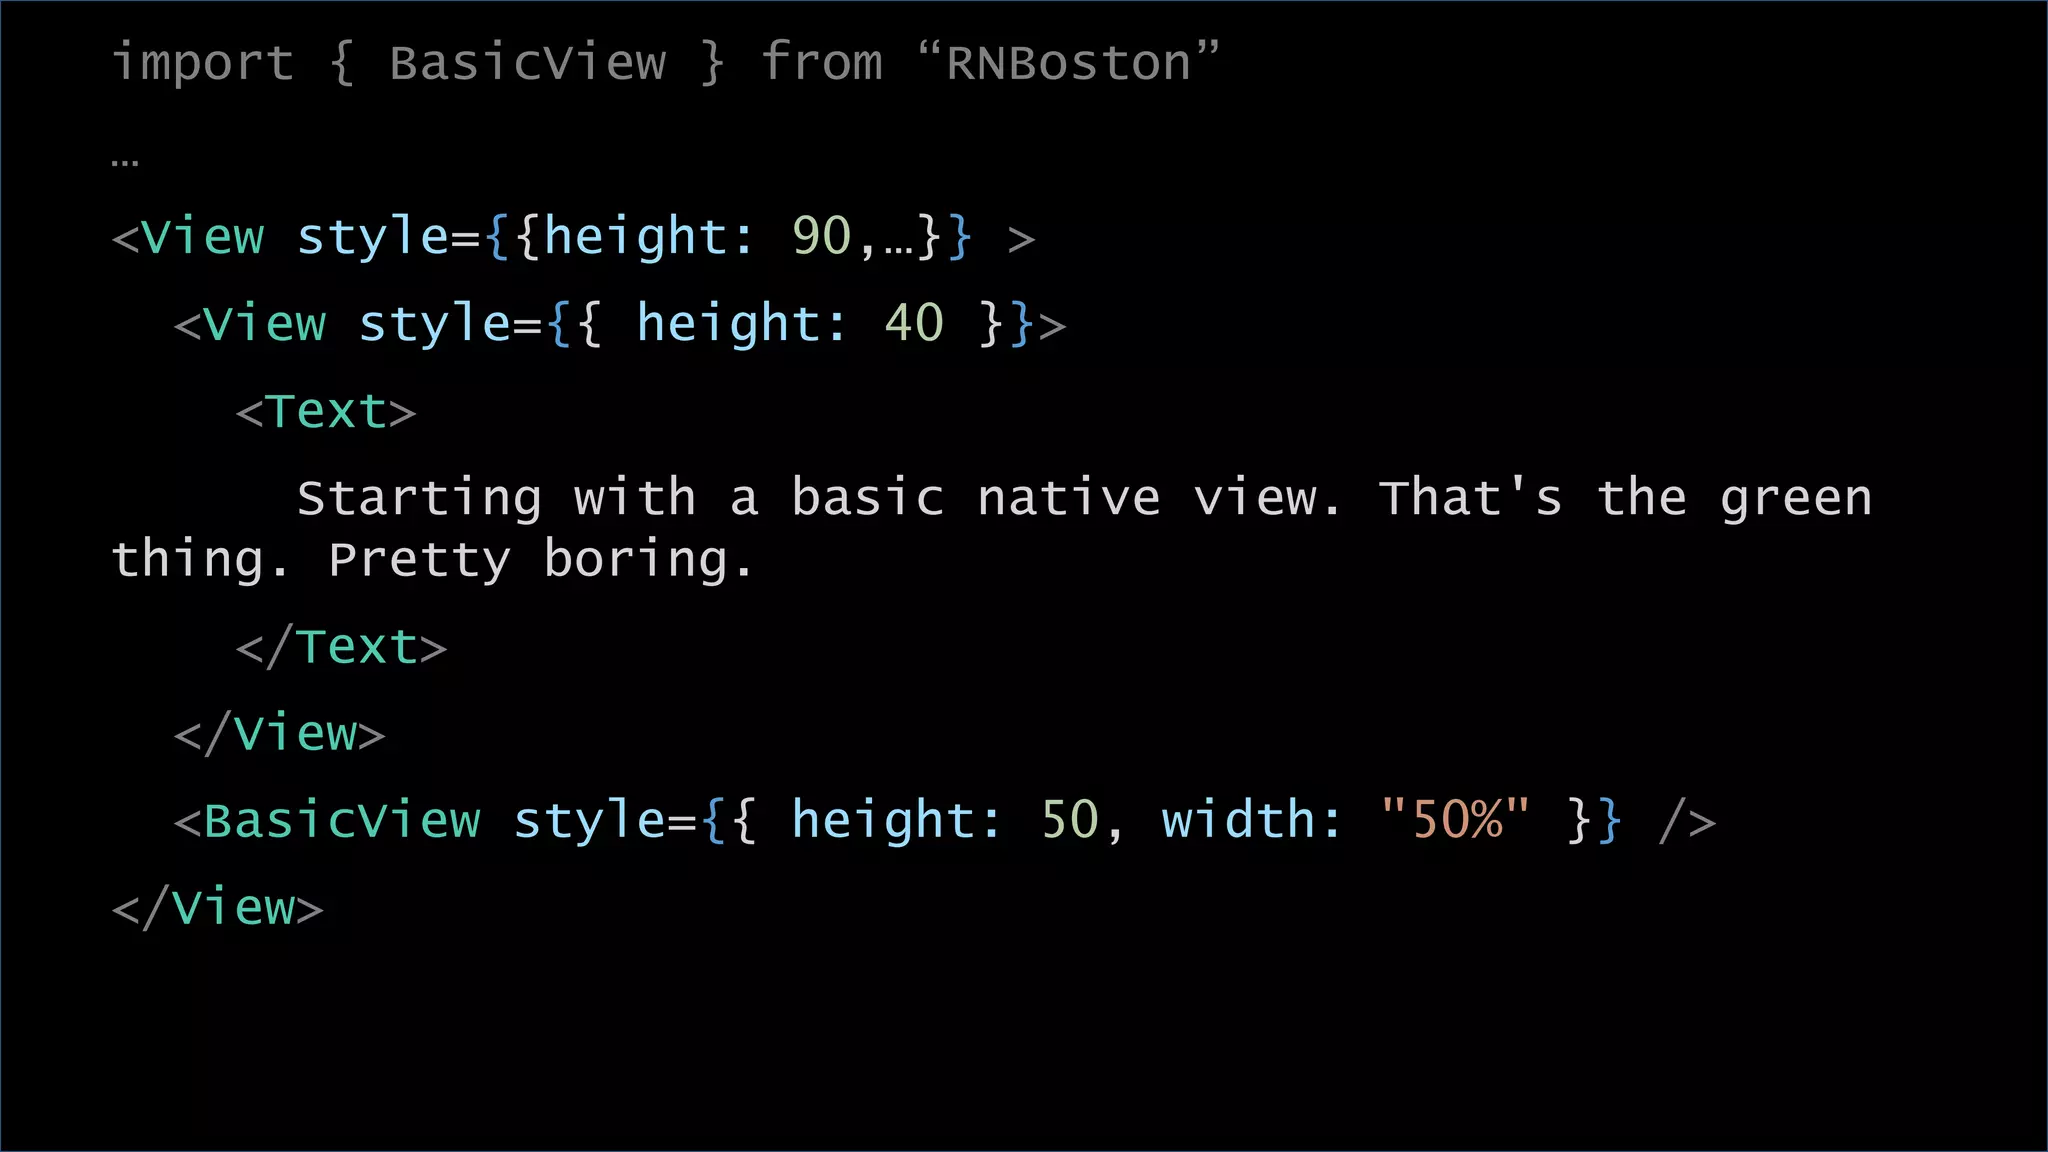
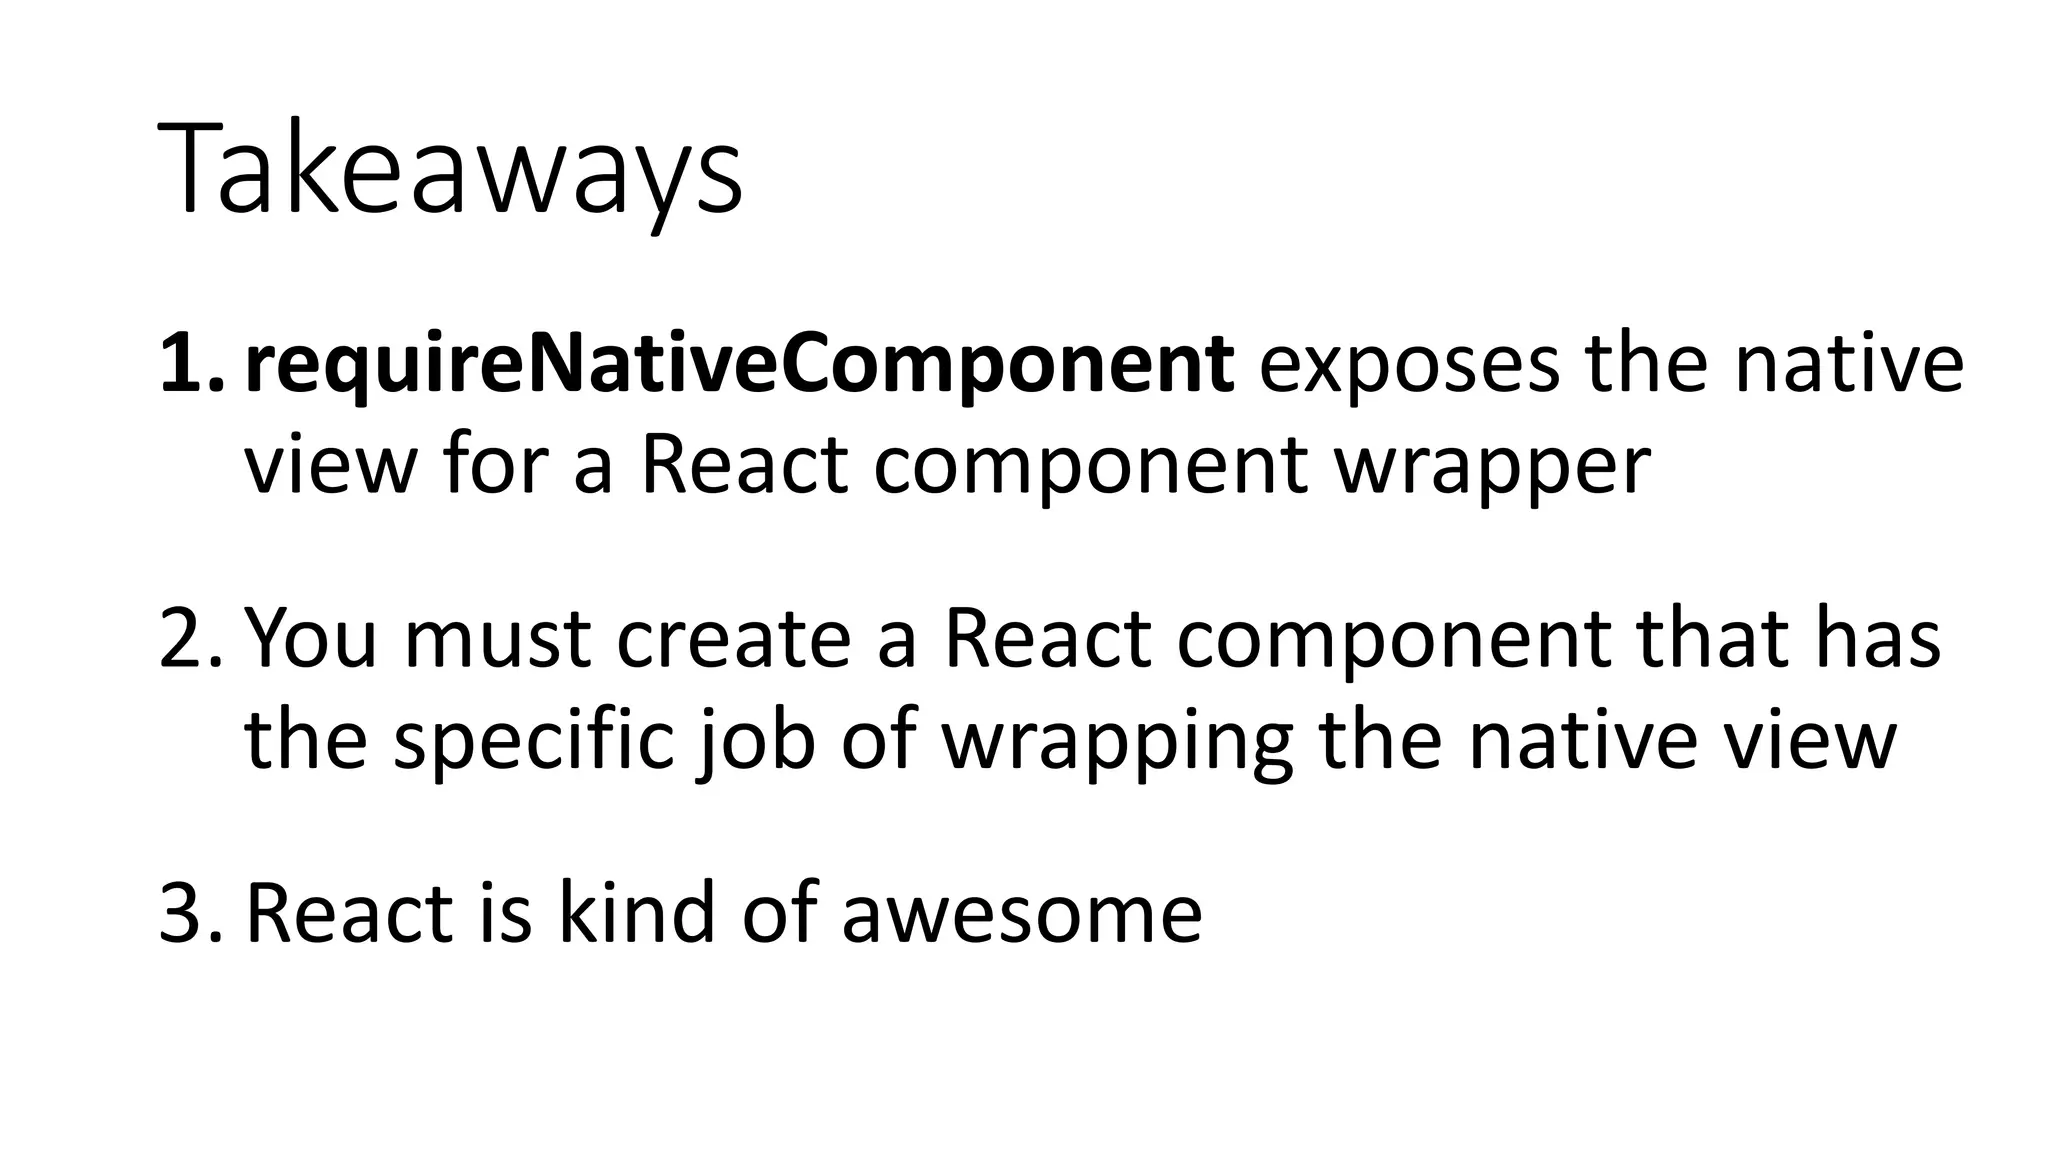
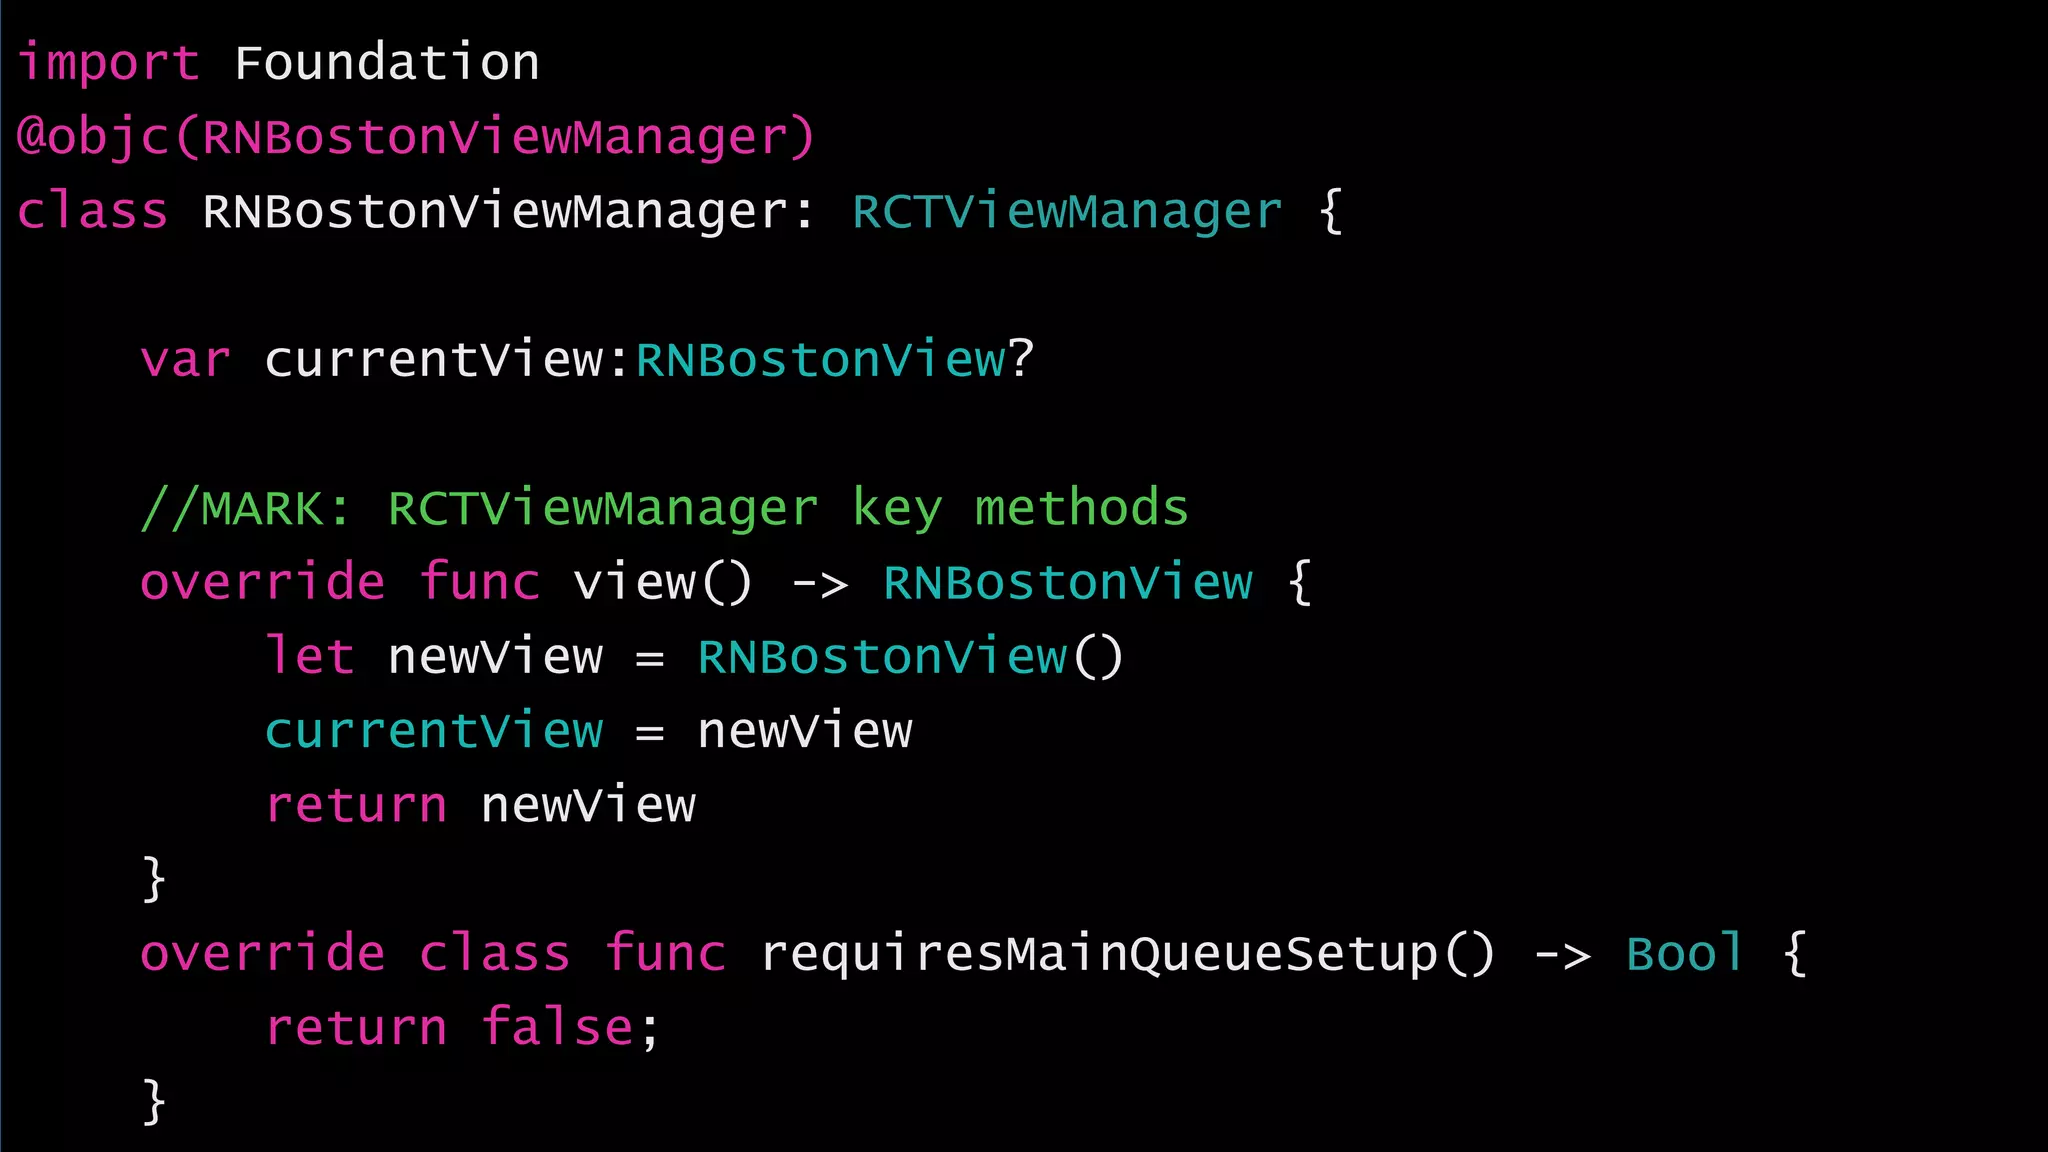
The document discusses the advantages of building reusable UI components in React Native, highlighting their ability to access native capabilities and integrate with third-party services. It provides a detailed overview of how to create and expose these components using Objective-C and Swift, including examples of view managers and methods for handling camera functionality. Key takeaways include the importance of the RCTBridge and RCTViewManager in managing the lifecycle and layout of views.


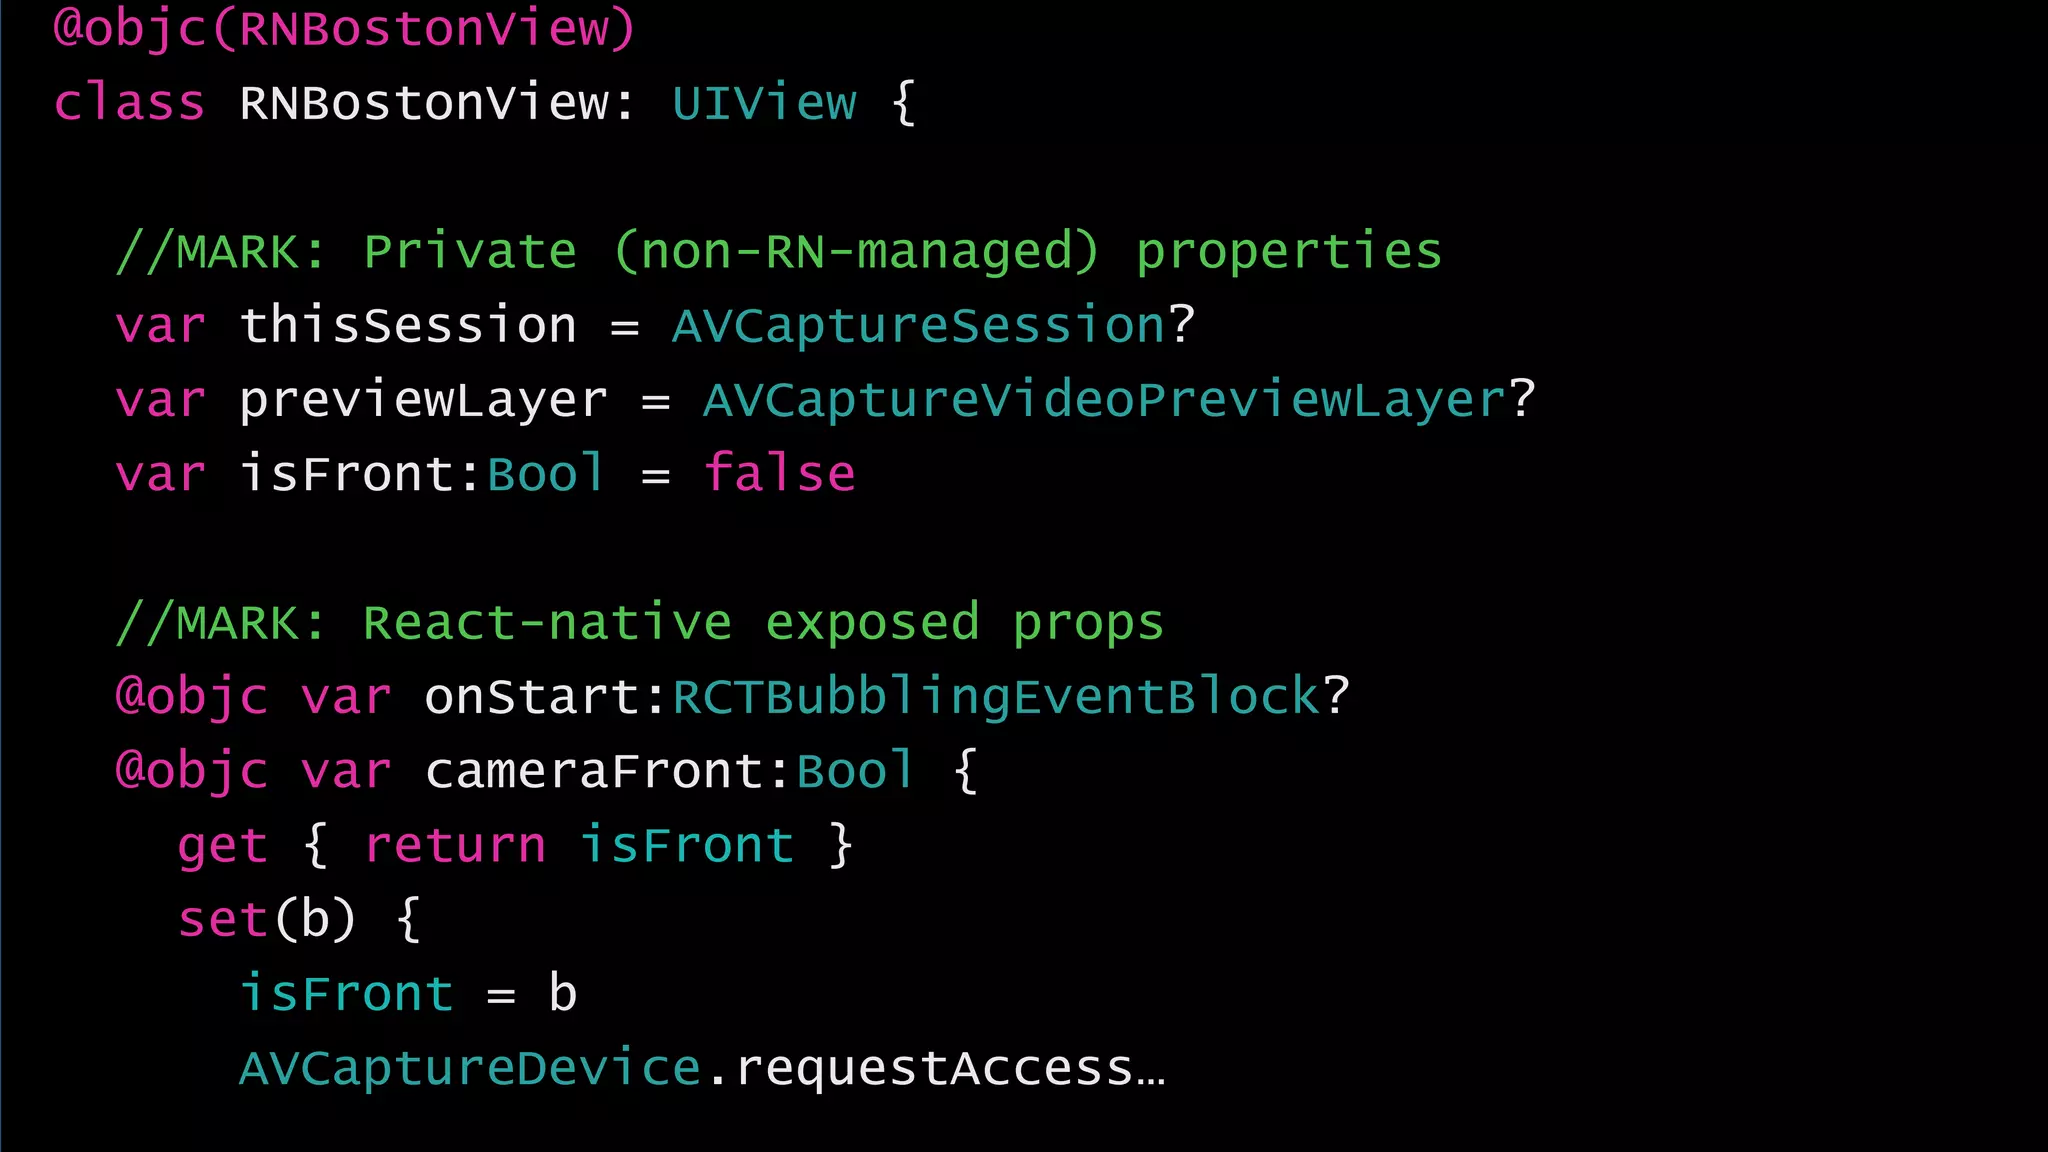
![import UIKit import AVKit @objc(RNBostonView) class RNBostonView: UIView { //MARK: Private (non-RN-managed) properties var thisSession = AVCaptureSession? var previewLayer = AVCaptureVideoPreviewLayer? var isFront:Bool = false //MARK: React-native exposed props @objc var onStart:RCTBubblingEventBlock? @objc var cameraFront:Bool { get { return isFront } set(b) { isFront = b AVCaptureDevice.requestAccess(forMediaType: AVMediaTypeVideo) { success in guard success else { return } guard let device = AVCaptureDevice.defaultDevice(withDeviceType: .builtInWideAngleCamera, mediaType: AVMediaTypeVideo, position: b ? AVCaptureDevice.Position.front : AVCaptureDevice.Position.back), let input = try? AVCaptureDeviceInput(device: device) else { return } let s = AVCaptureSession() s.addInput(input) s.startRunning() guard let pl = AVCaptureVideoPreviewLayer(session: s) else { return } DispatchQueue.main.async(){ pl.frame = self.bounds pl.videoGravity = AVLayerVideoGravityResizeAspectFill self.layer.addSublayer(pl) self.previewLayer = pl if let o = self.onStart { o([:]) } } } }](https://image.slidesharecdn.com/rnswiftuicomponentsrhd032718-180329180338/75/Making-React-Native-UI-Components-with-Swift-30-2048.jpg)